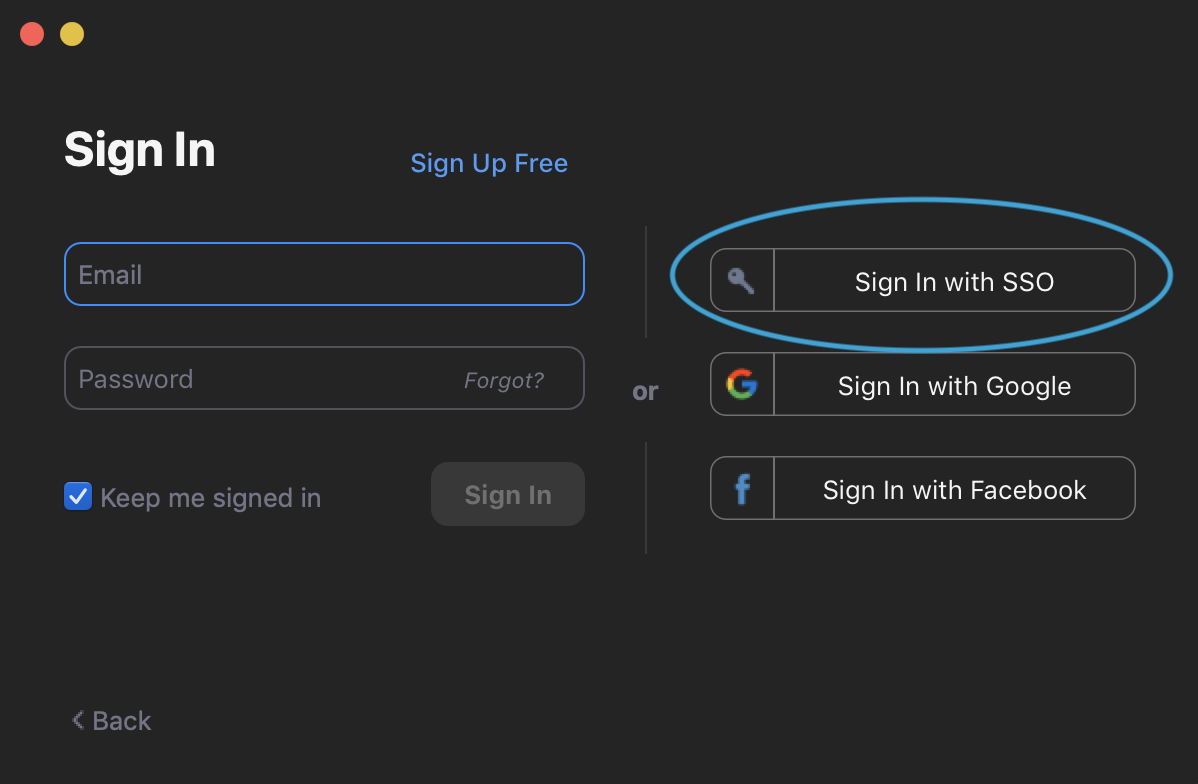
Confirm that you have your microphone and webcam properly installed and setup. Check your System Requirements for compatibility with Zoom. Check if you already have the Zoom application installed on your computer: Zoom provides an integration with Canvas that makes it very easy to set up class sessions, whether they be lectures, discussion sections, or any other meeting. These sessions are then automatically placed on participants' calendars within Canvas. To begin using Zoom through Canvas, you'll first have to authorize it. This will only need to be done the first time you use Zoom. To authorize Zoom to be used in Canvas: Once authorized, you will see the following Zoom integration page that lists all your Zoom MeetingsVerify Your Hardware
Installing Zoom
Download Zoom directly from any of the following links:Sign into the Zoom Desktop Client
Install the Zoom App for Mobile (iOS or Android)
Authorizing Zoom in Canvas
Scheduling Your Class Session in Canvas
To schedule your Zoom lecture in Canvas:
Open your course in Canvas
- From the sidebar, click "Zoom"
- Click the blue "Schedule a New Meeting" button
- Fill out the settings for your meeting as desired. You can provide a topic, description, decide the time and duration, and more.
- We recommend setting the topic to the course number, e.g., "E 303D Discussion"
- Your meeting time and duration should be set to that of your regular class session. In the example at right, the class meets for one hour at 12pm on Mondays, Wednesdays, and Fridays.
- By selecting "Recurring meeting", you can automatically schedule the event to repeat each week. Use the "Weekly" option and select the days on which your class occurs.
- "Registration" should be left unchecked. This option is not necessary and will significantly complicate joining your meeting.
- "Passcode" is unchecked by default. This option is not necessary and may complicate the process of joining for your students.
- We recommend checking the "Mute participants upon entry" option.
- This will prevent background noise from students or other participants from being immediately broadcast when they enter the meeting.
"Enable waiting room" will be set on by default, to restrict unauthorized or unwanted access by parties external to UT.
- This is, in part, a security measure meant to decrease potential disruption of Zoom meetings.
- "Require authentication to join" limits who can join your meetings. This is set to only allow UT Zoom users by default.
- If you'd like outside participants to be able to join your meetings, please see our documentation on Allowing Outside Participants.
You can record your class session using the "Record the meeting automatically" option shown in the screenshots below. When recording, use the "In the cloud" option. This will automatically save your Zoom meetings as recordings that you can view in the "Cloud Recordings" tab, which can be easily shared with your students.
- Once recording has stopped, it will be processed by Zoom and automatically added to your Cloud Recordings. These may take some time to process, after which you will receive an email notification stating that they are ready.
- Please note: You will need to click the "Publish" toggle on these recordings to make them available to your students.
- Students can access these recordings from the Canvas sidebar for the course under the "Zoom" heading
- Once recording has stopped, it will be processed by Zoom and automatically added to your Cloud Recordings. These may take some time to process, after which you will receive an email notification stating that they are ready.
- Alternative hosts: Enter the email address (theusersEID@eid.utexas.edu) of another Zoom user who is Licensed - to allow this user to start the meeting in your absence. Read more about Alternative Hosts.
- When configured to your liking, click "Save" to save your meeting. It will automatically be added to your Canvas calendar, as well as to your students' calendars.
Regarding Recording Consent
If you are recording a Zoom meeting of any kind, all participants will receive a notice, shown below, that they are being recorded as part of the meeting. They must consent to the recording or they will be removed from the meeting. They will receive this consent notice regardless of if a meeting is set to be recording automatically or if recording is started during the course of the meeting.
Please familiarize your students with this procedure if you plan to record class sessions.
Managing Break-Out Rooms
Hosts and co-hosts of meetings within Zoom can create Break-Out rooms to separate participants into smaller groups for discussions and group work
- To create Breakout Rooms, click the More ... button at the bottom of the Meeting window after all participants have joined and select "Breakout Rooms"
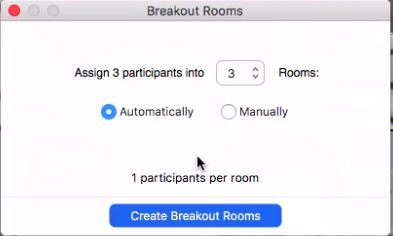
- Select how many rooms and participants per room you prefer, then select Create Breakout rooms to start
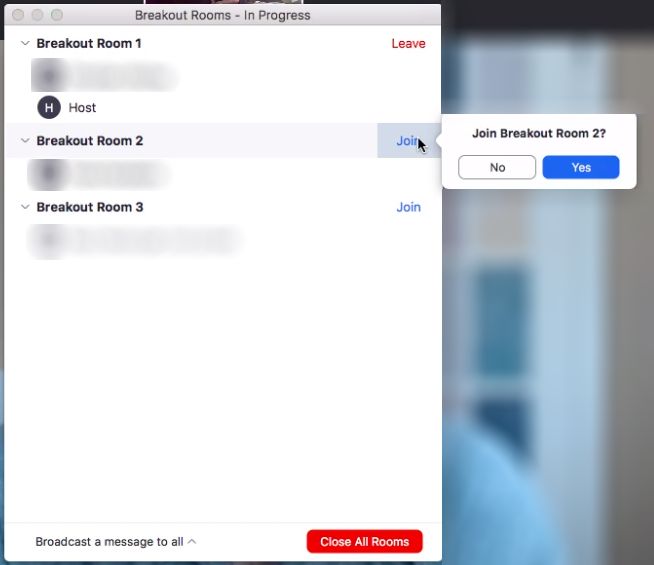
- A new dialogue box will pop up with the generated breakout rooms, click Open All Rooms to finalize settings and generate the rooms. Students will receive a notification to join.
- As a host, a window will appear that shows various rooms you can join and manage
- To navigate to another room, select the "Breakout Rooms" button in your menu at the bottom of the window
- Move participants in breakout rooms by hovering over their name in the Breakout Rooms menu and selecting "Move" next to a participant's name
- To go back to one main session navigate back to the Breakout rooms menu and select "Close All Rooms"
- To broadcast a message to every room beforehand, click "broadcast message to all"
*If the session is being recorded any room you join will be recorded automatically
Managing Chats with Students
Hosts and co-hosts can set how participants are allowed to use the text-based chat.
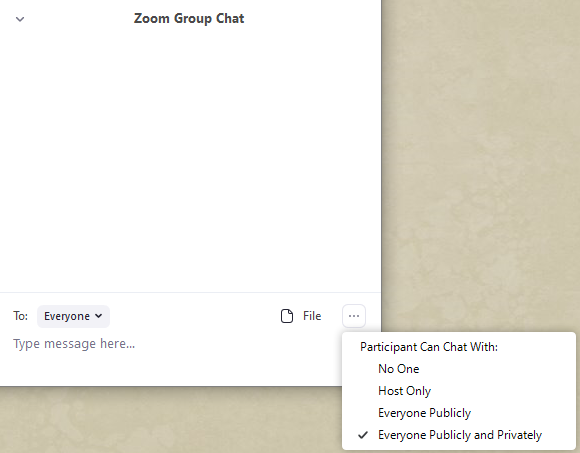
There are multiple settings for this, as visible below, that can be accessed from the Zoom Chat "..." button.
The "Participant Can Chat With" settings are as follows:
- No One
- Participants cannot chat with anyone else, including the host
- Host Only
- Participants can only chat with the host or co-hosts
- Everyone Publicly
- Participants can chat with everyone in the meeting, visible to all other participants
- Everyone Publicly and Privately
- Participants can chat with everyone in the meeting, and may have private chat conversations as well
Managing Student Participation
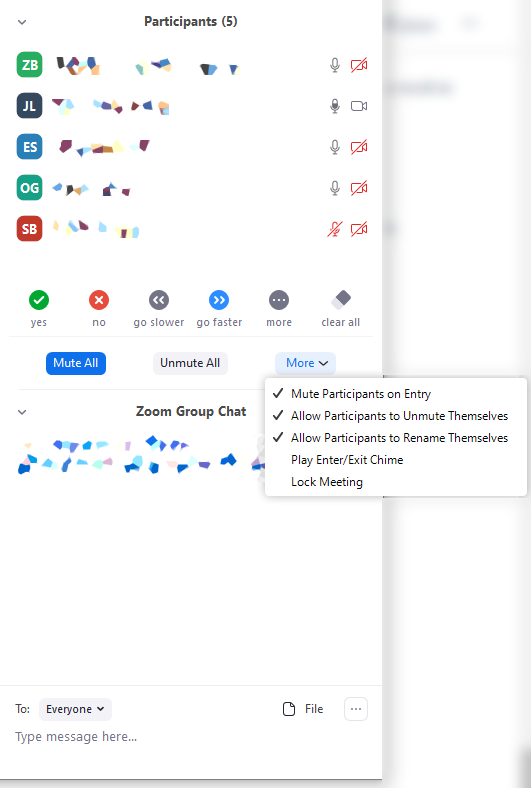
Host and co-hosts of the meeting can manage the ways in which students are allowed to participate in a meeting. As seen in the screenshot below, a host/co-host can change a settings regarding what participants are allowed to during the meeting.
To highlight some of these options:
- Mute Participants on Entry
- When checked, new participants will enter the call muted, with no audio broadcasting. This is the recommended setting for large classes and lectures.
- Allow Participants to Unmute Themselves
- When checked, participants will be able to unmute themselves at will. You can uncheck this option if you do not want any students to be able to broadcast audio. They can still be muted or unmuted by a host/co-host at any time. For large class sizes, it may be beneficial to disable uncheck this option, to prevent students from interrupting the lecture verbally.
Adding Your TA as Co-Host
You can add your TA(s) as co-host of your Zoom meetings. This will allow them to monitor and moderate the meeting's chat, as well as allow them to mute or unmute individuals as necessary. In short, they will have all of the abilities you would as host of the meeting.
You can find instructions on adding another user as a co-host here.
How Students Access Class Sessions
Joining a Zoom Meeting via Canvas
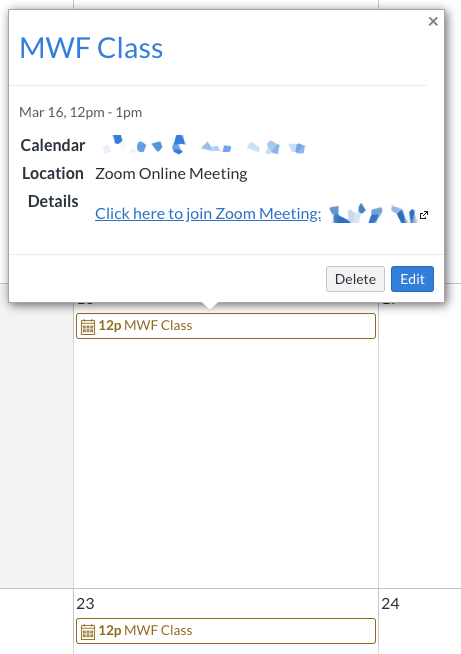
Canvas will automatically place any meetings scheduled with the Zoom integration on the Canvas calendars of your students. Students can then join these class sessions via the calendar whenever they are ready before each class session by clicking the event on their calendar, then clicking the "Click here to join Zoom Meeting" link
Notifying Your Students of Class Sessions
Via Canvas Announcement
To announce your Zoom class sessions to your students, you can utilize Canvas Announcements. When you post an Announcement, students will receive a notification and will be able to view its contents from their Canvas courses. To copy your Zoom meeting information for a meeting you have created in Canvas:
Open your course in Canvas
Click "Zoom" from the sidebar
In the "Upcoming Meetings" tab, click the "Topic" link of the desired meeting
If this is a recurring meeting, you can click the "Topic" of any occurrence
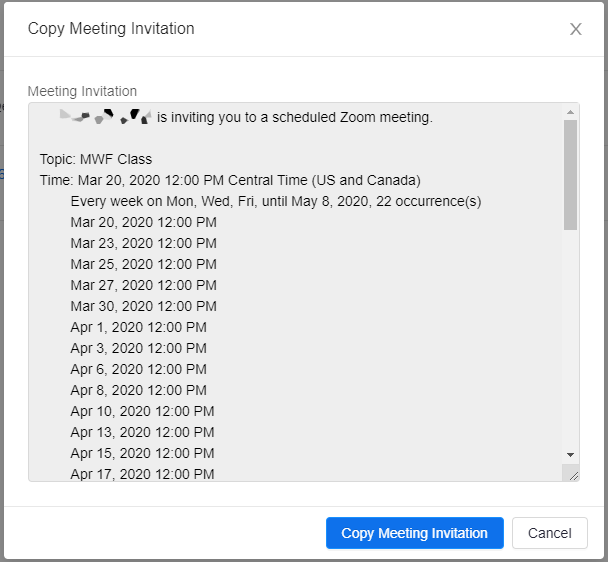
In the meeting details view, click the "Copy the invitation" link
Click "Copy Meeting Invitation"
Paste the copied invitation into your Canvas Announcement.
For information and instructions on creating a Canvas Announcement, please see the Canvas documentation on Announcements.
Students should be able to use the same link to access any scheduled meeting in the series.
Via Canvas Notifications
If your students have set their Canvas Notifications to alert them of Calendar events, they will receive a notification according to their chosen settings.

