Verify Your Hardware
Confirm that you have your microphone and webcam properly installed and setup.
Check your System Requirements for compatibility with Zoom.
Installing Zoom
Check if you already have the Zoom application installed on your computer:
- Windows: Navigate to Start > Scroll Start Menu to Zoom folder > Click "Start Zoom".
- Macintosh: Launch Finder > navigate to your Applications Folder > Zoom application will be listed.
Download Zoom directly from any of the following links:
- https://zoom.us/support/download
- https://zoom.us/download
- https://zoom.us/download2
Sign into the Zoom Desktop Client
- Click Sign In if you want to log in and start or schedule your own meeting.

- 'Join a Meeting' will be used by participants (students).
- Choose: Sign In with SSO
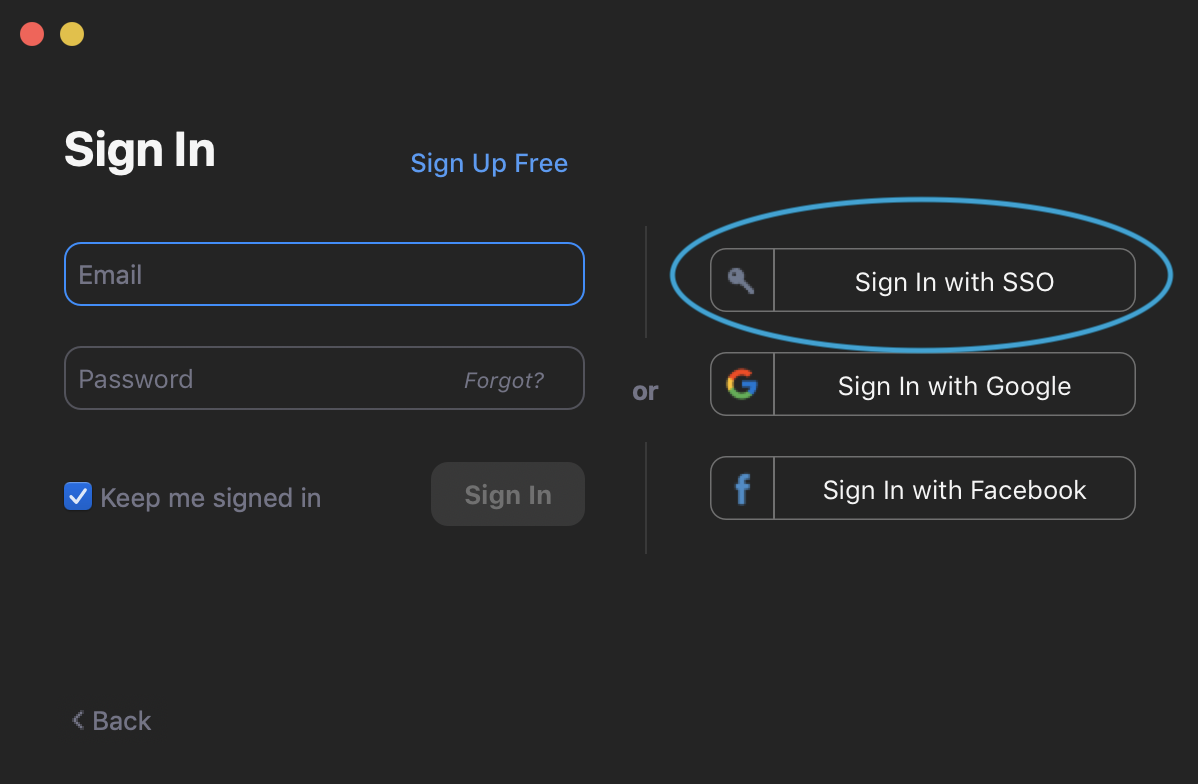
- Enter your company domain: utexas
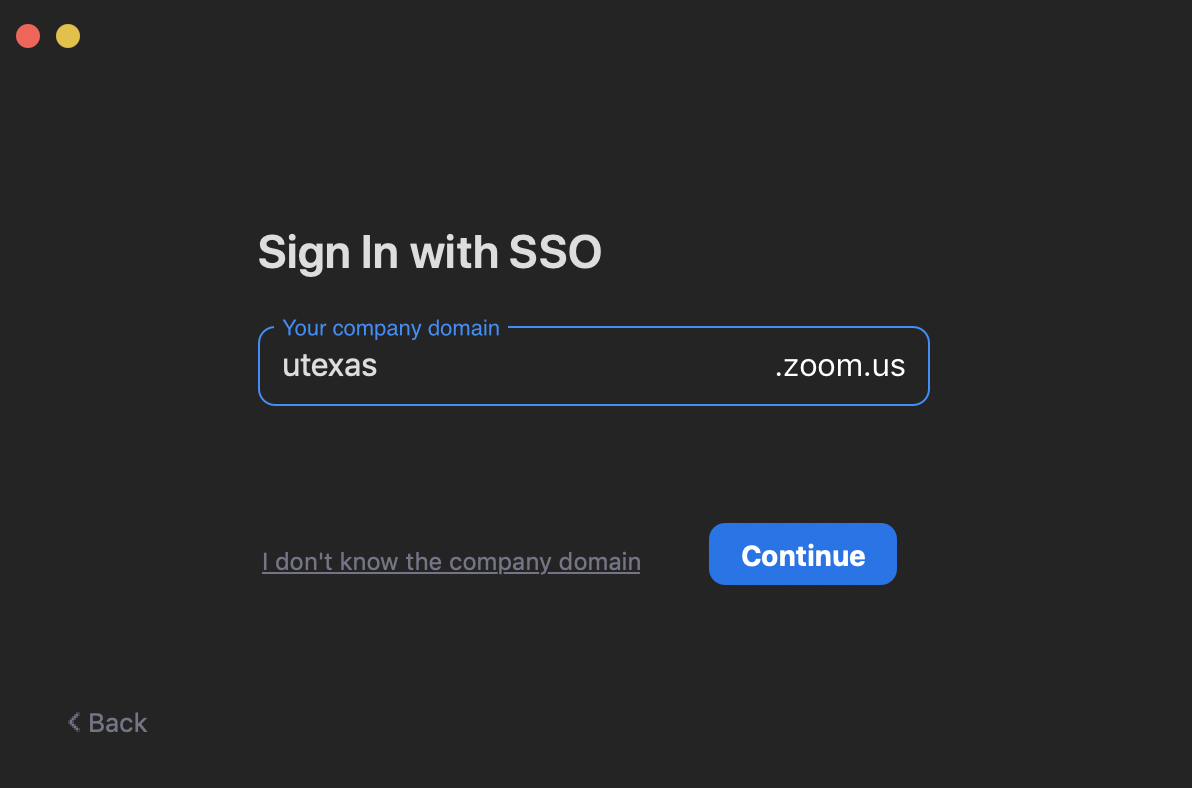
- Click continue
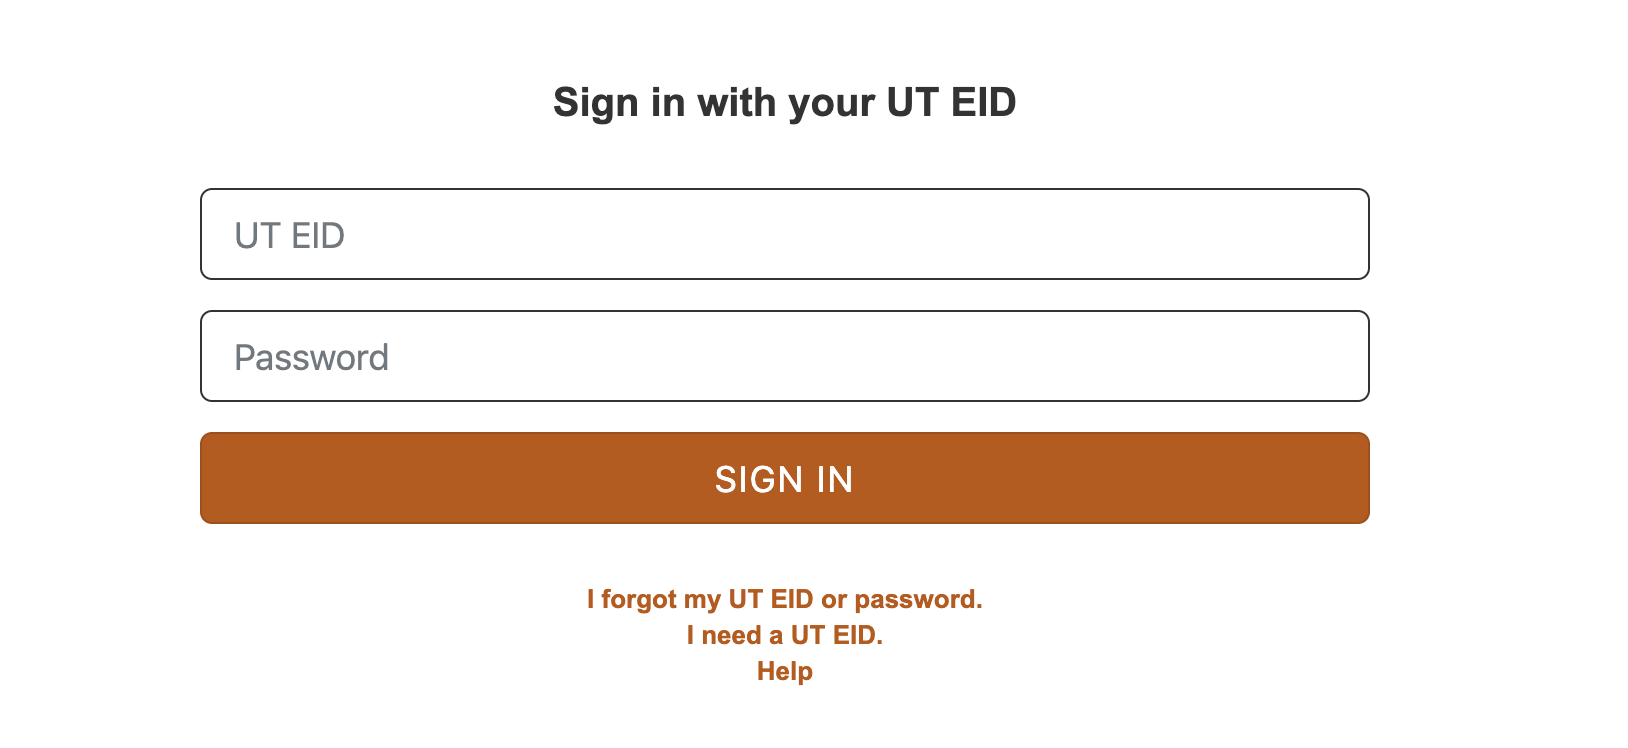
- A browser window will open, then Enter your UT EID and Password.
- You are now logged into the Zoom client! This is the Home tab.
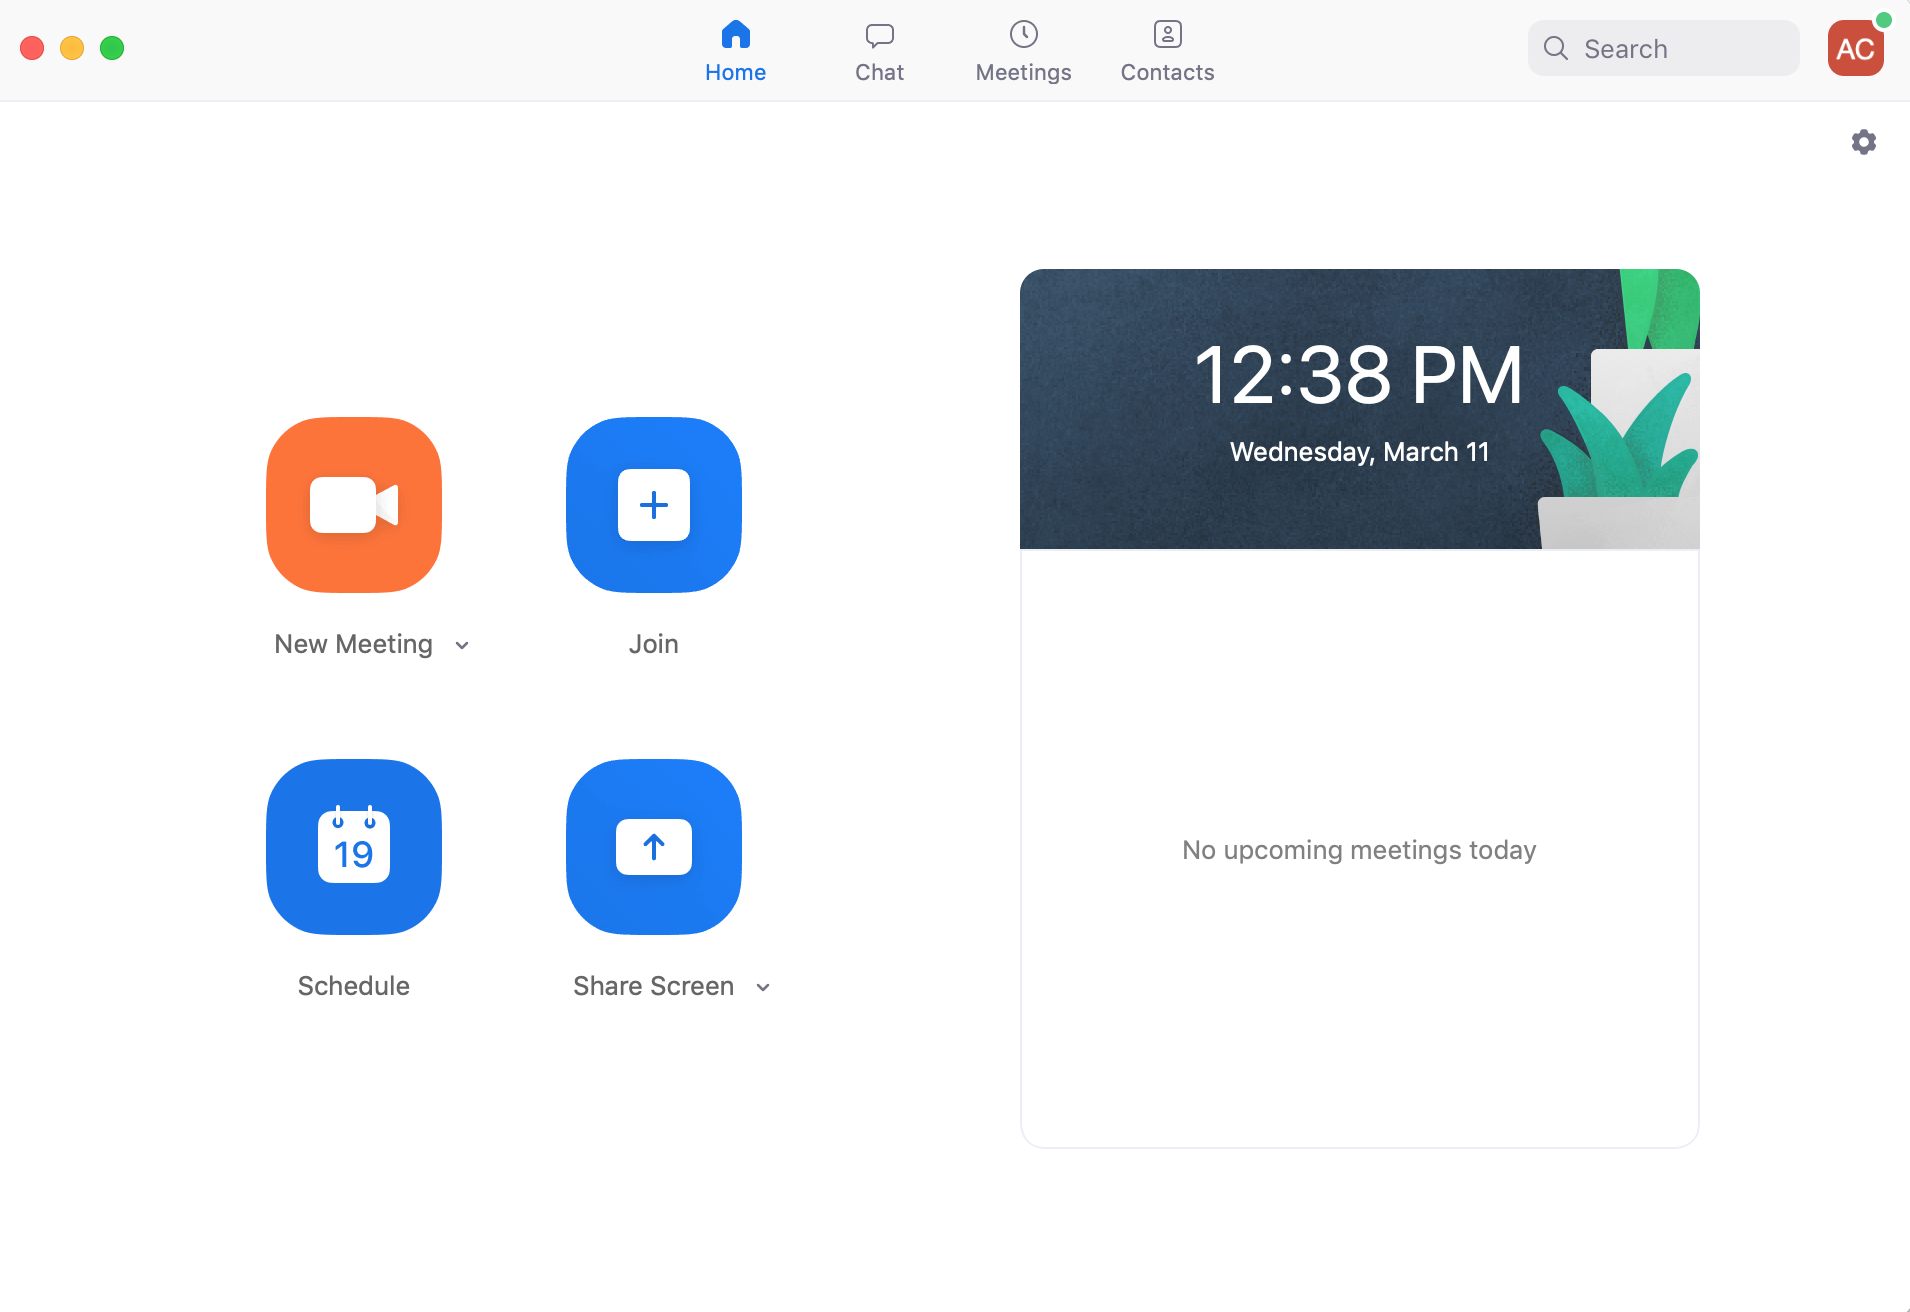
- From here you can join, schedule, and start Zoom meetings.
- Zoom is also available for your mobile device, you can download it here:
- Zoom Download in the Apple Store
- Google Download in the Google Play Store
Authorizing Zoom in Canvas
Zoom provides an integration with Canvas that makes it very easy to set up class sessions, whether they be lectures, discussion sections, or any other meeting. These sessions are then automatically placed on participants' calendars within Canvas.
To begin using Zoom through Canvas, you'll first have to authorize it. This will only need to be done once (the first time you use the Zoom integration).
To authorize Zoom to be used in Canvas:
- Open any one of your courses in Canvas.
- From the sidebar, select "Zoom".
- When prompted, click "Authorize".

Recommendations for One-on-One Office Hours
It is recommended, should you or a student need to meet privately for a one-on-one discussion about sensitive topics, that you coordinate them according to the following guidelines:
- Publish a schedule or itinerary of when you will be available for private office hours
- Instruct students to contact you to reserve time during your availability window
- Perhaps in 15 minute increments, though the duration of these slots should be at your discretion
- Respond to the student's request as appropriate
- If there is available time in that window, reply to them with a Zoom invite to a meeting set at the agreed-upon time
- If there is no available time during that window, inform the student that they will need to choose another time
For instructions on scheduling meetings with Zoom for this purpose, please see below.
Scheduling One-on-One Office Hours with Zoom
For office hours and meetings with individual students, you can use Zoom's meeting scheduler.
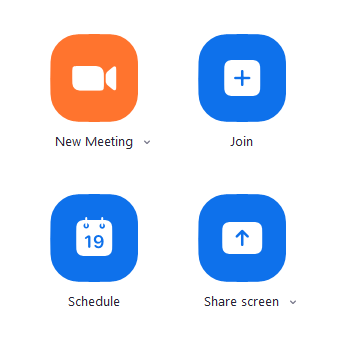
- Open the Zoom desktop application on your computer
- Click "Schedule" to schedule a meeting with an individual student
- Choose the date and time and adjust the settings to your preferences

- For more information on your Meeting Options
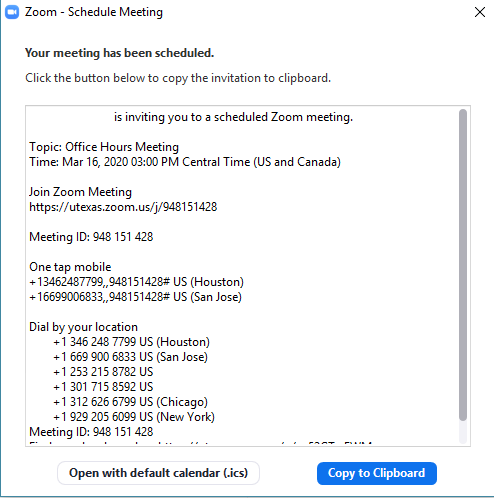
Select "Other Calendars" and then "Schedule"
A dialogue box with all the information your student needs to join your meeting at the scheduled time will appear, click "Copy to Clipboard" so you can share it with the student
Sharing Zoom Invite via Email
If the student contacted you via email, you can reply to them via email and paste the invite copied in the above steps. At the time of the meeting, they will be able to use the link found therein to access the meeting and speak with you one-on-one.
Sharing Zoom Invite via Canvas
- Go to your course in Canvas and select "People" on the left-hand panel
- After finding and selecting your student, their profile box will pop up on the right with a Messaging icon.

- Select the messaging icon and in the message fill in the Subject and paste the Zoom Meeting information into the body of the message.

- Once sent, the student now has the meeting information and can join the Meeting with the Meeting ID or the link provided at the scheduled time.
Open Meeting Office Hours
Office Hours in Zoom follow the same structure as hosting a lecture
Open your course in Canvas.
- From the sidebar, click "Zoom".
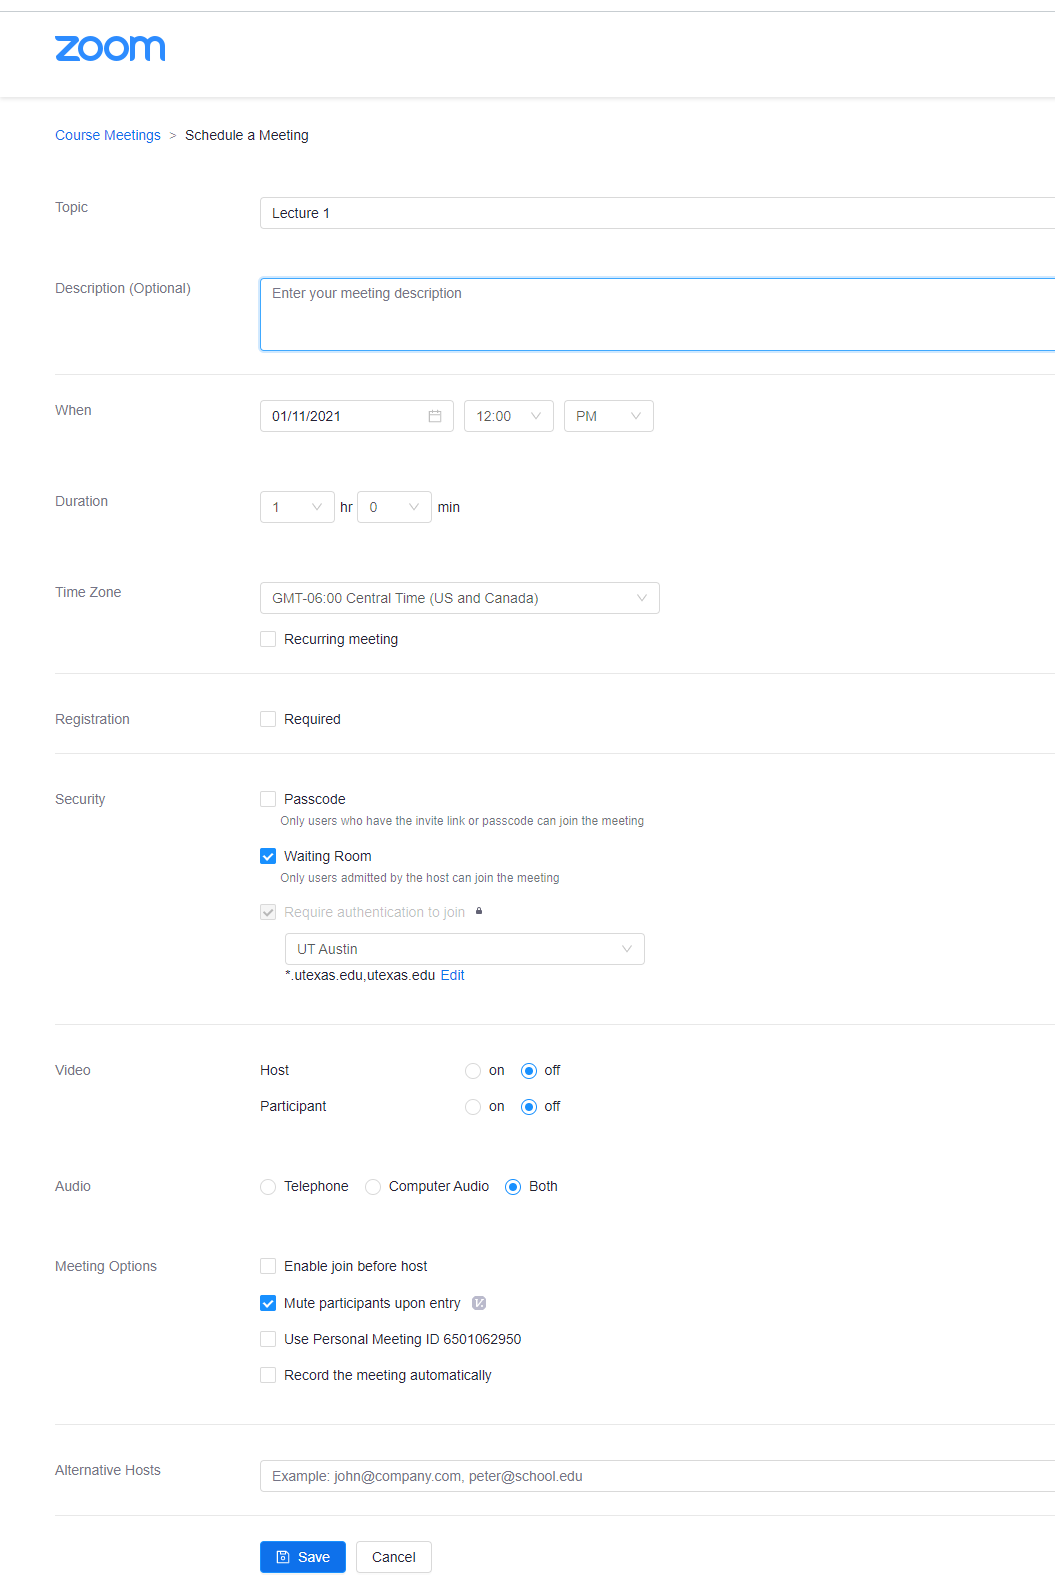
- Click the blue "Schedule a New Meeting" button.
- Fill out the settings for your lecture as desired. You can provide a topic, description, choose the start time and duration, and more.
- Your meeting time and duration should be set to that of your Office Hours.
- In our below example, the class meets for an hour at 1:00 pm.
- By selecting "Recurring meeting", you can automatically schedule your Office Hours to repeat each week. Use the "Weekly" option and select the days on which your Office Hours occur.
- "Passcode" is unchecked by default.
- This option is not necessary and may complicate the process of joining for your students.
- Be sure to check the "Mute participants upon entry" option.
- This will prevent background noise from students or other participants from being immediately broadcast when they enter the meeting.
"Enable waiting room" will be set on by default, to restrict unauthorized or unwanted access by parties external to UT.
- This is, in part, a security measure meant to decrease potential disruption of Zoom meetings.
- "Only authenticated users can join" is enabled by default for security. This restricts outside users without Zoom accounts from accessing your meetings.
- If you plan to have a non-UT attendee to this meeting, click the dropdown box and select "Sign in to Zoom". This will allow your guests to join your meeting with a free Zoom account.
- Alternative hosts: Enter the email address (the-users-EID@eid.utexas.edu) of another UT Zoom user - or the email address used for the Zoom account of an outside participant - to allow this user to start the meeting in your absence. Read more about Alternative Hosts.
- When configured to your liking, click "Save" to save your meeting. It will automatically be added to your Canvas calendar, as well as to your students' calendars.
Waiting Room Feature
Zoom's Waiting Room feature allows
the host to send attendees to a waiting room before joining a meeting. This setting gives hosts added security by not admitting everyone to the meeting automatically. By default, the Waiting Room setting is enabled and will send Only Guests (Non-EID accounts) to the waiting room. You can configure your meetings to send All Participants to the waiting room, but you will be responsible for admitting users before they can participate in the meeting. One thing to note is the "Only authenticated users can join" setting. This setting cannot be disabled and requires users to have a Zoom account (either an EID account or Non-EID account) to join a meeting hosted on the utexas (main) Zoom tenant. This was set to ensure maximum security for all meetings.
Read the matrix below to determine which Waiting Room setting option works best for your needs. See below to configure your Waiting Room setting.
| Waiting Room (Guests Only) | Waiting Room (All Participants) | Waiting Room Disabled |
|---|
| Only Authenticated Users Can Join - UT Austin (Default) | Recommended for:
Academic classes/Meetings - We strongly recommend leaving this as your DEFAULT setting and only changing the setting for a particular meeting as needed.
| Recommended for:
Advising and Office Hours - This setting will send everyone to the Waiting Room.
- You can admit one participant (or more) at a time from the Waiting Room to meet with you.
| NOT RECOMMENDED - Disabling the Waiting Room substantially increases your risk of uninvited guests entering your meeting.
(ie. "Zoombombing") - Do not use for classes.
|
| Only Authenticated Users Can Join - Sign in to Zoom (Guest) | Recommended for:
Academic Classes with guest lecturers/Meeting with external users - Should be used when non-EID accounts (guests) will be joining your meeting.
- Guests will be placed in the waiting room and can be admitted by the host.
| Recommended for:
Advising guests (non-EID accounts) - Should be used when non-EID accounts (guests) will be joining your meeting.
- All participants (EID accounts and non-EID accounts) will be placed in the waiting room and can be admitted by the host.
| NOT RECOMMENDED
- Disabling the Waiting Room substantially increases your risk of uninvited guests entering your meeting.
(ie. "Zoombombing") - Do not use for classes.
|
Enabling the Waiting Room
- Sign in to the Zoom web portal
- Click "Settings" from the navigation menu on the left
- In the "Meeting" tab, click "In Meeting (Advanced)", then navigate to the "Waiting Room" option.
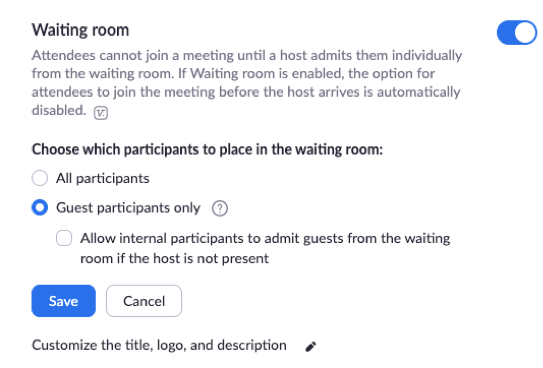
- If this setting is disabled, click the toggle to enable it. If you receive a verification dialog, click "Turn On" to verify the change.
- Select who you want to be admitted to the waiting room.
- All Participants: All participants joining your meeting will be admitted to the Waiting Room
- This includes those users who are using accounts associated with UT
- Guest Only: Only participants who are not associated with UT will be admitted to the waiting room.
- If Guest only is enabled, you can additionally allow internal participants (that is, UT-affiliated users) to admit guests from the waiting room into the meeting if the meeting host is not present
Using Zoom Breakout Rooms for Office Hours and/or Advising
- Launch Zoom meeting. Hosts can assign users as Co-Hosts to help with meeting management (i.e., check-in)
- You can Share a slide/message directing students to “check-in” by adding their name to Chat once they arrive.
- If the Host leaves the main meeting space (to go into a Breakout Room), this disrupts Screen Sharing.
- Click Breakout Rooms (lower right). Note: Only the Host sees the Breakout Room option.

- Configure the number of rooms needed and select Manually assign. Click Create Rooms

- Hello Kitty arrives (Manage Participants indicates 2 users [1]) and enters her name in Chat [2].

- Click Breakout Rooms and click Assign to move users into Breakout Room(s). Note: If you designate users to act as Co-hosts, you will need to assign them to a room. Co-hosts are unable to Join by themselves.

- You can click Options to edit all Breakout Room settings
- Click to Open All Rooms [3]
- Students will need to Join the Breakout Room:

- You can move a user to a different room by hovering over their name and clicking Move to:

- Hosts can join a Breakout Room by clicking Join. Co-hosts are unable to Join by themselves.

- If the Host leaves the Main meeting space (to go into a Breakout Room), this disrupts the Screen Sharing (e.g., PowerPoint slide) and the Host will no longer be able to Chat with the Main meeting room.
- Zoom will connect you to the Breakout Room.

- Once in the Breakout Room, users will have full controls similar to the meeting (Share Screen, Chat, etc.).

- The Host can leave by clicking Leave [1] from the Breakout Room panel or by clicking Leave Breakout Room in the lower right corner:

- Zoom will verify that you want to leave the Breakout Room:

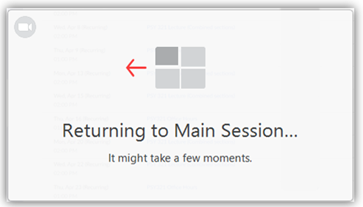
- Zoom will return you to the Main session:
- When finished, students can click Leave Meeting in the lower right corner:
