Initial Design Sketch

Our initial design was to make a four-bar mechanism which opened by a sliding link. After the instructor feedback we received that this design was too simple, decided to make some changes.
This initial idea also posed the issue of possibly "smashing" the food closed if it stuck out a little bit. We decided that closing from the top rather than the side would be the better option and make less mess / prevent leaks.
Modified Sketch
After a few weeks of discussion and ideation, we settled on a preliminary concept sketch shown below:
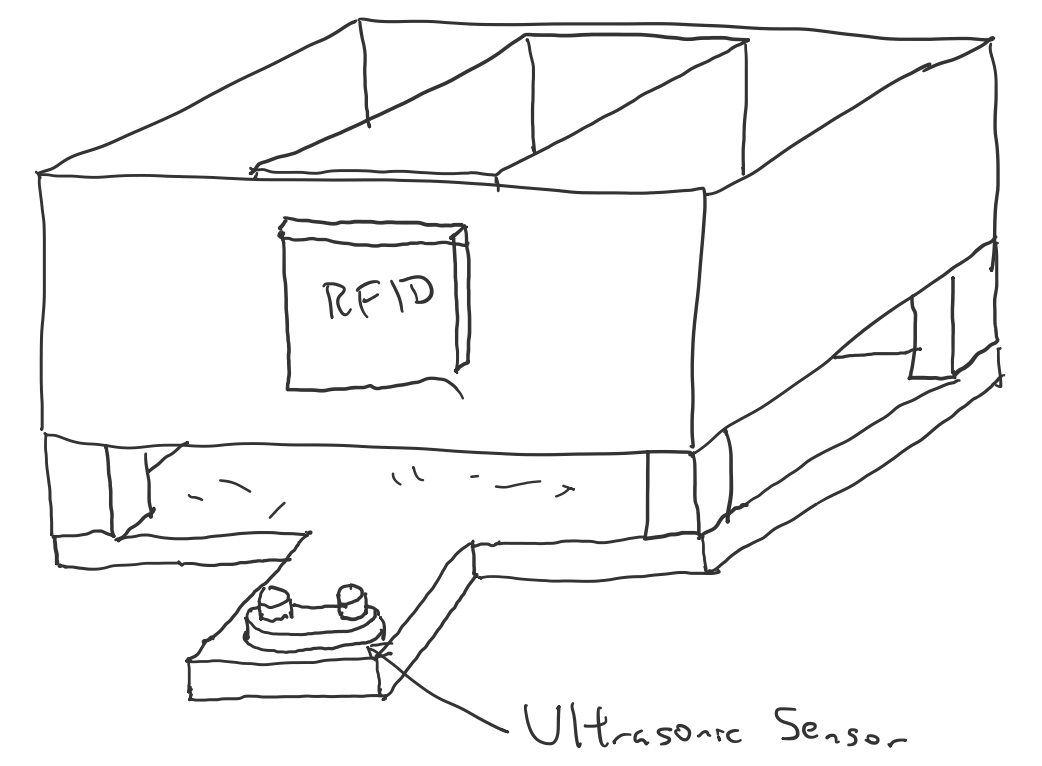
The exterior and interior boxes as well as the lid were going to be made from 1/4" Thick 6061-T6 Aluminum Sheet Metal to be purchased either from the ETC machine shop, Xometry Supplies, or Westbrook Metals. On the sides of the box were going to be two linkage assemblies that also interfaced with the underside of the lid. These linkage assemblies were to be controlled by two synced stepper motors hooked up to an Arduino Mega that would be built into the interior of the exterior box. The RFID Sensor was to be mounted on the front of the box to sense the RFID tags of the pets, while the Ultrasonic Sensor would be mounted on a base plate that extended forward to sense the presence of the pet as it eats its food. The exterior box was to be supported on wooden or metal square bars which would then sit upon the base plate. The space between the base plate and the exterior box would then be reserved for wiring from the motors and arduino mega to the RFID and the Ultrasonic Sensor to prevent untidiness of wiring on the inside of the box, as well as to improve the general aesthetic.
Linkage Assembly
The linkage assembly we selected was a 6-bar Watt's Linkage with a Slider. Some key features of this assembly for the purposes of our final prototype include:
- Built in 2 configurations, one for each side of ARFF
- Triangular Linkage interface with the lid
- Slider Joint and Revolute Joints
- 1 DOF
- 71 degree Range of Motion
note: The BOM for the linkage assembly is featured in the Appendix page.
For the linkage assemblies in particular, the following image depicts the dimensional parameters on a link-by-link basis:

For prototyping the actual movement of the linkage, we built a preliminary prototype of the linkage assembly in Solidworks, then manufactured a wooden prototype as shown below:

Preliminary Linkage Assembly Concept

Linkage Assembly Closed Lid Configuration

Linkage Assembly Open Lid Configuration
Prototype Linkage Simulated Motion

After simulating the prototype, it was concluded that the linkage assembly was too big and too heavy, and therefore it was scaled down and printed on the Craftbot 3D Printer for the final assembly using PETG.
After considering the time, facilities, budgetary restrictions, and other resources available, it was decided to move forward with a wooden exterior box, a metal interior box, 3D printed Linkage Assemblies, as well as a custom 3D printed stepper motor mount for our final prototype.