Step-by-step guide
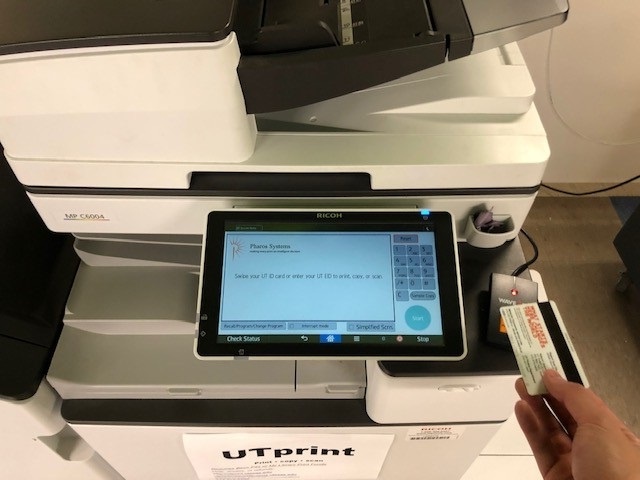
- Login on the Print Station either by scanning your UT HID Card or entering in your EID and Password manually using the onscreen keyboard.
- From the launch page, go to the home screen by tapping the blue home button in the middle-bottom of the screen.

- Tap on the Scan or Quick Scan function.

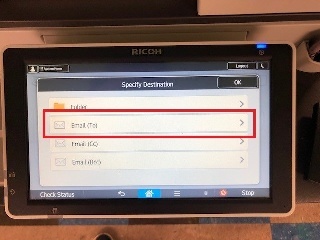
- Tap on the green Destination button. From this page, you can specify the email that you would like the scan to be sent to. Click on Manual Entry to type in an email address.


- Once you have your destination specified, place your original document either face up into the Auto Document Feeder or face down on the Platen Glass.


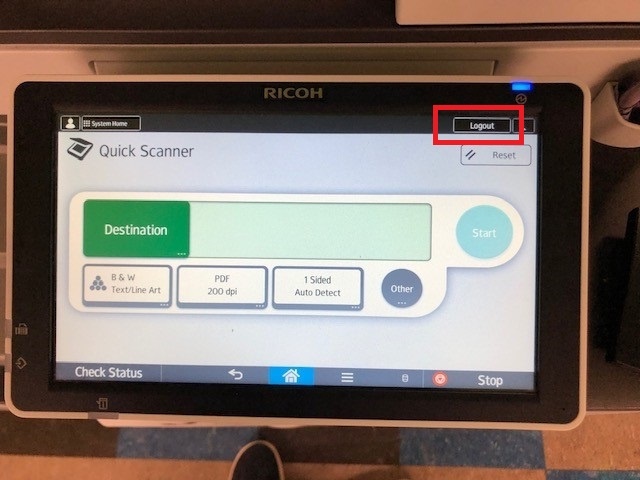
- Double check all of your scan preferences below the destination: color, filetype/quality, and single or double-sided. Tap on the green Start button to scan. If you are scanning a multiple-page document and using the glass, you can place the next original document and hit Start again to append the scan to your file.

- When you have scanned all of your documents, hit the Finish Scan button to send the file to your destination
- Lastly, tap the Logout button to finish your session.
Related articles
-
Page:
-
Page:
-
Page:
-
Page:
-
Page:
-
Page:
-
Page:
-
Page:
-
Page:
-
Page:
-
Page:
{"serverDuration": 134, "requestCorrelationId": "6c2a42d2ffff919d"}