Details
Images
Audience View

Projector

Chalkboard

Presenter View


Console

Guide
Turn on the Classroom A/V system by selecting the appropriate source on the Crestron touch panel. The home screen displays all of the classroom technology control options. You can tap the screen to select which source you would like to display through the classroom technology. Display the selected source to the projector in the room by selecting Computer, HDMI, or Document Camera. USB extension cables are located on top of the podium and can be used to connect flash drives or other USB peripheral devices.
Sources
Computer
The computer option relates to the classroom computer located in the podium. The keyboard and mouse are typically found on a retractable shelf underneath the podium. You can log into any SOA classroom computer using your UT EID and password.
HDMI
By selecting the HDMI option, you can connect and display sources like a personal laptop or tablet using the HDMI cable located on top of the classroom podium. Adapters are provided in most rooms to accommodate various connections.
Document Camera
The document camera displays a live view of whatever is beneath the camera. For example, a document camera can be used to display handwritten notes through the projector instead of using the chalkboard/whiteboard. On the touch screen, press the "Document Camera" button. Function controls are available on top of the document camera arm as well as on the touch panel.
Startup screen source selection
Main screen source selection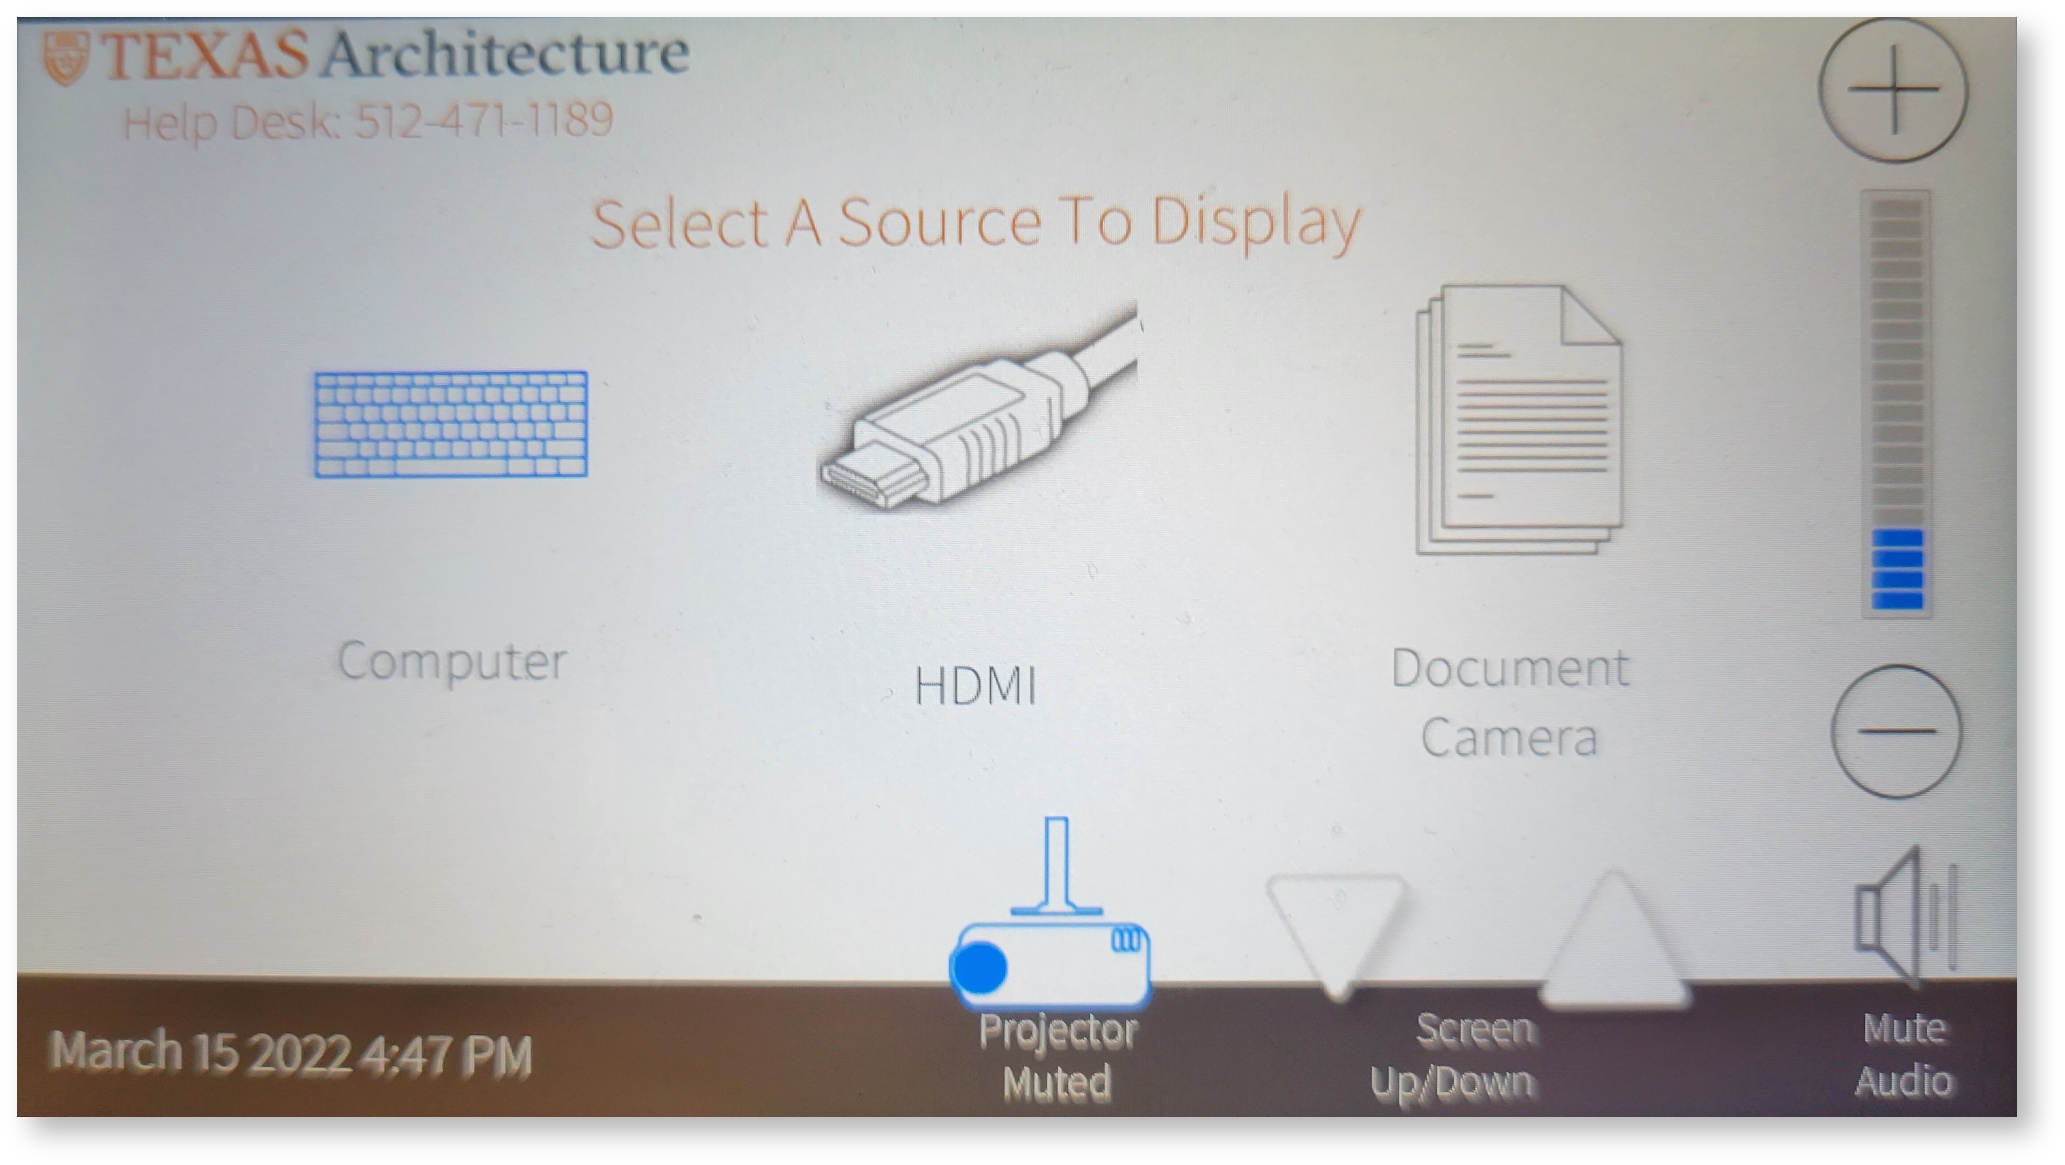
Alternative Displays
Blank/Mute Display
Blank Display will turn off the projector image without turning off the projector. This feature can be useful if you would like to prepare material for viewing before sharing with the class without having to turn the system off and back on. Hide Projector Video will turn off the projector image without turning off the projector. This feature can be useful if you would like to prepare material for viewing before sharing with the class without having to turn the system off and back on. Turn the Projector Video back on by pressing Show Projector Video.

Chalkboard Mode
The Chalkboard will raise the projector screen without turning off the AV system. This will allow users to use the Chalkboard in the classroom without interference from the projection screen and without completely turning off the AV system. Press 'Screen Up/Down' arrows to raise and lower the screen

Audio
Volume
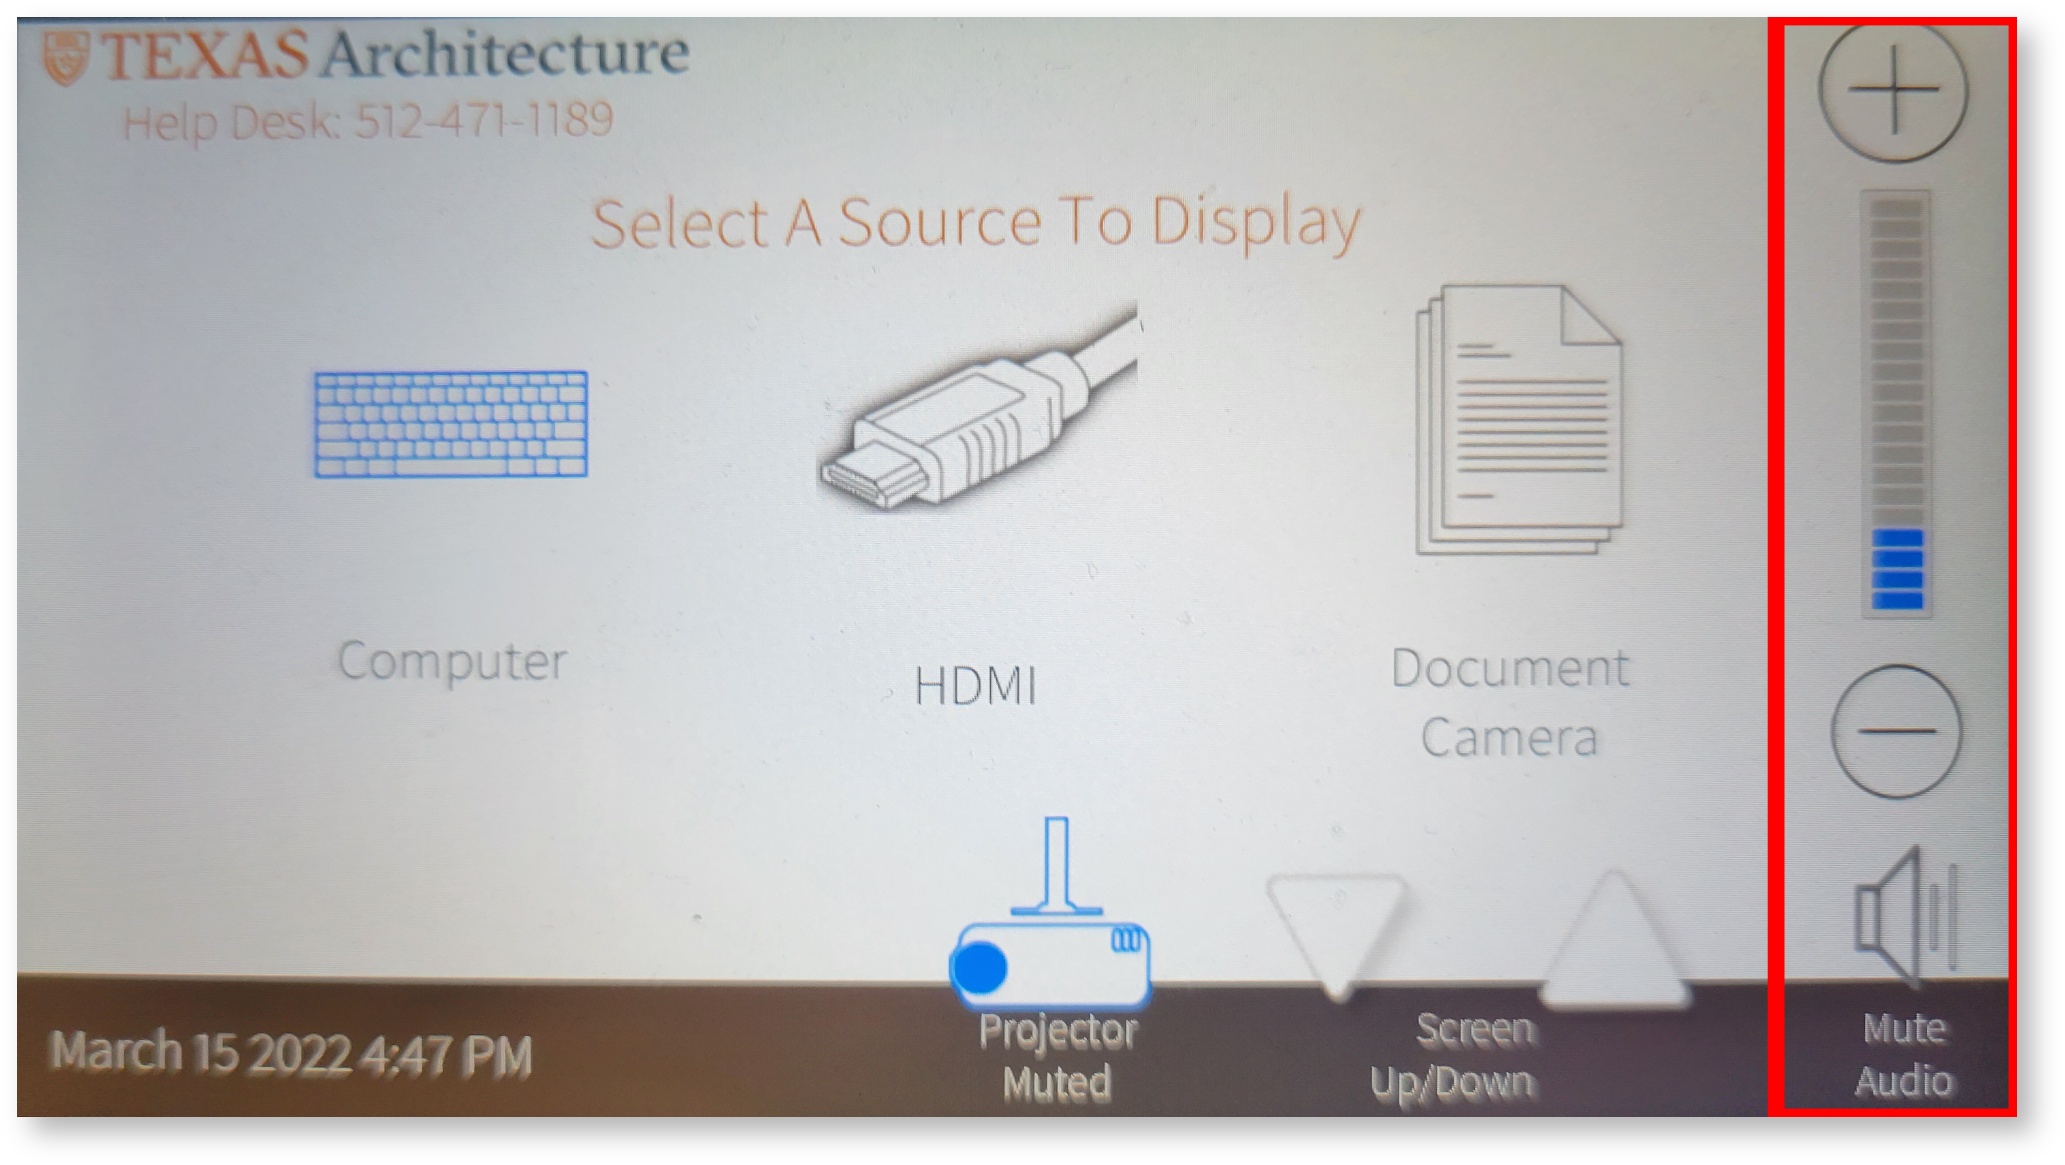
The Volume control for the room is located at the bottom right-hand corner of the touch panel. Press the “Down” option to turn down the volume in the room and press the “Up” option to turn up the volume in the room. Press the mute button to the left of the volume bar to mute the audio in the classroom.
Mute
The “Mute” button will mute all program audio in the room from any computer source.
Lights
This room has standard lights and switches located on the wall upon entry of the room.
Adjustable Height Table
A controller on the right-hand side of the teaching podium controls the adjustable height table. Press the Up-arrow button to raise the table and the Down-arrow button to lower the table to your comfort.

End
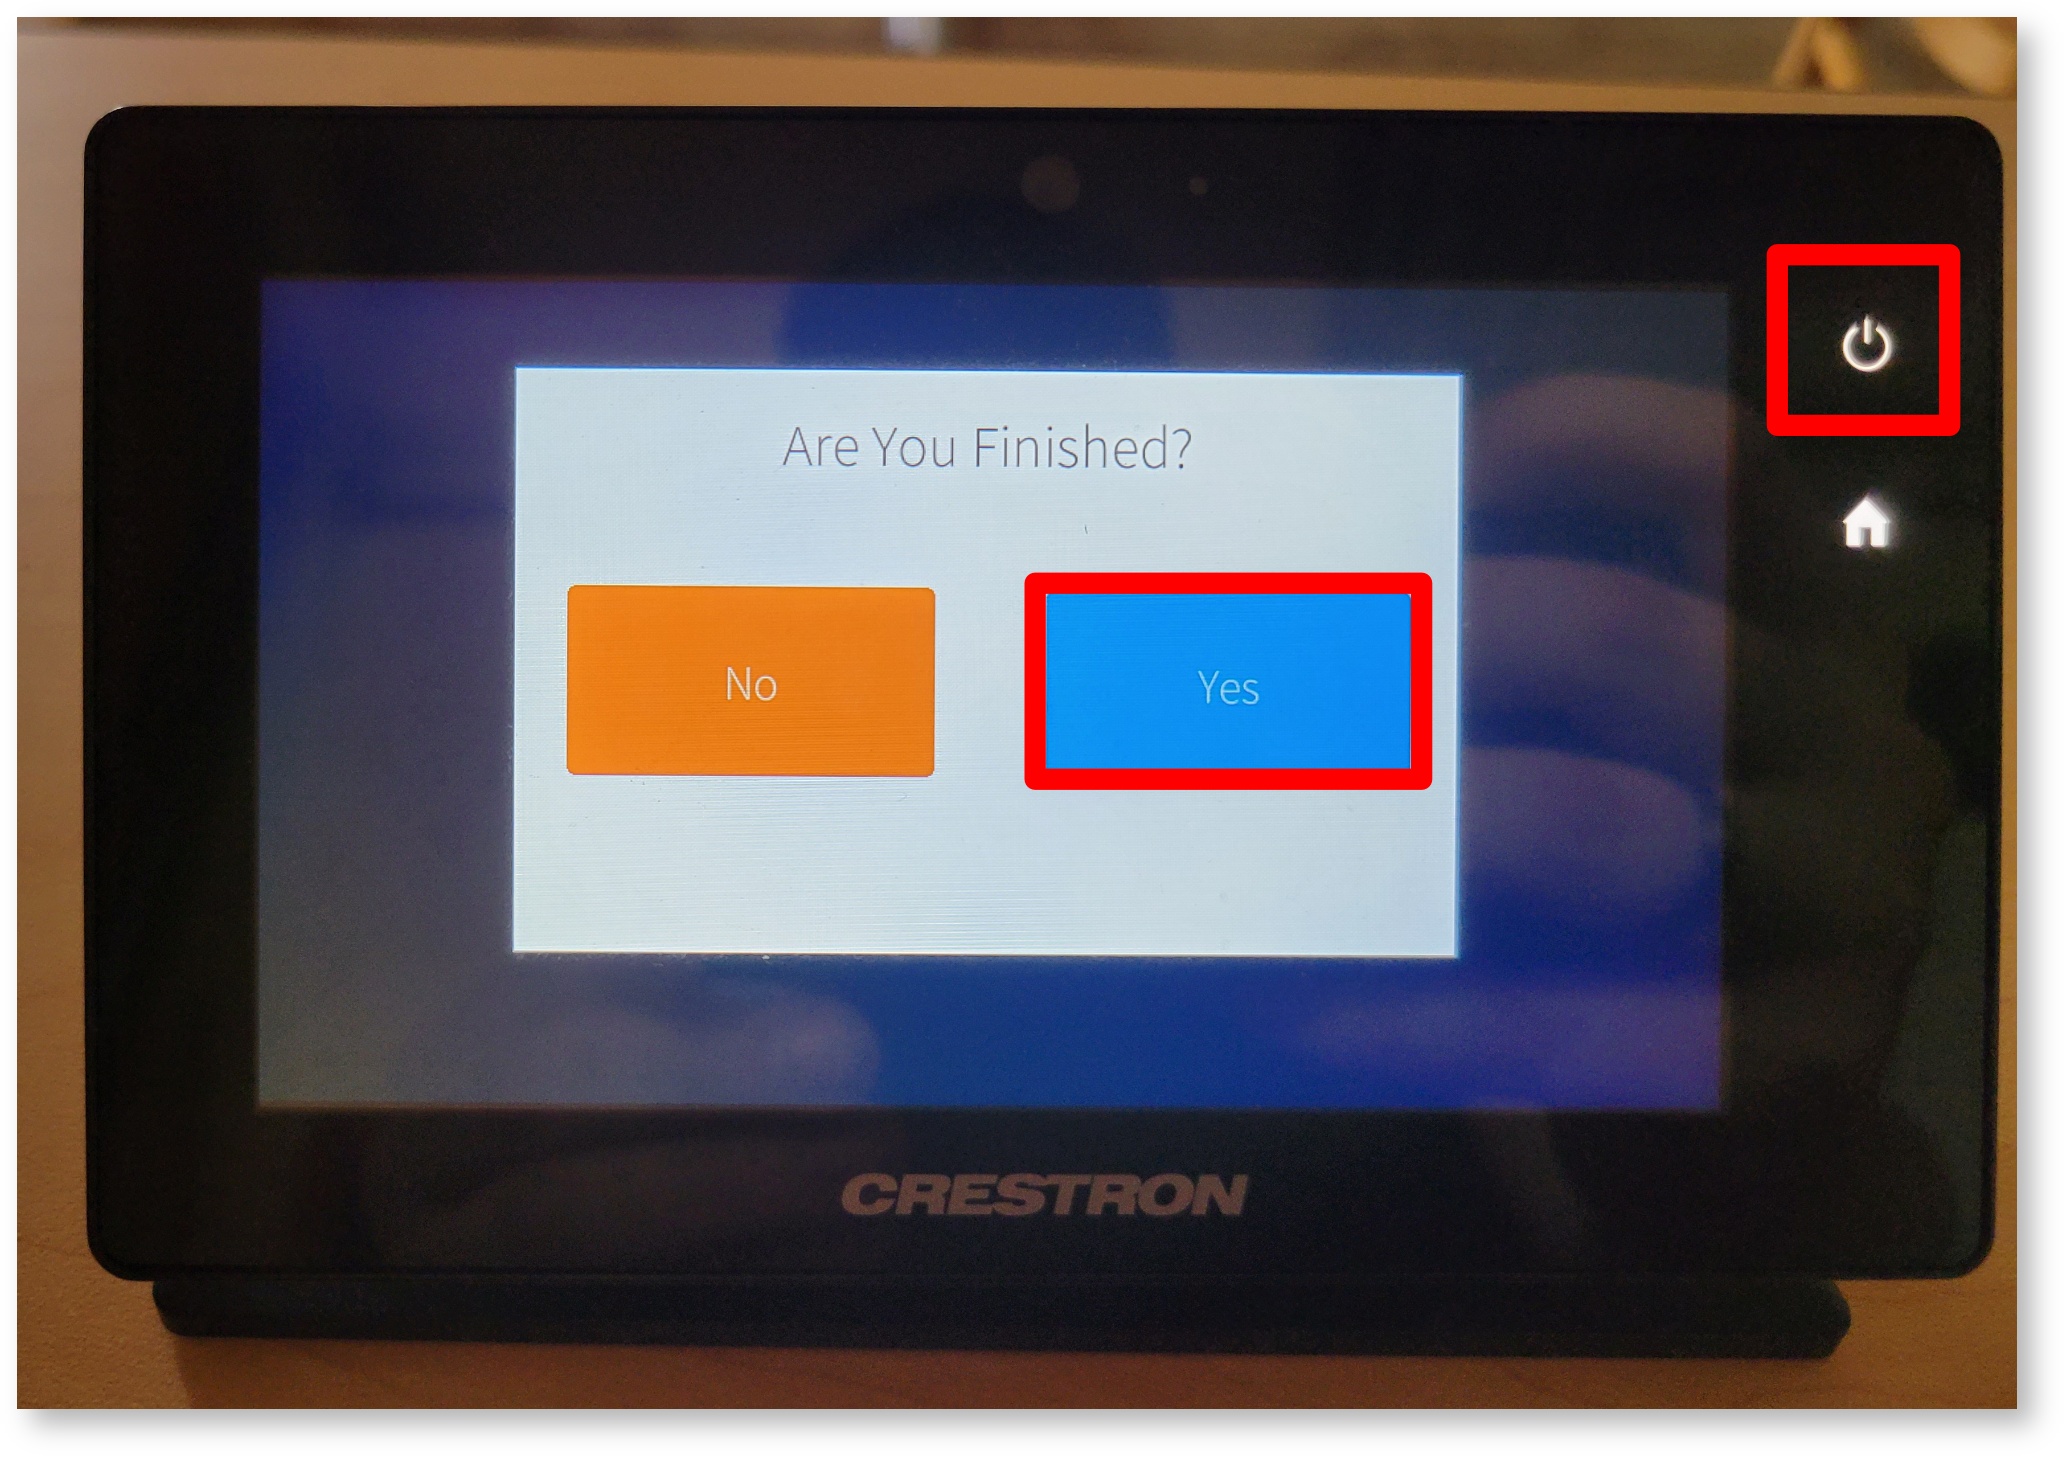
When you are finished with the Classroom AV equipment, tap the power button at the bottom left-hand corner of the touch panel. You will be asked “Are you sure you are finished?” Select "Yes" to turn off the classroom technology.