This page shows how to migrate from the CNS IT JAMF management server to the centrally-managed, campus-wide JAMF management server. Follow the steps on this page if you have been instructed to by CNS IT. To improve the consistency, efficiency, and security of UT devices, the IT Leadership Council Endpoint Management (EPM) Standing Committee, in partnership with the Information Security Office, is leading a campus-wide initiative to implement centralized endpoint management tools for UT desktops, laptops, and tablets. More information can be found at the Endpoint Management (EPM) Centralization and Standardization Program Website: https://it.utexas.edu/projects/epm |
|---|
Instructions for Migrating macOS Computers:
*********************************************** BEFORE MIGRATING *********************************************** The migration process should take no more than 15-20 minutes, and can be completed either on or off campus. Save and close your work: you will need to restart your computer at the end of the process Turn off Focus or Do Not Disturb: having Focus or Do Not Disturb on will prevent migration How to Turn a Focus or Do Not Disturb off on Mac: https://support.apple.com/guide/mac-help/turn-a-focus-on-or-off-mchl999b7c1a/mac *********************************************************************************************************************** |
|---|
- Find the version of Mac operating system installed on the computer:
From the Apple menu in the corner of your screen, choose About This Mac. You should see the macOS name, such as macOS Ventura or macOS Monterey, followed by its version number.
- Disable any Focus' enabled, or turn off Do Not Disturb:
- macOS Ventura 13 or macOS Monterey 12
- In the menu bar on your Mac, click Control Center
 , then click anywhere in the Focus section.
*** If you set the option in Control Center settings to always show Focus in the menu bar, you can click the Focus icon there. *** Turn off a Focus: Select the Focus. Its icon is no longer highlighted in the list, and the dimmed Do Not Disturb icon
 is briefly shown in the menu bar.
To close Control Center, click anywhere on the desktop.
*** If you keep Focus up to date across your Apple devices, turning a Focus on or off on your Mac turns it on or off on your other devices. ***
- In the menu bar on your Mac, click Control Center
- macOS Big Sur 11.0
In the menu bar on your Mac, click the Do Not Disturb icon
 .
.Click the active duration (it’s highlighted), then click anywhere on the desktop.
*** The Do Not Disturb icon is removed from the menu bar. ***
- macOS Catalina 10.15
In the menu bar, click the Notification Center icon
 , swipe down, then click the Do Not Disturb button to un-highlight or un-dim the button.
- macOS Ventura 13 or macOS Monterey 12
- Launch the CNS App Store (found in the /Applications/ folder)

- Under the Featured section of the Home tab, there will be a policy titled Migrate to Central Management, click the Migrate button.

- You may be prompted for your password multiple times to modify a System Extension for Secure Endpoint Service, enter your login password and click OK.
- We're switching to Microsoft Defender for Endpoint Security as our antivirus, this prompt is part of the switch.

- You will then receive a message stating that "Your computer is being migrated to the central campus JAMF...", click Continue.

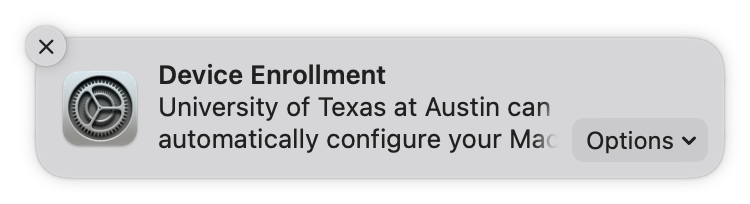
- Click the Device Enrollment notification when it appears in the top right corner of your screen which will open System Preferences or System Settings (depending on what macOS version you're running).
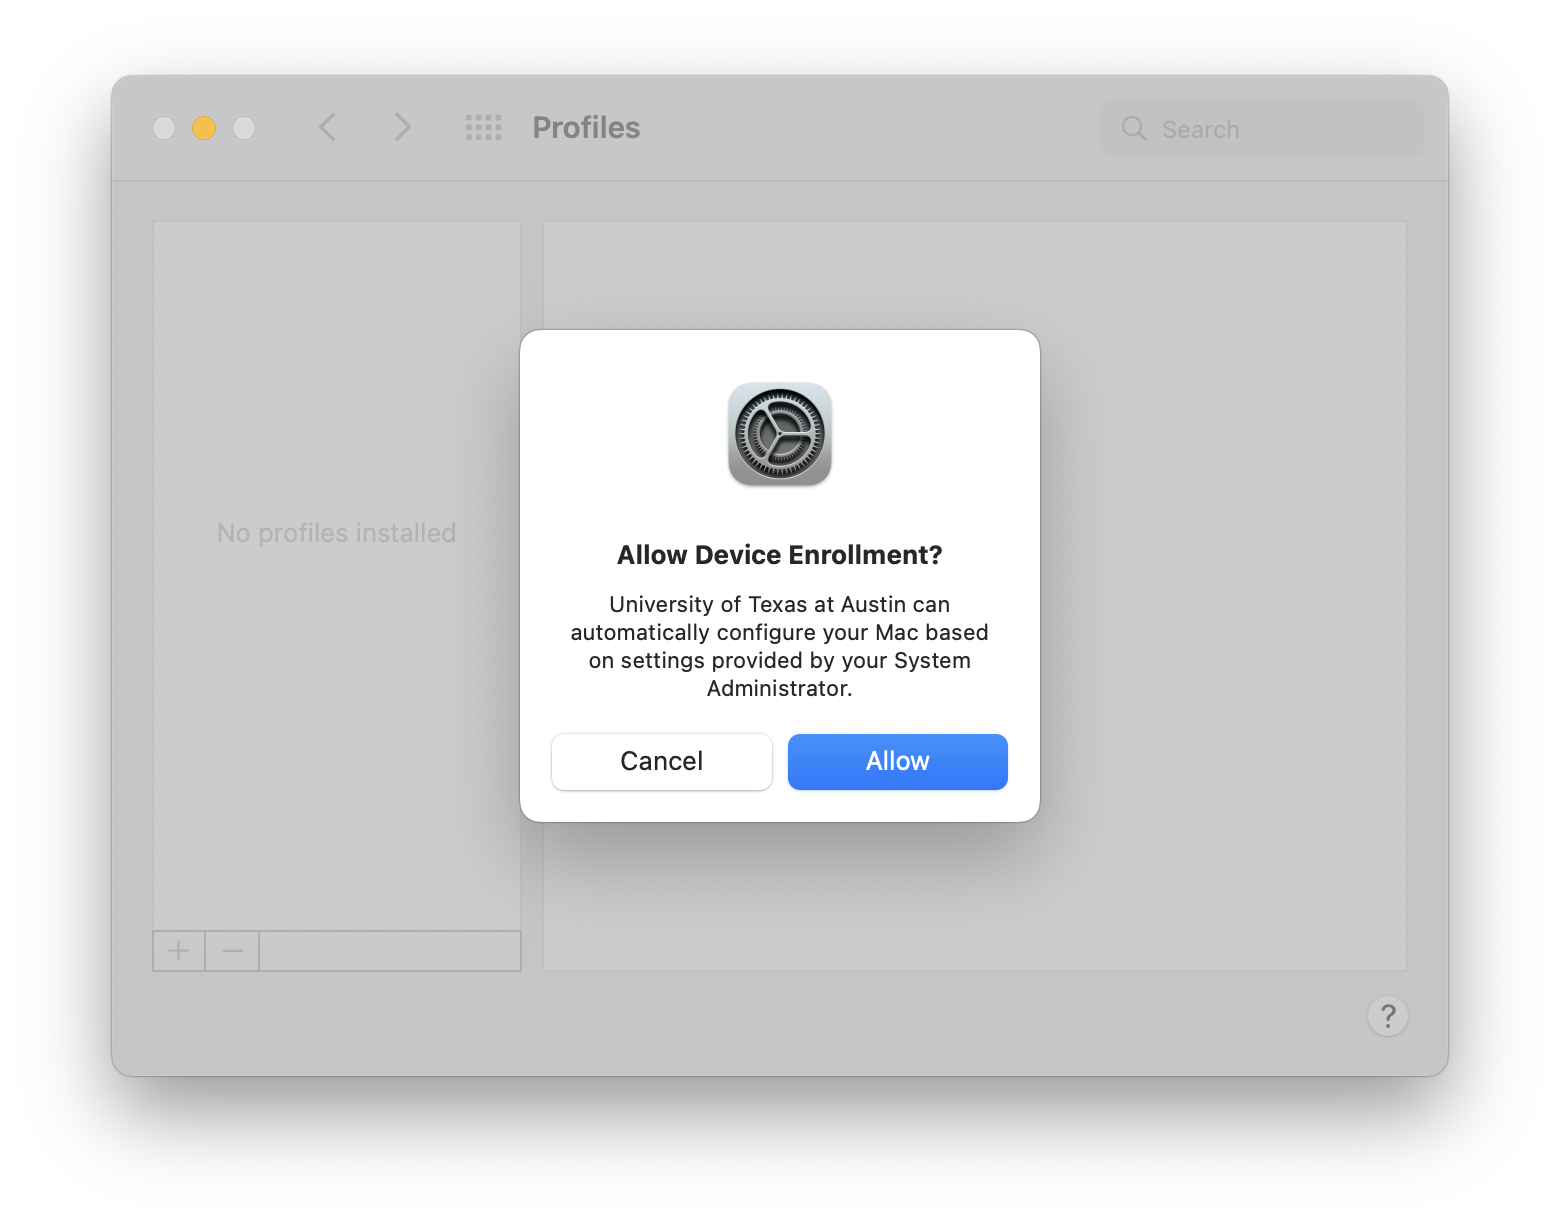
- You will be prompted to "Allow Device Enrollment?", click Allow.
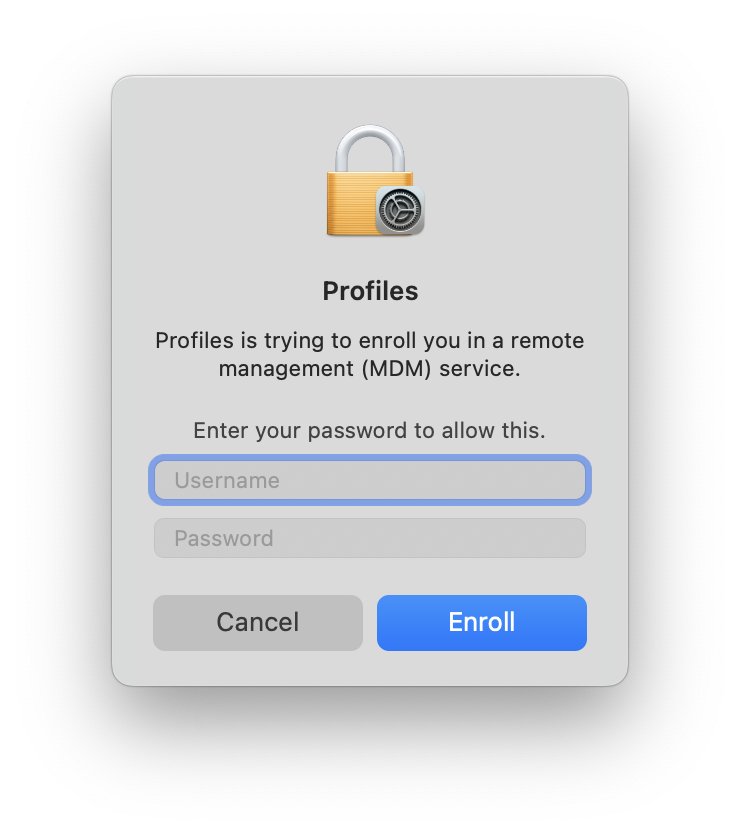
- Enter your login password when prompted in the Profiles window, then click Enroll.
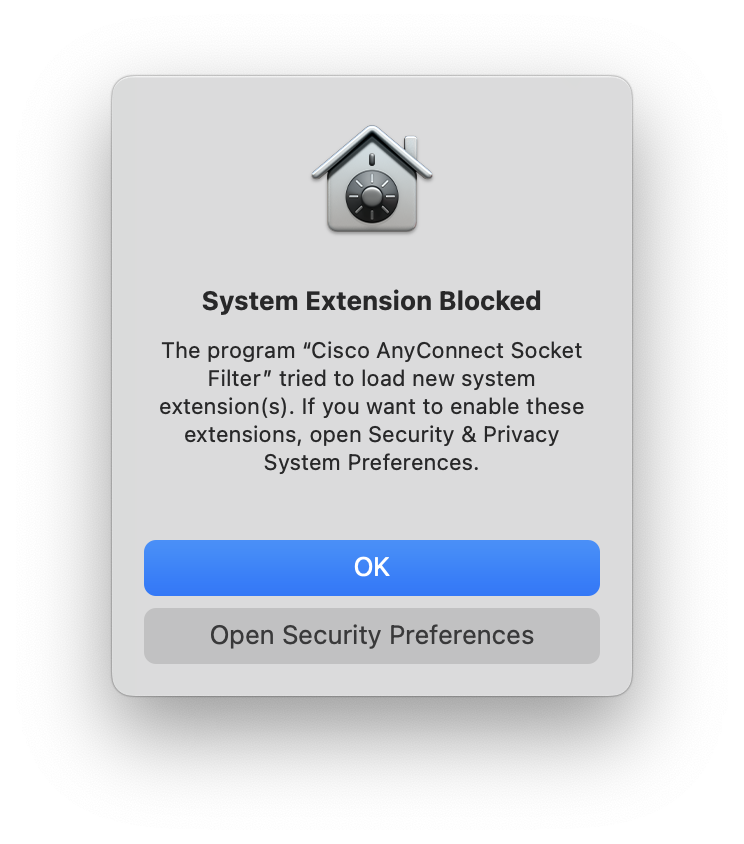
- If an alert stating "System Extension Blocked" appears, click OK.
- A new Self Service application called UT Self Service will open and is replacing the CNS App Store. Under the Featured section of the Home tab there will be a policy titled Initial Migration Inventory Update, click Update.

- Enter your login password when prompted and click Ok to generate a new FileVault Key.

- When you receive the message that "Your FileVault Key was successfully Changed", click Close.

Once these steps have been taken, you will receive a final message stating "This the computer will restart in 5 minutes...", click OK to start the countdown. Then, wait for your computer to restart itself, or choose Restart from the Apple Menu () to speed up the process.
*** Please note that clicking OK starts the 5 minute countdown. Save and close any work you have open during this 5 minutes. ***

- Your computer should now be fully migrated off of CNS IT JAMF and enrolled in the central campus JAMF. There are no further actions you need to take.
If you run into any issues during the migration, have questions, or need further assistance, please contact the College of Natural Sciences, Office of Information Technology by sending an email to help@cns.utexas.edu or calling our help desk line (512) 232-1077, serviced by the UT Service Desk. |
|---|
Overview
Content Tools