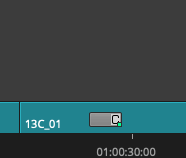
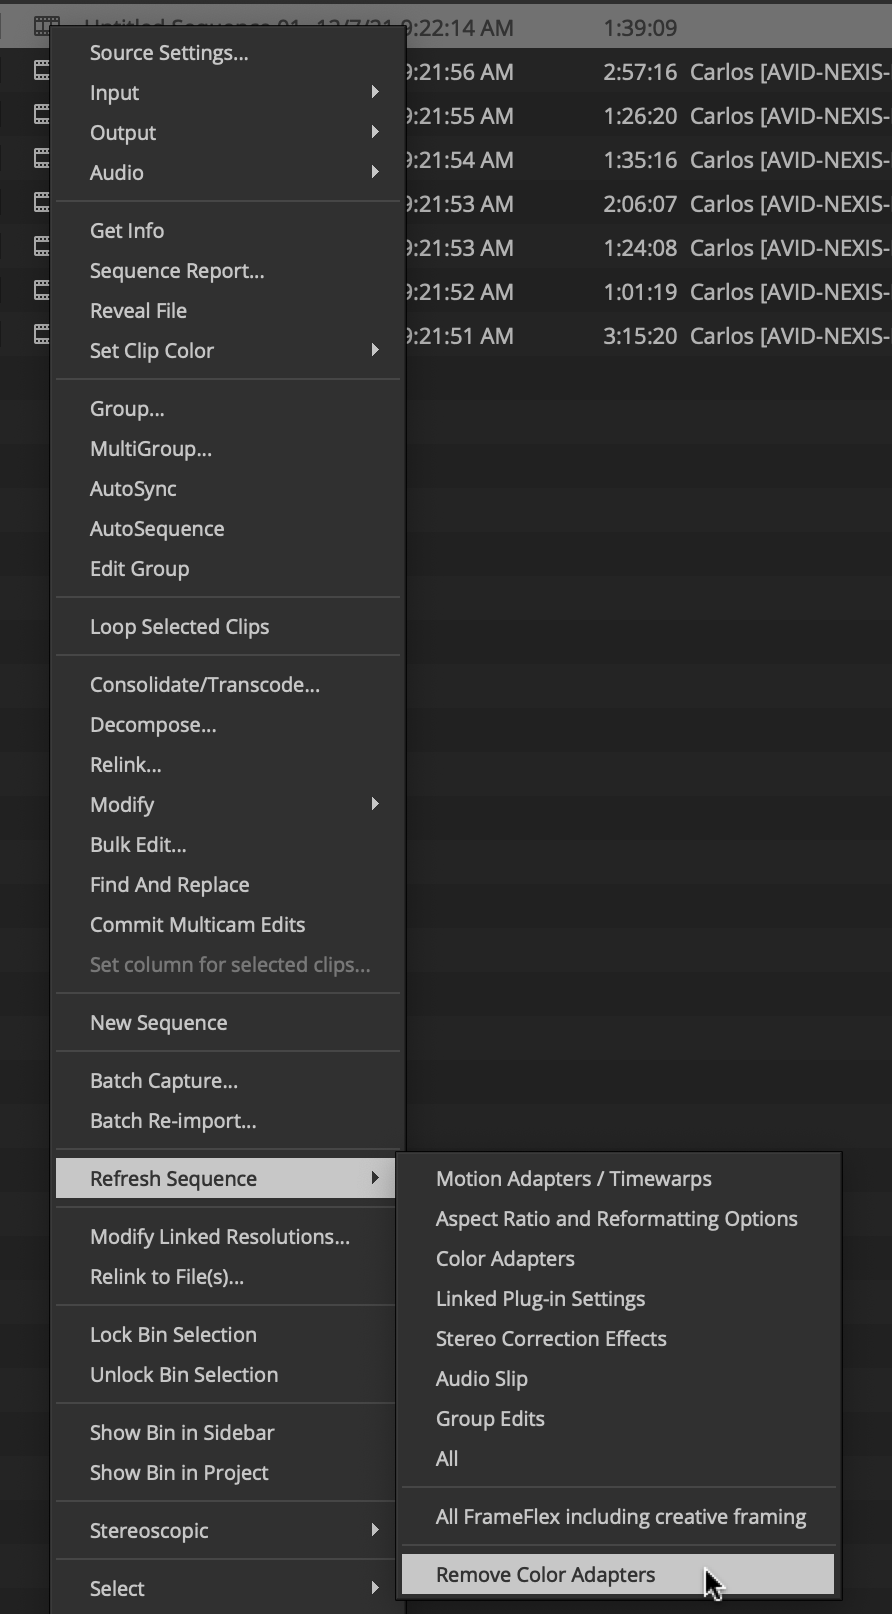
You don't have to but could consider removing the LUT on the footage. Right click sequence>Refresh Sequence>Remove Color Adapters If your timeline has a "C"on it like this then you need to remove the color adapter
|
|
Click on Windows on the top navigation bar > Workspaces > Color Correction |
|
| Or press the COLOR icon on the side bar to enter "COLOR" mode |
|
Select the HSL Tab (Hue, Saturation, Luminance) Make sure that “Hue Offsets” is selected. |
|
These buttons are the “Auto Color Correction Tools” |
|
| |
Auto Balance – Removes Color Casts |
|
Auto Black – Adjusts the black to the richest levels of black – removes milky look |
|
Auto Contrast – Adjusts for the best possible contrast between black and white |
|
To apply place cursor on the clip to apply color correction and click: |
|
Apply and change in this order: Auto Black Auto Balance Auto Contrast |
|
Click the – Dual Split Icon will show the before and after color correction Before is on the left and after on the right |
|
| You can drag this template to your bin and apply to other similar clips |
|
To move to the previous or next uncorrected shot, press these buttons |
|
Make sure the video quality menu is set to full green and then render all effects before export. |
|


Overview
Content Tools