Basic Audio in Avid
Audio Mixer Tool | |
The Audio Mix tool can be used to do volume adjustments of shots in your sequence. If you need to do detailed volume changes within shots, you should use audio keyframing. |
|
2. Select shot to be adjusted by placing the position indicator (blue line) in the shot. |
|
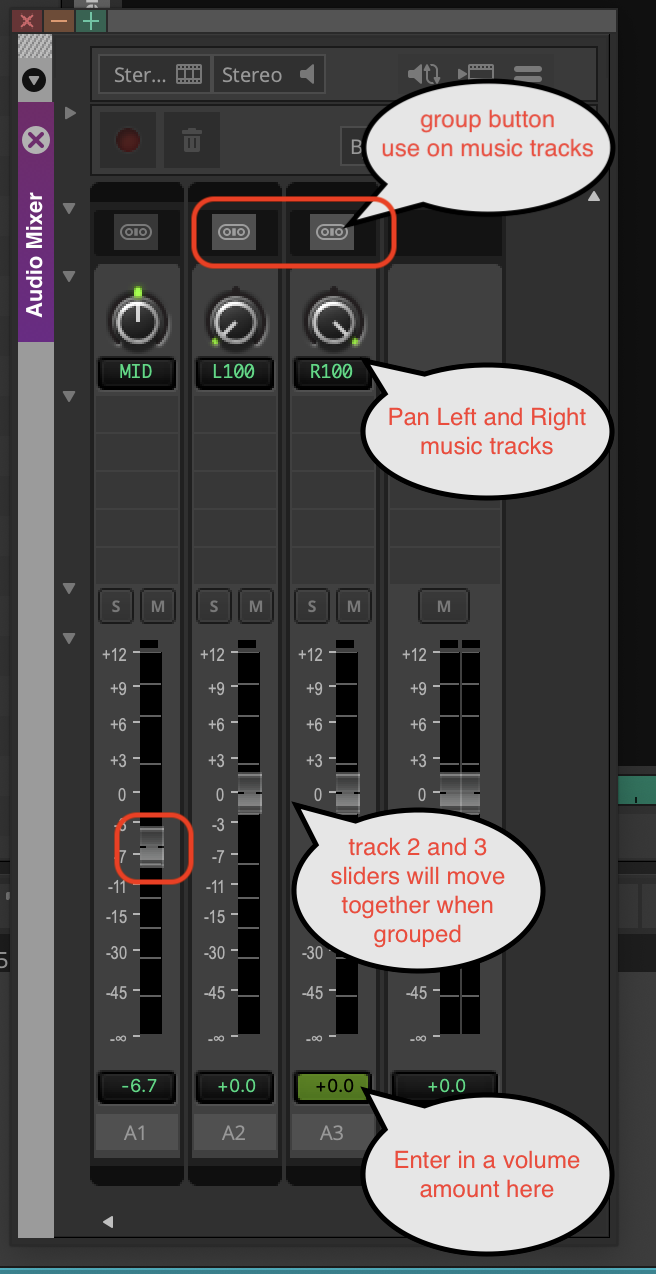
We have 3 tracks here Notice that the music on tracks 3 and 4 we need to pan the knobs Left and Right for stereo MUSIC tracks always pan L100 and R100 Dialog can leave paned center as show here on track on "MID" You can adjust the volume of the each channel in this tool Move the volume slider for the track you want to adjust (e.g. A1 for channel 1 audio track)
|
|
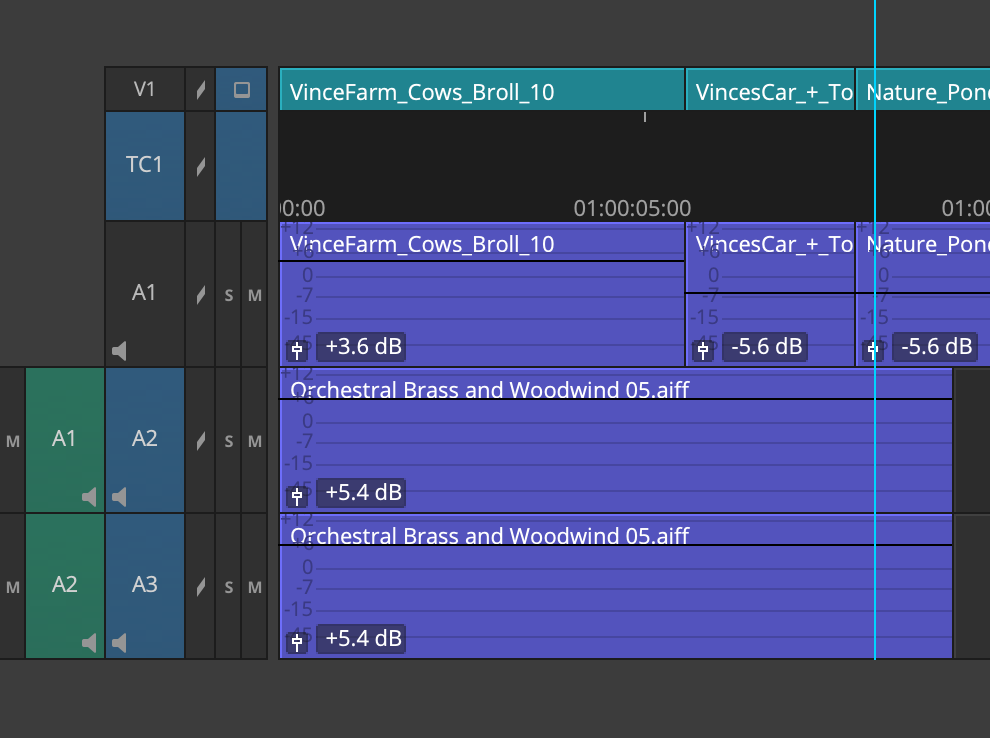
To be able to see the volume change on the timeline, you have to choose "Audio Clip Gain" from the fast menu in the timeline under Audio Data. |
|
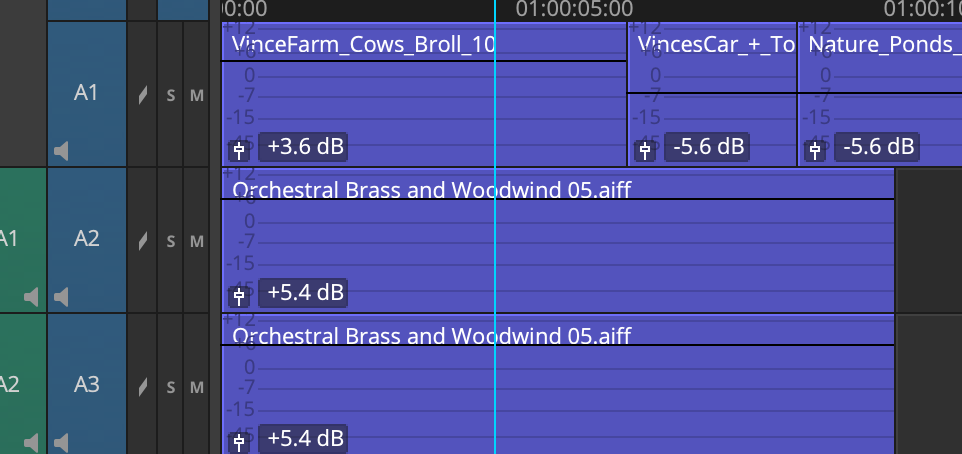
Here you can see the volume changes that have been made to the track in the Audio Tool see the (-6.7 dB) that is the volume adjustment level |
|
Changing entire track or portion of track. You can make a volume change to the whole track, by choosing set Level On Track Global from the fast menu (see third diagram) Make sure that the track is selected in the Audio Mix tool. |
|
| You can make a volume change to part of the sequence by putting an in-point and an out-point around the section you want to change and then choosing "Set Level In-Out" from the fast menu (this will only appear in the fast menu, if you have an in and out on your sequence) |
|
Audio Keyframes Go to the fast menu in beneath your timeline, >go to Audio Data then choose "volume". |
|
(optional) Enlarge your Audio track by clicking the shortcuts "Command" L to enlarge the track Note "Command" K will make the tracks smaller Put the position indicator (blue line) on the area you want to change. |
|
Select the tracks you want to change (very important) using the blue track selectors Here we have A2 and A3 selected |
|
Park the position indicator where you want to change the audio Hit the “ (quotation) key on the key board. You will see a black triangle appear on your time line where the position indicator was parked |
|
5. By moving at least a frame away from that triangle and hitting the “ (quote) key again, you can have one key frame as an anchor and then another key frame to change the volume with. When you put the cursor on the black triangle the hand icon appears and that is how you can pull the keyframe where you want the levels to go by dragging up and down
(make sure to be out of segment mode when selecting the keyframes).
|
|
You can also put dissolves on audio tracks to fade level adjustments or fade in and out of audio tracks One example here is we have two clips with audio level adjustments and we want to smooth it out |
|
Put the position indicator on the cut or about at the cut Only have the track that you want to smooth out the transition selected (in blue) ex here is A1 |
|
Press the Quick Transition icon or on a mac keyboard the "Backslash" key under the delete key to add a dissolve
|
|
Here you see that you can put in how long of a transition you want (15) frames for example Centered on Cut is good and what tracks the dissolve will be applied Choose the target drive as your hard drive and click Add and Render |
|
The result will be a smooth transition between audio adjustments |
|
Also you can use this to fade in and out of music easily |
|


Overview
Content Tools