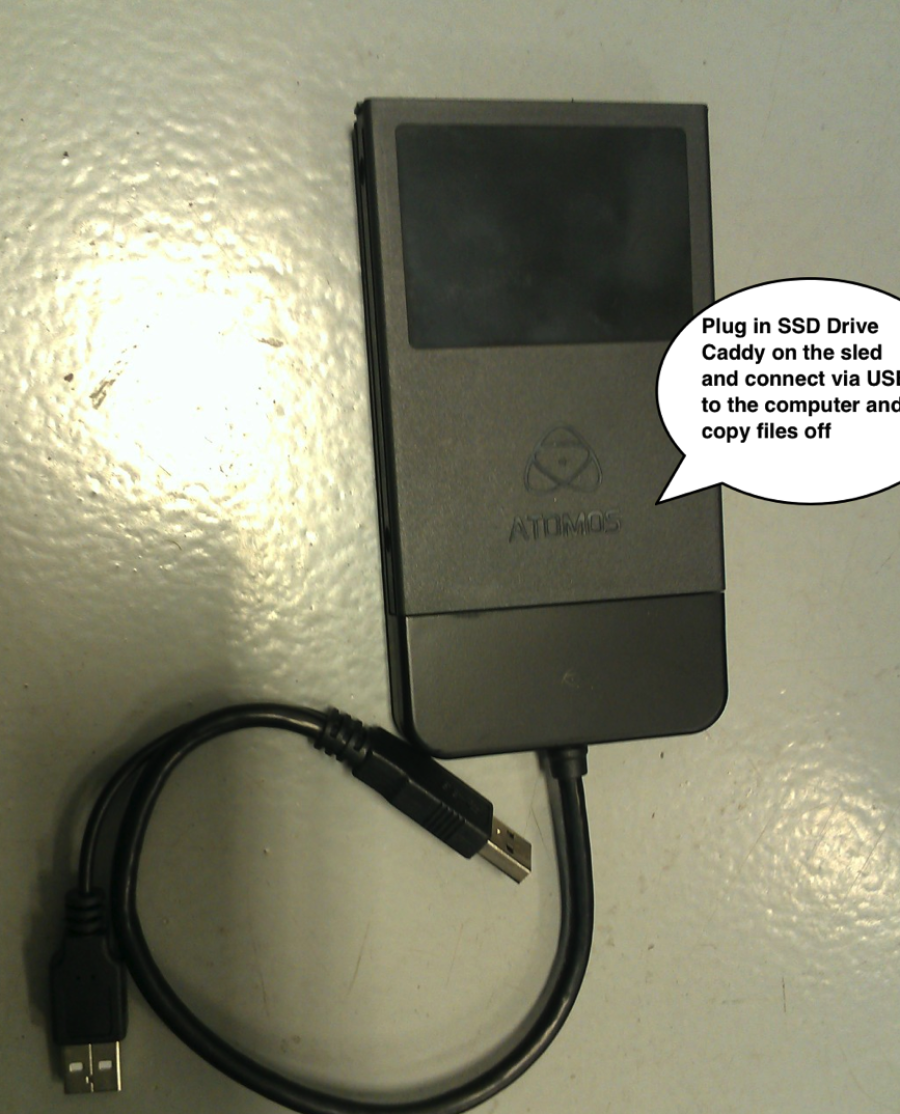
Step One is to Backup all the files off the ATOMOS Cards Connect the SSD Drive Caddy to the sled and the sled connects via USB to the computer. Copy file straight off for import into AVID, Premiere. |
|
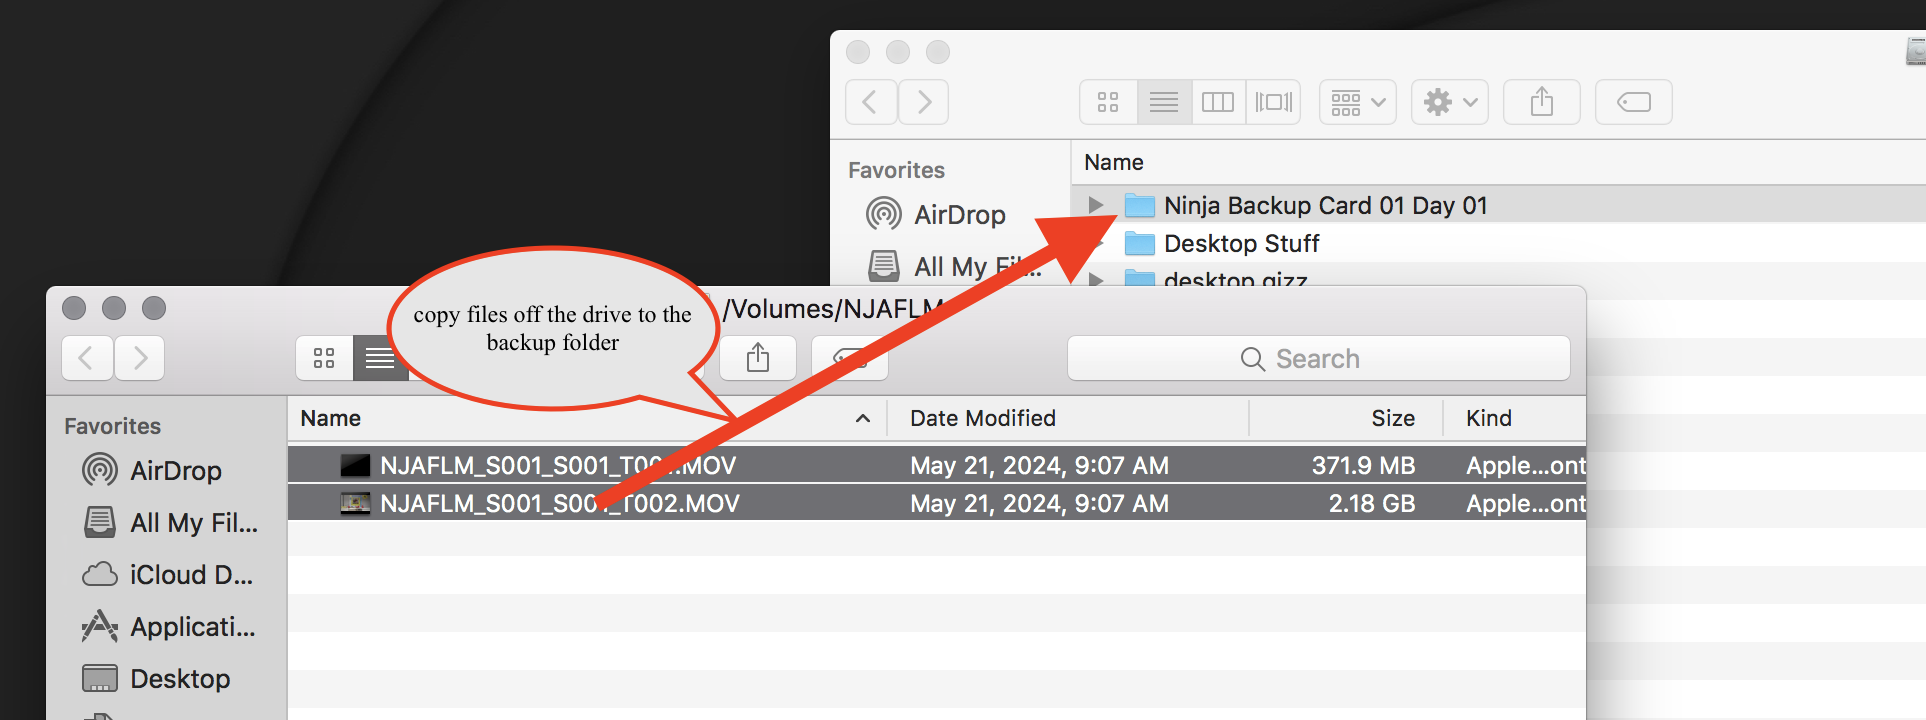
The Drive will mount on your MAC desktop as shown here. |
|
Next step is to backup this data on this SSD drive. "Clone" it to another hard drive. |
|
Make a new folder called "Day 1 Card 1" for example and copy the FILES exactly as they are on the source to the backup folder. Make Sense!!! Repeat for every SSD Card you shoot on. |
|
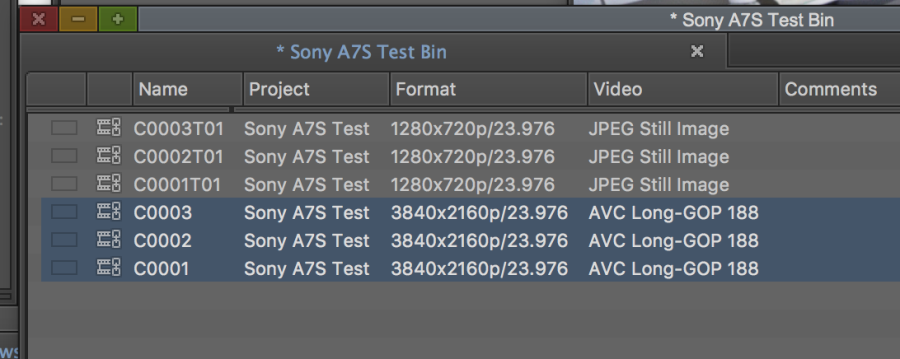
After the backup open the files on the drive and make sure they play okay and also check the frame rate and aspect ratio. Open the files in Quicktime Player and choose >Window>Show Movie Inspector
The file properties should be exactly like this frame grab to the right FPS 23.98 Format Apple ProREs 422 HQ 3840 x 2160 |
|
To process the files into the Editing Application - AVID Open AVID Media Composer |
|
Make sure the project is saved to your HD and then select New Project |
|
Name the Project and choose UHD 23.976P |
|
Go to > Tools > Source Browser |
|
| Navigate to the folder containing the ProRes files backed up off the Ninja hard drives |
|
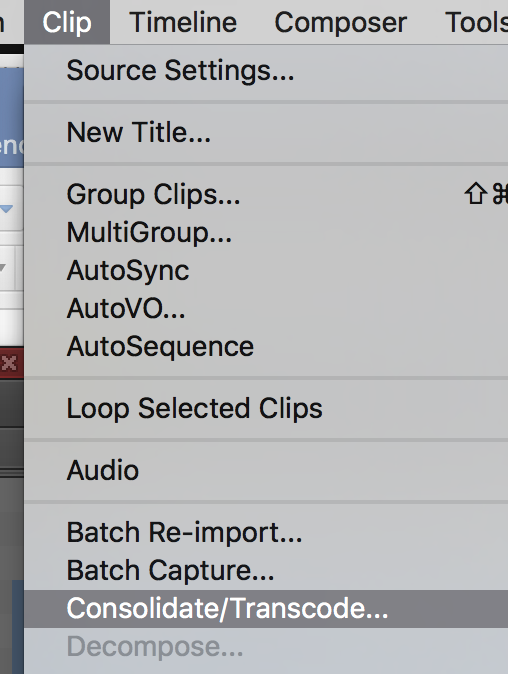
Select the files you want to use in the project and transcode them to work in AVID for offline editing. |
|
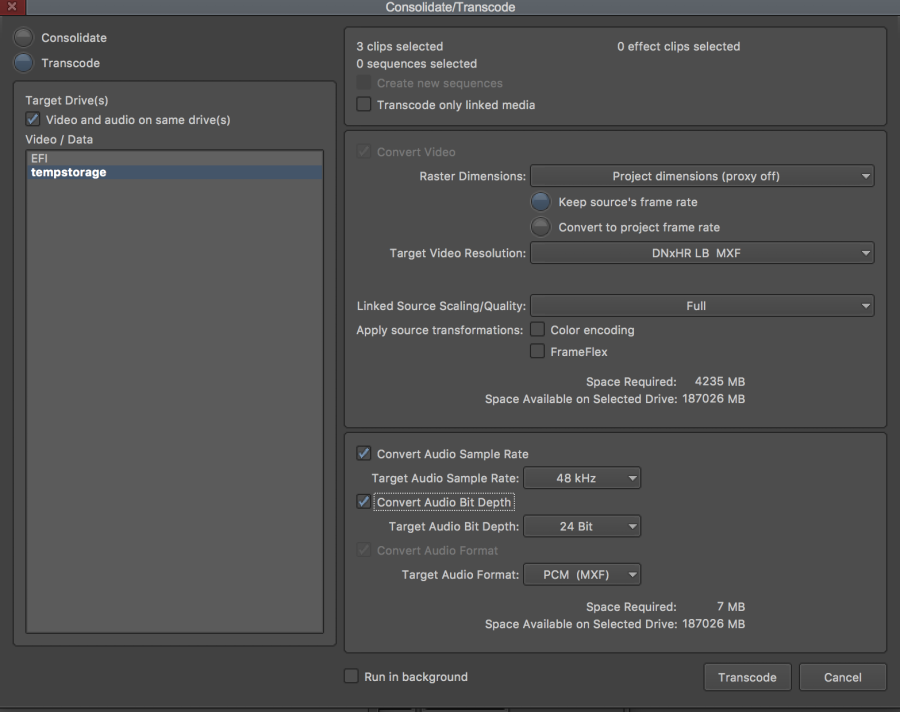
Once selected choose >Clip>Consolidate/Transcode |
|
Choose Transcode |
|
The resulting file will be the same raster size but will now be an AVID DNxHR Codec. |
|
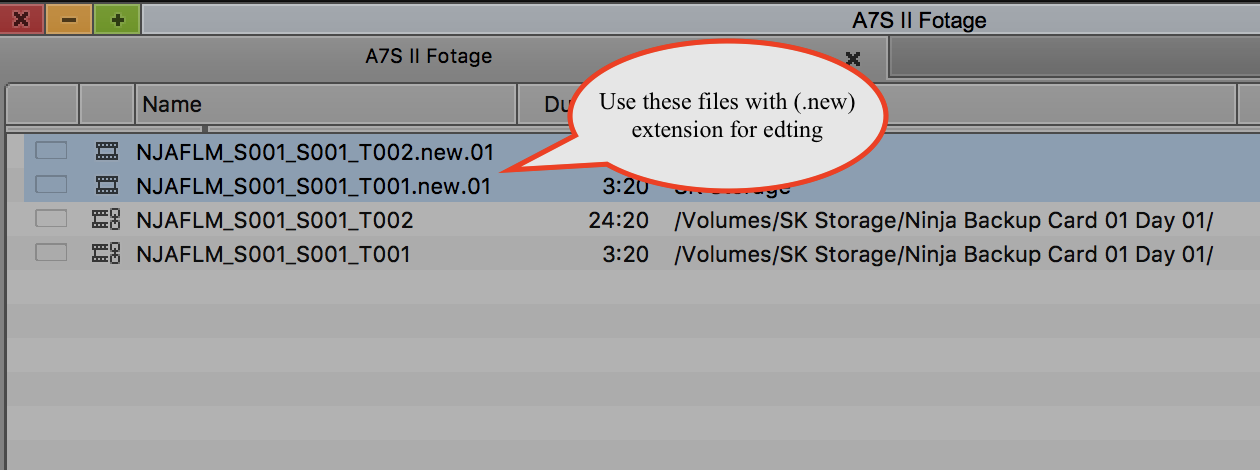
Will also have a .new extension (these are the files you want to use for editing) Do the same transcoding process to all the camera files you want to use in your AVID project. |
|


Overview
Content Tools