Download PDF
Introductory text
1. When using Final Cut Pro or AVID to edit projects you will find the
mediums available for import (all types of images, graphics, & audio files
are accepted) can be extremely convenient. However, these items will be
conformed and rendered to your project/sequence settings. Therefore,
when applying Transform operations on images, like pushing or pulling
in/out (also referred as the “Ken Burns Effect”), it is imperative your
images have proper resolutions to prevent unnecessary artifacting.
2. Before we begin, let’s take a brief moment to understand some
terminology on resolution. DPI, used primarily by the printing industry,
refers to Dots Per Inch which is the method of describing the resolution
of an image. The more dots the higher resolution (ex. 72dpi = Web
quality, 150dpi = Draft quality, 300dpi = Print quality). With video
resolution, quality is measured by the total amount of pixels within a
frame size (the width x the height). Therefore, the bigger the frame
size the better quality of an image (ex. 320x240 = Web quality, 720x480
= DV NTSC quality, 1920x1080 = High Definition quality). Refer to the
following chart to understand how frame size increases amount of pixel
information. |
 |
3. To acquire and import materials, such as scanned images, into a video
project we must overshoot our current frame size to account for any
operations we may want to apply to the image. My frame size for my
project and all of its accompanying footage is 1920x1080.
Note: Overshooting an image size (same as frame size) is a
precautionary measure. Imagine the digital realm as a big palette of
pixels; you can always discard pixels (decreasing frame size) and still
maintain best quality. The same is not true in reverse - you cannot easily
add pixels (increasing frame size) without serious mathematical
estimation(s). The end result is artifacting and the overall quality suffers
pretty terribly.
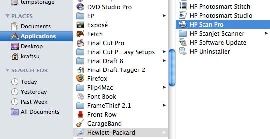
4. To access the scanner click >Applications>Hewlett-Packard>HP Scan Pro |
|
5. If a new window did not pop up or you received an error message doublecheck
that your scanner’s power cable and USB cable are both firmly
plugged in. Open the lid to the scanner and place your photo face-down
on the glass flush against one of the corners.
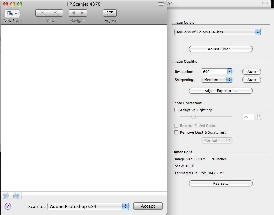
6. Click on the Adjust button and set the following settings
Image Color-Millions of Colors (24-bit)
Image Quality-Resolution 600
Choose to scan the image to Adobe Photoshop CS4-This will open the file in
photoshop once it is scanned. |
|
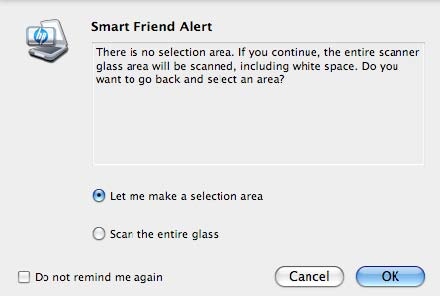
7. Choose New Scan to start the scanning process-Choose “Let me make a
selection area” so the scanning area can be decided unless the image
takes up the whole glass area of the scanner. |
|
8. In a few moments you will see your photo appear in the preview area of
the window. By default, it should auto-select your image.
If you prefer to adjust your dimensions in the scanner utility you may use
the mouse to adjust the edges of the image (also know as cropping).
9. Click the Accept button to finalize the scan. |

|
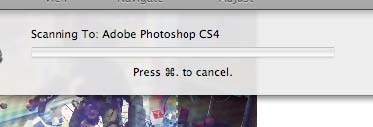
10. Choose to Scan with the current resolution |

|
11. This might take a few minutes.
12. The pop-up scanner utility window should close and the image should
open in Photoshop. At this point, you can use Photoshop’s tools to brush
out scratches, adjust color ranges and tones, and much much more.
Consult the User Guide for Photoshop to learn more about the various
tools the package has to offer.
13. When ready to export your file to the editing application click File?Save
As. A new window will pop-up. Save files in a separate folder to make
organization easier. Name the file in the space provided and change the
format to TIFF by using the pull down menu. |

|
14. The TIFF format (Tagged Image File Format) is a lossless image format
which is superior in quality to other more commonly used formats such
as JPG, GIF, and PNG. They can get pretty large…so to save them
efficiently, select the following when the TIFF Options window pops up
and click OK:
*Compression = LZW, Pixel Order = Interleaved, Byte Order =
Macintosh
View & Print PDF |

|
By Susanne Kraft and Jeremy Gruy