To set the height unscrew these on each leg. The more you clips you unscrew the higher the tripod will be. Make sure you match what you unclip on each leg so the tripod is even |
|
| This example shows the tripod legs extended equally so the camera is level |
|
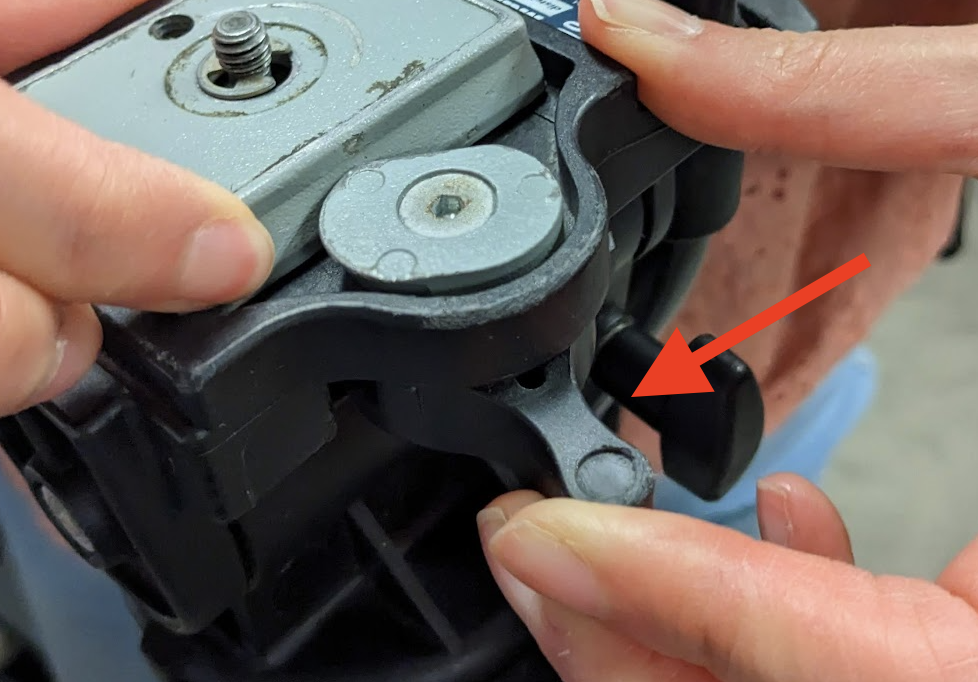
There is a hinge below the tripod head that when flipped open you can raise the center pole on the tripod to give you more height flexibility. Close the hinge to set the tripod's center column height. |
|
Next we need to take the mounting plate or quick release plate off the tripod this will mount to the bottom of the camera. |
|
Take the plate off we'll mount this to the camera. |
|
Take the plate and screw it on to the bottom of the camera using the mounting screw handle. |
|
Put the camera with the plate attached back on the tripod with the lens facing the front of the tripod. |
|
This knob sets the angle position of the head so you can shoot straight ahead or straight down |
|
This knob twist it and it will turn the head horizontally Tighten it when you get it lined up with the position you want to shoot. Loosen it just enough if you want to be able to pan the camera. This will hold it in position. |
|
When you are finished make sure that the mounting plate gets put back on the tripod. Remove it from the camera |
|
Put it back on the tripod head. To put the tripod away reverse what you did to setup. |
|


Overview
Content Tools