This WIKI will troubleshoot getting the Video and Audio Interface todisplay image on the monitorand audio through the speakersFirst Quit all applications and |
|
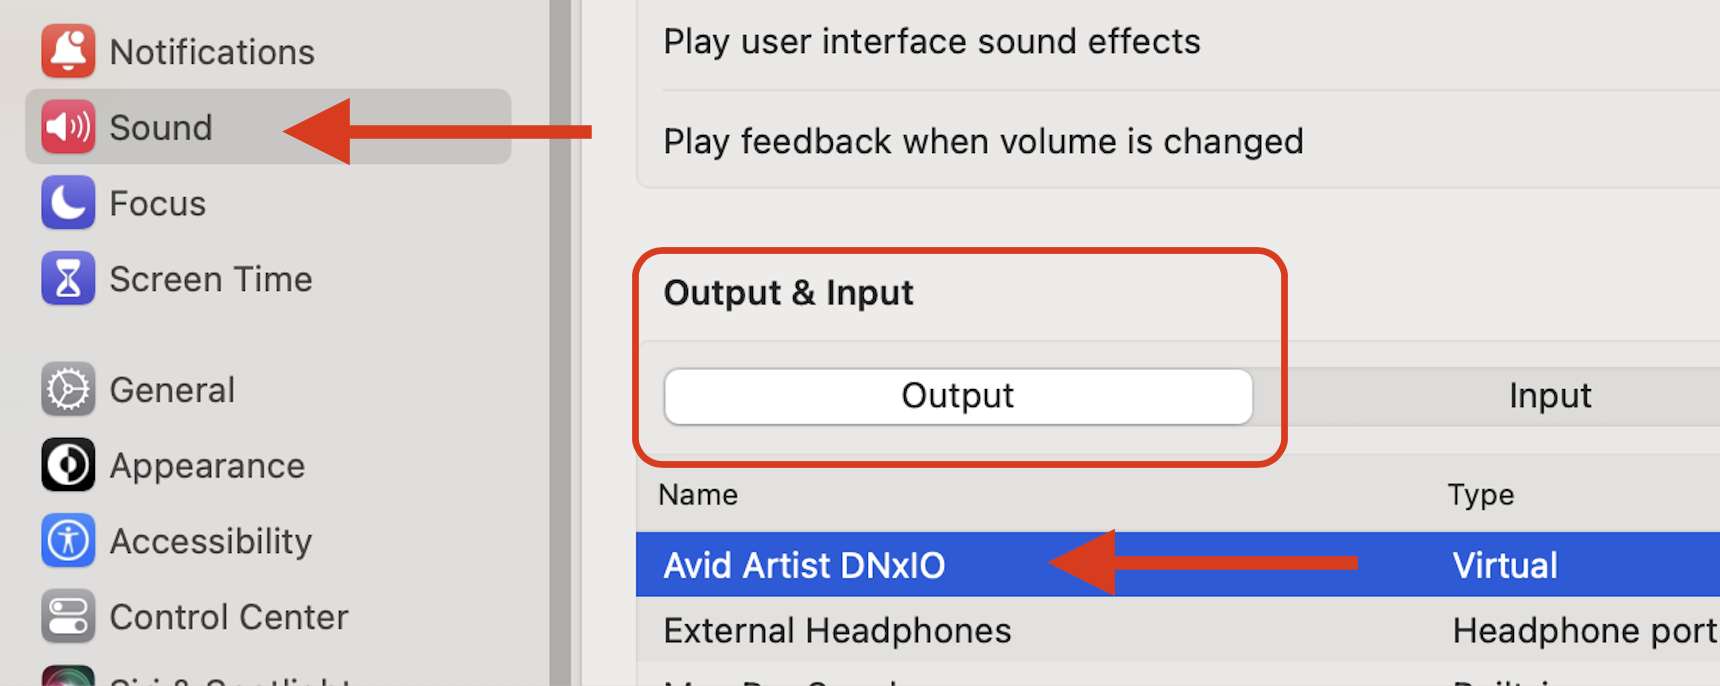
Next go to >Apple>System Settings |
|
Choose Sound Output > Set to AVID Artist DNxIO |
|
Stay in System Settings > Go to Blackmagic Design Desktop Video pref and double click it to open |
|
Should see Desktop Video Utility - Artist DNxIO |
|
Click on the Audio Tab Make sure it is set to XLR |  |
Video Output Tab4K Video Settings |
Or for 4K 24 Frame not 23.98 |
SDI Output set to Color Space Y, Cb, Cr, 4:2:2 1080p HD and 2K is set to 1080P not PSF SDI set to Quad LInk!! |
|
| Click Save to save the preferences |
|
2K Video Settings |
|
SDI Output set to Color Space Y, Cb, Cr, 4:2:2 1080p HD and 2K is set to 1080P not PSF SDI set to Quad LInk!! |
|
| Click Save to save the preferences |
|
Quit the Blackmagic Desktop Video Setup |
|
| Open Davinci Resolve |
|
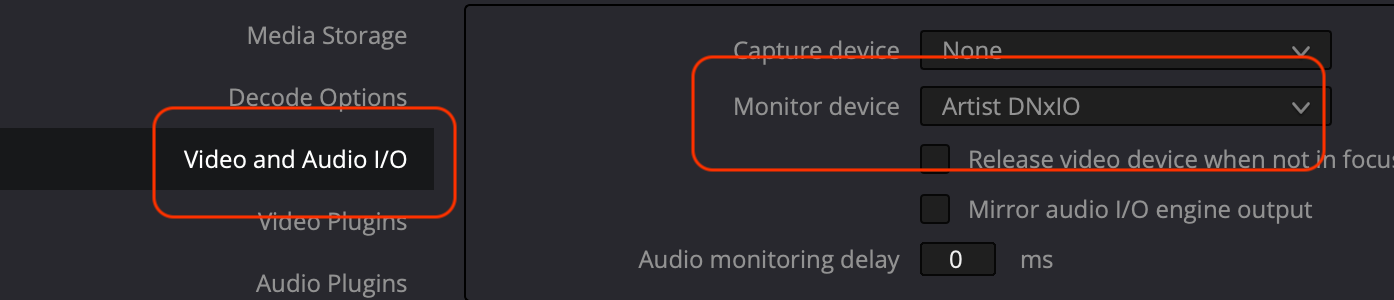
Set the Monitoring for the Desktop Display on the desk Go To Davinci Resolve Preferences |
|
| Set the Video and Audio I//O to Artist DNxIO |
|
| click on Save |
|
| You need to save your project and close Resolve and open it again if the I/O was updated |
|
| Setup for Davinci Resolve>Go to your project settings in the lower left corner of the application |
|
4K Settings!!Project Settings>Master Project Settings Timeline FormatTimeline resolution - Choose 4096 x 2160 DCITimeline frame rate should be 23.976 or 24 depending what the footage is |
|
Video Monitoring -Video Format - Choose 4K 2160p 23.976 or 24SDI Configuration >Quad Link Data Levels Video Video Bit Depth >10Bit |
|
VERY important Set this to Data Levels >Video Check Retain sub-black and super-white data |
|
| click Save to apply settings |
|
2K Settings!!Project Settings>Master Project Settings Timeline FormatTimeline resolution - Choose 2048 x 1152 2K 16:9 |
|
| Click Save to apply settings |
|
Turn On TV by pressing the Monitor button on the Sony Remote on top of the AVID Artist DNxIO |
|
The 4K Sony TV will turn green when it is fully on but the remote won't change at all. So don't keep hitting the Monitor On/Off button!! |  |
Davinci Project should be setup correctly now. |  |
If you are getting the QUAD Split image on the TV something is not matching the Blackmagic System Settings and the Resolve settings All these things have to match to either 2K or 4K
Note if your timeline is HD 1080 then monitor it on the 2K setting |
|
Next is the AVID setupOpen AVID |
|
There is a button on the timeline that sometimes gets turned off make sure the Hardware Active Button is on in AVID Right click it and choose Artist DNxIO > Select> |
|
Click it Again so it turns RED |
|
For Adobe PremiereOpen Premiere > Set Playback settings by going to Premiere Pro > Settings > Playback
|
|
Click on Playback>Audio Device Blackmagic Playback Video Device Blackmagic Playback |  |
Then Click on the Settings Icon for BlackMagic Playback |
|
Choose Device Artist DNxIO Colco 601 Rec 709 Unsupported frame sizes choose to Scale Up Click OK and then Click OK again and should see image on the TV and hear sound |
|
Audio Monitoring make sure all the buttons shown here are pressed. |
|


Overview
Content Tools