ATEM Mini Extreme ISO
Inputs
| 1 | CAM 1 |
| 2 | CAM2 |
| 3 | CAM 3 |
| 4 | Crane Cam |
| 5 | Shoulder Cam on pedestal |
| 6 | Crestron Mac from teaching station |
| 7 | HD1 - Hyperdeck 1 |
| 8 | HD2 - Hyperdeck 2 |
ISO Recording using ATEM Software
The ATEM Mini Extreme ISO can record ISOs of each camera. Recoding can be started and stopped from the ATEM Software Controller.
The SSD drive needs to be plugged in to the switcher into USB-B on the back of the ATEM Mini Extreme ISO switcher. |  |
To access the record controls, click on the OUTPUT tab on the right side of the SWITCHER screen, then click on RECORD STREAM. Under FILENAME you can name the files that will be recorded. When ready: Press the REC button to begin recording. NOTE: Make sure the checkboxes for Display Status and ISO record all inputs are checked. Record in all cameras can be checked or left unchecked. We will not be recording in the cameras so if left checked it has no effect |
|
Once recording the screen changes to ISO REC in red and the timecode begins counting. |
|
The ISO recording status is also displayed in the Multi-viewer | |
To stop the ISO recording press the STOP button. Unplug the SSD drive from the back of the ATEM Mini and plug it into the Switcher Control Mac to upload the files. When uploading is complete return the SSD drive to USB-B on the ATEM Mini switcher. |
|


Media Players on the ATEM Extreme Mini ISO
There are two Media Players for showing JPG (only) image files. There are 20 slots for loading images.
These Media Players are ideal for loading logos or show opening/closing graphics.
The file format of the images must be JPG. Copy the files to Temp Storage on the Switcher Control Mac. Navigate to those JPG files using the Local Library Panel on the left side of the Media window. Drag the image files you want to use into the empty slots. This will load the files into the switcher as usable assets. |
|
Next, drag an image file into the Media Player 1 on the right side of the Media window then, drag a second image file into the Media Player 2. | 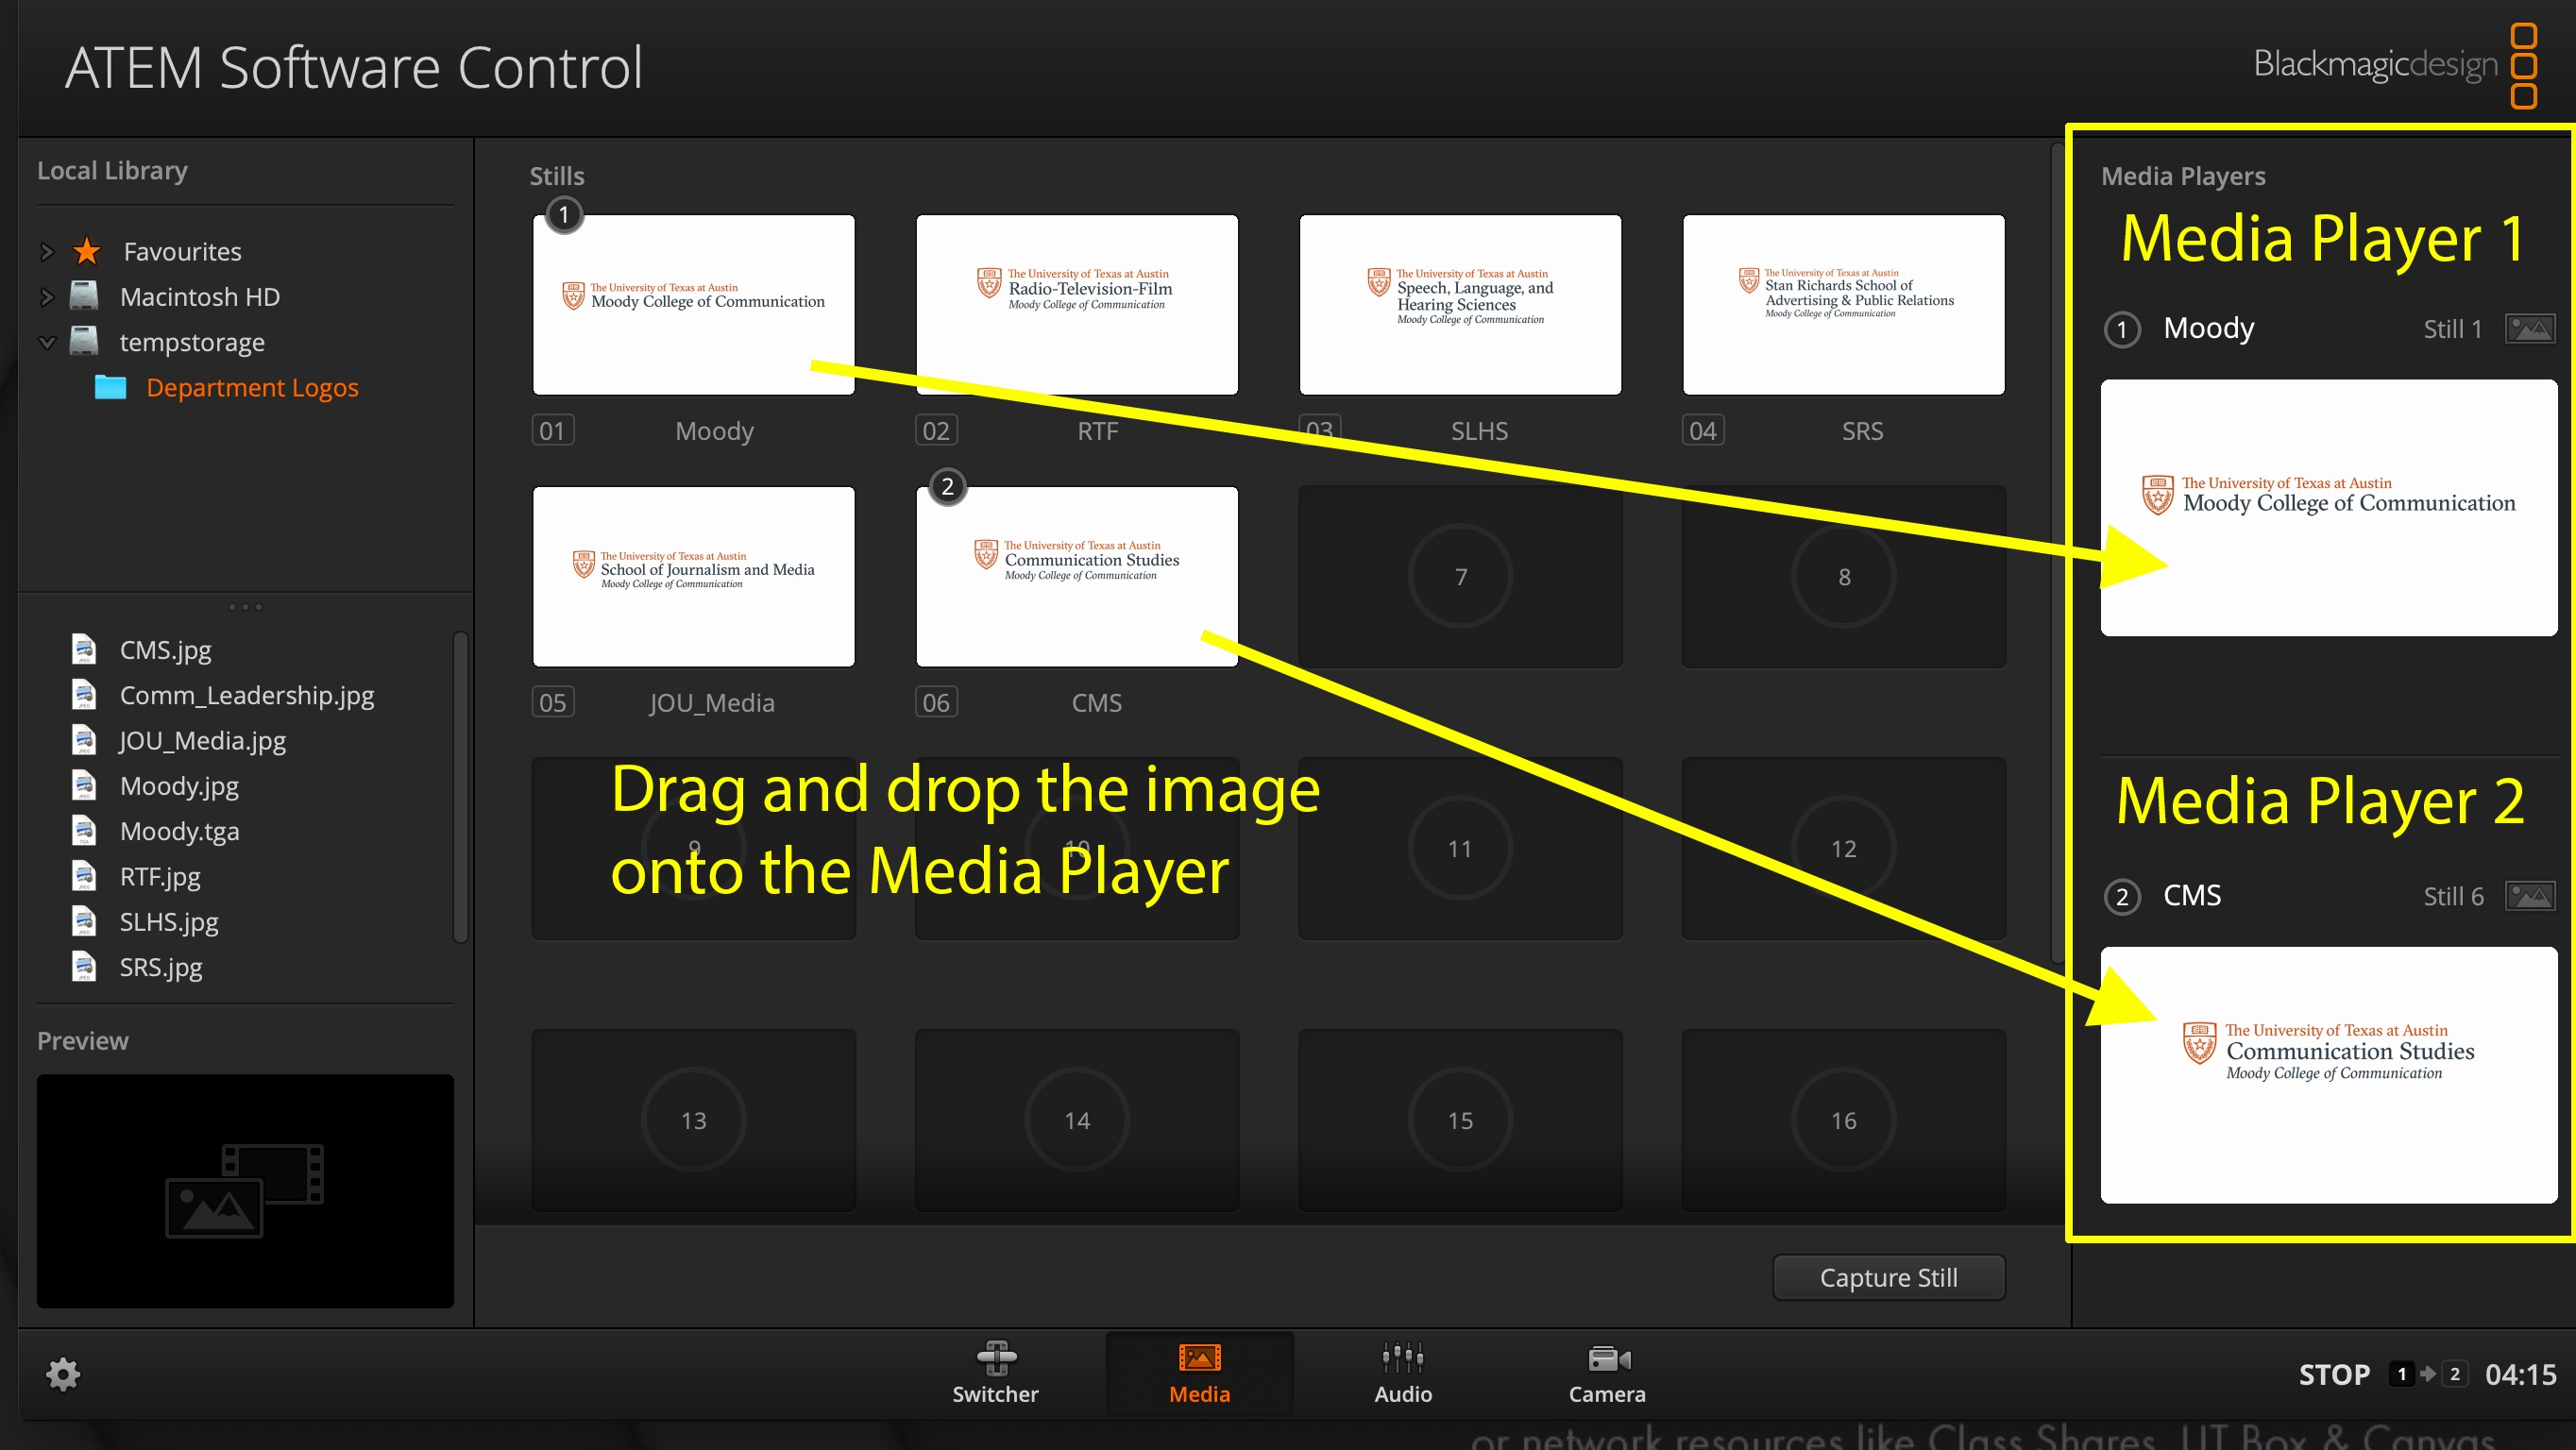 |
To present the images on air, press the MP1 or MP2 buttons on the software controller. |
|


Media Playback from Hyperdecks
Media can be played back from the Hyperdecks (HD1 and HD2). The file format for the media loaded onto the SD card must be ProRes LT 29.97 upper filed first.
Click on Media Players on the left side of the switcher window then click on Hyperdecks. You will see HD1 and HD2 and if there is a SD card with media loaded you will see | |
Live YouTube Streaming from ATEM Mini Extreme ISO
Live streaming to the Moody YouTube channel can be initiated from the ATEM Mini switcher. Most streaming will be done using the Blackmagic Web Presenter and/or OBS.
Streaming directly from the switcher will be a quick and easy way to begin streaming for a last minute request.
The ATEM Mini is set to live stream a generic live stream to the Moody YouTube homepage. The Platform, Server, and Stream Key have all been set up. To start streaming press the ON AIR button. IMPORTANT NOTE: The streaming from the ATEM Mini is ALWAYS a PUBLIC steam. There is no way to set a stream to be Unlisted or Private from the switcher. If ON AIR is pressed the stream is started and is PUBLIC. |
|
To end the stream press the OFF button. |
|


Overview
Content Tools