Zoom H4 how to connect via USB to computer menus | |
| Turn on the Zoom H4 |
|
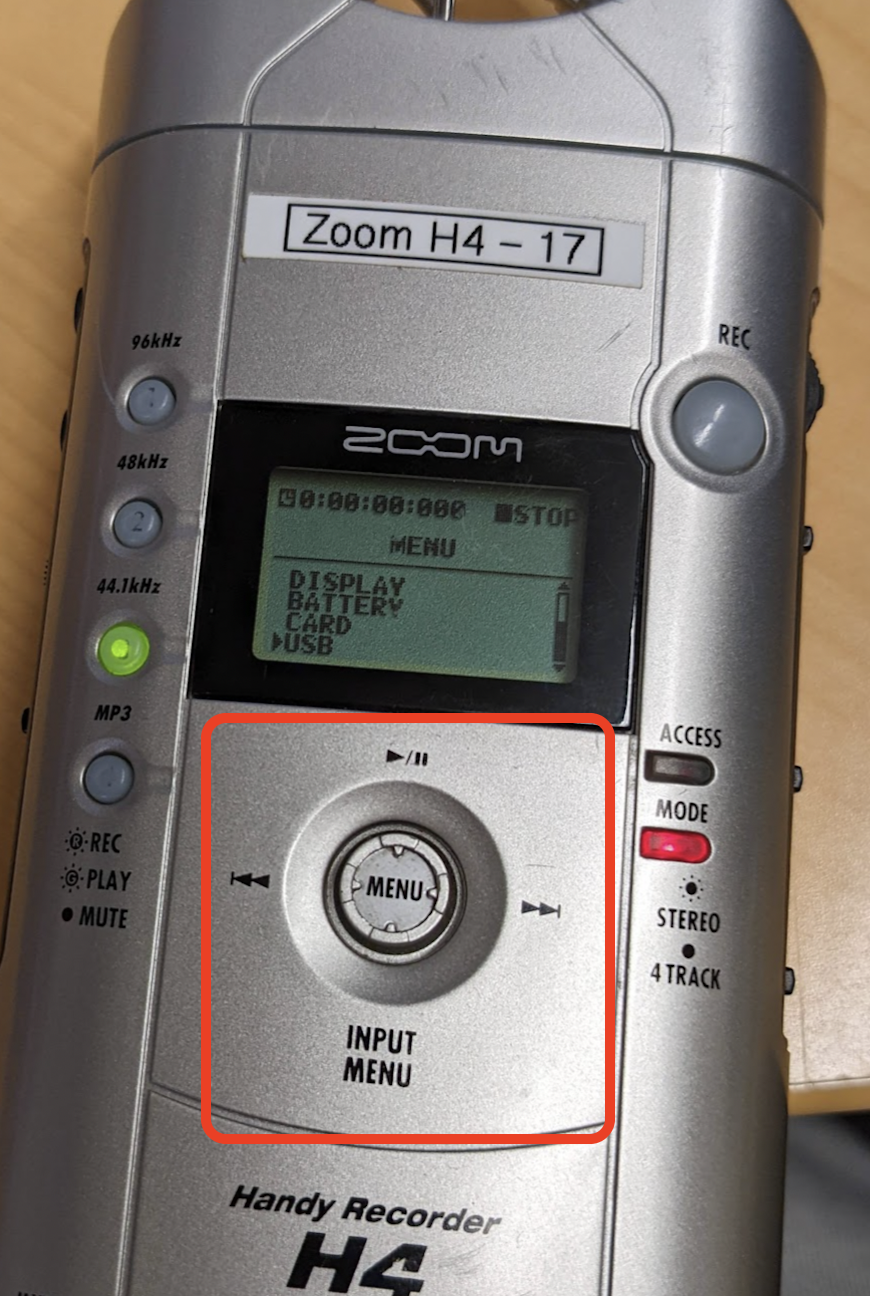
| Press the MENU button to access the Menus |
|
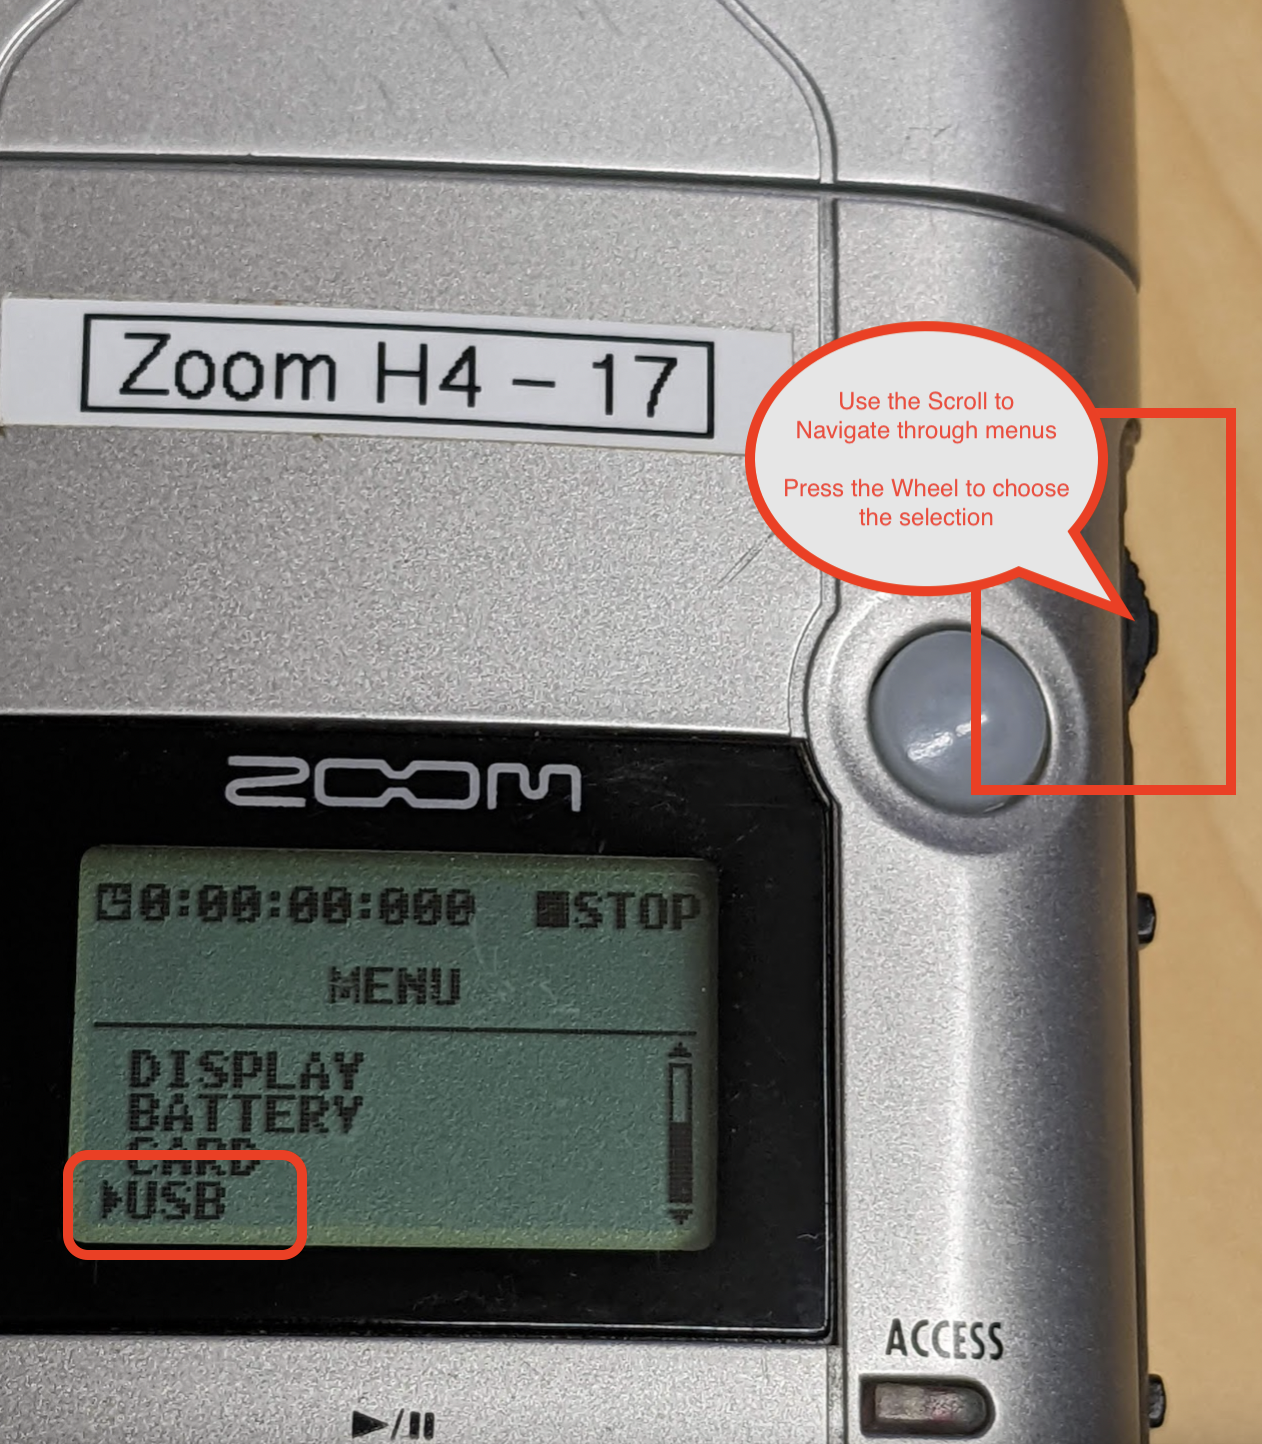
Click on Menu on the Side Scroll button Use the Scroll to Navigate through menus PRESS the Wheel to choose the selection Scroll to USB AND PRESS THE WHEEL to select it |
|
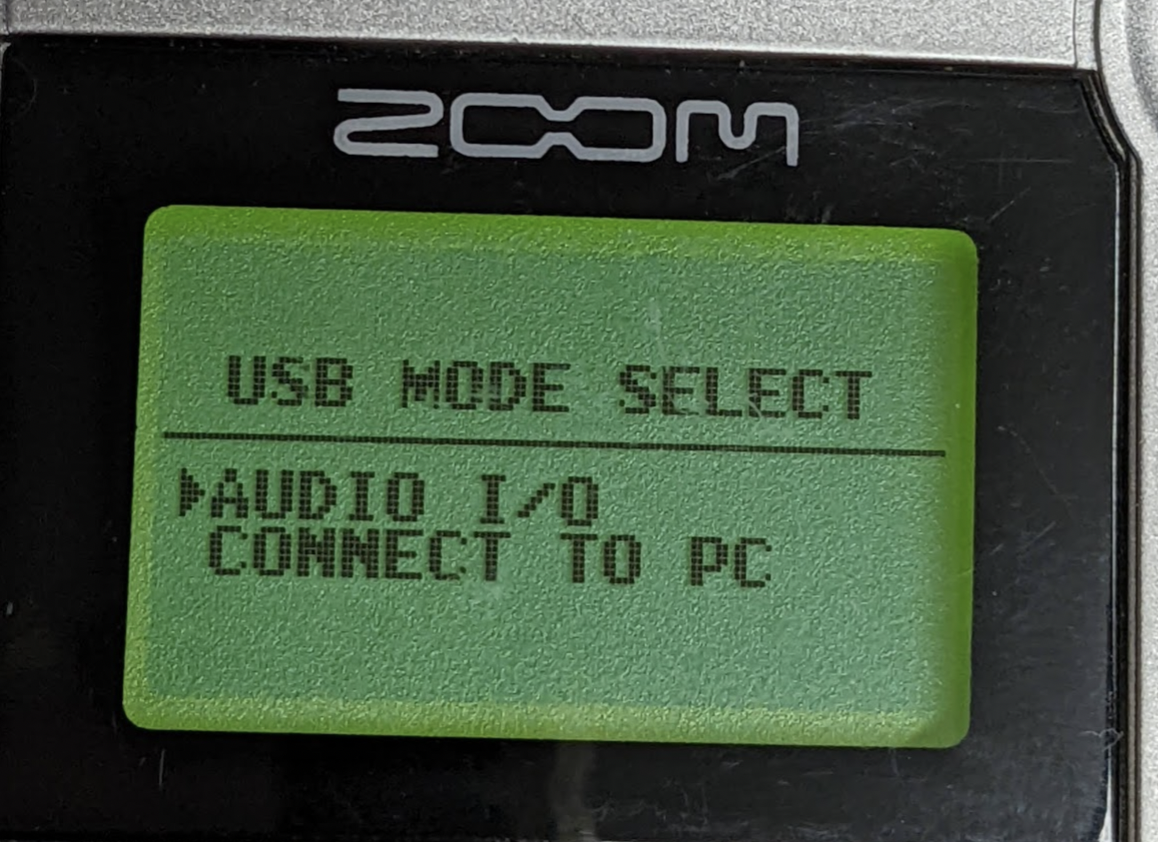
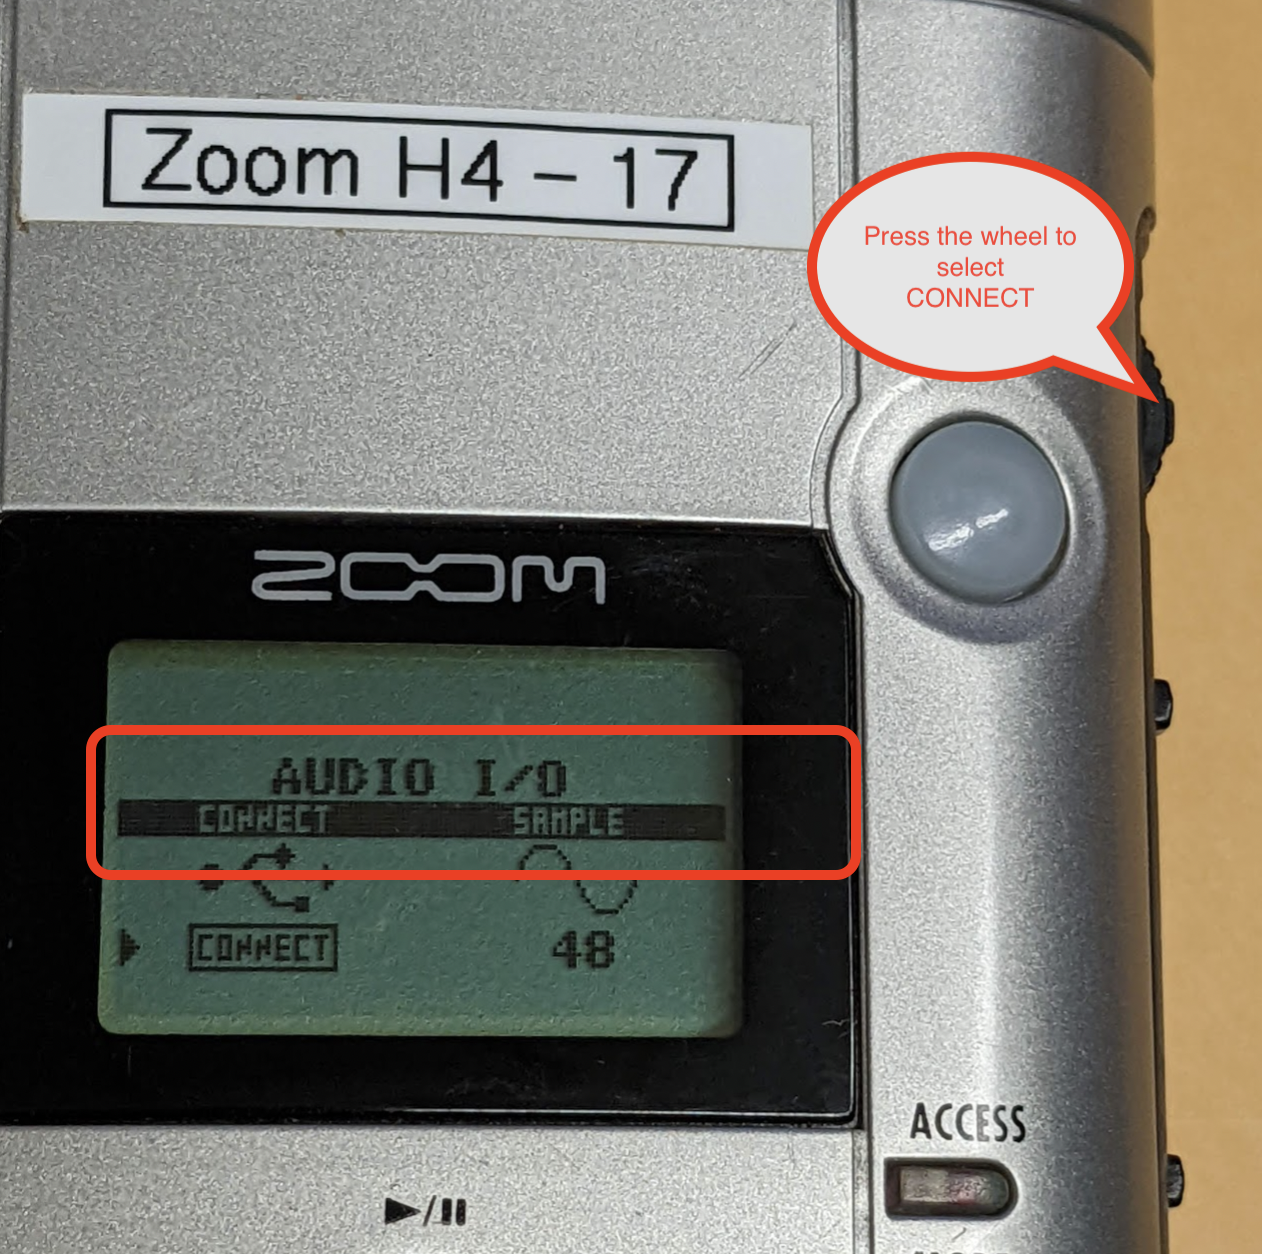
PRESS the wheel TO SELECT AUDIO I/O |
|
PRESS connect to connect to the computer Press the wheel to select |
|
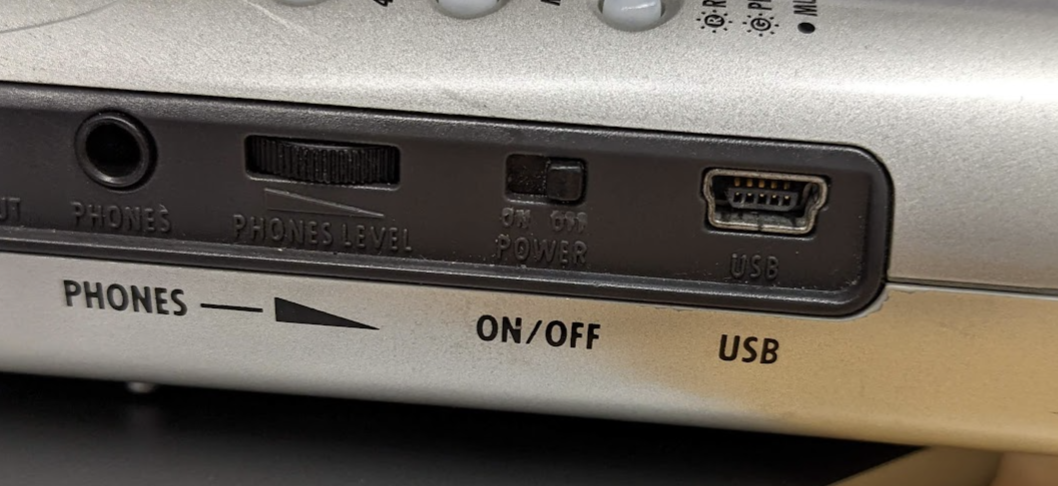
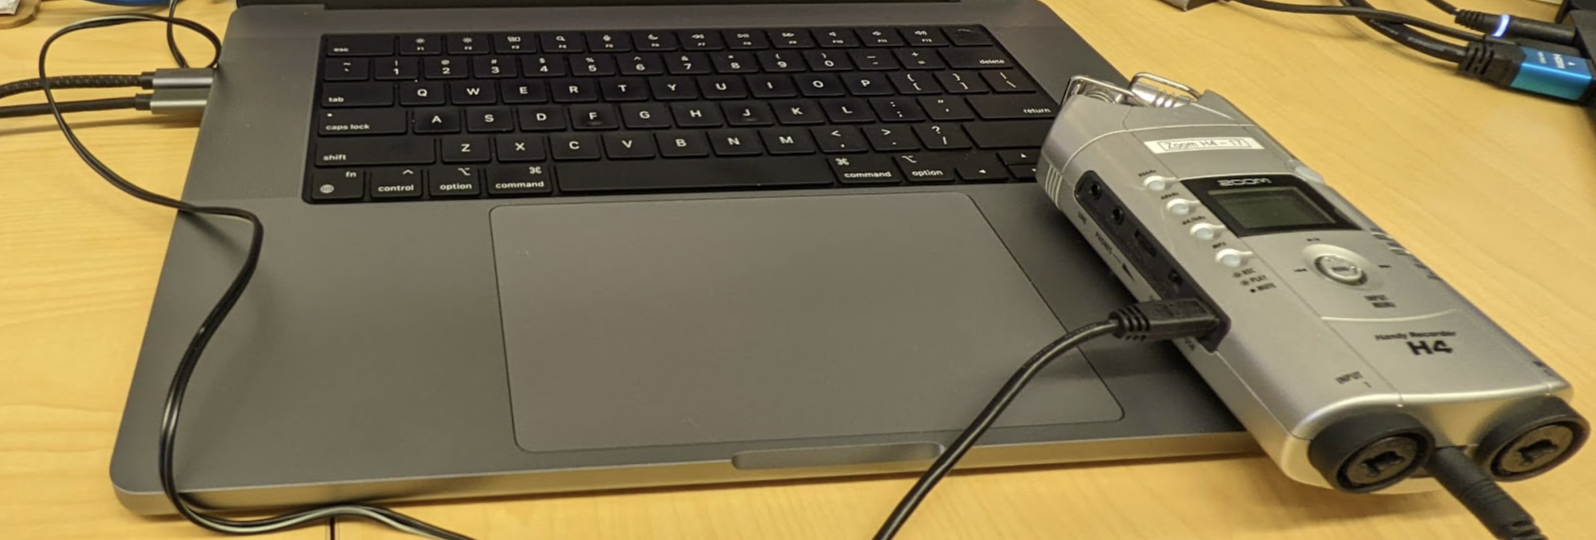
Then plug in your type 1 older USB mini cable to the H4 and your computer |
|
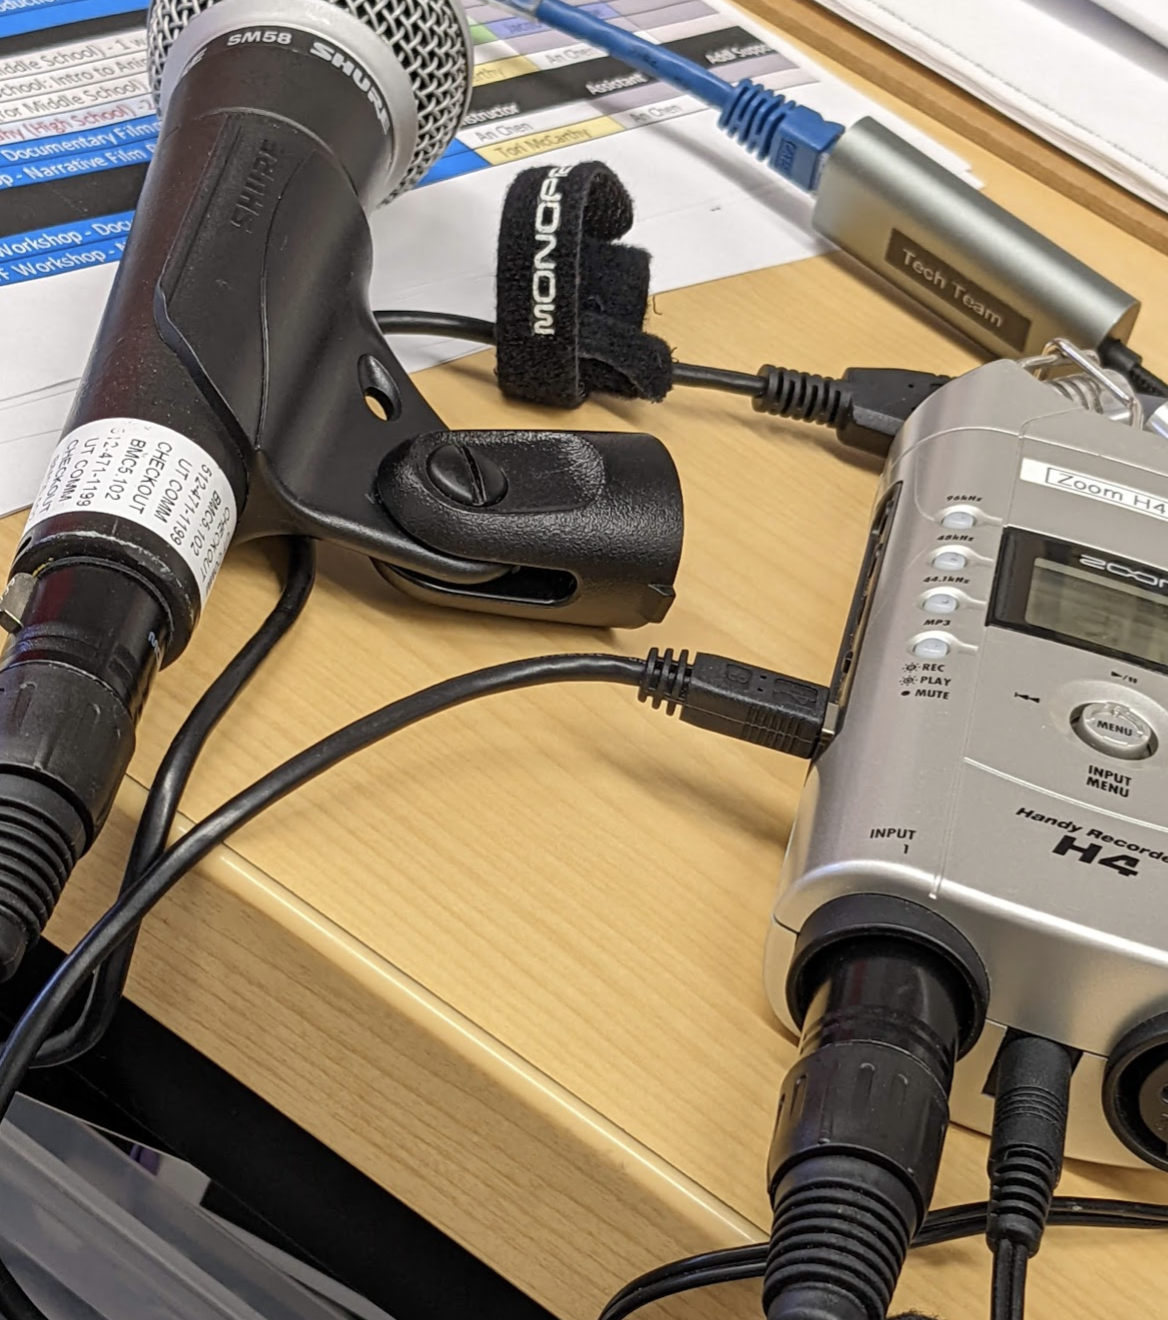
| Connect the mic to the H4 if you want to use a mic to make a better quality recording |
|
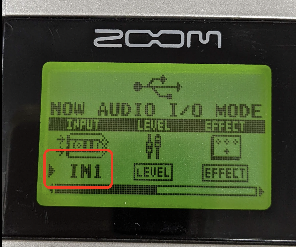
Use the scroll wheel on the side to change the input here to the XLR input you have the mic connected in this case it is Input 1 Or IN1 |
|
Next scroll over to "Level" to set output levels PRESS The scroll wheel to select LEVEL |
|
Press the scroll wheel again to select the "Mic Level" Then hold the scroll wheel down and press up to raise level and down to lower |
|
You will see the little dots go up and down and the LEVEL changing Will need a magnifying glass to see it however. You can magnify with a phone |
|
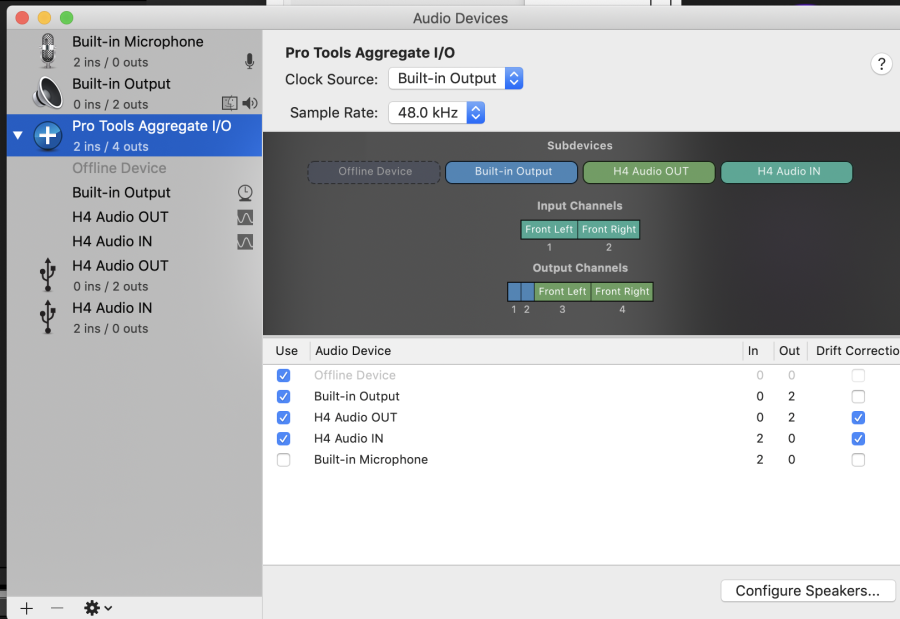
Open Audio Midi setup |
|
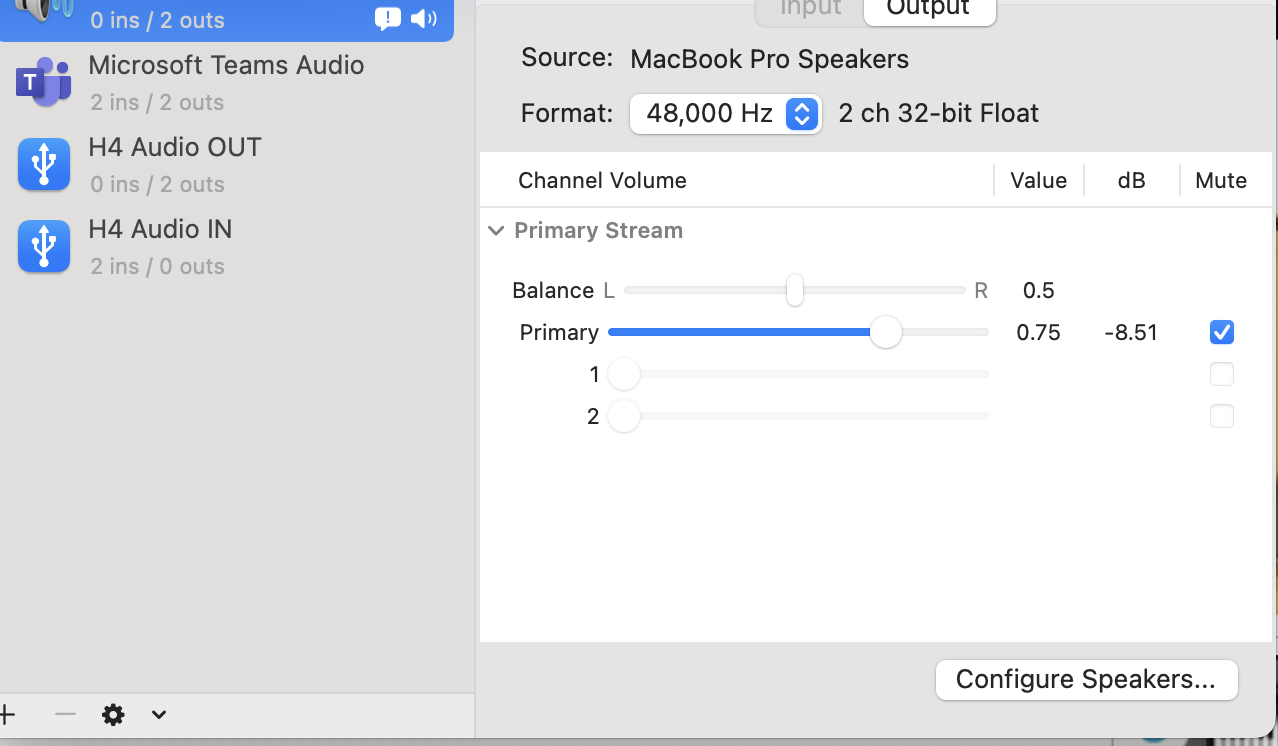
On the Audio Devices should see the H4 Audio In and Out |
|
Then go to ProTools Aggregate I/O |
|
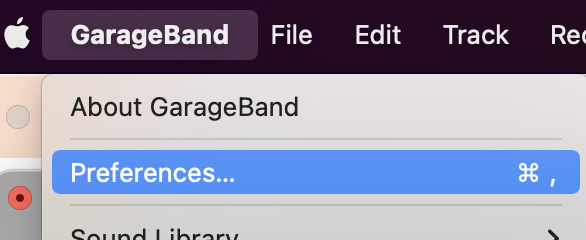
| Open GarageBand |
|
| Go to >GarageBand>Preferences |
|
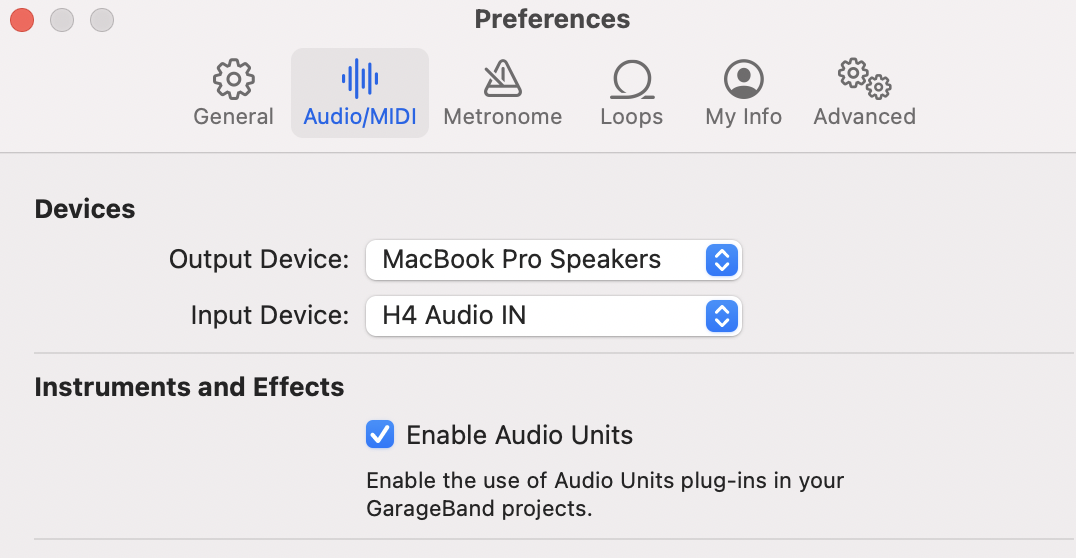
Go to AudioMIDI Input Device > Choose H4 Audio IN Output should be Crestron if in the classroom or computer speakers if on a laptop Close the preferences to save |
|
Back in GarageBand Chose Track New Track |
|
Choose Record using a Microphone or Line Input Choose Input 1 or 2 or 1 and 2 Choose Create |
|
| Press the record button to start recording. |
|


Overview
Content Tools