Detailed Information for Advanced Workflow
| Turn the Camera ON |
|
Pull out the touch screen monitor for the camera Monitor pulls out from the top handle of the unit shown here. |
|
The monitor will flip up and you can use it as a touch screen as well as a camera monitor. |
|
Insert the SDHC cards that came with the kit Note from the picture the way to insert cards into the camera. If you insert the cards the wrong way you can damage the cards and the camera |
|
| Push the cards into the card slots all the way |
|
| Close the plastic door over the cards |
|
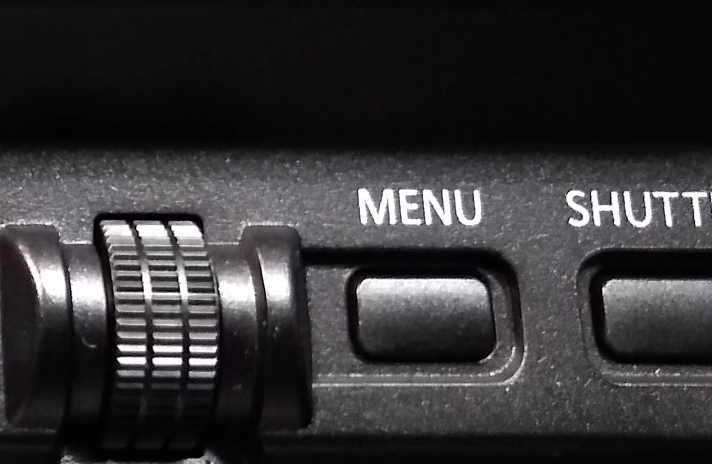
First re-set the camera to wipe any weirdsettings that the previous user setPress Menu |
|
| Press "Other Function" |
|
Press Menu Initialize |
|
Press Initial Set All |
|
Yes Return all menu settings to the initial settings This will erase all the weird settings that were set by the previous user so your footage won't be messed up |
|
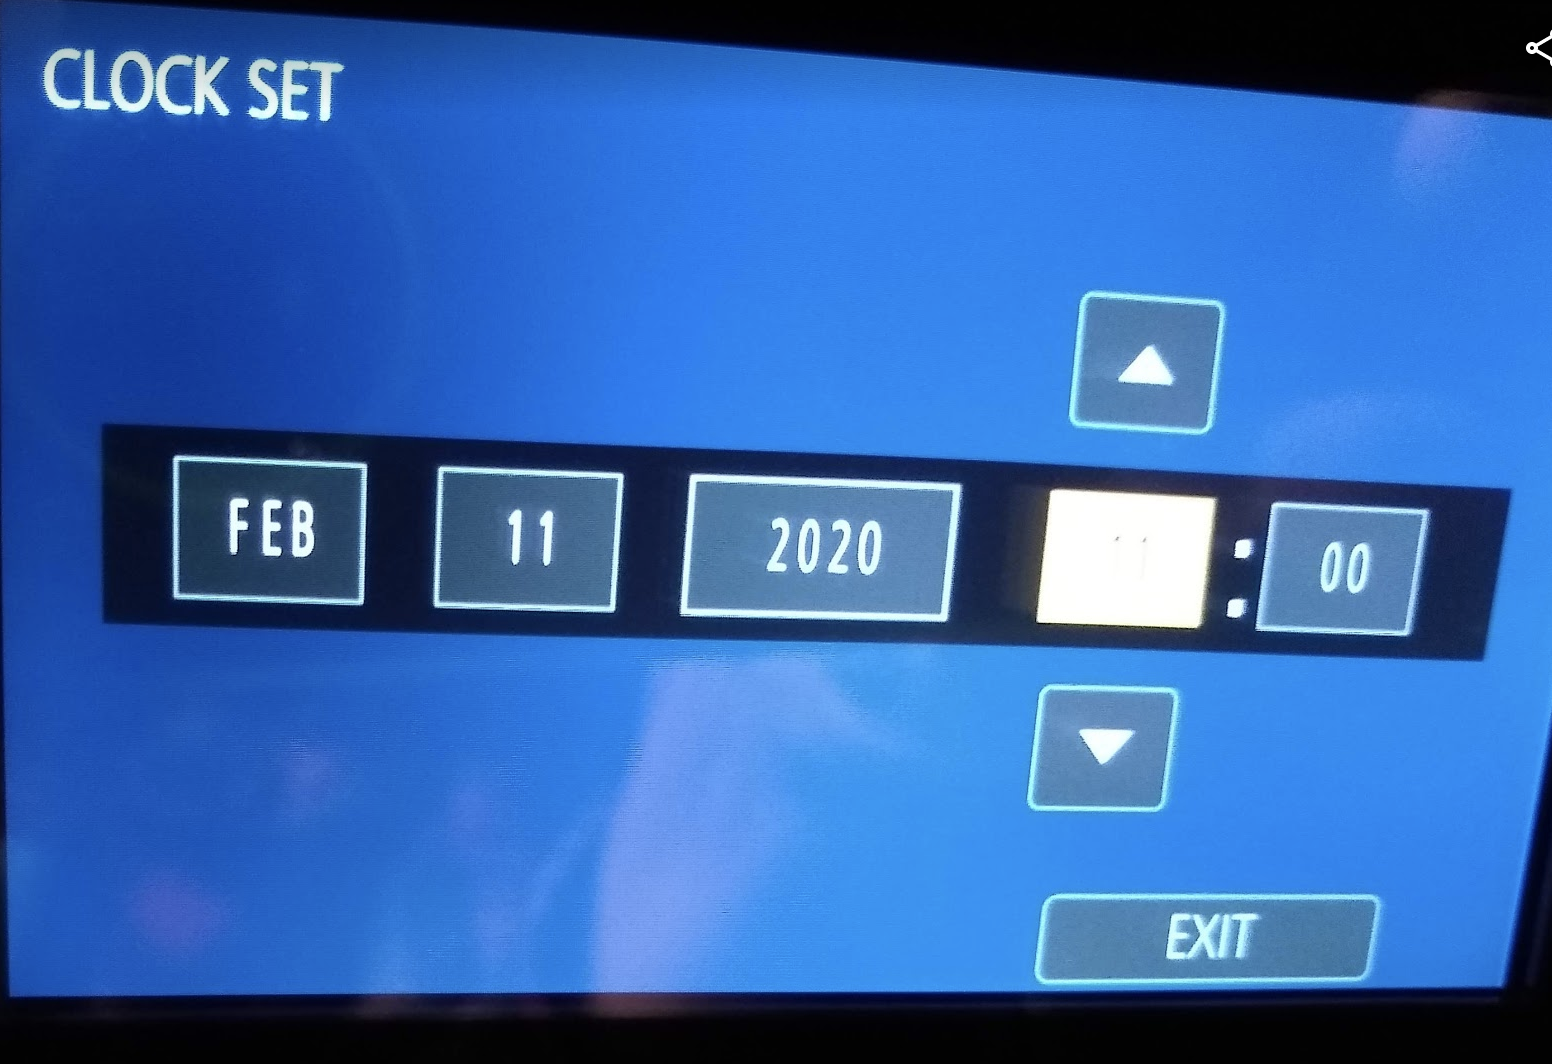
You will be asked to pick a time zone "Houston" |
|
| Set the clock to today's date and time |
|
Press Menu again |
|
| Press System Mode |
|
Leave everything at defaults after you re-set the camera REC Mode MP4 REC Format FHD (full HD) 1080 59.94 50 M for 50Mb |
|
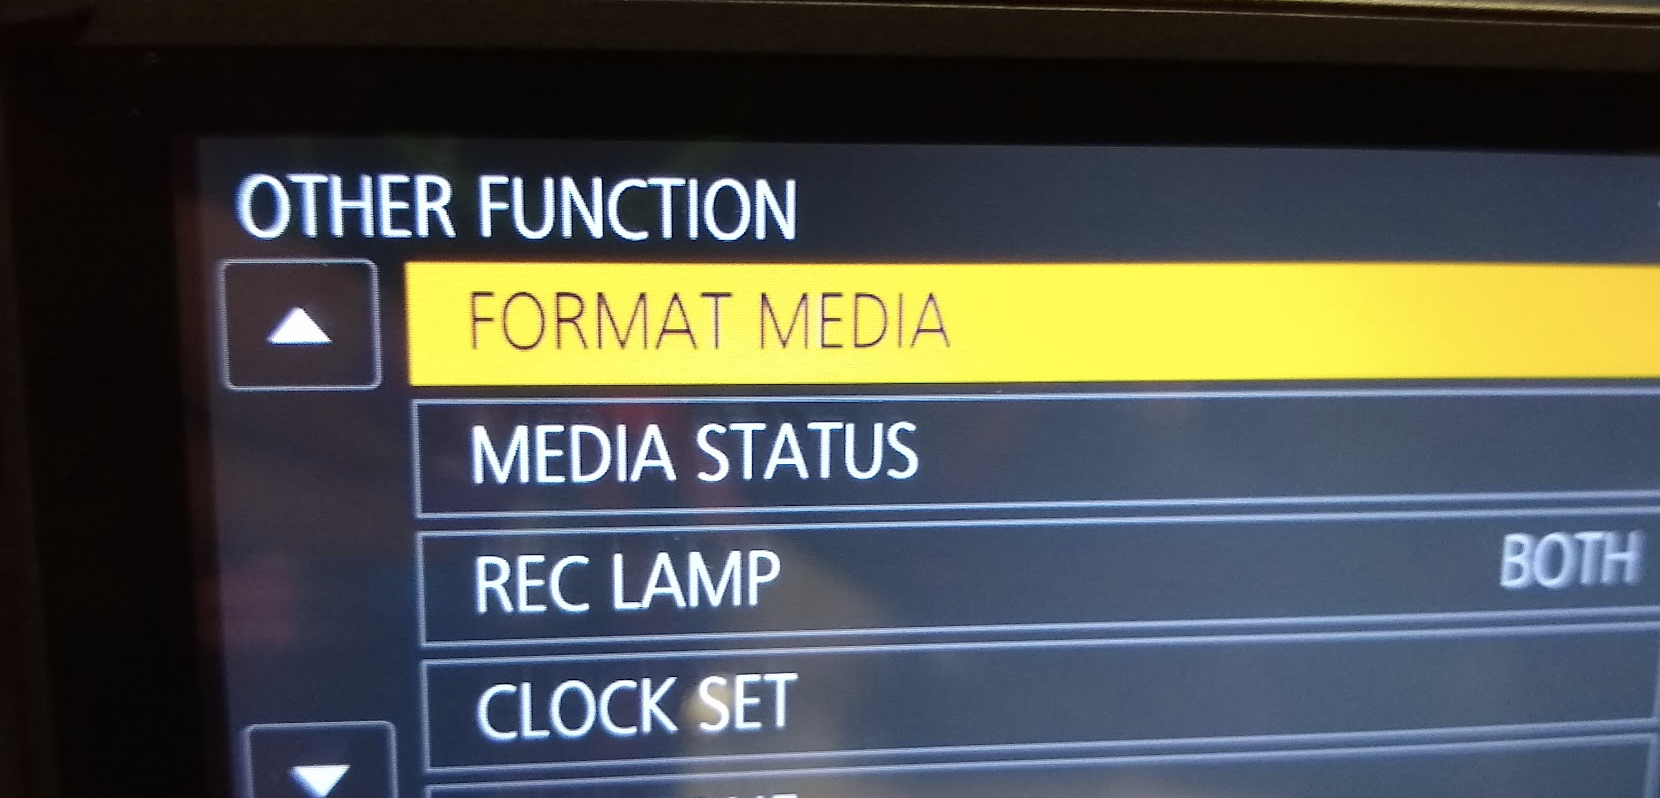
Press RETURN to go back to main menu Go to Other Function again |
|
| Choose Format Media |
|
Go through the prompts to format both cards Choose SD Card 1 then SD Card 2 |
|
Yes you want to format YES |
|
Confirm you want to erase all the data YES |
|
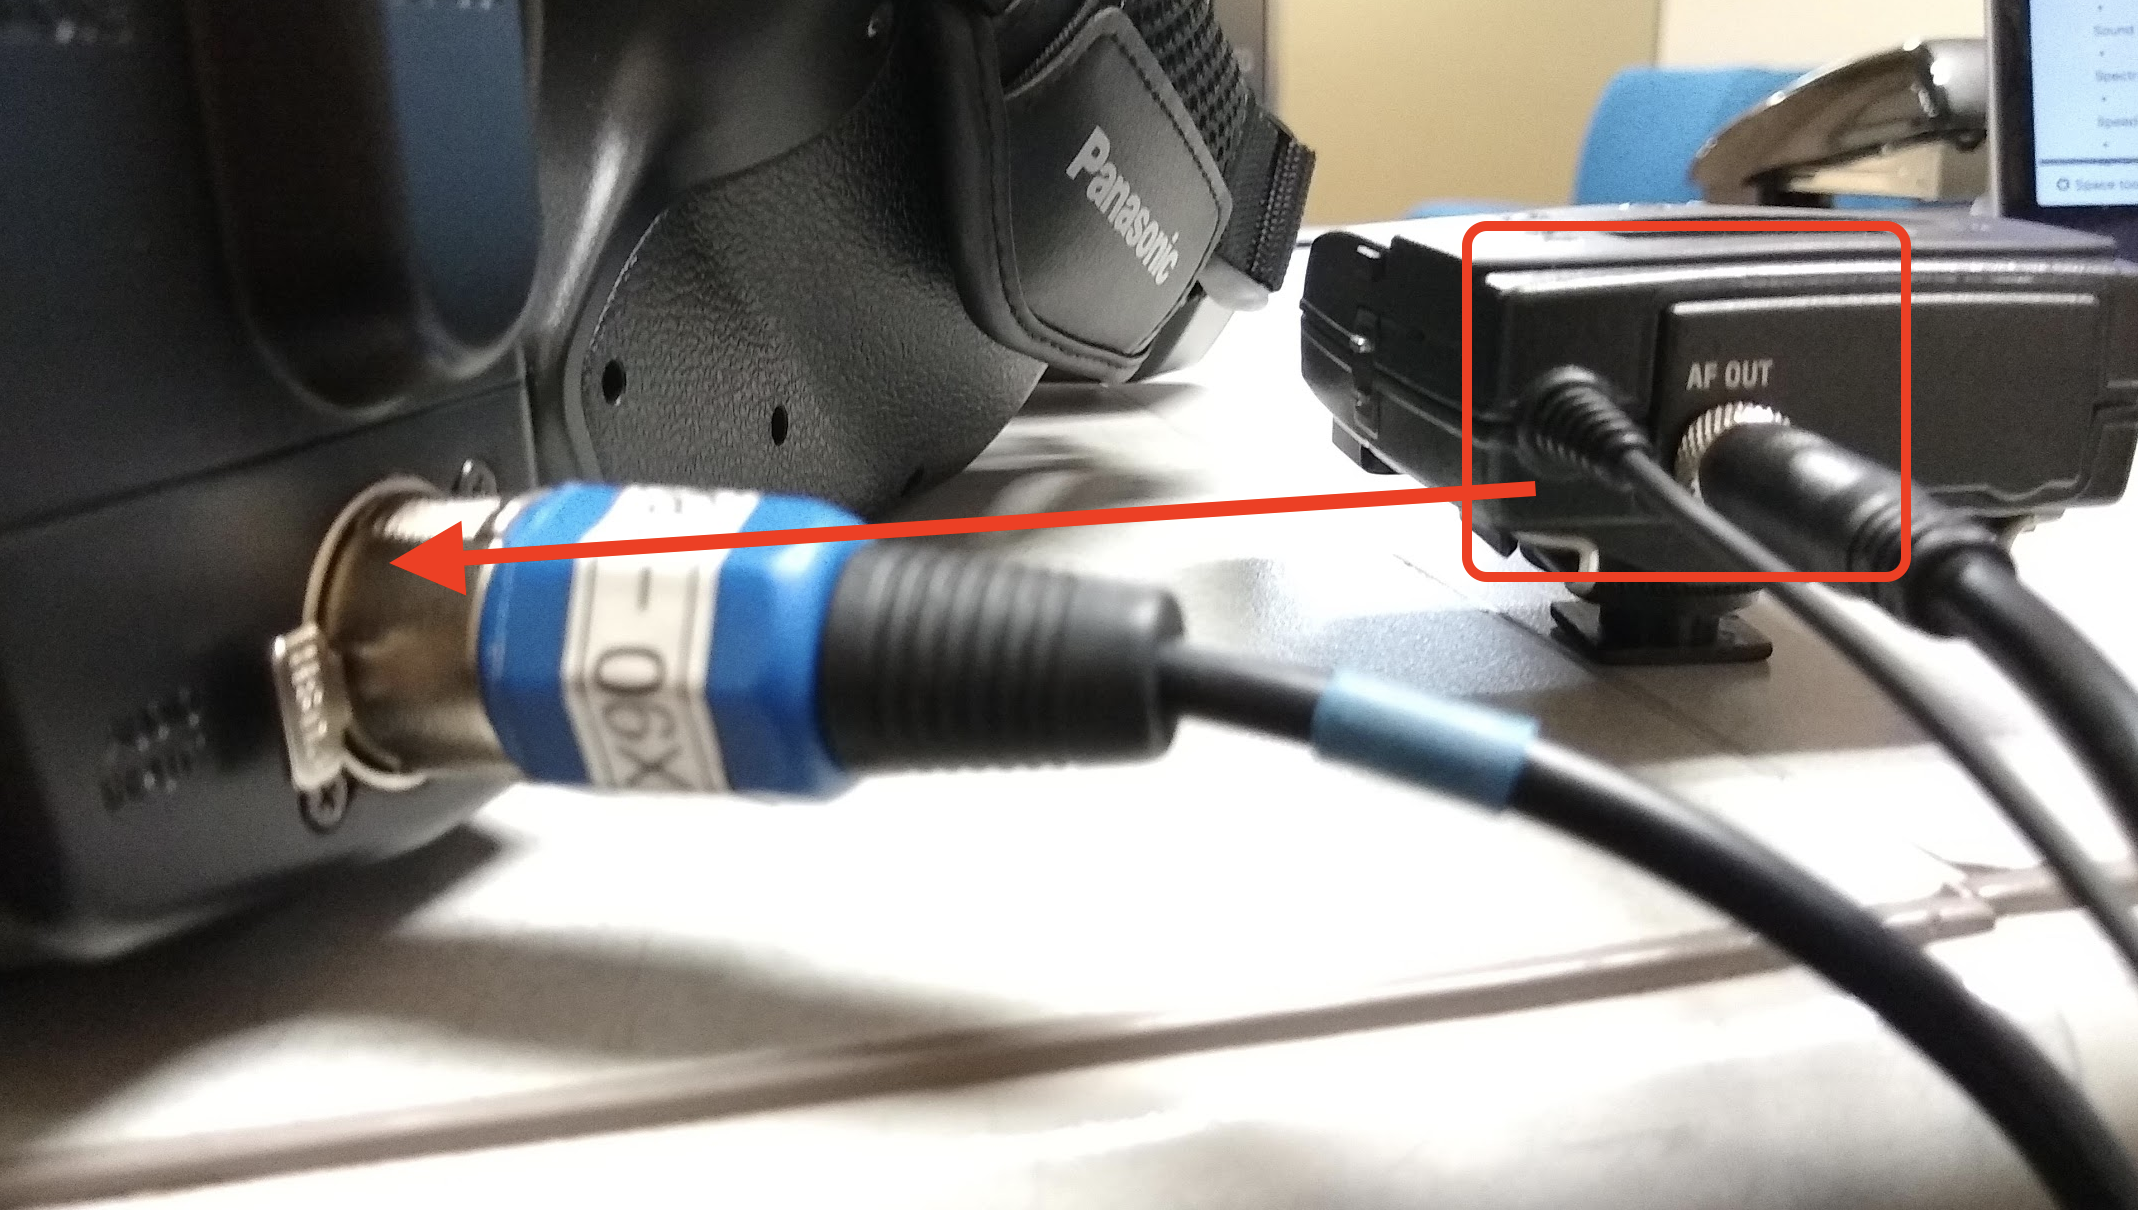
Next setup the On Board MicAttach and plug in the Attached Micplug into the "Audio Input 1"
XLR input |
|
This is where you plug into the Headphone Jack It is on the right side when you are behind the camera Good to have headphones plugged into the camera toinsure you are recording good audio! |
|
Next setup your Wireless Lavaliers | LOOK at this WIKI to show you how to setup the Lav Mics |
Plug in your Lavalier mic into Audio Input 2 See example to the left |
|
Set Input 1 to +48V (for the attached mic) Ch1 select Input 1 Set Input 2 to Mic Ch2 select Input 2 Next set the audio inputs on the camera to Manual |
|
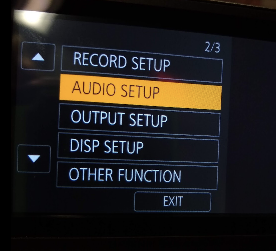
Press Menu |
|
| Press Audio Setup |
|
| Press Audio Level Ch1 > Manual |
|
| Press Audio Level Ch2 > Manual |
|
| Set audio input levels turning these knobs |
|
The auto and manual buttons are helpful if you don't have time to setup the camera you can put them in Auto |
|
Use the provided USB C / USB card reader connect to computer to mount the cards |
|
Here is the card structure and you need to make sure that you copy over all the folders to your backup |
|
The file structure for each recorded card needs to be archived on to a hard drive. make folders on the hard drive to reflect the day of the shoot and the card number EX: Day 01 Card 01 Put the contents of each card (keeping the file structure) on to the back up drive. Do this for every card you shoot. |
|
| Next open AVID or Premiere and start working | AVID Project Setup Workflow Wiki AVID - Panasonic - CX350 - Quick Start Editing Workflow Adobe Premiere Pro Project Setup Wiki Broadcast Journalism student Premiere settings - Project Setup |


Overview
Content Tools