This document discusses the proper Premiere settings for student packages for the Broadcast Journalism Reporting Texas program. If these settings are not used, videos will not play-to-air properly.
RECOMMENDED make and work with Proxies you don't have to but sometimes the files won't play back | Adobe Premiere Pro - Make and work with Proxies in Premiere |
| Open Premiere |  |
| If you need a refresher on how to start a project refer to this wiki | Adobe Premiere Pro - Get Started Using Premiere - Project Setup |
Create a new timeline/sequence by clicking on the new item icon Choose "Sequence..." |
|
Choose "Canon XF MPEG2 > 1080p > 24 > Canon XF MPEG2 1080p24 The Editing Mode will be 1920 x 1080 at 23.98 |  |
| Name your timeline/sequence |
|
| Click OK |
|
| Your project window should look like this |
|
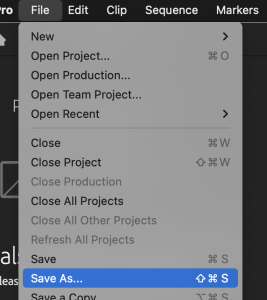
Now Save your Project >Got to >File > Save As Navigate to your hard drive and save your Premiere Project |
|
Now import your footage Right click in your Bin and choose >File>Import |
|
Navigate to your card archive that you backed up to your hard drive. If you are still working off your SD card stop right now and backup your card to a hard drive see this wiki Click Here for backup instructions - VERY IMPORTANT!! |
|
| Canon footage you will get this error it's okay to ignore it and click OK |
|
WARNING!
| |
Select all of your imported footage From the clip menu choose "Modify > Audio Channels..." or Press Shift + G | 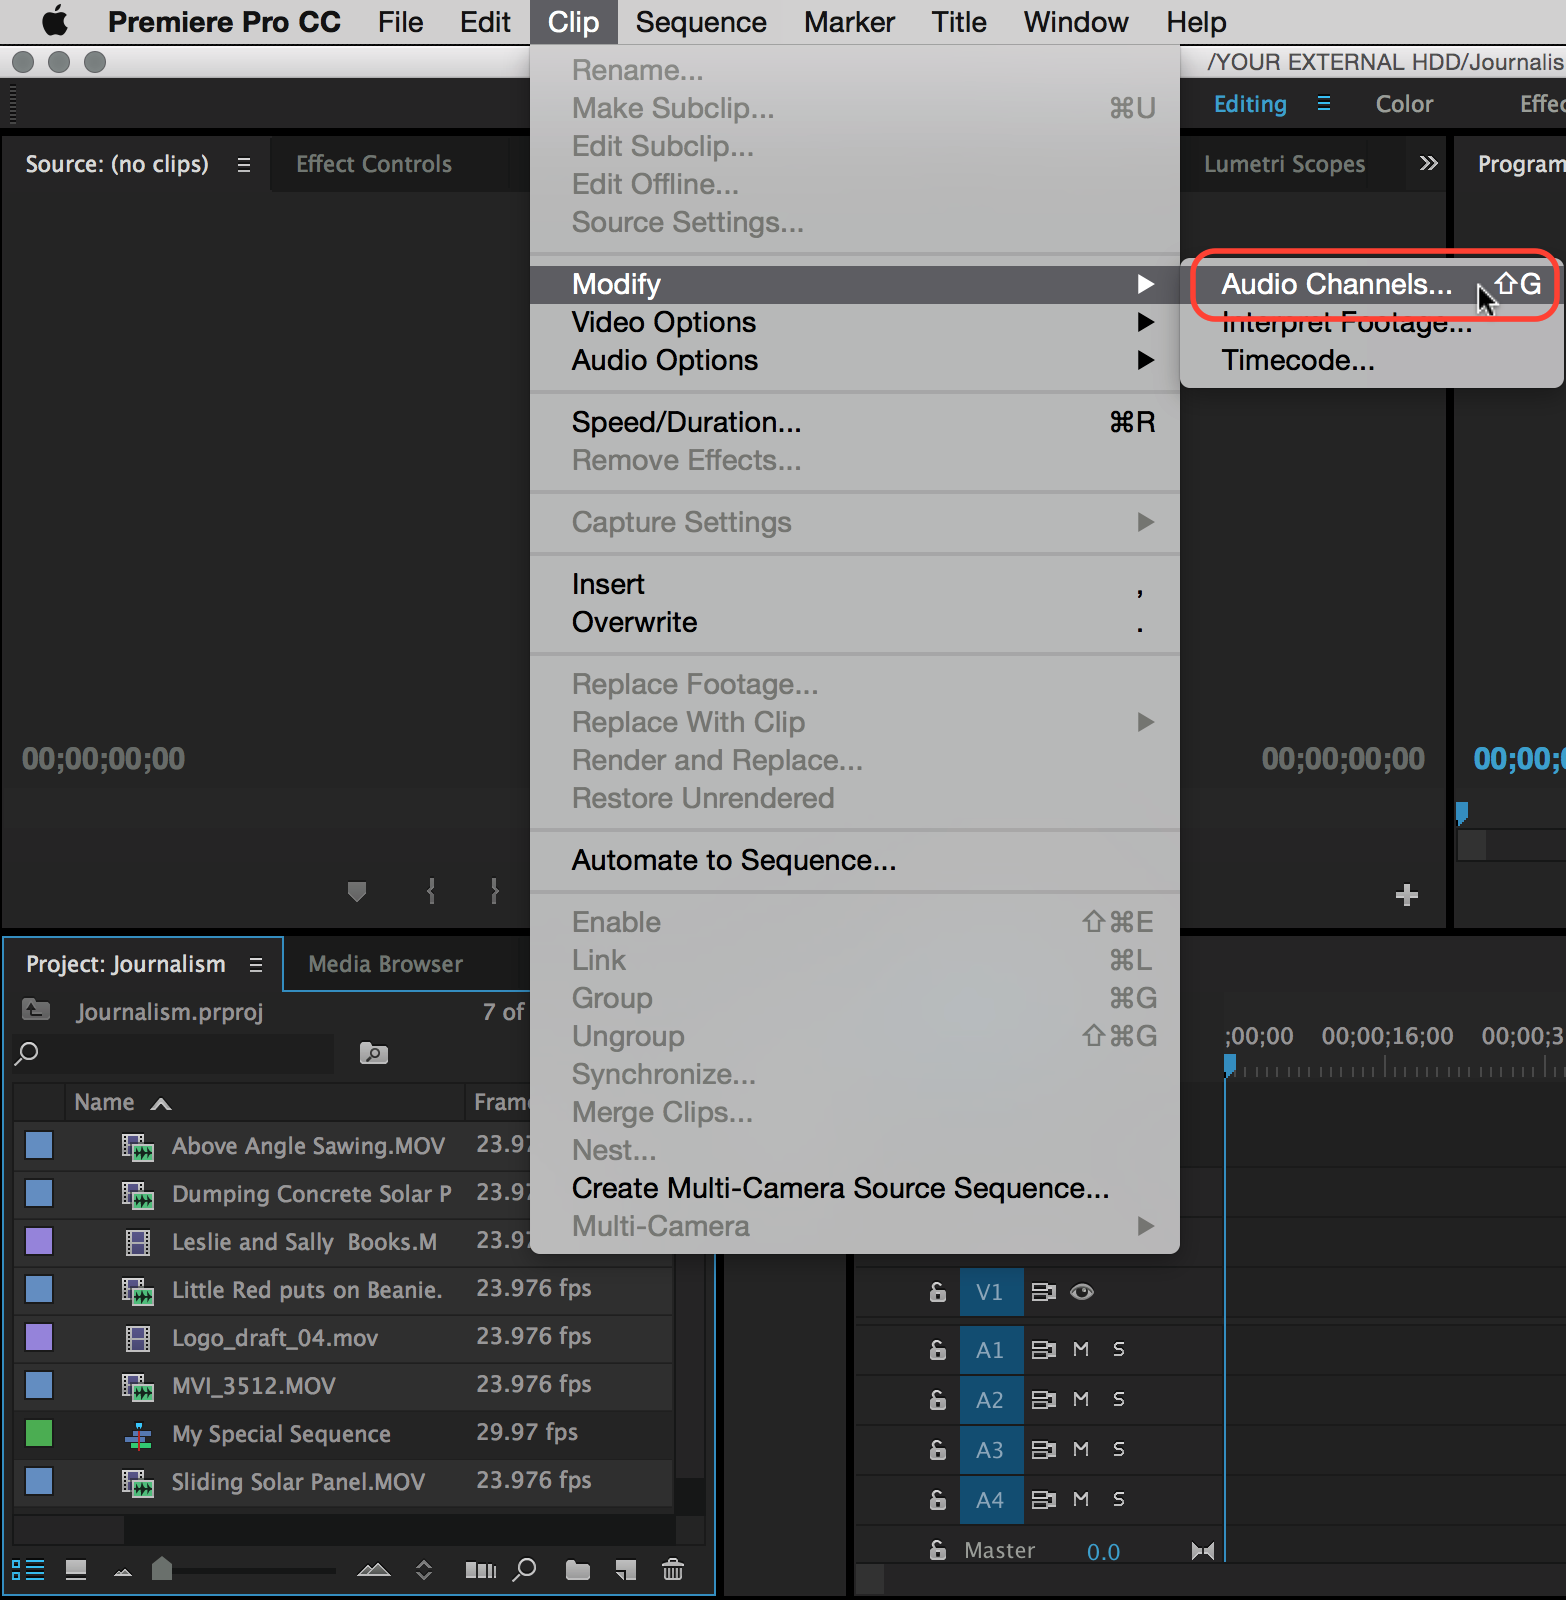 |
| Select "Mono" from the "Clip Channel Format" drop down |  |
| Set the "Number of Audio Clips:" to 2 |  |
Route your audio Click OK | 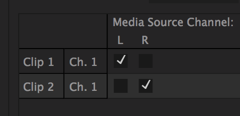 |
| Drag you clips into the timeline | 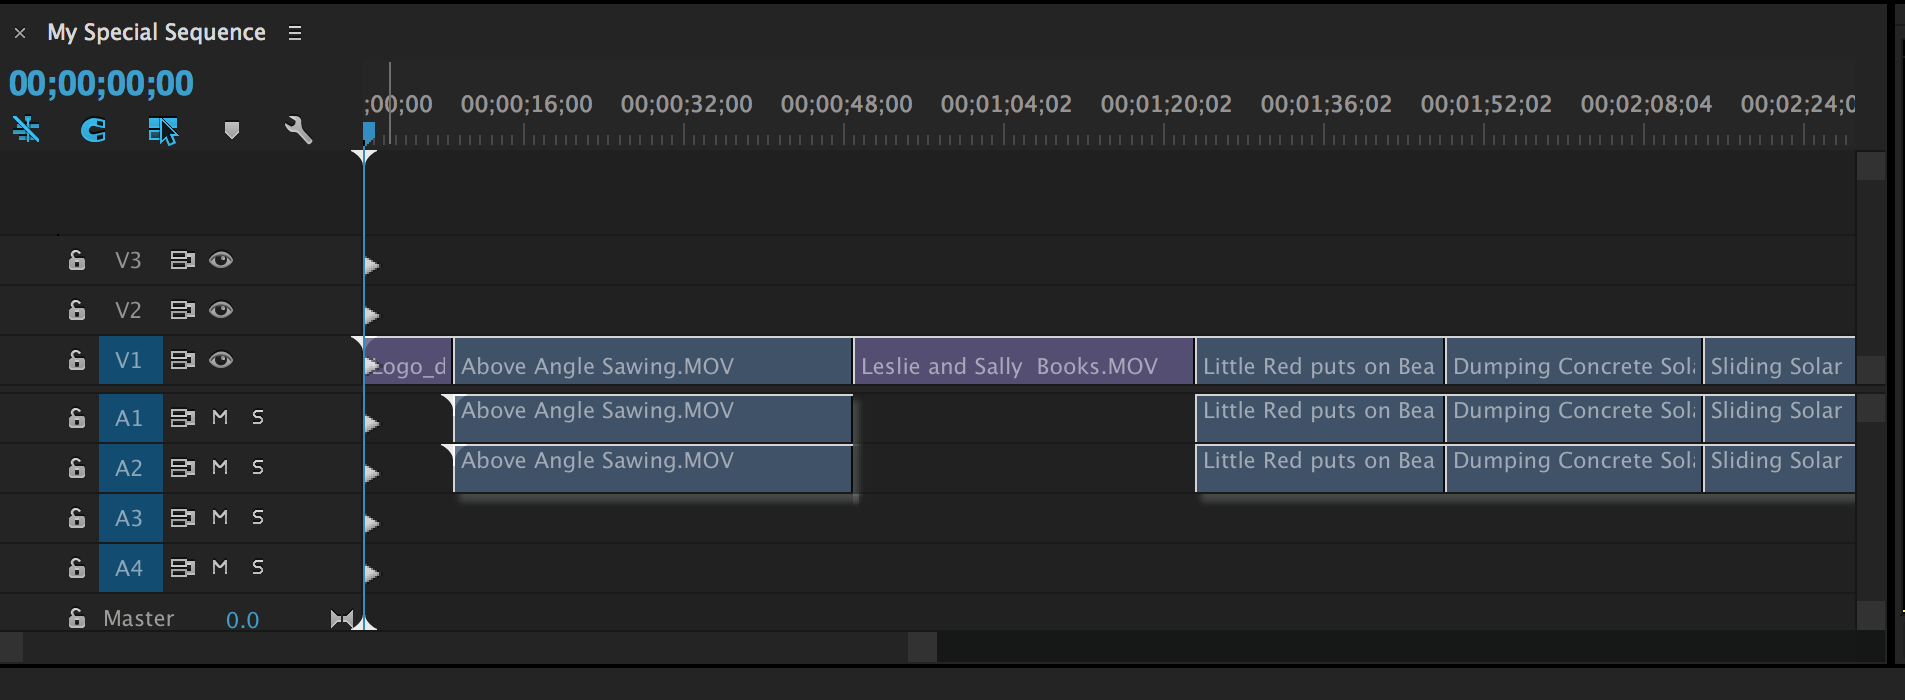 |
| If you get this warning, choose "Keep existing settings" |  |


Overview
Content Tools