Before using this protocol you will need to create a few hotkeys. If you have not already done this, go to Liath's Protocol - Creating New Hotkeys
Also, you will need to have your units set to mm. To check go to Edit --> Preferences --> Units & Rulers, and set units to mm.
Open an image in photoshop - make sure colors in the tool bar are set to white and black, with white on top.
Open Specify and run a query to check to be sure that the number and the label information match up with the data in Specify.
FYI – the Photoshop scripts that you will need for this process are kept in the DocLib on the network drive. Z:\DocLib\code_and_scripts\PhotoshopScripting\NSF_Scripts\Production\
1. Set Image Levels
Click Ctrl+L and the levels window will open. Shift the left arrow to the right in order to make the background black (be careful not to obscure any dark details on your specimen – this may require zooming in on the specimen first, before setting levels). Next shift the right arrow to the left in order to correct for white. Leave the central arrow in the center.

2. Straighten Scale Bar (if scale bar is straight already, proceed to step 3.)
Using the zoom (z) tool, zoom to the scale (hold alt key to zoom out; hold space bar to move image )
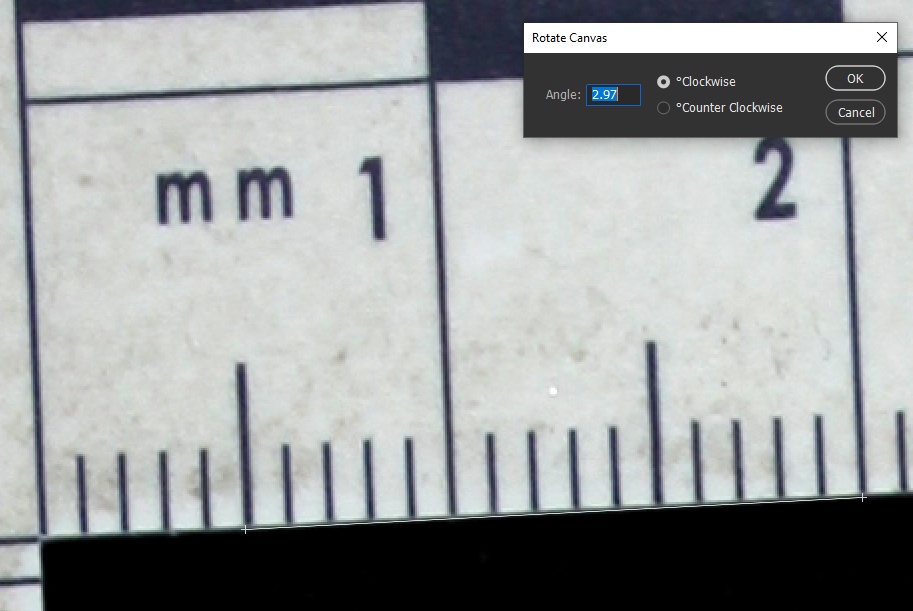
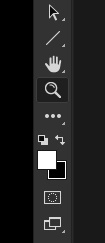
Select the ruler tool to draw a line along edge of scale bar, then click f1 and straighten. The ruler tool is often hidden under the eye dropper.

With the ruler (i), draw a line along the edge of the scale bar. Click F1 and the Rotate Canvas window will open. Select Ok, and the image will align itself so that the scale bar is now straight.

3. Scale Image
Using the line tool (u), draw a 15mm line (hold the shift key as you draw in order to keep straight line). Be sure to start on the left side of a line and end on the left side of a line for accuracy.

Click Alt+F1 and browser window will open. Browse to the folder containing your scripts (you only have to do this once and Photoshop will remember for the next time) and double-click ScaleImage.jsx. The Scale Image window will open. It is automatically set to 15 mm. Click Ok.


I won’t look like anything happened, but the line you drew previously will disappear. Now you image resolution has been set to work with the Draw Scale script that you will run later.
4. Remove extra stuff and crop
Using the lasso tool (l) draw a line around the specimen. Try to avoid dust particles and other crud that you don’t want in your final image.

right-click, create new layer using layer via cut

Before proceeding, make sure that your colors are set to white and black in your tool bar, with white on top.
Open the Layers window and you will see that you now have two layers. Select the black background layer and click on the black and white circle icon to create a new background. Select Solid Color from the background list and a white background will appear, along with a color selection box and an eye dropper tool.

Use the eye dropper tool to select the dark background surrounding your specimen and the background will change to duplicate that color. Click ok. NOTE: the background surrounding your specimen may not be exactly black, so it is important to use the eye dropper tool rather than simply creating a black background. It is also important that you do not have "Only Web Colors" selected in the Color Picker window.

Your image should now look something like this.

5. Clean up
In your Layers window, select the specimen layer and zoom in for a closer look. You may find some things that need to be removed, like dust or other markings. Use the eraser tool (E) to do this. NOTE: you must have "Layer 1" selected in order to use the eraser.

Zoom in and around the entire specimen and carefully remove all extraneous stuff.
6. Crop image
Using the crop tool (c), create the final shape of you image. You want it to be a rectangle. If it is too square, the final scale bar will appear cut off on the end.

7. save as psd file
Temporarily save your image as a PSD file. This step is very important. If anything gets screwed up in the upcoming scale drawing process, you will need this file.
8. Flatten image
In the layers window there will be three layers. In order for the Draw Scale script to work, you need to first flatten you image to a single layer. Click Alt+F2 and now you have one layer.
9. Run Draw Scale script
Click Alt+F1 and browse to DrawScale.jsx. Double-click and allow the process to run. The end result should look like this.

10. Write catalog number using the text tool (t). If the specimen is a type, please include whether it is a holotype, paratype.

11. Save your completed image as a .jpg in the processed folder.
12. Move the original file into the Originals folder before opening your next image.