Current specimen labels
Migration from our many Access databases to a single database allowed us to solve some of the issues with non-standard data standards that were present. Labels have been redesigned to improve 'at a glance' data, improving efficiency of finding specimens as well as assisting the photographic inventory initiative.

There are 2 ways to make labels- record sets and manual entry.

From a record set:
click and drag the record set into the Specimen Label.
A new window will open with a status bar. This status bar indicates how long it will take for Specify to populate the information from your record set into labels.
A label will be automatically generated for each specimen in the set.
Notice the OnLoan label is not highlighted. The query that governs that label requires a loan number, and will only operate from the manual entry window.
Click on the print icon in the upper left hand corner of the display window.
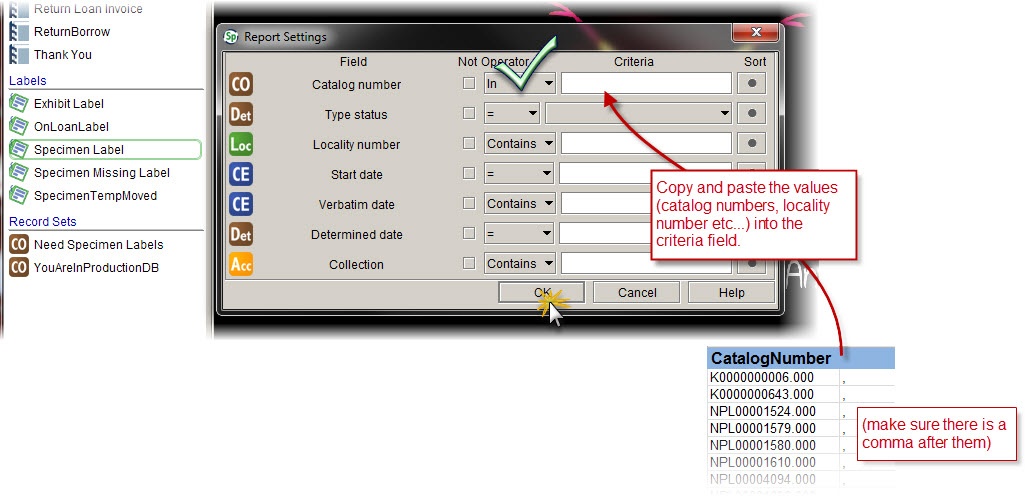
Manual Criteria Entry:
Make a list of catalog numbers, type status, or locality numbers. (Catalog Numbers is most common)
Copy and paste into the correct field. In the example below, Catalog Numbers is used.
hit 'OK'. Specify will now compile the labels.
In the window that displays the labels, click on the print icon in the upper left hand corner. Select a printer from the print dialogue that pops up, and click OK.

Sometimes, you will be asked to save the labels to a place on the network instead of printing them. To do this, click the save icon. In the Save pop up window, use the "Save In:" drop down to navigate to the correct folder. Type a file name, and change file type to PDF. Save and Exit.
