Overview
By default, CrashPlan PRO encrypts your backup data with an encryption key before sending it to your destinations. Your security setting determines how the encryption key itself is secured. No matter what security setting you use, your data is encrypted.
You can specify increasingly greater security for securing your encrypted data. You can secure your encryption key with:
- Your account password (default)
- A private password (stronger security)
- A private key, which replaces the current encryption key (strongest security)
Secure with Private Password
You can choose to use a private password, which is different from your account password, to secure your encryption key. If you do this, your encryption key will be protected with your private password and stored on the servers and in the archive. Securing your encryption key with another password offers another level of security and prevents the administrators of the CrashPlan service from being able to decrypt your data. However, you will be required to provide this password to recover any data from the archive.
|
To set a private password:
|

Tip
You can use Stache to safely store and escrow your private password.
Secure with Private Encryption Key
With this option, you replace the default encryption key with a private key that is then used to encrypt your archive. This private encryption key is never sent to the servers and is stored only on the source machine and never leaves the source, so it is not even secured there. This is in fact the most secure option, but it requires the most user management because you must provide your private key when doing any restore. You can create your private key in several ways:
- Enter a passphrase that will return a private encryption key that you paste into the encryption key box
- Allow CrashPlan PRO to generate a private encryption key for you without entering any text (just click the Generate option)
- Import an encryption key that you had previously saved to a text file
Once you've selected the method for generating your private key, you can export the key to a text file. Exporting the private key to a file makes it easier to locate the key in case you forget it. When you need to supply the private key on another computer to which you want to recover files, you can use the Import option to import the encryption key from the text file.
Warning
Any previously backed up data associated with the old encryption key will be deleted. Your backups will begin again using the new private encryption key.
Option 1: Create a private key with a passphrase
|
To create a private key:
|

Export your private key now
Follow these directions now to export your private key and store it someplace safe! You must provide this key when performing any restore operation. You can use Stache to safely store and escrow this key.
Option 2: Generate a private key
|
To generate a private key:
|

Export your private key now
Follow these directions now to export your private key and store it someplace safe! You must provide this key when performing any restore operation. You can use Stache to safely store and escrow this key.
Export the private key
|
To export a private key:
|
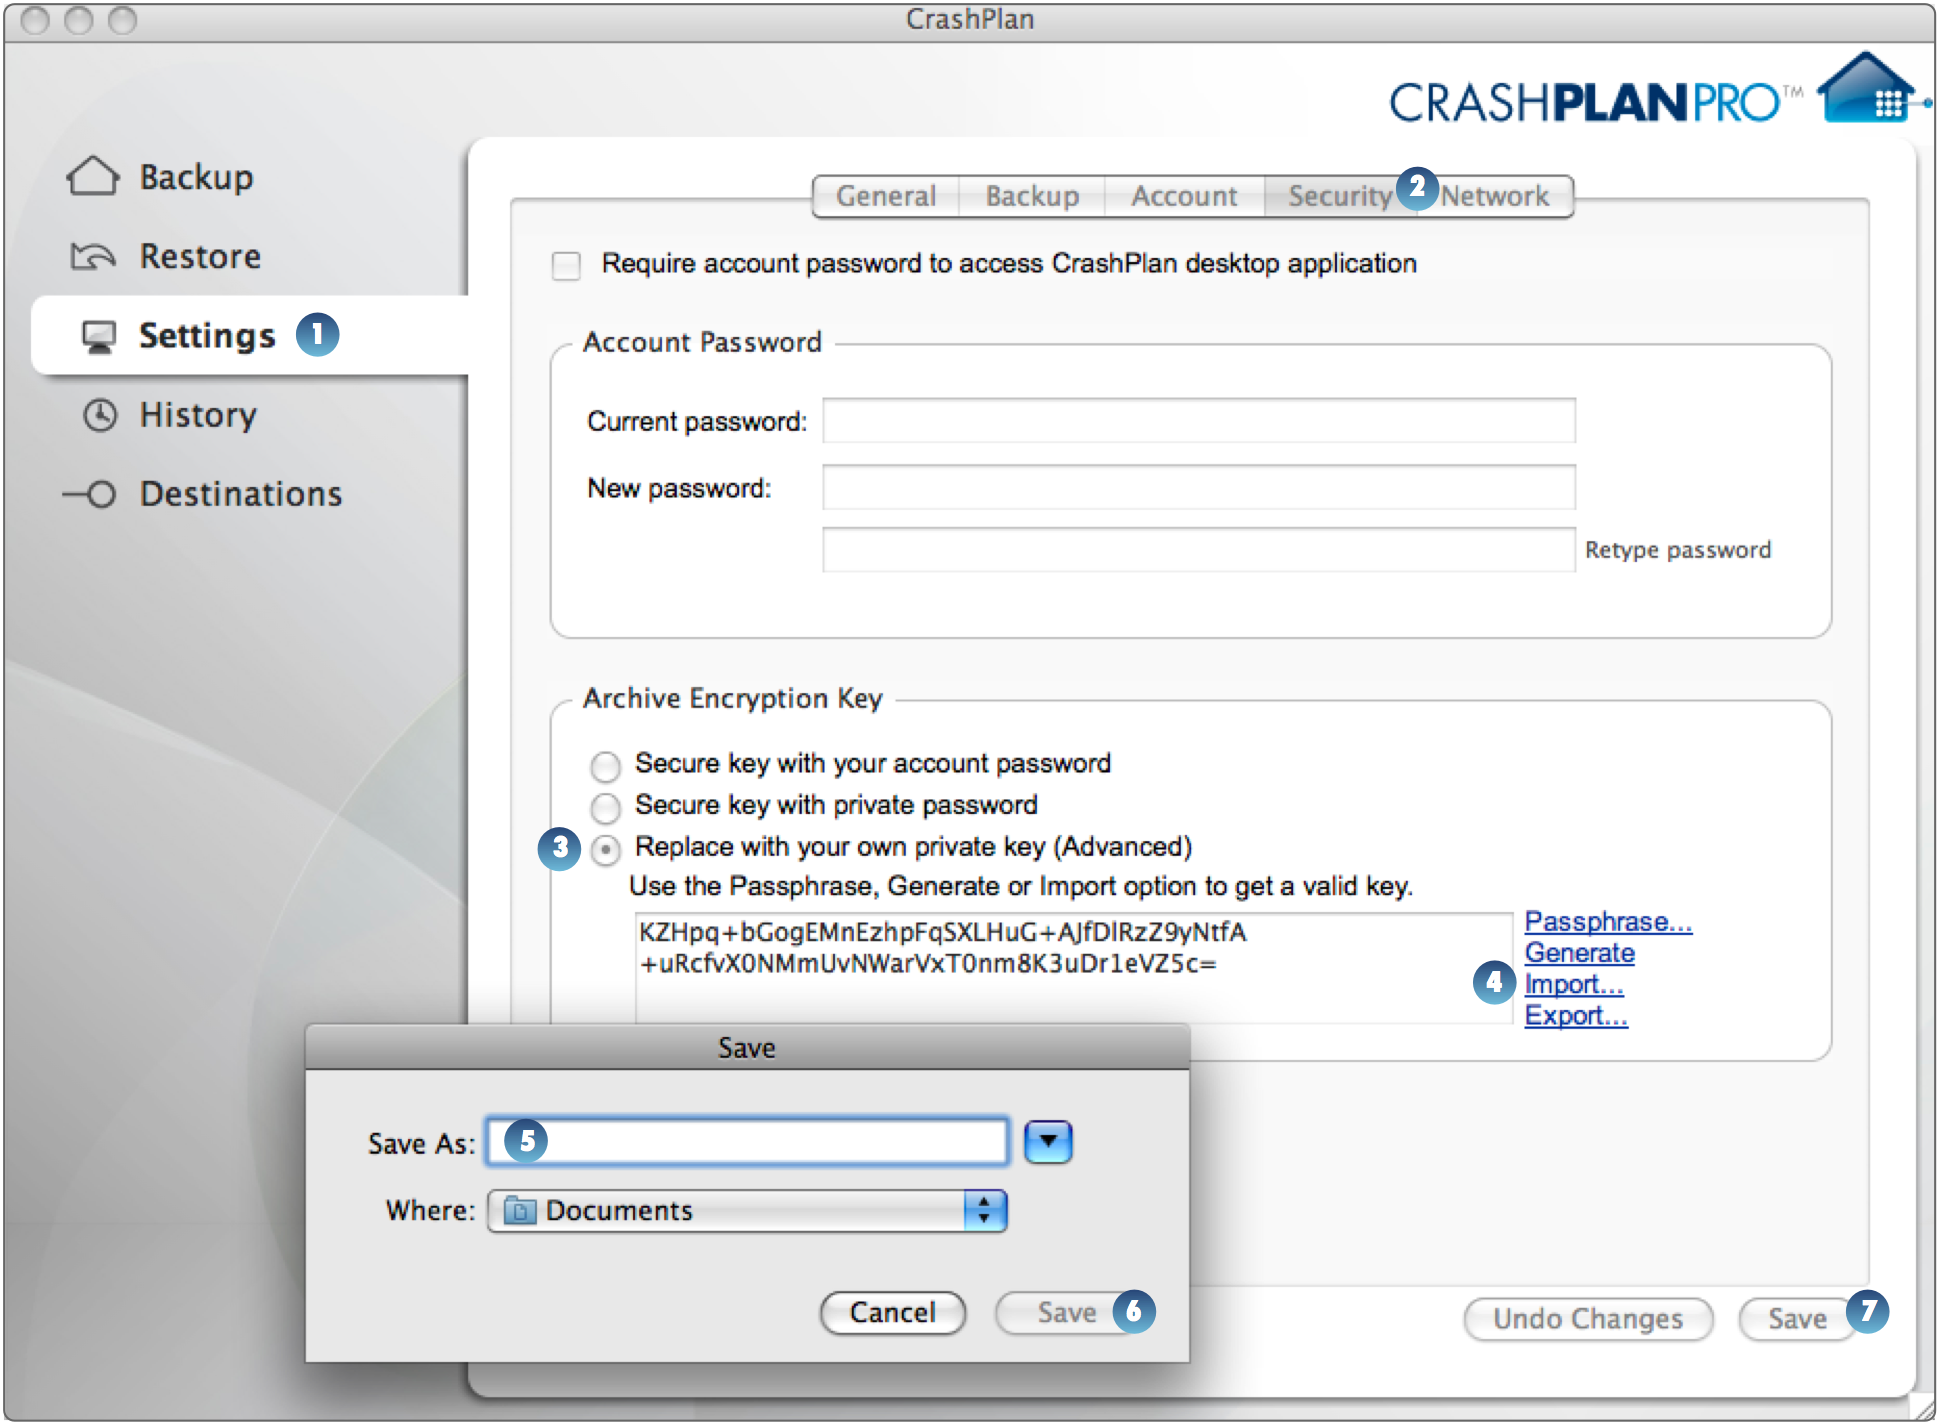
Import a private key
|
To import a private key:
|

Overview
Content Tools