Page History
FIRST YOU NEED TO CHECK OUT THE MICRO SD CARD FROM THE PROCTOR!! |
|
Turn on the RODECASTER if it isn't already |
|
Put the card in the RODECASTER in the small MicroSD slot |
|
If it is a new card it'll ask you to format it click YES |
|
There are two microphones already setup just put on the headphones for one or two |
|
Next set the sound input to the computer. |
|
Choose >Sound |
|
Go to the Output Tab and make sure it is set to RODECaster Pro Stereo USB |
|
Go to the Input Tab |
|
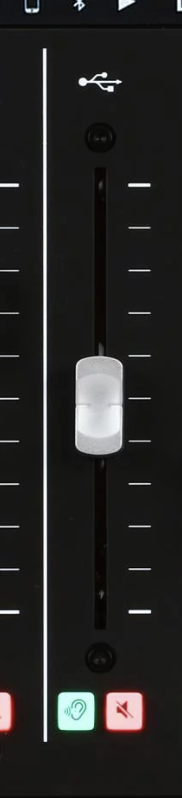
Turn up the sliders on the board and talk into the mic |
|
Set the levels watching the meters so you set a good level |
|
You can adjust headphone volume with these knobs |
|
Click on the Green REC button to start recording to the SD card |
|
When recording the button will be RED |
|
This icon is how much time you have left to record on the card |
|
Conduct the narration, interview or podcast and when finished press REC button to stop recording |
|
To hear what you did press the Settings Icon |
|
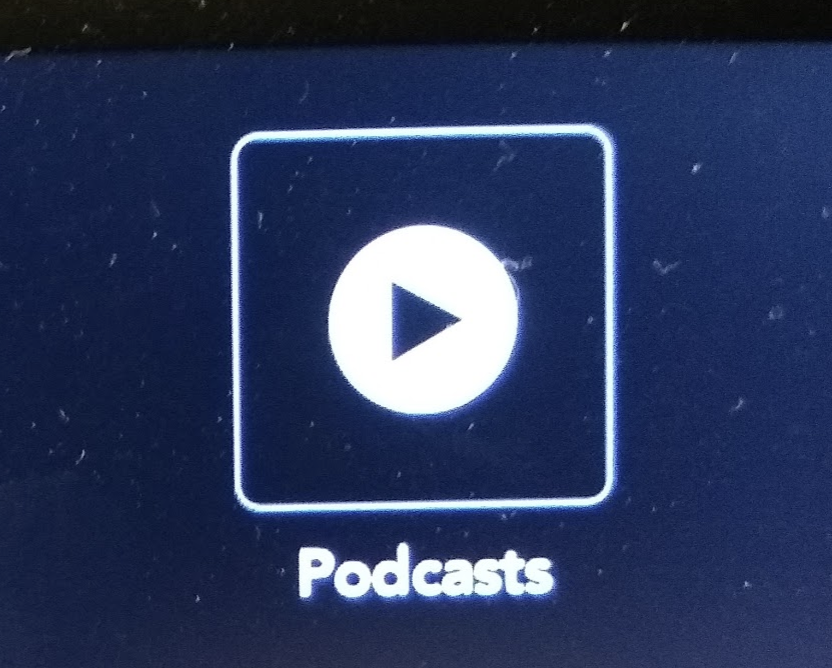
Click on Podcasts |
|
You can click on the top left and right arrows to navigate through the podcasts and click on the green play button to play the selection |
|
When you are finished you need to get the files off the SD card. First eject it from the RODECASTER |
|
Mount it into the card reader under the mac |
|
It will show up on the desktop titled RODECASTER |
|
The .Wav files are in the folder called PODCASTS |
|
Open RODECaster Pro software in the Applications folder |
|
When it launches it will show you the podcasts in a list |
|
Title it and choose a custom color and then click on Save |
|
Choose a place to save it and click Open |
|
The files save with all the different mics and channels that may or may not have audio on them. |
|
You can check the mix in quicktime player or VLC |
|
To monitor the audio of the file you are going to have to turn up the computer input on the RODECASTER and that is the USB channel |
|
Adding Sound effects |
|
To change the effect or to see what is loaded on all of them open the RodeCaster Pro software again |
|
Go to the sounds tab and you can see what is loaded |
|
To add a different effect download the audio file or find it on our stock server and drag it over to the colored button |
|
The software will convert the file |
|
Then you can name it and change the color if you want |
|


Overview
Content Tools