Page History
How to use the College's Wiki - DRAFT
All knowledgebase content will be migrating over to the College of Communication Wiki over the next two months. The text in existing MS Word files can be copied/pasted into the Wiki's WYSIWYG application, but images that exist only in the word doc will need to be copied/pasted in to PowerPoint, one per slide, and exported as jpgs. If the images exist as jpgs, pngs, or gifs there is no need to take the extra step.
Adding a Page
Use the navigation hierarchy on the left to browse to the appropriate section. Note that these sections are actually pages that have Child pages. | |
Click on "Add" in the upper right of the screen and select "Add Page" | |
Enter the Title of your page in the "New Page" field at the top. | |
Use the WYSIWYG tool underneath the New Page field to enter text. The WYSIWYG works much like a scaled-down version of Word. You are encouraged to use Heading styles (see the Paragraph pull-down menu) as appropriate as they are useful for creating a Table of Contents. | |
We also recommend using the Table tool to assist with positioning images, just as you see with this document. Click on the tool and wait for the pop-up dialog box. | |
We recommend starting with a 2-column, 1-row layout with the "First Row is Heading" box deselected. Just as with Word, you can use the Tab button to create new rows as needed. | |


Preparing Images
If you are not comfortable using Photoshop to annotate and resize images, PowerPoint is a useful alternative. | |
When you are finished with all the slides, click the "File" tab then click in "Save As" | |
Select "JPEG FILE Interchange Format" from the "Save as type" pull-down menu. | |
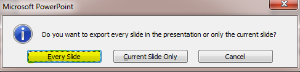
Export Every Slide. | |
The confirmation dialog box will show you folder location containing all the jpgs. | |


Uploading Images
Once your images are ready you can upload them using the image upload button in the WYSIWYG Toolbar | |
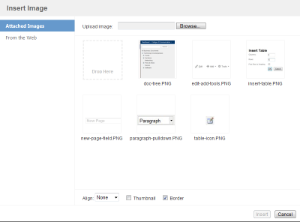
This brings up the Insert Image dialog box. | |
Click the Browse button and locate your image, click Open. This will return you to the Insert Image dialog box. | |
Note the two checkboxes at the bottom of the dialog box. If your image is large, click on the "thumbnail" checkbox to upload a small version image that the wiki software creates for you and automatically links to the larger version. The other checkbox puts a thin black border around the edge of the image. | |


Attachments
The makers of this wiki software have documented how to add attachments here.
To have attachments show up at the bottom of your page, put your curser at the bottom of the page and type
open-curly-brace attachments close-curly-brace per below, but without the spaces per this image: 
Labels
Be sure to add labels to each page you add to the wiki. For consistency, all labels will be lowercase with underscores replacing periods or other punctuation. References to rooms should flow as follows: cmb2_254.
These are the labels we are currently using in this wiki.
| Labels List |
|---|
Overview
Content Tools