The Final Cut Pro Premiere screen is divided into four main areas - BrowserPreview, Sequence Viewer , Canvas and Timeline. | 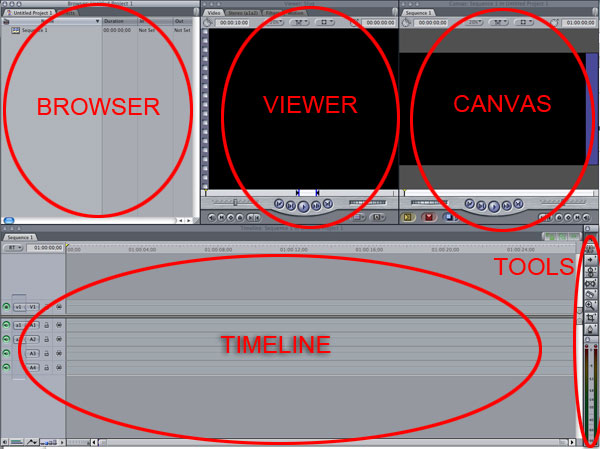 Image Removed Image Removed
| Project and Timeline. and Two small areas - Tools and VU. | 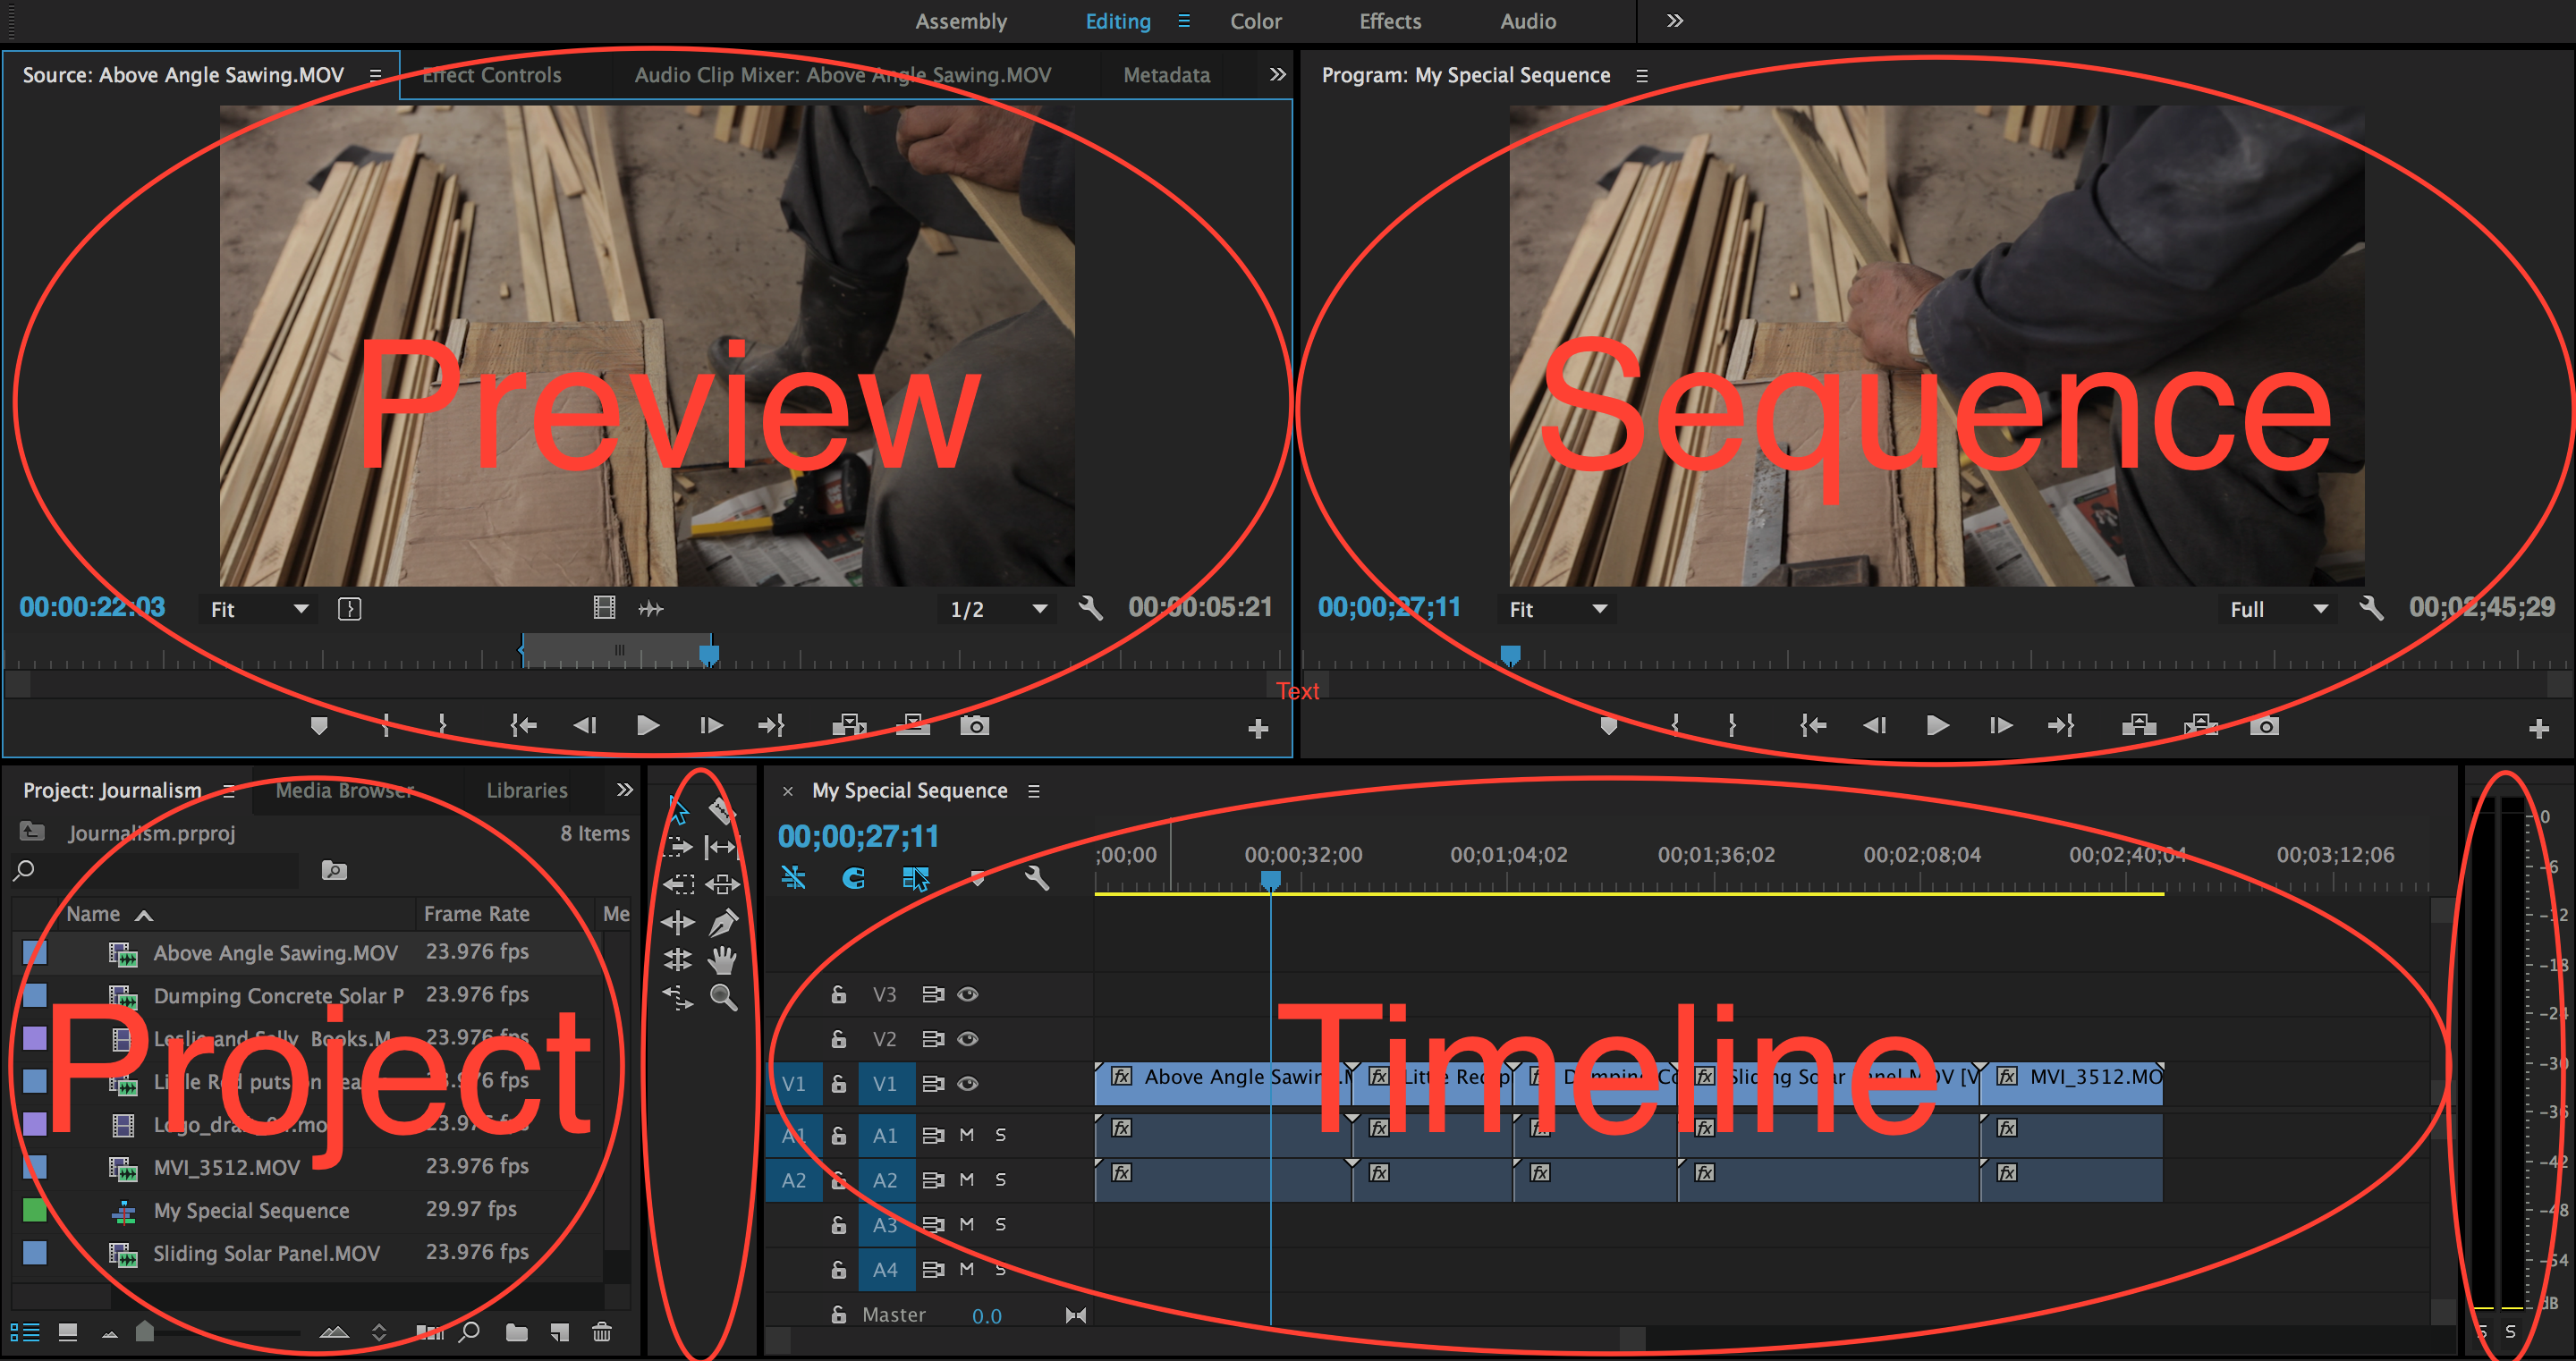 Image Added Image Added
|
The lower The upper left of the screen is your Project window Browser, which is like a file cabinet for your project within which you put your media files - audio, video, still pictures, etcand sequences/timelines.
You can create folders - which are called bins - within each project in the Browser to organize your media files.
To see what's in a folder, just click on the tiny triangle to the left of its name.
The files can be individual files, such as individual clips, or sequences, which are the sequences of clips you will create in the Final Cut Pro Timeline.
You can get more details on the files in your Browser by dragging the lower right corner of the Browser window further to the righthovering your mouse over the project window and pressing the "~" key. Your whole screen will become the project window. Press the "~" key again to stop panicking. The new columns will tell you which files are video, which are audio, which are both video and audio, how many tracks of audio there are, the duration of each clip, etc. |  Image Removed Image Removed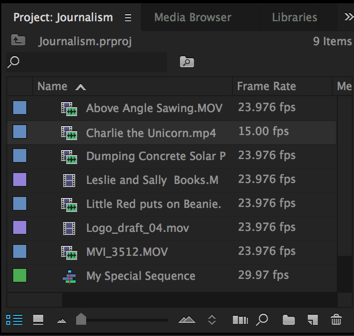 Image Added Image Added
|
Just to the right of above the Browser is the ViewerSource Preview window, where you can display and play individual video clips you select in drag from the Browser.
If you double click on a video clip in the Project Browser directory, it will be displayed in the Viewer.
Just below the clip in the Viewer is the playhead, a small yellow blue triangle-ish thing in the white wide horizontal box (with tick marks) that you can click on and drag to the left or right to move or scrub through the clip.
Beneath the playhead is a Play/Stop button you can use to play or move through a clip.
You also can play a clip in the Viewer by pressing the spacebar on (while the Source Preview window is active) on your computer. To stop playing the clip, just press the spacebar again. To the right of the Play/Stop button is a jog control you can use to move very slowly or very quickly through a clip. |  Image Removed Image Removed Image Added Image Added
|
Below the Browser and Sequence Viewer is the Timeline, where you assemble your video and audio clips into a sequence to create a movie.
On the upper far right is the CanvasSequence Viewer, which will play whatever "sequence" of clips is in your Timeline. | Image RemovedImage Added |
If you drag a video clip that also has two audio tracks from the Viewer into the Timeline, it will be displayed in the Timeline as a single light blue horizontal video track, with two separate green darker blue horizontal audio tracks underneath.
If you then drag another clip down from the viewer you could drop it onto the timeline to the right of the first clip, so it would play after that first clip in your sequence.
You can continue this process to create a sequence of clips along your Timeline.
Just above the top video track in the Timeline is the playhead, a tiny yellow blue triangle-ish object  Image Added you can click on and drag to the left or right to move or "scrub" through your sequence of clips. Image Added you can click on and drag to the left or right to move or "scrub" through your sequence of clips.
To see the entire sequence of clips, on your keyboard press shift Z. Final Cut then will squish " \ ". Premiere will then zoom out to reveal all the clips in your sequence together into a single screen view on the Timelinethe timeline. |  Image Removed Image Removed Image Added Image Added
|
Press the I Key (for IN) at the desired point where you want your clip to start playing. Then hit the O Key (for OUT) at the point you want your clip to end. You will see arrows brackets appear in the window at the points you pressed the I and O keys.
When you have the clip set with in and out points you want, you can click on the clip in the Viewer and drag the clip into the Timeline. Only the portion of the clip where you set your in and out points will be placed in the Timeline. |  Image Removed Image Removed
| Text and pictures borrowed liberally from Berkely Graduate School of Journalism Knight Digital Media Center.
http://multimedia.journalism.berkeley.edu/tutorials/finalcut/movingclips-timeline/ |  Image Added Image Added |