Page History
This workflow is based on menu settings that can be seen either through the eyepiece or a monitor connected via SDI You will not see these menu settings on the LCD on the side of the camera |  |
| Connect the Monitor to SDI out #3 on the camera |  |
Turn on the Sony F5 using the on switch |
|
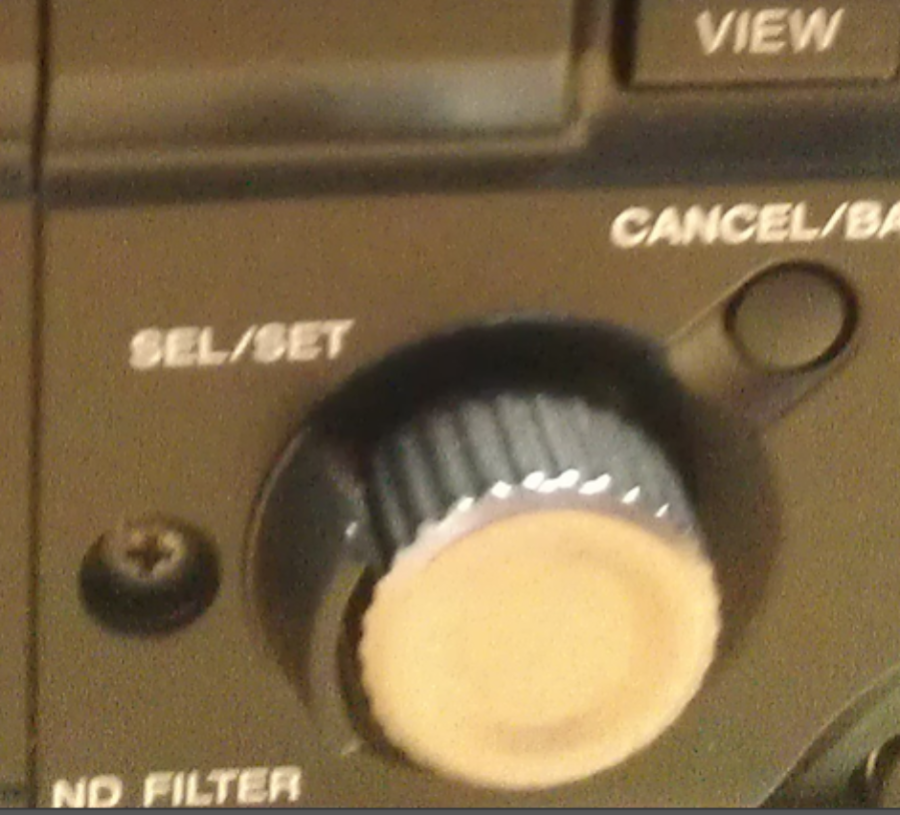
| Click on Menu Button |  |
Use the knob to Navigate through the menus and press the knob to select the menu item |
|
Go to System Menu |
|
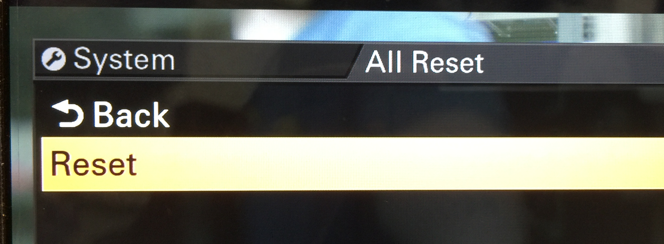
Reset the camera to defaults |
|
|
|
| Reset>Execute |  |
| Yep Execute again |  |
| Turn the camera off and on |  |
| Power off the camera wait about 30 seconds and power on the camera | 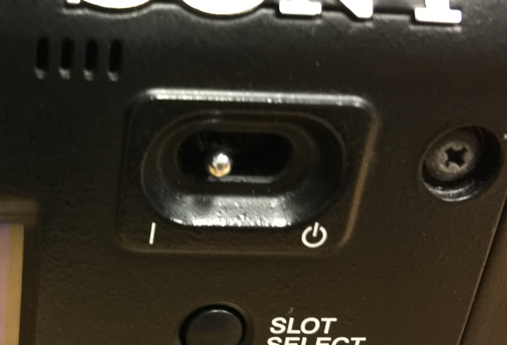 |
If this menu comes up: It's a maintenance self check that the camera does every 5 days or so. It's best to let the camera do APR whenever it reminds you. |  |
Press Menu to set up some more settings | 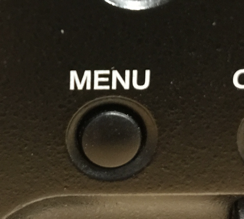 |
| Go back to System > System Setting and make sure the Frequency is set to 23.98 |  |
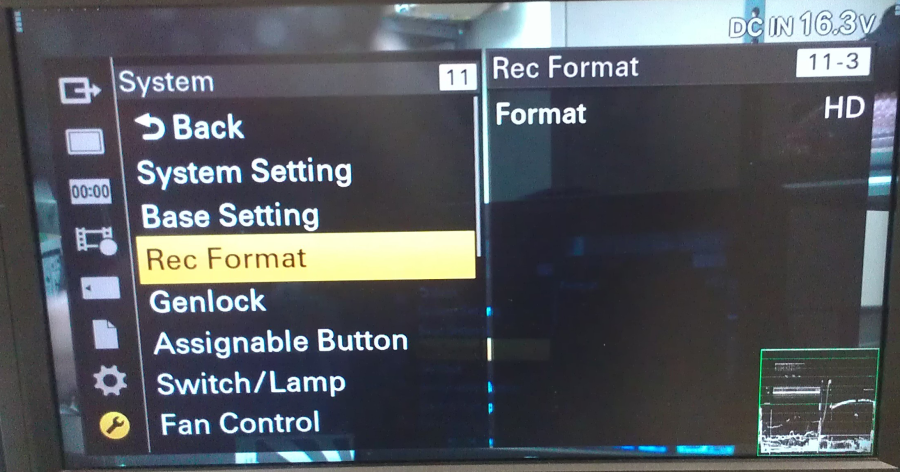
Go to System > Record Format> HD |
|
| Choose SxS Format > XAVC 4K Class480 |  |
Confirm the Change Select Execute |
|
class 480 is the 480Mb/s version of 4K XAVC. This gives a bit rate of…… drum roll……. 480Mb/s at 24/25/30fps. At 50 and 60fps it runs at a whopping 960Mb/s, this is the top limit for XAVC in it’s current form. Sony’s PMW-F5/F55 and the FS7 currently record XAVC using Class 300 which is up to 300Mb/s at 24/25/30fps or 600Mb/s at 50/60p. So as you can see Class 480 has the potential to improve the compressed image quality from these cameras still further should it ever make it into a camera. | |
Change to the 4K settings |
|
Next we will show you how to set the camera to Slog 3 for recording Slog
Go to >User Menu |  |
| Base Settings |  |
| shooting mode - change to Cine EI |  |
| Execute |  |
Go to Color Space and choose which slog to use SLog3 extends dynamic range about 1.5 stops. So it might be best for very high contrast (high dynamic range) scenes, and SLog2 might be best for low contrast "flat" scenes. |  |
Here is what SONY states about the difference between S-Gamut3 and S-Gamut3.Cine: S-Gamut3:
1) SLog3SG3toSG3Cine.cube (provided below) + 2) Either Sony provided Look Profile or 3DLUT S-Gamut3.Cine:
| |
NOTE Use these Sony SXS Pro + |
|
Put the card in the SD Card slot in the camera and format it. |
|
| Go to >Media> |  |
| Format Media> |  |
| Media A or B | 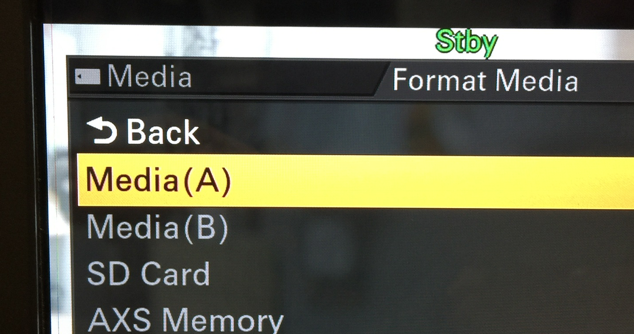 |
Execute to format
|  |
Now set to record press record on the Sony F5 camera and it will begin recording |
|
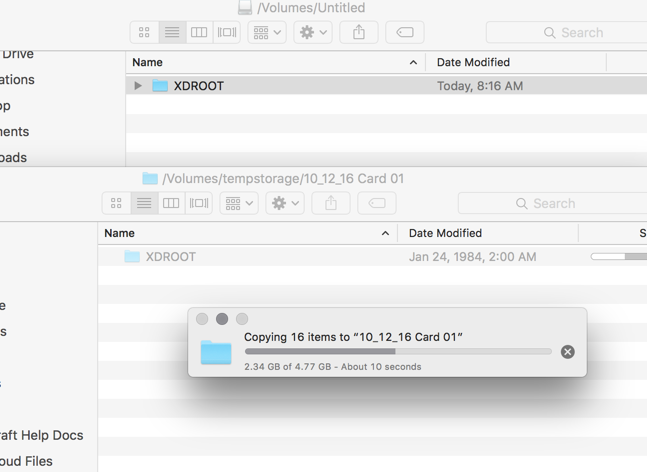
BACK UP THE FILES YOU RECORDED ON THE SXS CARDS IN THE EXACT FORMAT THAT WAS ON THE CARD MAKE SEPARATE FOLDERS FOR EVERY CARD |
|
Open Adobe Premiere and select the location to save your media and your project Click OK to create the project
Title your project |
|
| Next select the "Scratch Disks" tab and choose from the drop down to set all the parameters to the same as project or a custom destination. If you choose same as project the media and other data will be stored with the project on the location you choose for your project. Then click OK to apply the settings. | 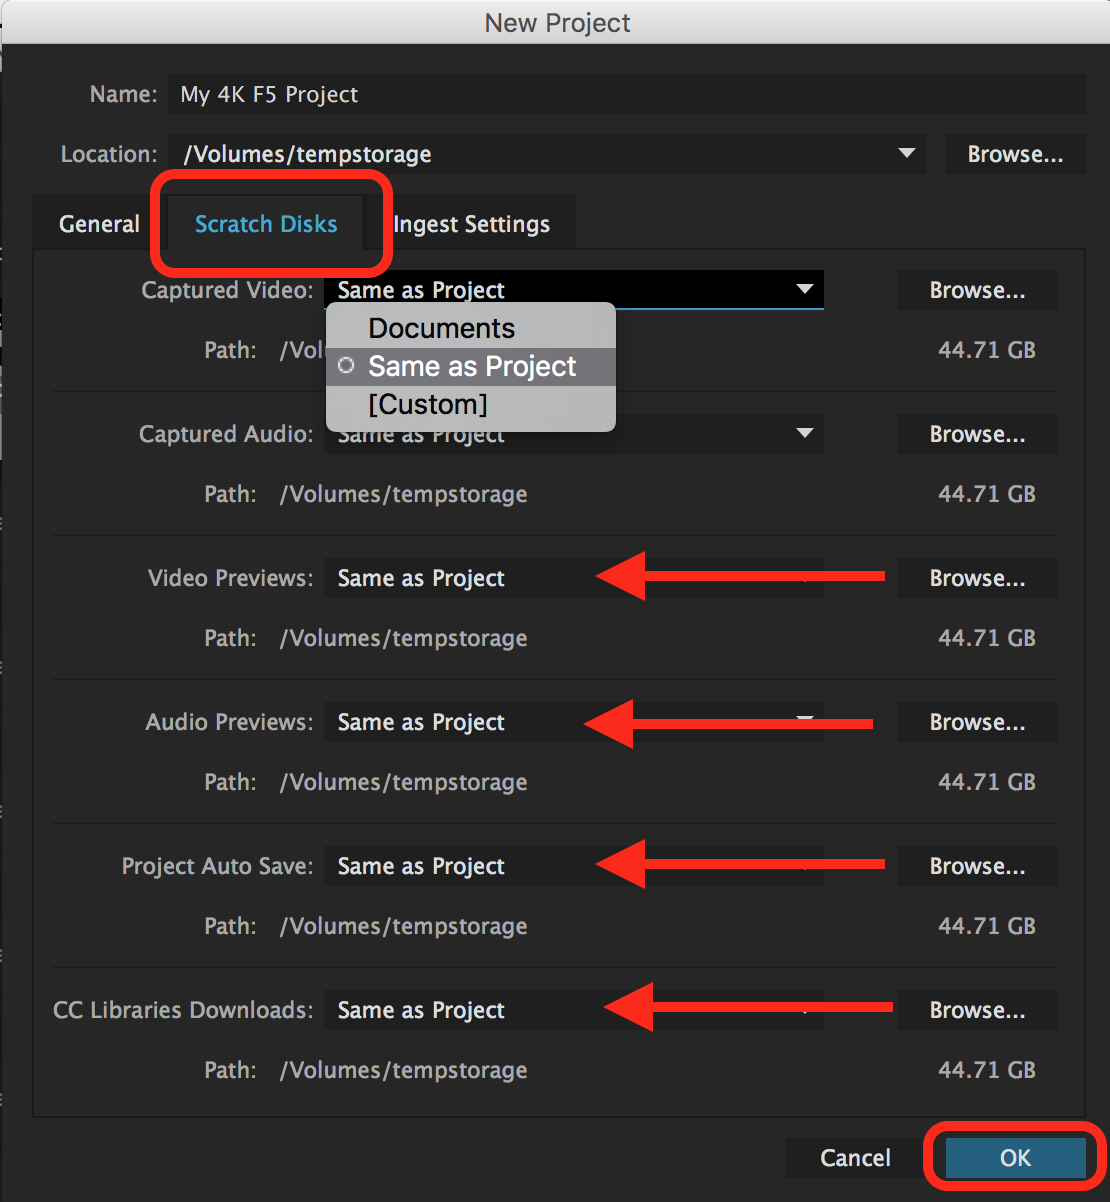 |
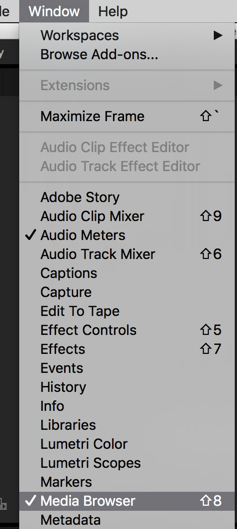
Go to >Window>Media Browser |
|
Navigate to the folder you backed up your card data and click on the folder |
|
| Right click on the folder and choose Import |  |
| You will get a generic error but click OK |  |
The files should open in the "Project" window
Format should be 4096x2160/23.976 frame rate
|
|
We recommend you make Proxies Now using this workflow: https://wikis.utexas.edu/display/comm/Make+and+work+with+Proxies+in+Premiere You can choose to edit with the files as is but depending on the processor of the computer you will most likely have to adjust your resolution to 1/16 under your source window to play the clips without stuttering. Also the project will load MUCH Slower using the 4K files. |
|


Overview
Content Tools