Page History
...
| Authorized users can reserve the studio using the room reservation system. | |
At the time of your reservation, contact the CMB 4th floor proctor at CMB 4.110. The proctor will open the studio for you and check out the pocket wizard transmitter to you. |   |
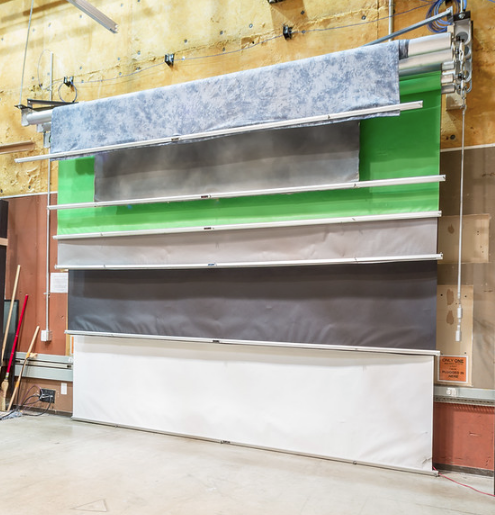
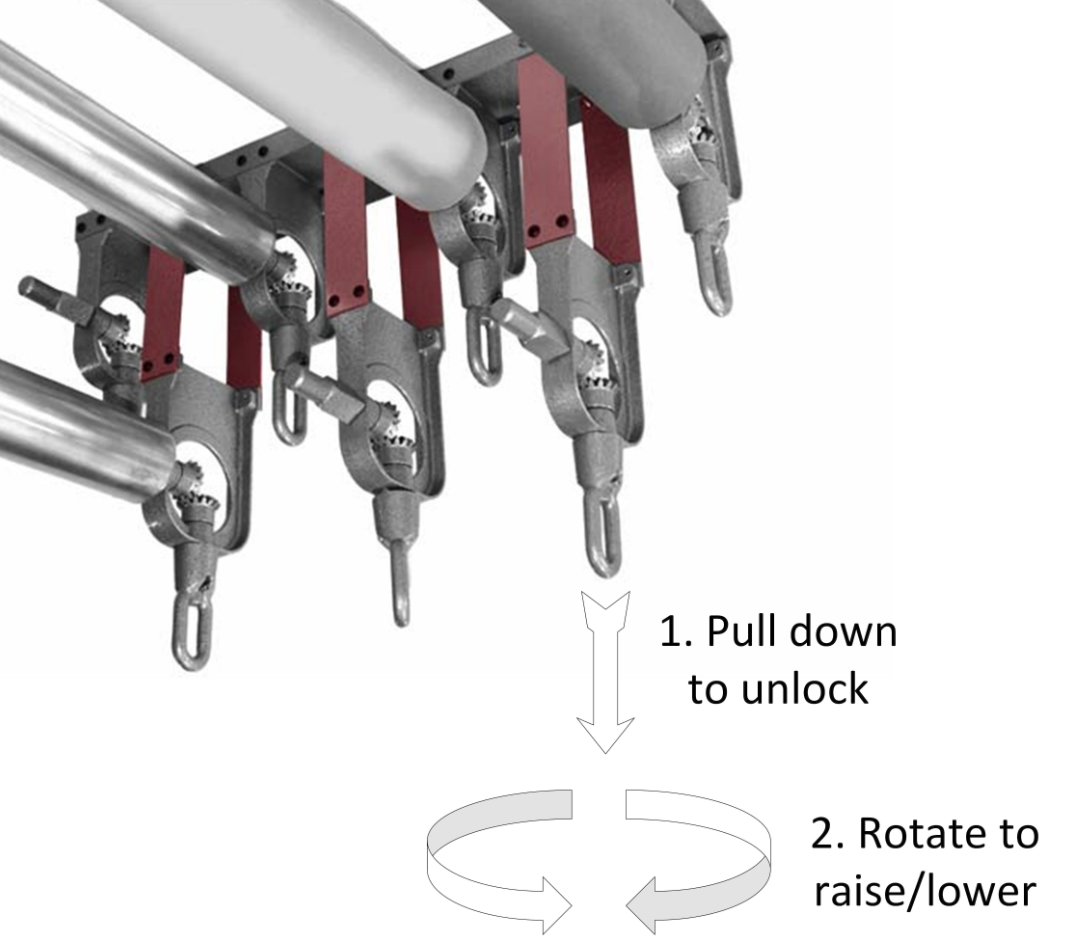
Choose a background.Use the background roller hook to adjust the backgrounds. The hook is usually hanging with the rollers. The rollers are locked unless you pull down using the hook. Pull down gently before rotating the hook. |
|
Set up Pocket WizardFind the pocket wizard transmitter in the equipment cage. Turn on the trasmitter using the switch on the side. Set Channel to 1. Set Transmit Mode to BOTH. If the status lights are not flashing on the pocket wizard, check the (2) AA batteries. | |
Lower & Clip StrobesUse the extension hook if you can't reach the strobes. Pull the strobe down to the desired height and clip with spring clip. Be sure to clip on the side which says "clip here" not the side which says "no clip". |  |
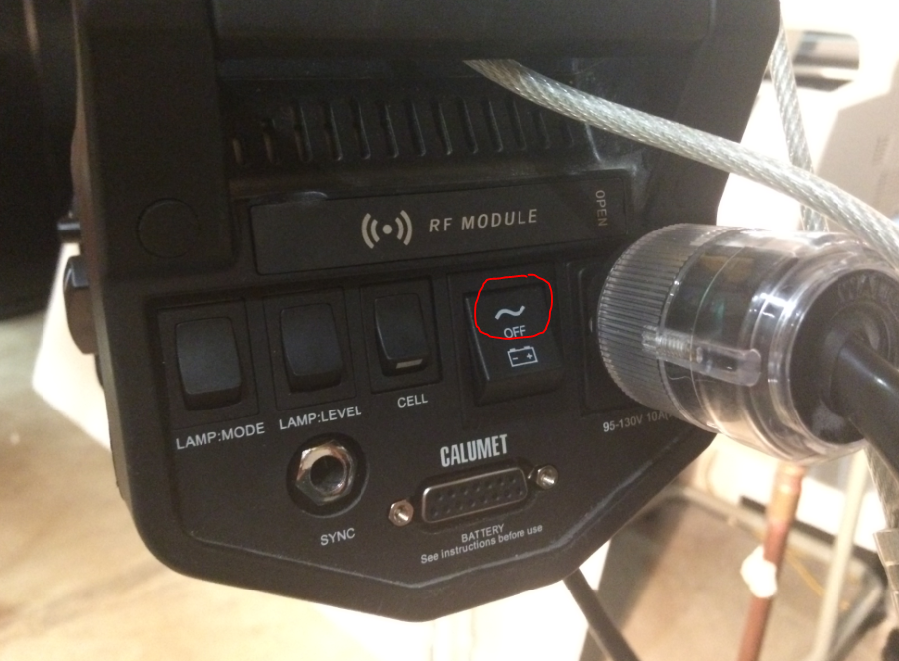
Turn on Master StrobeThere are 4 strobes. The one nearest the door is the master strobe which has a pocket wizard receiver built in. Turn on power to the master strobe by setting the large switch on the back to ~
|
|
Program Master Strobe Pocket Wizard ChannelWithin 10 seconds of turning on the master strobe, begin pressing the TEST button repeatedly on your pocket wizard transmitter. The master strobe will learn your channel and start flashing with each press of the TEST button. Press TEST at least 5 times to confirm the channel. |  |
Turn on additional strobesTurn on any additional strobes you wish to use for your shoot by setting the large switch on the back to ~.
|  |
Confirm All Strobe Switch SettingsOn all strobes, confirm all rear switches are in the up position. |  |
Test all strobesPress TEST again on your pocket wizard transmitter. This should trigger the master strobe. The other strobes should flash in response to the master. Confirm all strobes are flashing. If not, see section below "Troubleshooting Strobes" |
|
Set up CameraConnect pocket wizard transmitter to the hotshoe on your camera. Rotate lock ring to lock in place. Turn on camera and start with settings of ISO 100 on M (manual) at 1/80th shutter speed and f8 aperture. Shoot a test frame and confirm the flashes fire. | 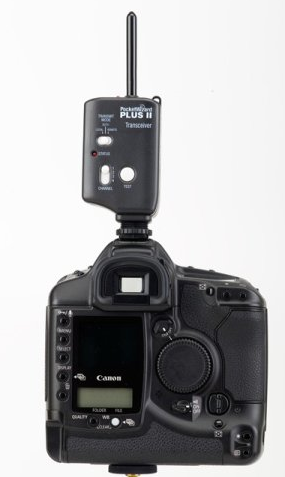 |
Adjust lighting & camera settingsAdjust lighting & camera settings as necessary. To increase exposure, turn up the flash, move the flash closer to the subject, or open up to a larger aperture (eg f5.6, f4, etc) To decrease exposure, turn down the flash, move the flash away from subject, or close down to a smaller aperture (eg f11, f16, etc) | 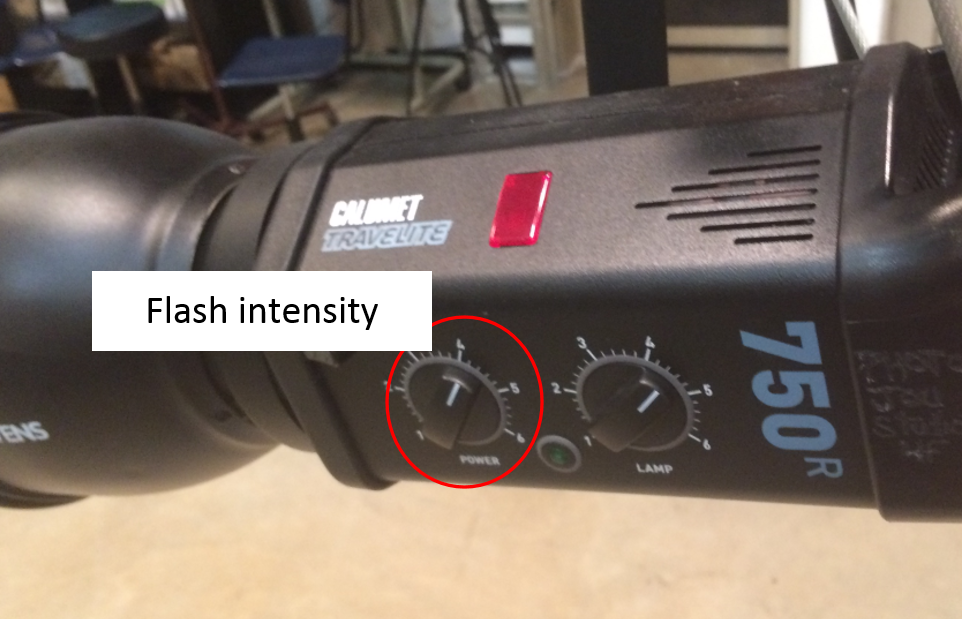 |
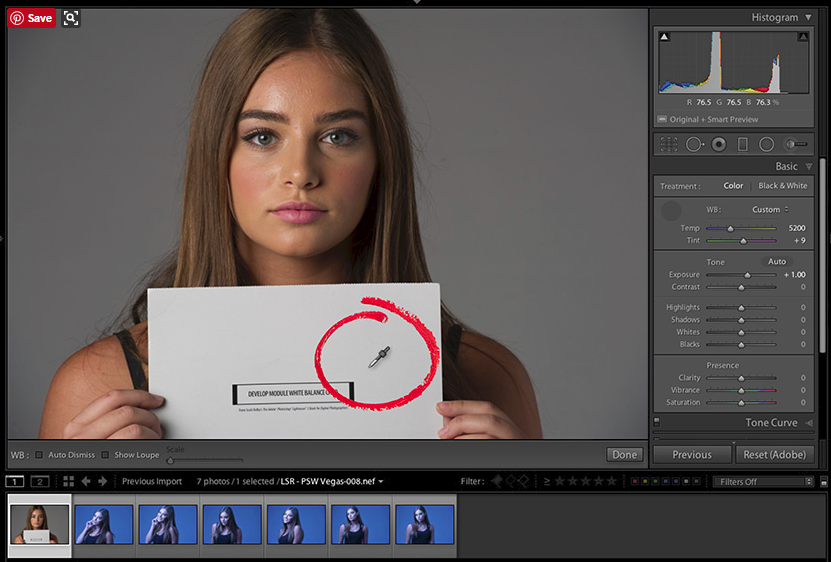
White BalanceEnsure that you are shooting RAW files in your camera menus. Shoot a test image of a white or grey card held at the subject's face position facing the camera. Later, adjust the white balance in software by clicking the white balance tool on this card. |
|
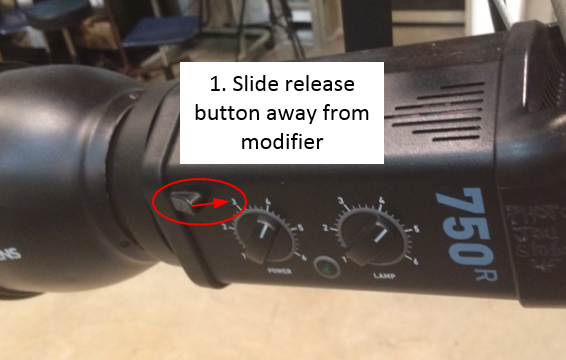
Change ModifiersTo remove the modifier from a strobe: Turn the power off (large switch to OFF). Slide the RELEASE BUTTON away from modifier. Rotate the modifier and pull forward to remove. Be sure not to touch the flash bulb with your fingers - the oils on your fingers will cause the bulb to fail prematurely. |
|
| To install the modifier on a strobe: Make sure the power is off (large switch to OFF). Insert the modifier and rotate until it clicks. Turn on power (large switch to ~). Be sure not to touch the flash bulb with your fingers - the oils on your fingers will cause the bulb to fail prematurely | 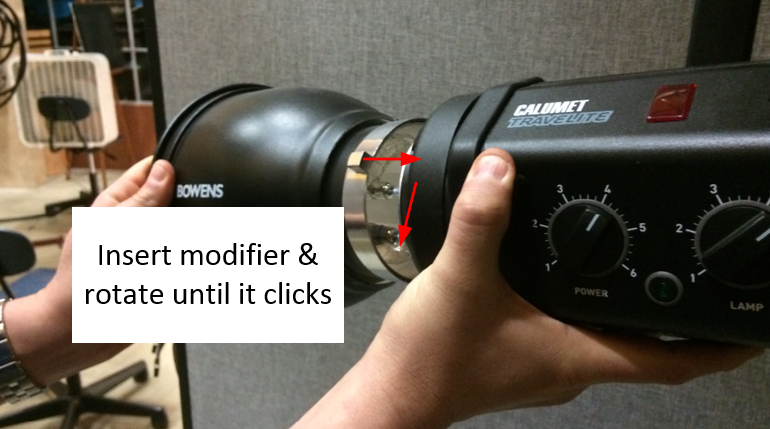 |
Troubleshooting strobesIf a strobe isn't flashing, confirm the power switch it is turned on (~) and the CELL switch is up. Press the test button on an individual strobe to test that it has power and is working. |
|


...
Overview
Content Tools