...
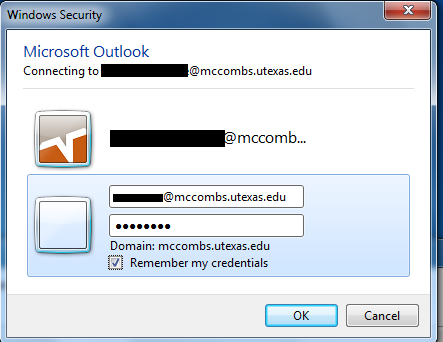
- Outlook - Open Outlook and you will be prompted to log in. Use your McCombs account in the format of <McCombs username>@mccombs.utexas.edu to log in and check the box to remember your password. You will not switch to using your EID for email at this time.
- Fileshares, database and other network resources - Your EID should be able to access the same network fileshares, databases and other resources. If you encounter something you can't connect to, please contact Tech Support.
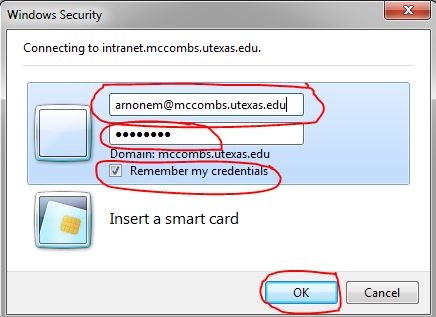
Expand title If you use the McCombs Intranet click here (Otherwise skip this step) Open your browser and navigate to the Intranet URL, https://intranet.mccombs.utexas.edu. Your browser may log you into the Intranet with your EID. Look in the upper right corner of the Intranet page. If you see your EID after the word "AUSTIN\", then select, select "Sign in as a different user" from the drop down menu below it. Then, log in with your McCombs account in the format of <McCombs username>@mccombs.utexas.edu and check the box to remember your password.

If instead you receive an Access Denied Error, then click the "Sign In as a different user" on that message box. Then, log in with your McCombs account in the format of <McCombs username>@mccombs.utexas.edu and check the box to remember your password.

- If you use https://community.mccombs.utexas.edu, you will need to use the step above to log back in with your McCombs account.
- If you use multiple browsers to access the Intranet, repeat the steps above.Expand title If you use the Mainframe QWS3270 click here (Otherwise skip this step) Open QWS3270. If you receive an error stating "error creating credentials," quit QWS3270. Then, from the Start menu, navigate to All Programs > Microsoft Systems Center > Configuration Manager > Software Center. Open Software Center and select the "Installation Status" tab from the top (highlighted as 1 in the image below), then select "UTConfigfor3270 - UTConfigfor3270" from the list (highlighted as 2) and click on "REINSTALL" in the lower right corner of the window (highlighted as 3).

Expand title If you use Google Chrome web browser click here (Otherwise skip this step) There is an issue that causes Chrome to not work properly without a re-install. If you already know how to uninstall Chrome and install the latest version from https://www.google.com/chrome/ then go ahead and do so. if you don't know how, then you can follow the steps below.
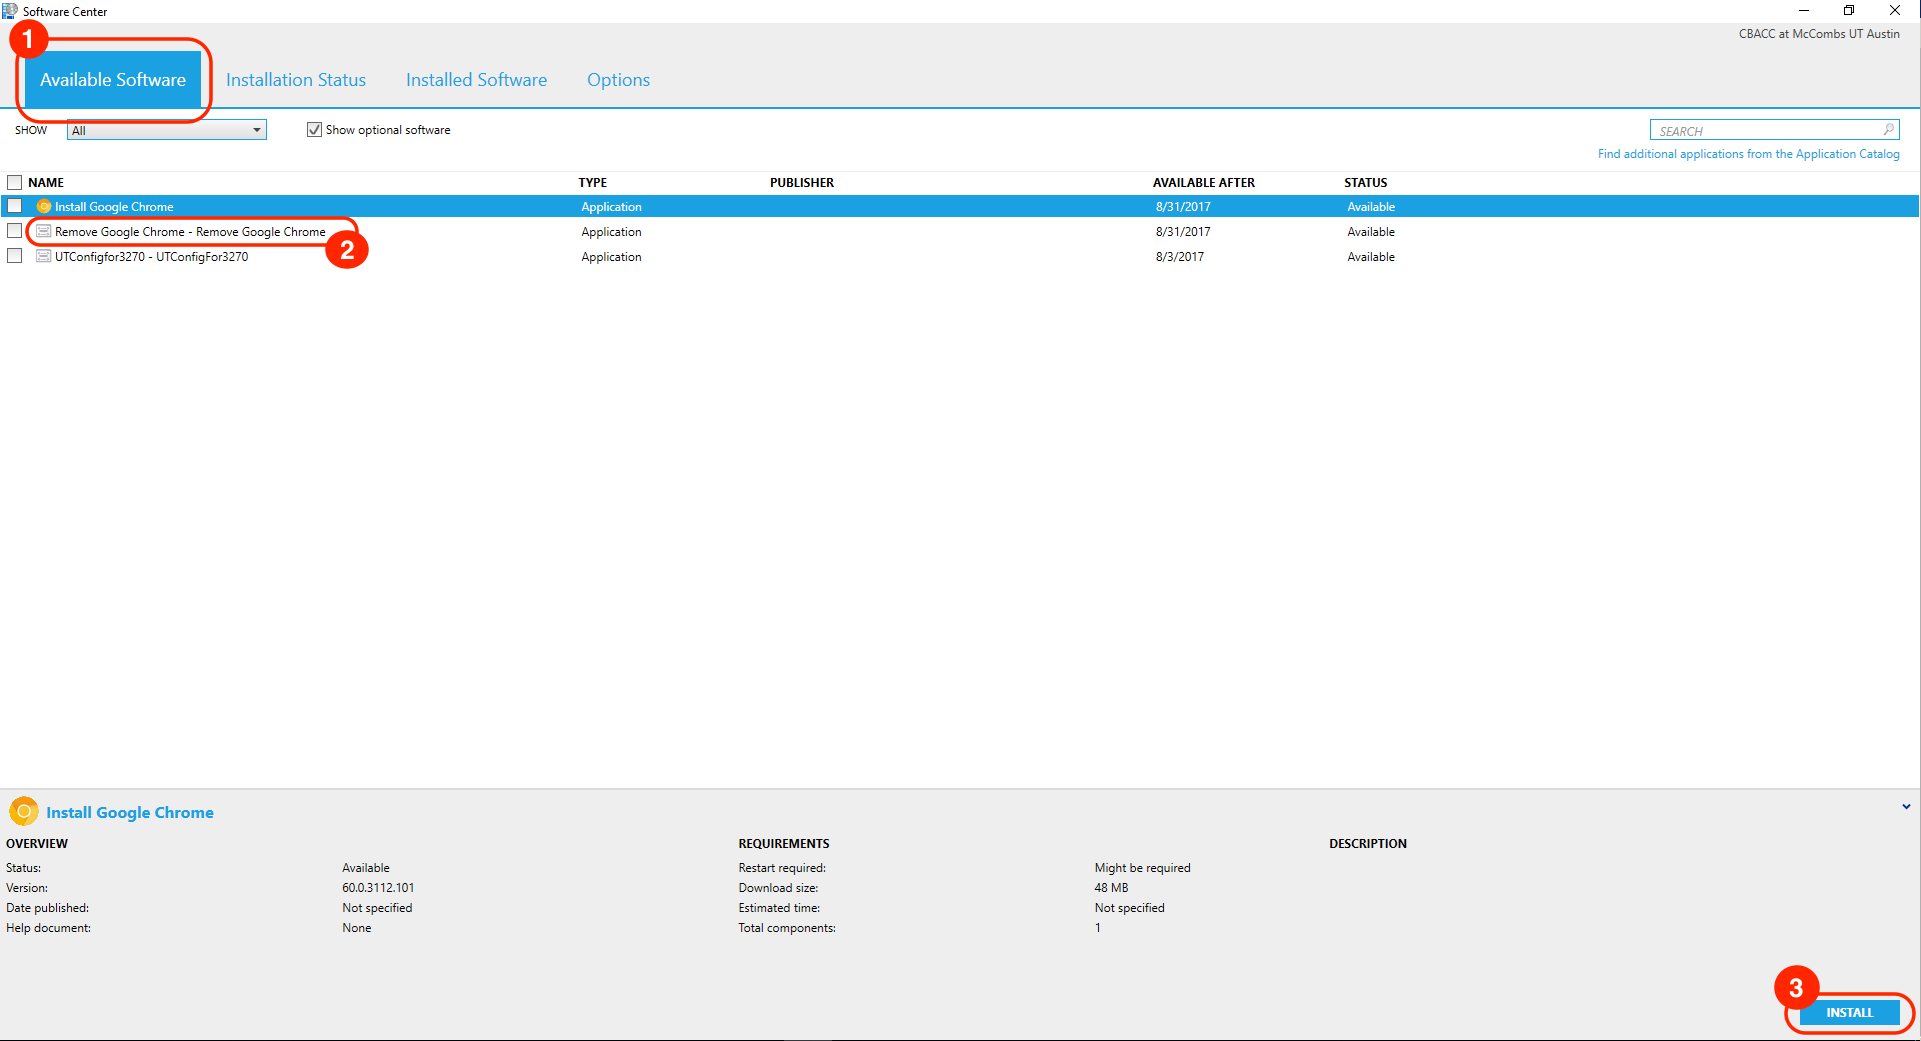
Open Software Center - from the Start menu, navigate to All Programs > Microsoft Systems Center > Configuration Manager > Software Center. Open Software Center and select the "Available Software" tab from the top (highlighted as 1 in the image below), then select "Remove Google Chrome - Remove Google Chrome" from the list (highlighted as 2) and click on "INSTALL" in the lower right corner of the window (highlighted as 3). Once you've completed the steps to remove Google Chrome, then follow a similar process by selecting "Install Google Chrome" from the list and click "INSTALL" again.
Chrome will then be re-installed. If you previously logged into Chrome with a Google account, you'll need to log in again to bring back your bookmarks and other settings.
Removing Google Chrome

After removing Chrome, then select Install Google Chrome and click INSTALL
Expand title If this does not work, your Chrome Profile will need to be manually recreated, please follow the steps below or contact tech Support for assistance. There is an issue that causes Chrome to not load a webpage after migration. This usually happens on Chrome where there user is logged into the browser to sync the data (bookmarks, passwords, history, etc) with their Google account. To fix the issue, you need to recreate the Google Chrome profile.
- Close Chrome. Open Task Manager and end any chrome.exe processes.
- Browse to C:\Users\useraccount\AppData\Local\Google\Chrome\User Data\
- Cut the Default folder, go up one folder to Google\Chrome and paste it.
- Launch Chrome and have the user sign back in to sync data.
- If the user's data does not sync or the user never logged into Chrome to begin with, you can browse to the Default folder you moved and copy/paste/replace the Bookmarks file in the newly created Default folder.
***If this doesn't work, follow the steps below to uninstall (or do it manually in Control Panel and redownload Chrome). You can save the Default folder if they don't sign in to sync Chrome data. Make sure that the Chrome folder in C:\Users\useraccount\AppData\Local\Google\ is deleted after uninstalling.
Expand title If you use Skype for Business click here (Otherwise skip this step) Open Skype for Business and you will be prompted to log in. Use your McCombs account in the format of <McCombs username>@mccombs.utexas.edu to log in and check the box to remember you password. You will not switch to using your EID for Skype at this time.
Info title If you receive an error stating the "service is unavailable" Tech Support will need to assist you in resolving the issue. Please contact McCombs Tech Support ASAP at 232-6617 or visit the SWAT Service Desk at CBA 1.328. If you'd like us to follow up with you at a later time, emailtechsupport@mccombs.utexas.edu.

Expand title if you are a SiteCore content editor click here (Otherwise skip this step) Your SiteCore logon is completely separate from your MCCOMBS and AUSTIN logons so it is unaffected by the domain migration. However, if you have saved you SiteCore password in your browser then you will probably need to re-enter it the first time you log into SiteCore after you swith to your AUSTIn EID account.
- Outlook - Open Outlook and you will be prompted to log in. Use your McCombs account in the format of <McCombs username>@mccombs.utexas.edu to log in and check the box to remember your password. You will not switch to using your EID for email at this time.
...