Versions Compared

Key

  • This line was added.
  • This line was removed.
  • Formatting was changed.

...


    1. Choose Export As QuickTime Movie, Use Marks, Use Enabled Tracks if you only want to export a certain part of the timeline. Leave them unchecked to export the whole timeline
    2. Uncheck Same as Source by clicking on the Custom button
    3. Click on Video and Audio (Recommended)
    4. Video Format 1920 x 1080 Width and Height
    5. Color Levels should be Keep at Legal Range
    6. Display Aspect Ratio leave on Native Dimensions
    7. Click on Format Options

Click on Video Settings

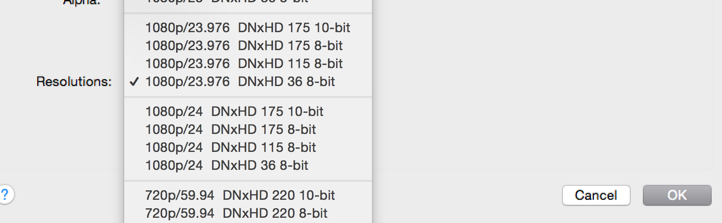
Choose Compression Type Avid DNxHD Codec

Current fps


Compressor choose 709

None on Alpha

Resolution choose 1080p/23.976 DnXHD 36 8-bit

Click OK

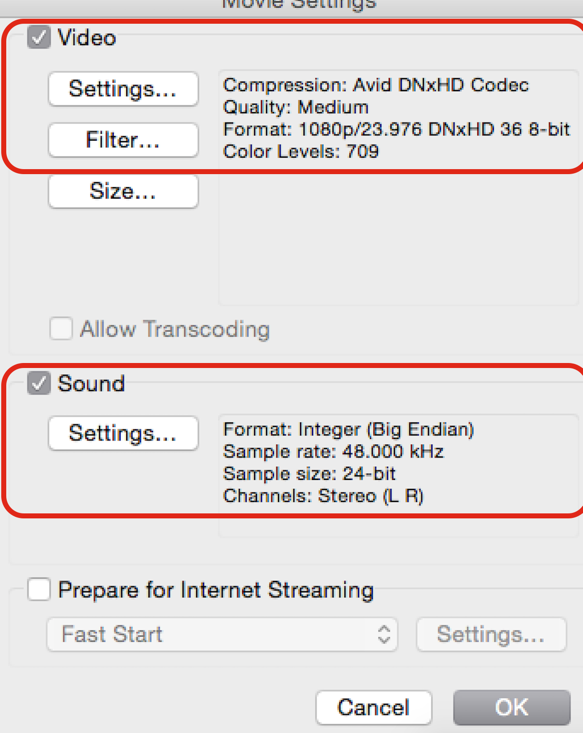
These are the final settings for the QuickTime Movie Settings

Compression: AVID DNxHD

Format 1080p/23.976 DNxHD 36 8bit


Video and Audio checkboxes should be checked.


Audio 48kHz 24 bit


Make sure Prepare for Internet Streaming is unchecked

Click OK

This is how the AVID export window should be set


Video Format 1920 x 1080 Width and Height


Color Levels should be Keep at Legal Range


Display Aspect Ratio leave on Native Dimensions

Click on Save and will be prompted to select a place to save the quicktime

Then click Save and the export will start.


!! DON'T FORGET !! 

If you are working in an Ultra High Definition resolution (ie 2K, UHD, or 4K) you need to change your project format back to your original resolution !!


Advanced Tables - Attachment Table

...