Page History
...
Go to the Video Previews |
|
Change the Codec to Apple ProRes 4444 |
|
DCP – Settings - Double check to make sure this all looks correct
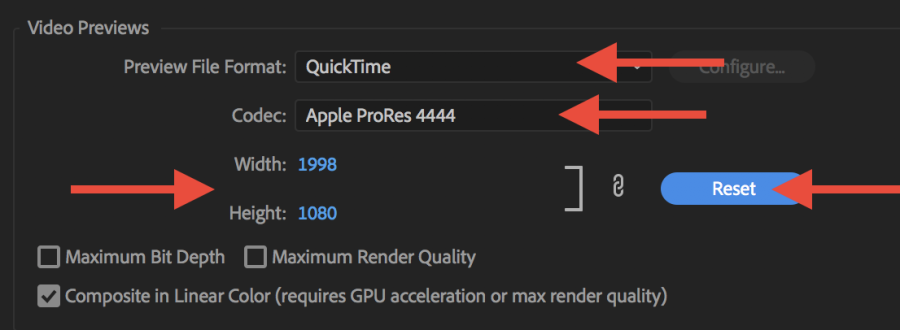
Video Previews need to match these settings as well Preview File Format to QuickTime
Then click on Reset and that will change the Width and Height to match Video Custom Settings. DONT' HIT OKAY YET |
|


...
Set Video to 1 track |
| ||
Change the Track Type of the one audio track to 5.1 |
| ||
Title the sequence and click OK |
| ||
Double click the video 2K or 4K file to load it into the source monitor Drag the Video Only icon to your newly created timeline |
| ||
| Choose to Keep existing settings |
| ||
Then load the sound mix (5.1 Interleaved) file into the source monitor and drag the audio only tracks to the timeline Place on the 5.1 track in the new sequence you just made |
| ||
YOU will be only able to check audio tracks 1 and 2 so you won't hear dialog but hopefully you can tell well enough.The final check will be the QuickTime you will make next.REMEMBERDELETE THE 2 POP AT THE BEGINNING AND AT THE END |
| ||
Scaling YOU WILL HAVE TO SCALE YOUR FILE Click on the Effects tab |  | ||
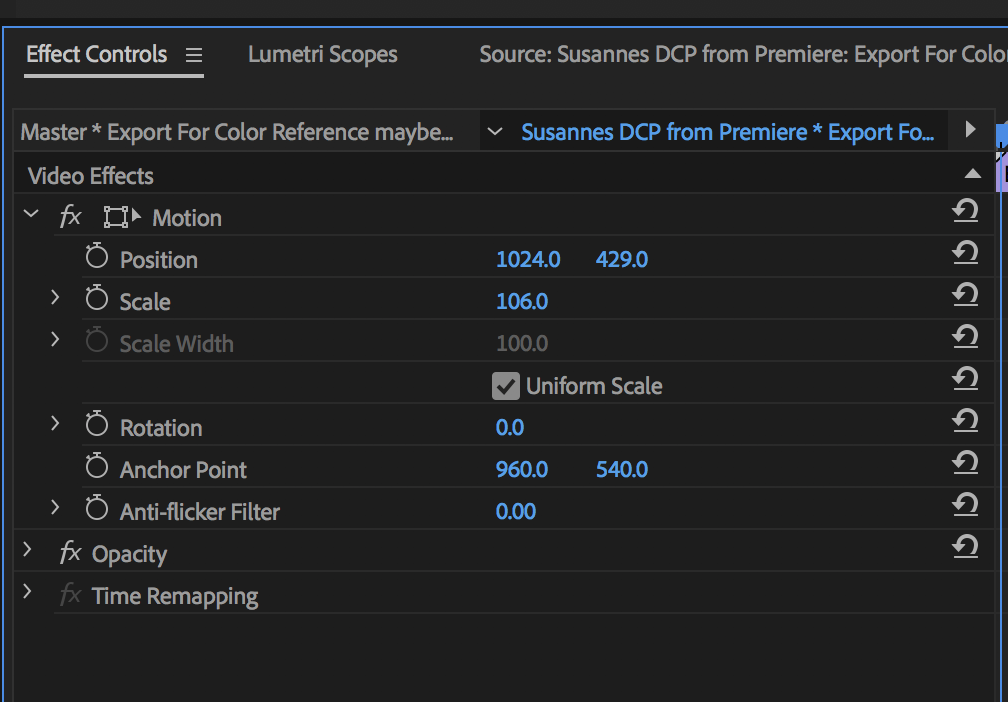
Click on your video file in the timeline Drop down the Motion setting and on scale select that parameter |
| ||
| Scale the image down to 50% or until you see black around the frame then scale it up till you don't see any black |
| ||
Don't want to see this small black edge around your image Don't want this black line
|
| ||
No black line this is what you want
|
| ||
Make sure the sequence is loaded in the Timeline Window and then select the timeline window so it's Highlighted Blue |
| ||
Go to >File >Export>Media |
| Click on the Sequence to export and choose >File>Export>Media or click "Command M" | |
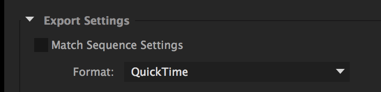
| Choose Format QuickTime |
| ||
| Choose to Export Video and Export Audio |  | ||
Preset Settings won't work we will have to make a custom setting. But in the meantime choose GoPro whatever so we can modify it |
| ||
Click on the Video tab and choose the Video Codec as Apple ProRes 4444 |
| ||
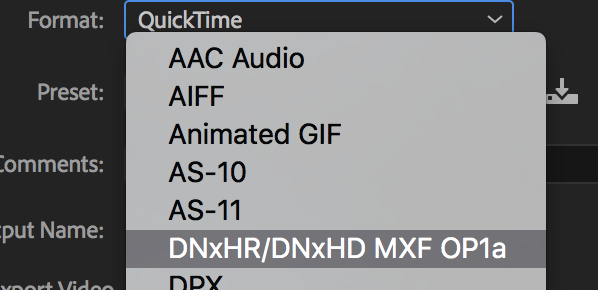
Go to Video>Basic Video Settings Change to 2048 x 858 scope moviesChange to 1998 x 1080 for Flat movies23.976Field Order - Progressive Aspect - Square Pixels |
If you need to do 1998 x 1080 you have to change it to DNxHR/DNxHD first and then back to QuickTime
|
| |
Then change the settings to Video Codec Apple ProRes 4444 Change to 2048 x 858 scope moviesChange to 1998 x 1080 for Flat movies23.976 |
| ||
Click on Output Name - and choose where you want to save the file. DONT' CLICK EXPORT YET |
|


...
Overview
Content Tools