Page History
...
| Open your AVID Project |
|
| Make a New Bin to import your surround sound mix files |
| Title the bin how you wish |
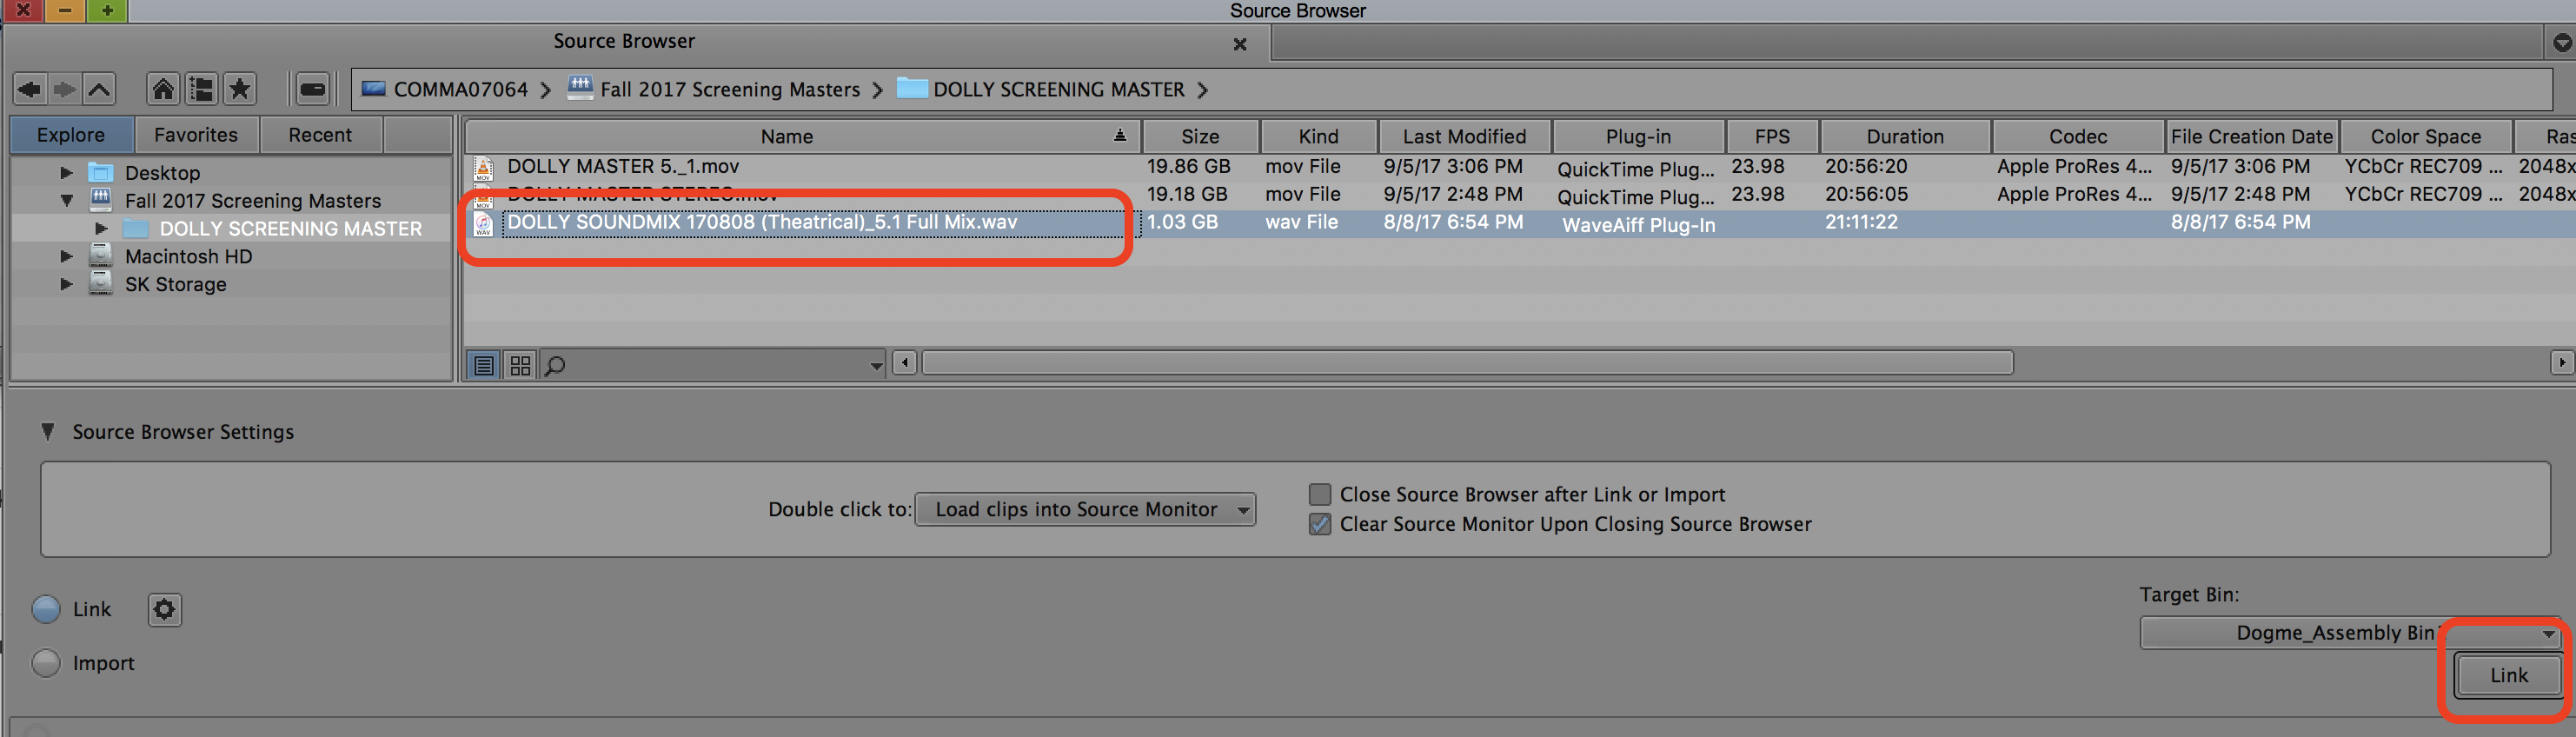
Link to the Surround Interleaved file that you received from the mixer Go to >Tools>Source Browser> |
|
The file will be a 5.1 Full Mix.wav file Click on Link |
|
| The file will appear in the bin |
|
| Right click on that linked file in the bin and choose Modify > Modify Clip... |  |
| Choose Set Multichannel Audio from the drop down |  |
| Choose 5.1 SMPTE: L R C Lfe Ls Rs |  |
When you load it into the source window the file will have a 5.1 icon on it shown here |
|
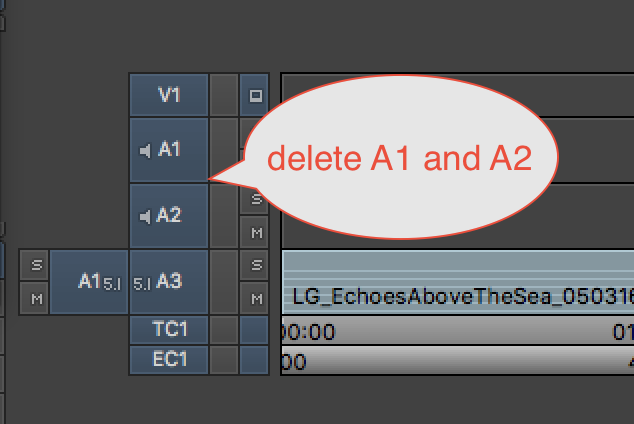
| Create a new sequence and edit the 5.1 audio into the new timeline and then delete the other audio tracks that are automatically generated in the timeline |
|
| delete the other audio tracks that are automatically generated in the timeline |
|
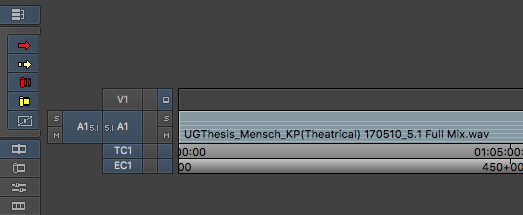
| Edit the 5.1 audio file into this new timeline |
|
Next need to make your video file to overwrite the 5.1 audio file Select your timeline in the bin and double click it to load it into the timeline  |  |
| Next choose Timeline>Mixdown>Video |
|
Choose the bin in AVID you want to save the file Choose where the .MXF will be saved (your hard drive) Resolution Apple ProRes DNxHR HQ MXF |
|
| You will end up with a file titled Video Mixdown after the title of your timelin |
|
Load that video mixdown clip into the source browser and edit that on to the newly created 5.1 timeline that contains the 5.1 audio. |
|
Check the Sync of the entire movie before exporting Remove the 2POP from the timeline at the head and tail. |  |
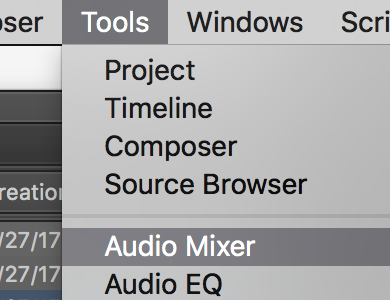
| Next go to >Tools Audio Mixer |
|
| Change these audio mixer settings for the timeline |  |
Make sure the timeline is set to 5.1 Sequence Close the Audio Mixer |  |
| Go to Audio Settings |
|
Set the Display Channel order to SMPTE Close the Audio Settings |
|
Select the Sequence |
|
| Go to >File>Output>Export to File |
|
| Click on Options |
|
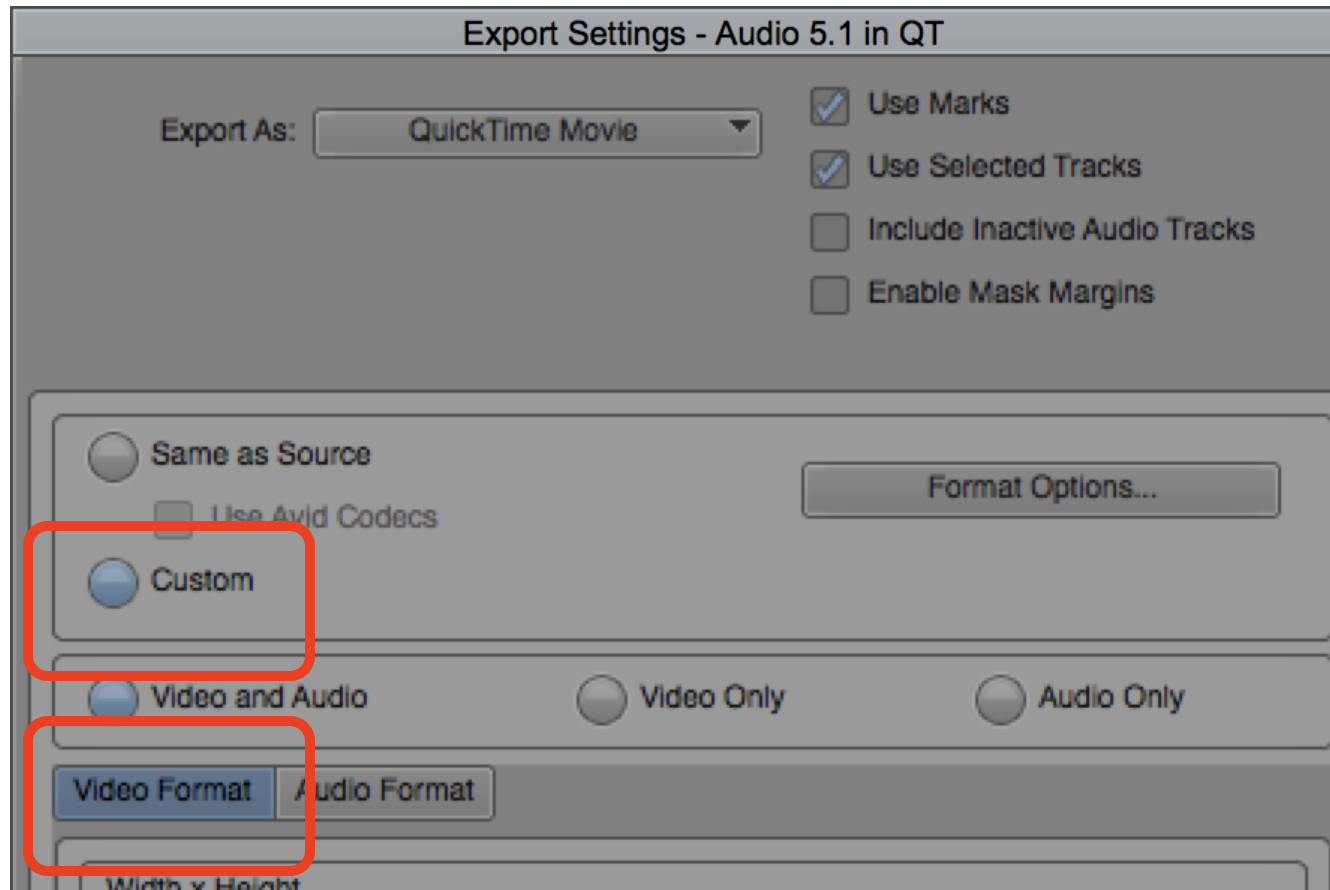
Click on the Audio Format Tab Change the QT Audio Option to 5.1 Click OK |
|
Click on the Video Format Tab now and we'll set up the Video Format Click on Custom Button Make sure Video and Audio button is selected |
|
Choose the Export Type Quicktime Native Dimensions 1998 x 1080 |
|
2048 x 858 Choose Color Levels "Keep at Legal Range" Native Dimensions either 2048 x 858 |
|
Then click on Format Options |
|
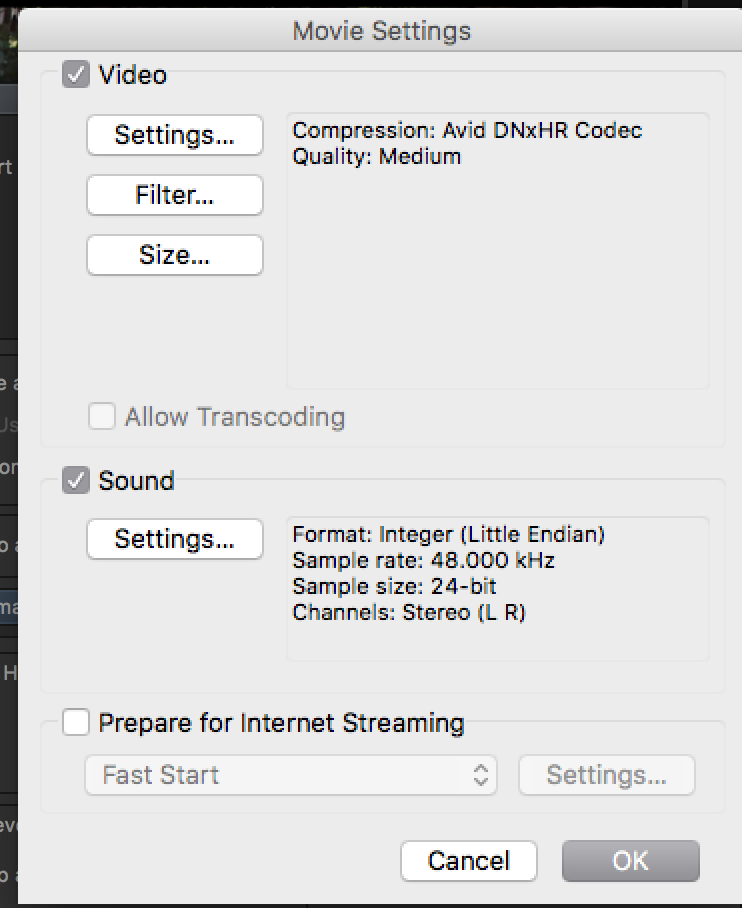
Movie Settings > Click on Video Settings> |
|
Choose Avid DNxHR Codec Frame Rate Current Color Levels 709 None on Alpha Resolutions Generally Choose DNxHR High Quality 10 bit or 8 bit |  |
| Click on Sound Settings |
|
Change to the following Audio Format: Linear PCM Channels 5.1 (L R C LFE Ls Rs) Rate: 48.000 Quality: Best Sample size: 24 Little Endian Click OK |
|
| Movie Settings Video Compression Type: Avid DNxHR Codec Quality: Medium don't worry about that it's high quality Audio Format: Linear PCM Channels 5.1 (L R C LFE Ls Rs) Rate: 48.000 Quality: Best Sample size: 24 Little Endian Click OK |
|
Color Levels - Keep as Legal Range |
|
Check the settings shown here to make sure you have it set right Click Save |
|
Perform the export choose a place to save the file choose Save
|
|


...
Overview
Content Tools