Page History
Turn on the RØDECaster, if it isn't already on |
|
First step is to FORMAT the SD card that is in the RØDECaster. Click on the gear icon in the top left corner of the LCD screen on the RØDECaster. |
|
Click on Hardware icon |
|
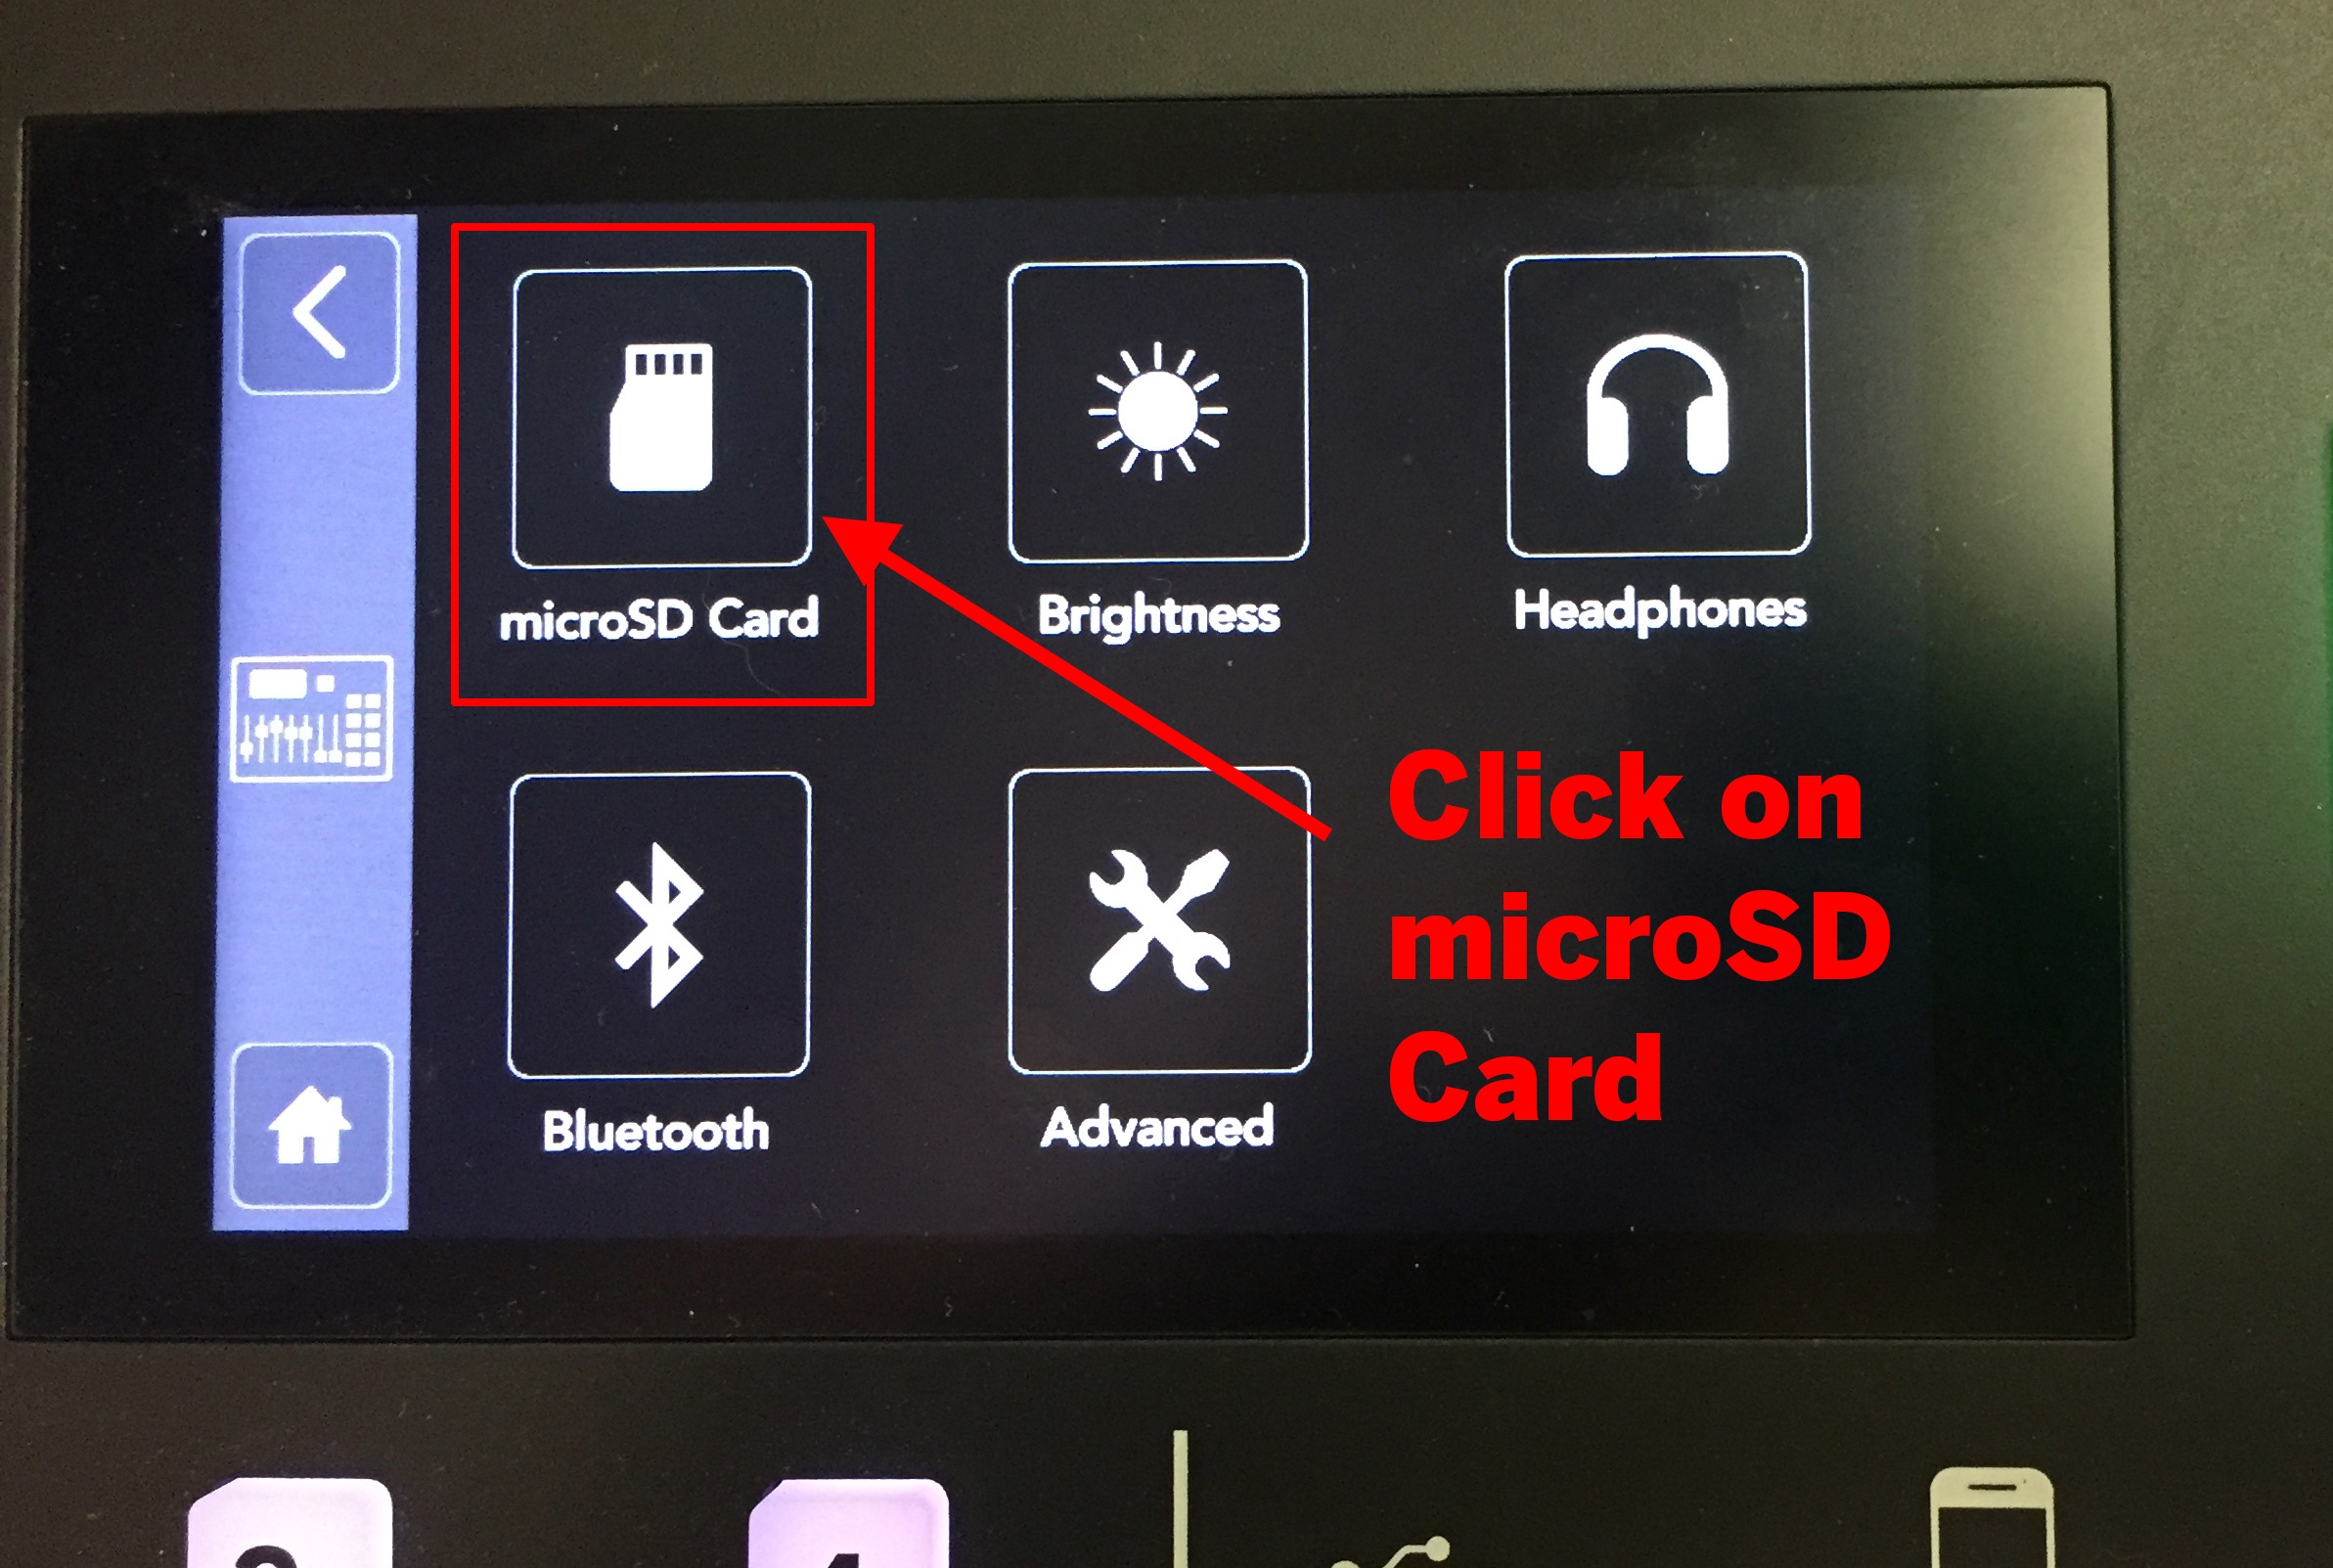
| Click on micro SD Card icon |
|
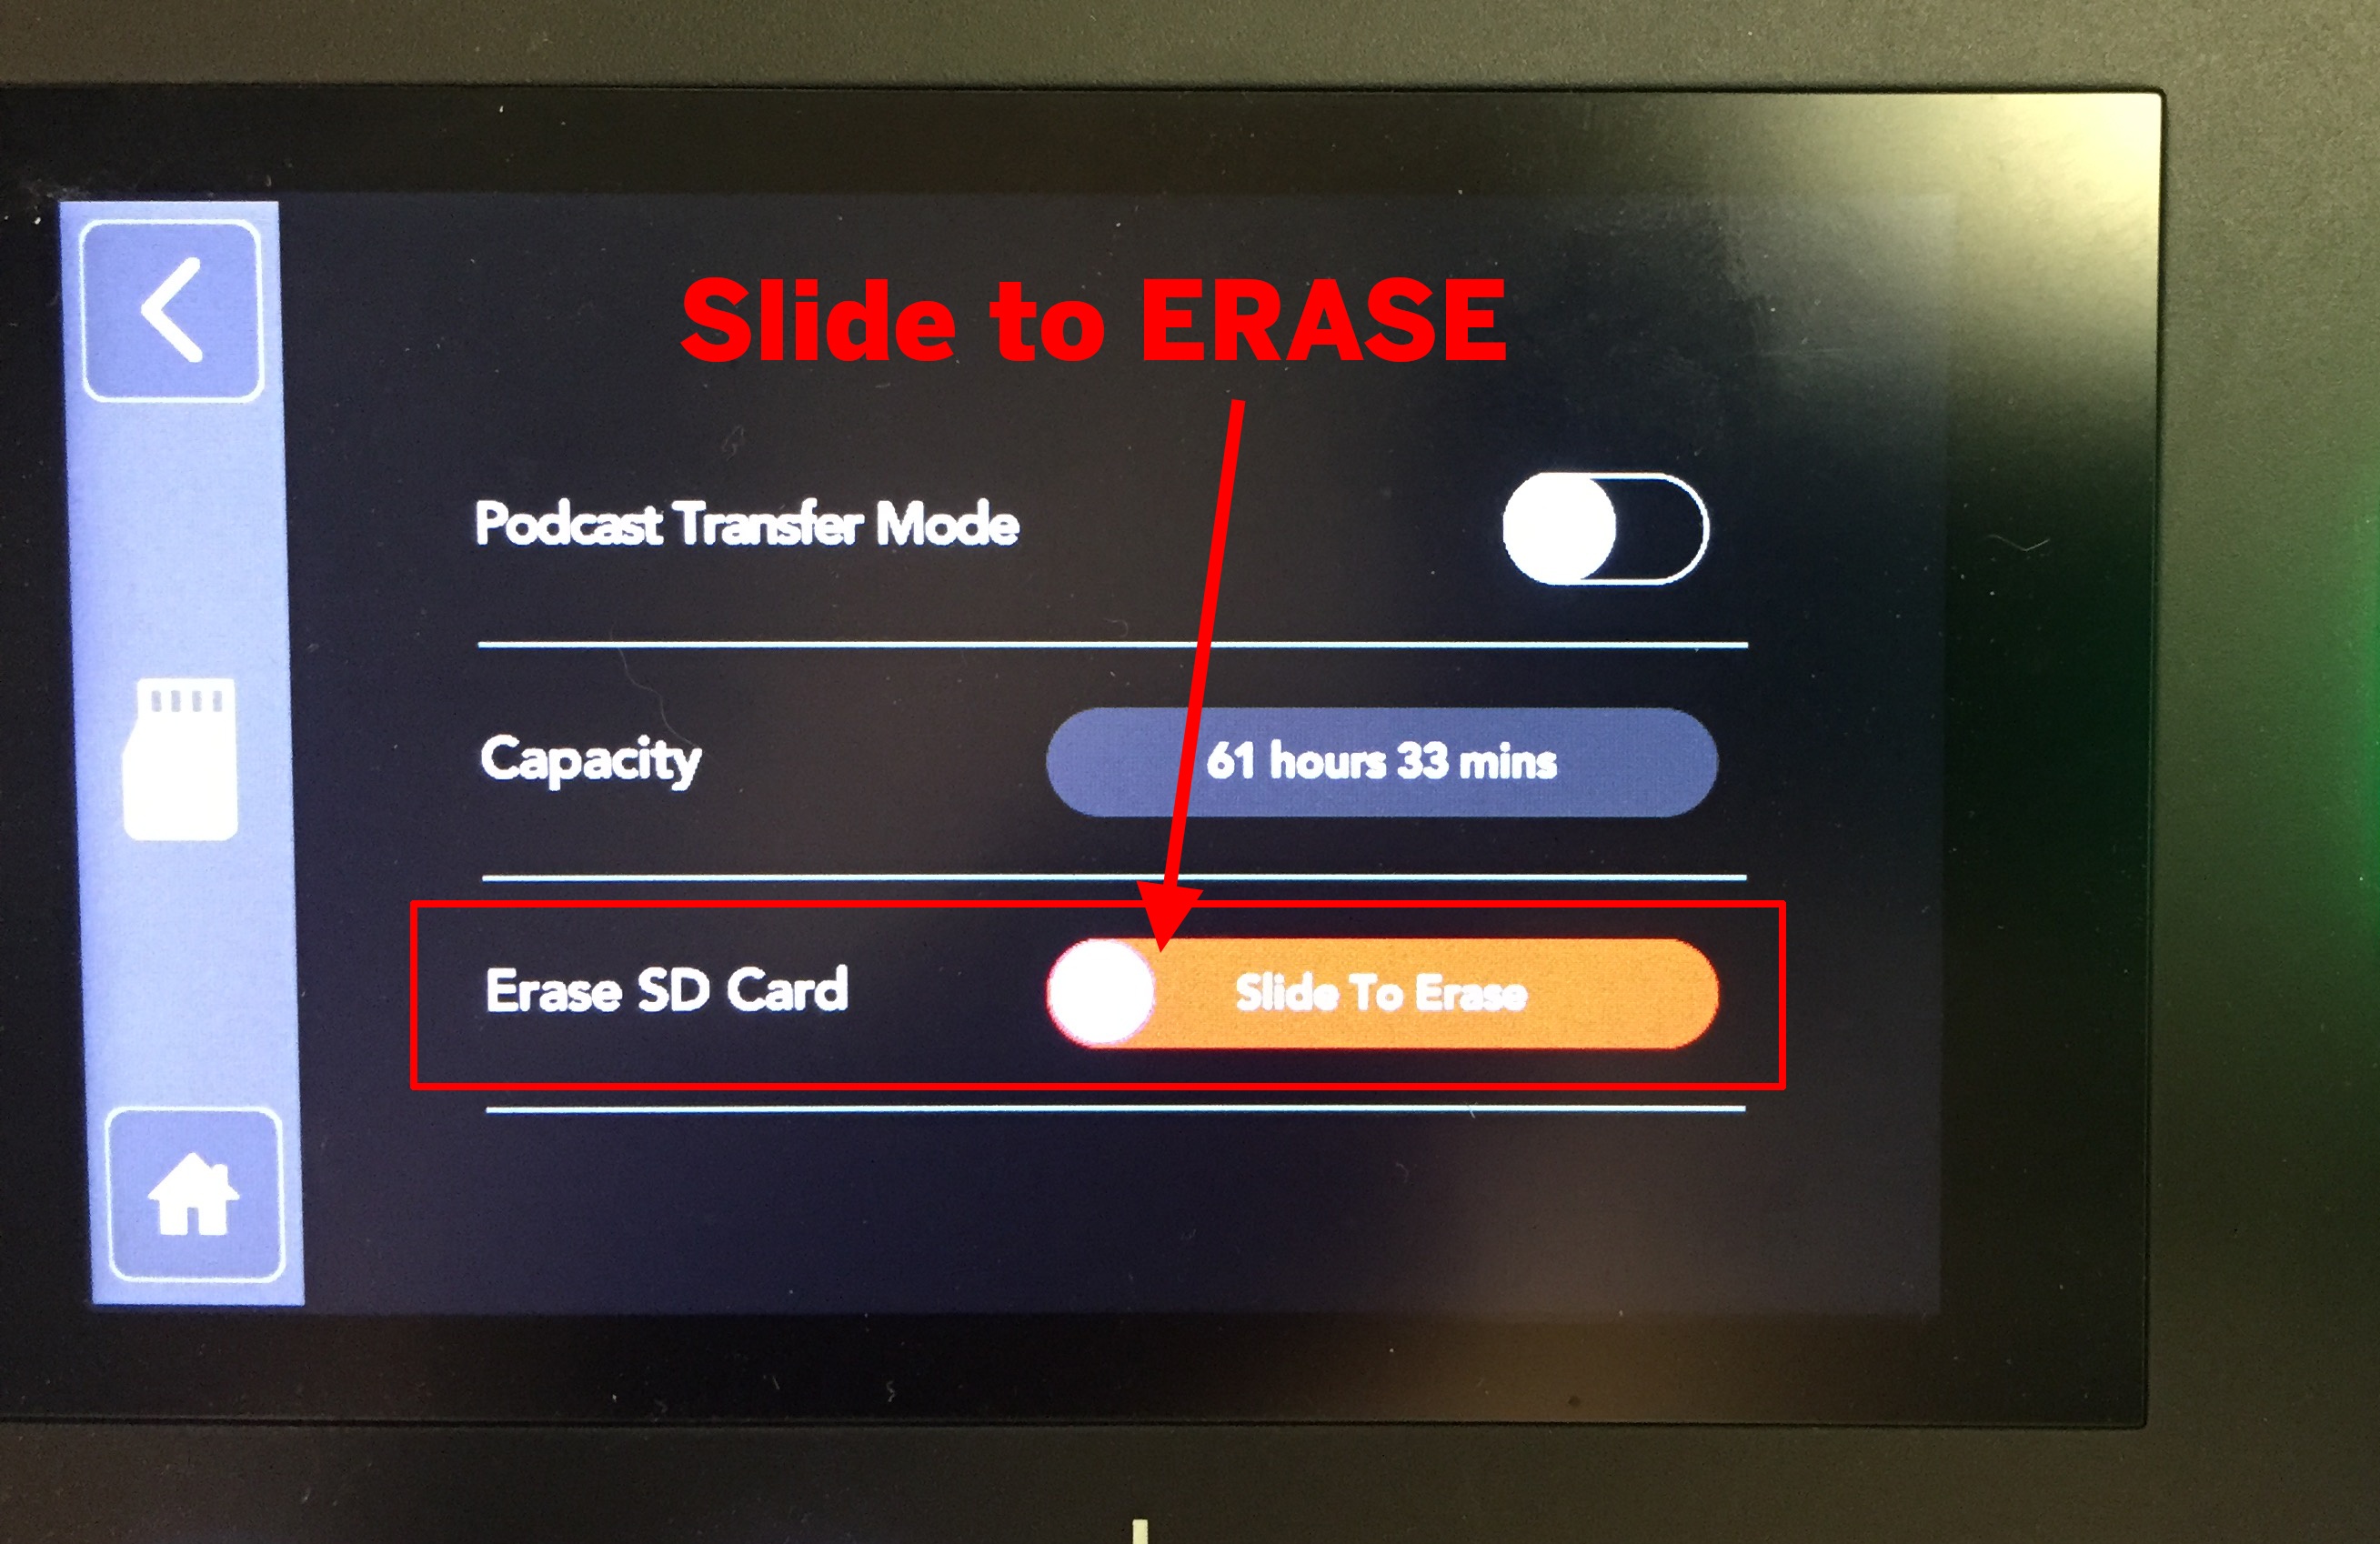
Slide the switch to ERASE the SD Card |
|
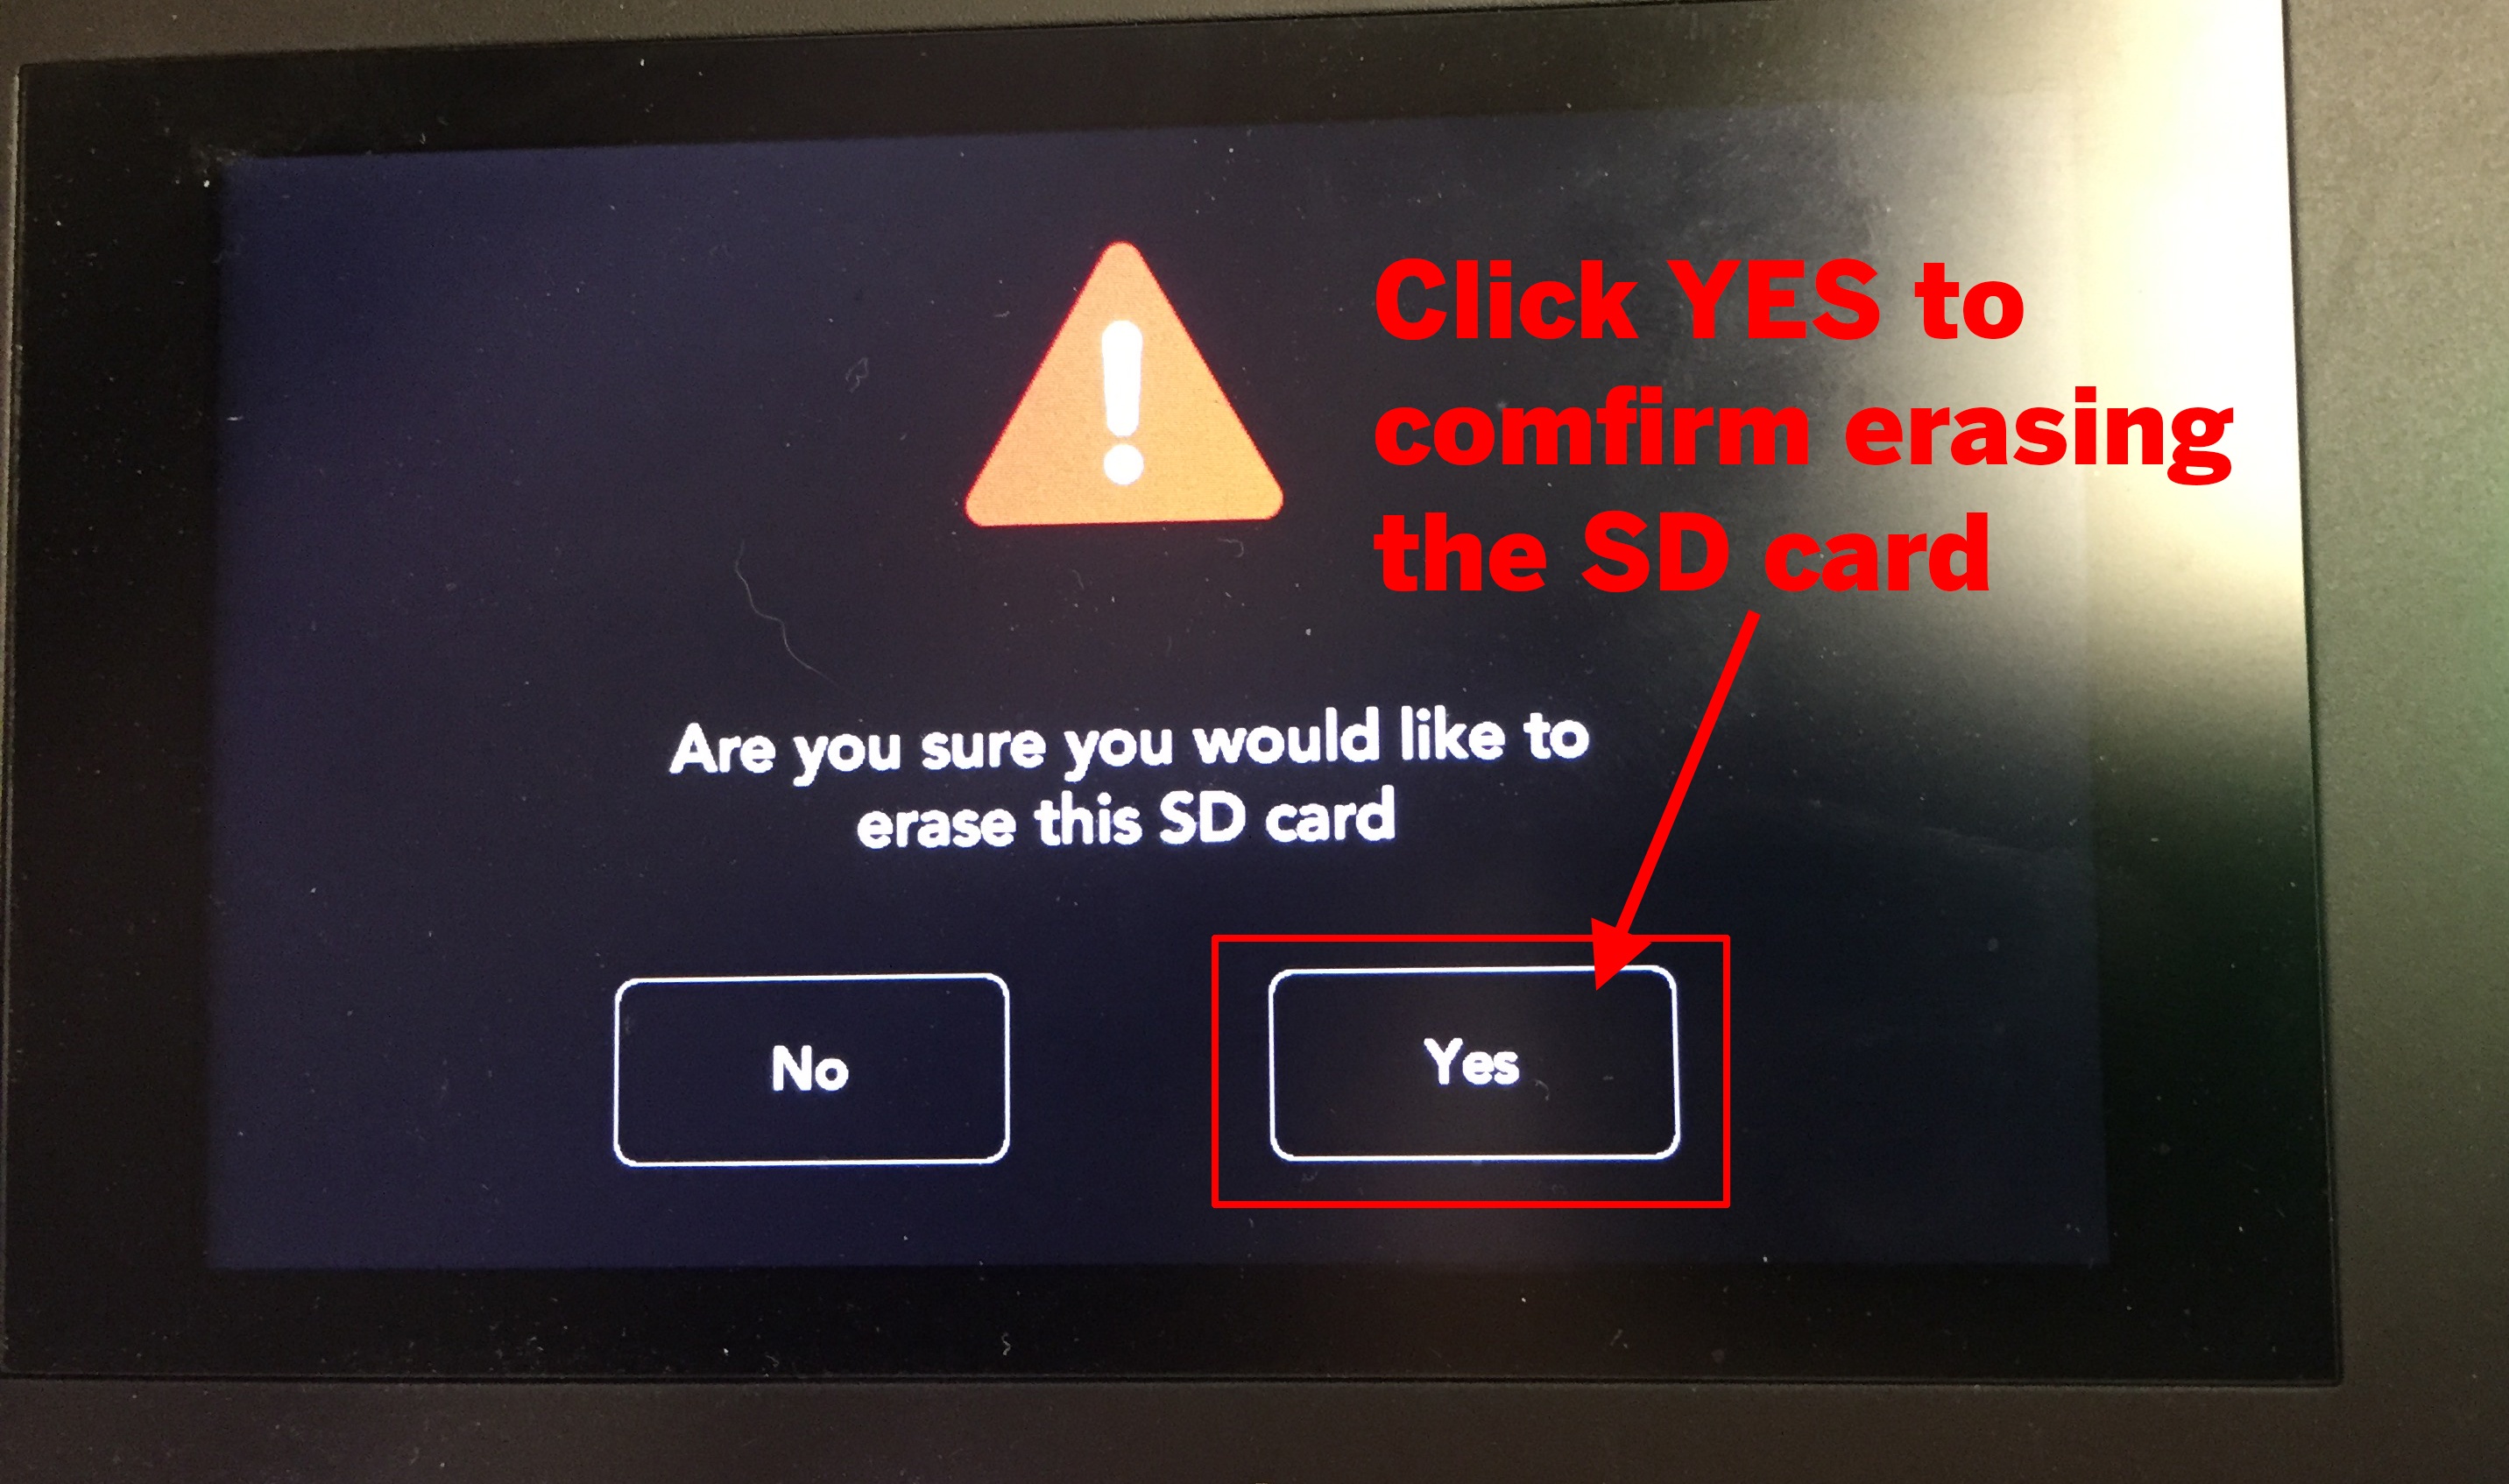
Click YES to confirm erasing the SD Card |
|
Next set the sound input to the computer. |
|
Choose >Sound |
|
| Go to the Input Tab Choose the RØDECaster Pro Multichannel |
|
There are four microphones setup just put on the headphones for which microphones are you using |
|
Make sure the rolloff switch is in the up position |
|
Next we need to make sure the microphones are set correctly Select the Microphone channel selector softkey for the mic you want to use EX: #2 |
|
| Then Choose Microphone |
|
Make sure it is set to RODE Broadcaster |
|
| Click the Back button to get to the previous menu |
|
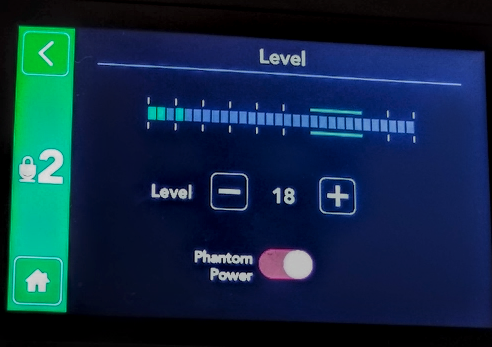
| Click On Level |
|
Make sure that Phantom Power is on and the Level is set to 18 |
|
Turn up the sliders on the board and talk into the mic(s) you want to use |
|
Have each guest and interviewer speak directly into the front of the mic, and not from the sides |
|
Set the levels by watching the meters as you speak. You'll be at a good level to record when the color of the level bars peak at green going into yellow (see picture →) You should never hit red! |
|
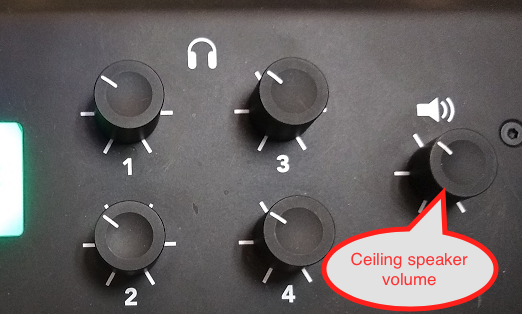
You can adjust headphone volume with these knobs |
|
Make sure the Ceiling Speaker Volume is all the way down before recording!! |
|
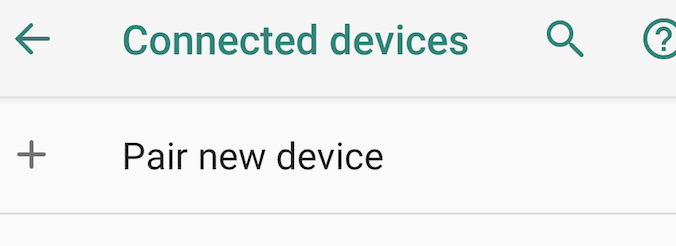
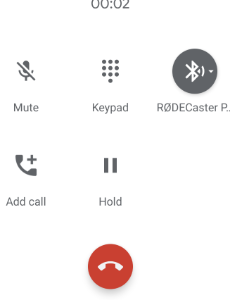
Next you will need to connect the cell phone you will use to host and record the phone conversation with. This is the phone that will be either making or receiving the phone call from the interviewee. It needs to be Bluetooth-enabled. On the Rodecaster press the Bluetooth button shown here |
|
On the display screen you will get a dialog message asking you to pair the phone Choose Yes |
|
This will put the console into Bluetooth Discoverable mode, and the blue Bluetooth button will begin to blink. |
|
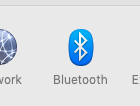
| To pair with the mac in the suite go to System Preferences |
|
| |
| |
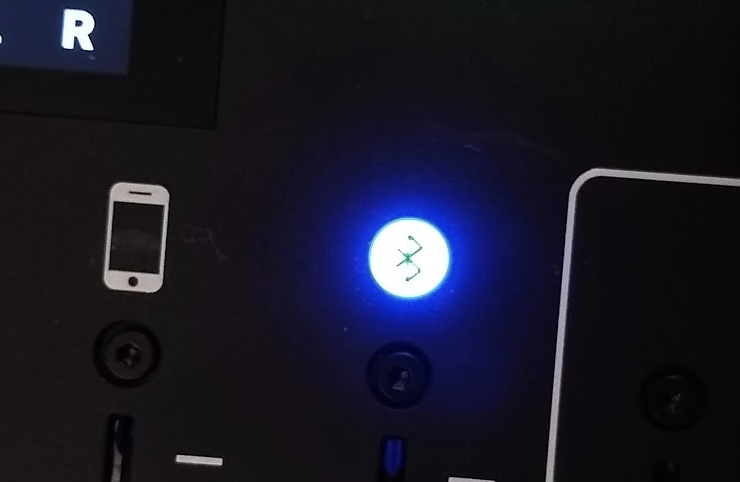
On a Google Android Phone: Press the >Settings icon >Choose Connected devices Bluetooth |
|
| Choose Pair new device |
|
| Choose RODECaster Pro |
|
| Choose Pair |
|
On an Apple iPhone: Press the Settings icon |
|
Choose Bluetooth |
|
Enable Bluetooth, if not already enabled. |
|
| Under Other Devices, you should see RODECaster Pro. Press the name to connect. |
|
| Once connected, the RODECaster Pro will be listed as Connected under My Devices and is ready to be used. |
|
| The Bluetooth light on the RODECaster will also stop blinking, and will become bright blue when the phone is connected. |
|
Turn up the slider for the Bluetooth input so we'll hear audio from the phone Now either call your guest or have them call you on your connected phone |
|
When you are connected, the phone will have the RODECaster Icon and not the usual speaker icon The interviewee that you are calling will be heard in the headphones now and you will see levels on the board on BlueTooth Input
Double check the input levels from the BlueTooth input and adjust, if necessary |
|
On the Mac you can open Zoom, facetime, skype or whatever Our example is Zoom |
|
| |
| |
| |
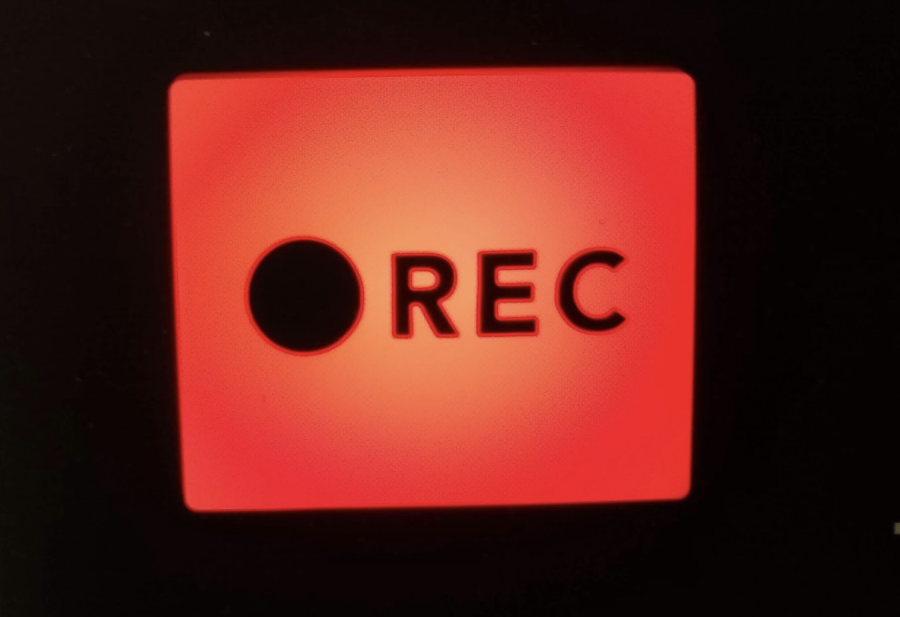
Click on the Green REC button to start recording to the SD card |
|
When recording the button will be RED Conduct the narration, interview or podcast and when finished press REC button to stop recording |
|
To hear what you did press the Settings Icon |
|
Click on Podcasts |
|
You can click on the top left and right arrows to navigate through the podcasts and click on the green play button to play the selection |
|
Turn up the ceiling speaker volume to hear playback in the room Turn up the headphone volume for playback in headphones |
|
Once you have completed recording you can use the Podcast Transfer Mode to transfer the audio files to the computer. Note that when the RØDECaster is in ‘Podcast Transfer Mode’ all other functionality is disabled. |
|
To get to the Podcast Transfer Mode click on the gear icon in the top left corner of the LCD screen on the RØDECaster Pro. | |
Click on HARDWARE icon |
|
Click on microSD Card icon |
|
Flip the Podcast Transfer Mode switch to ON |
|
Confirm switching to Podcast Transfer Mode by clicking YES Note: When the RØDECaster is in ‘Podcast Transfer Mode’ all other functionality is disabled. |
|
The RØDECaster will mount as a volume on the desktop |
|
The recorded .WAV audio files are in the folder called PODCASTS
The most popular file for uploading podcasts directly to the internet is known as the Stereo Mix. This means all of the channels have been mixed together into a 2 channel audio file. If you want to extract this file from your multi-channel recording, you will need to continue to the next steps. |
|
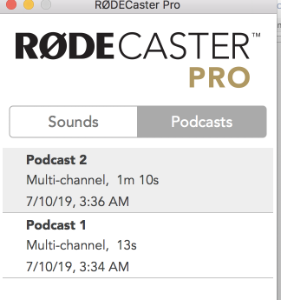
| Open the RØDECaster Pro software in the Applications folder |
|
When it launches it will show you the podcasts in a list |
|
Title it and choose a custom color and then click on Save |
|
Choose a place to save it and click Open |
|
The files save with all the different mics and channels that may or may not have audio on them. |
|
You can check the mix in Quicktime Player or VLC Player on the mac computer. |
|
If using the computer to playback/edit your audio file, you will need turn up the USB Channel input on the RØDECaster to monitor the audio |
|
| When you are finished transferring your files to the computer, click "Done," and then click "Yes." The RØDECaster will disconnect from the computer. |
|
Adding Sound effects |
|


Overview
Content Tools