Page History
Here is the manual for Advanced Workflows
http://Blackmagic Pocket 6K Camera Manual
The hard drive is already plugged into the USB C port on the camera This is the primary recording format that will be used |
|
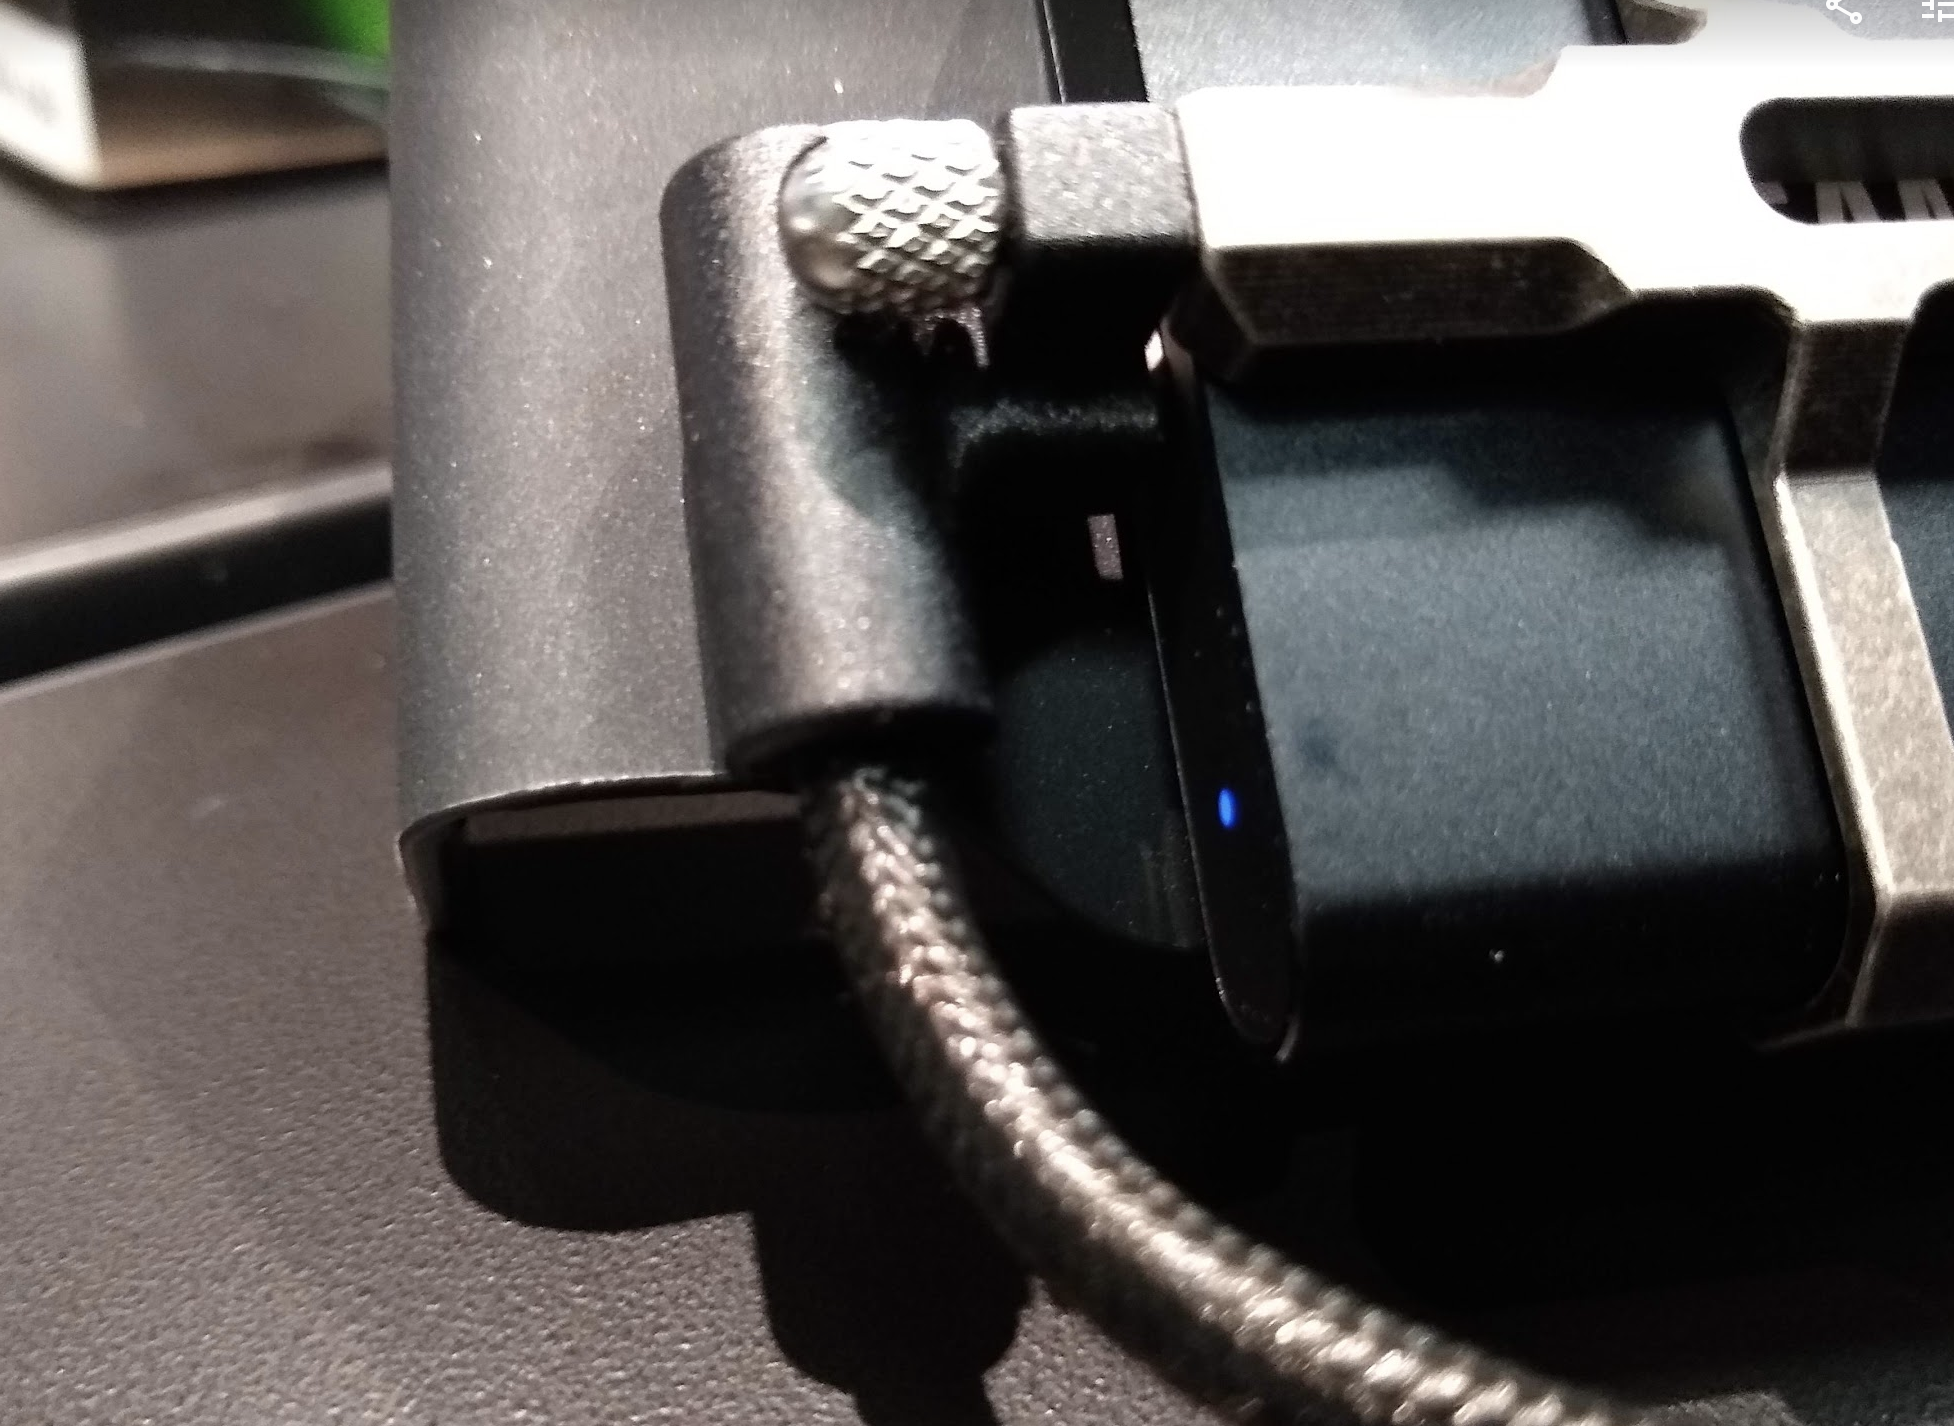
The USB C drive connects in the cradle as shown here NOTE: The connection is tricky to get so make sure that you see the BLUE dot on the hard drive shown here. |
|
Power on the camera with the switch on the top of the camera body |
|
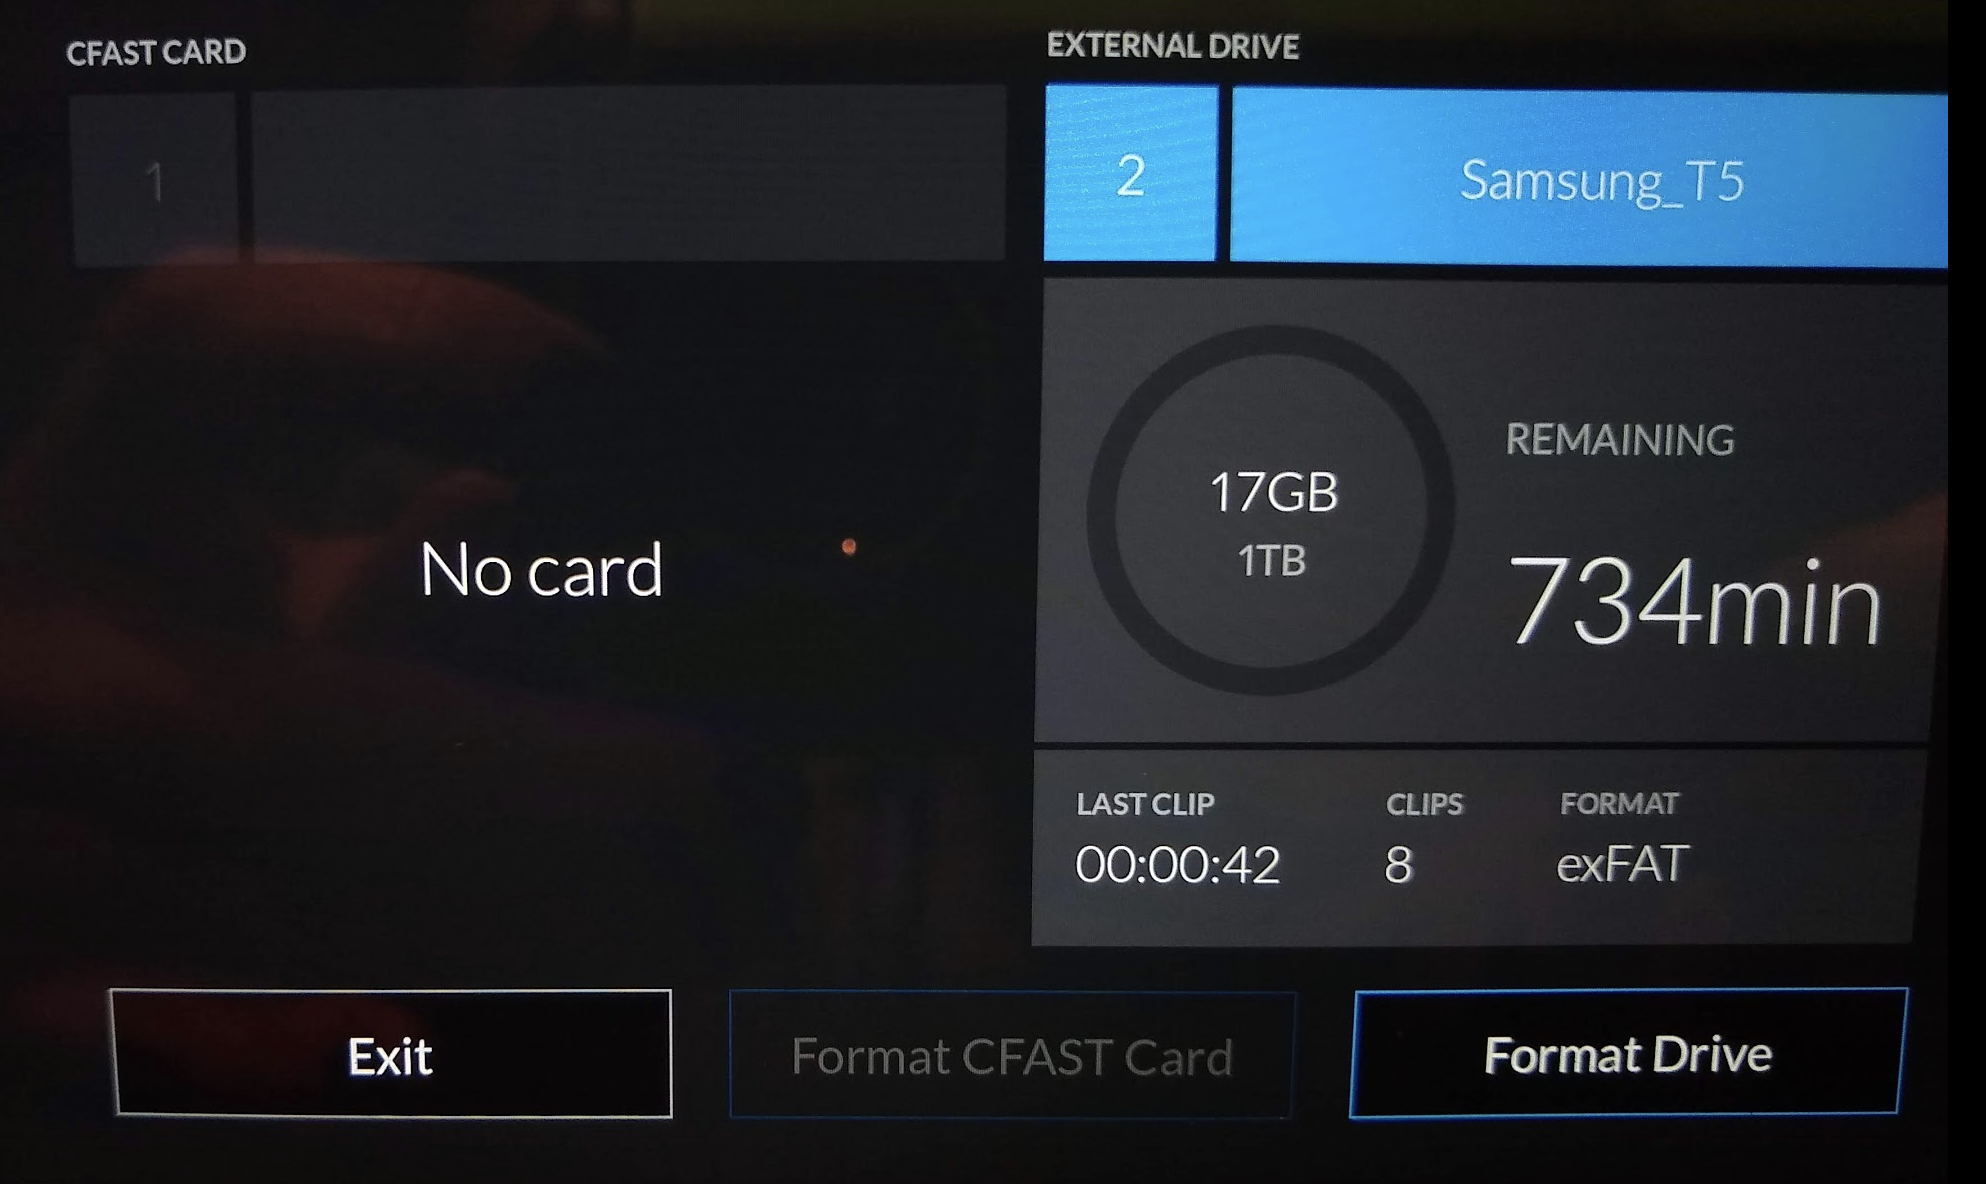
The home menu is where we will find the recording media Here we see the "No Card" because we don't have any cards in the camera because we are using the USB C drive for recording First format the USB C drive Press on the screen on the USB External Drive icon |
|
| Choose Format Drive |
|
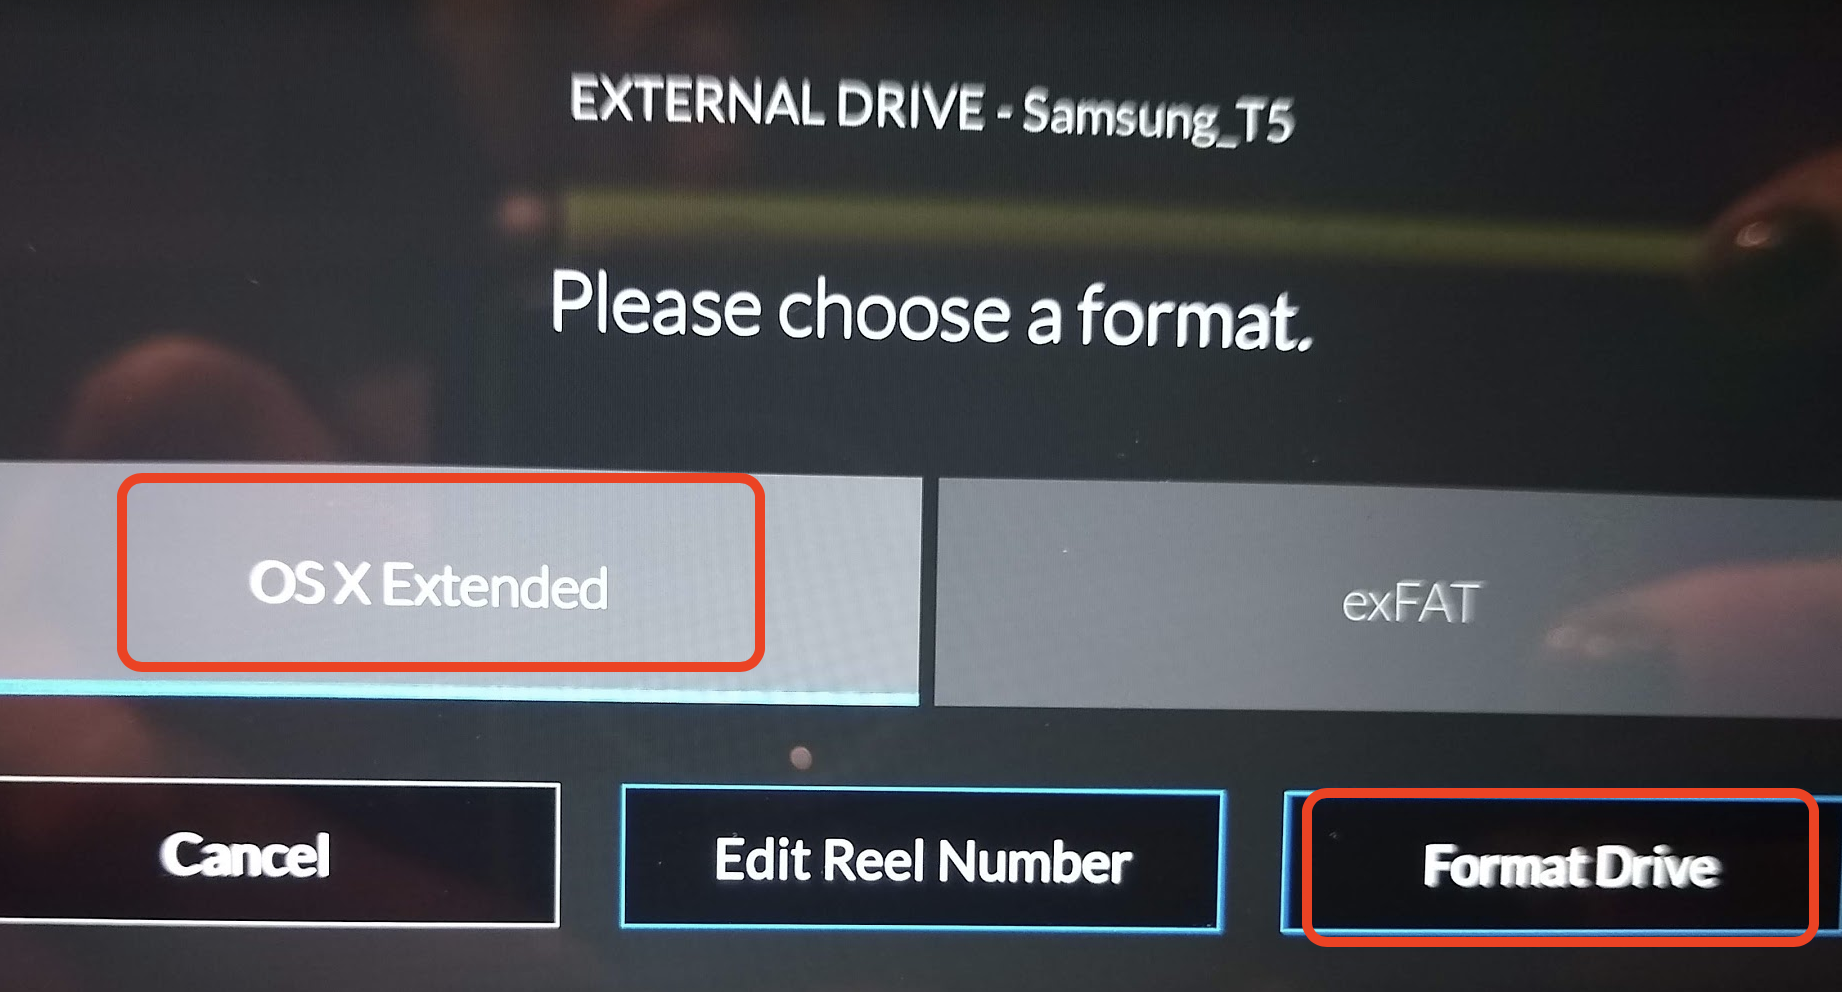
OS X Extended is the recommended choice Format Drive |
|
| Confirm > Format Drive |
|
| Hold down the format button for three seconds to format your media. |
|
| click OK |
|
| Exit To get out of the menu |
|
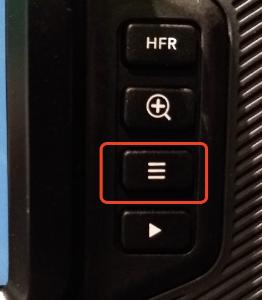
| Press the Menu Icon to get into the menus |
|
Go to the Record tab and set the following Dynamic Range - Film Project Frame Rate - 23.98 fps Preferred Card for Recording - External Drive |
|
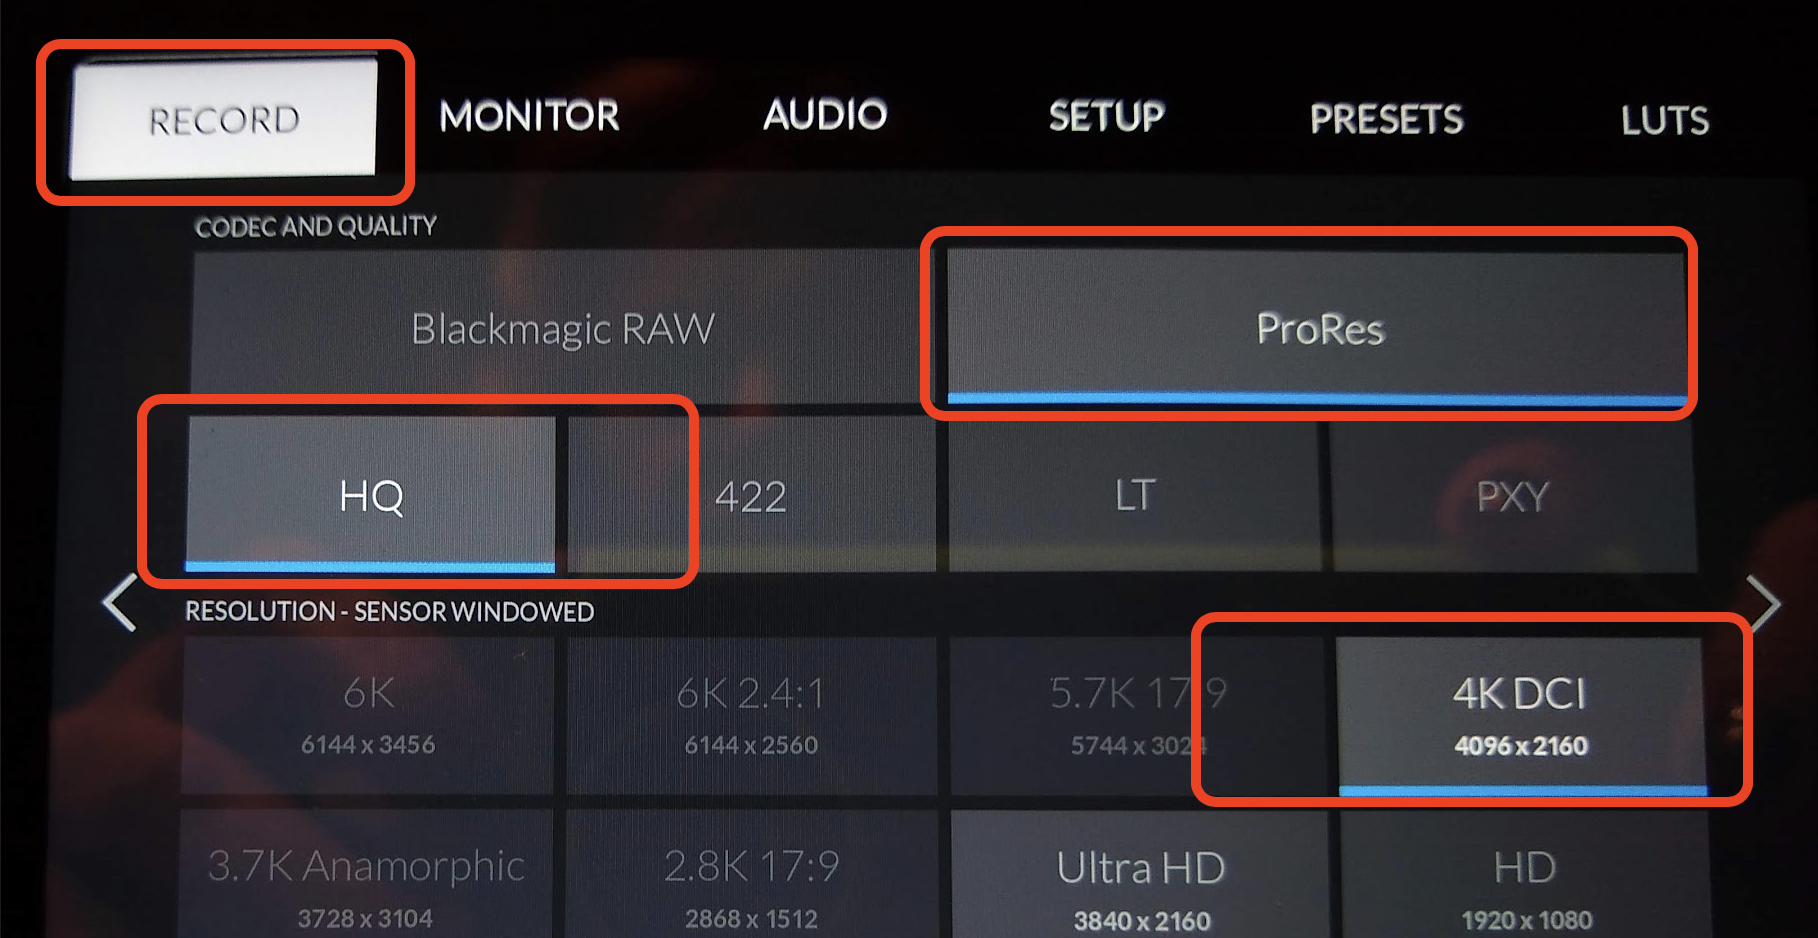
BEST RECOMMENDED BY TECH STAFF Recording Option DON'T USE 6K!! ProRes = 4K resolutions Choose the following settings: Codec And Quality - ProRes Choose HQ Resolution - 4K DCI 4096 x 2160 |
|
Recording time on the drive goes up to 175 minutes on this setting This is the recommended setting by Tech Staff for the CONSISTENT workflow |
|
Frame up the shot and set focus The + button on the camera will zoom the shot in the viewfinder |
|
This will help you focus When you see the RED outlines you are in focus Press the + button again to exit this mode |
|
Start shooting press record as normal When finished you can mount the hard drive on any of our lab seats All have USB 3 inputs See the files here? They are self contained files The Blackmagic RAW files have a .braw extension (BUT IF YOU SHOT RAW YOU ARE GOING TO HAVE TROUBLE)ProRes have .mov Back them up to another hard drive or server |
|
Open AVID and create a AVID 4096 x 2160 Color Space - YCbCr 709 Click OK to create the project |
|
Go to >Tools>Source Browser |
|
Navigate to the folder you backed up your card data and click on Link |
|
The files should open in the selected Bin or an existing Bin depending on what the Target Bin was set to Format should be 4096x2180/23.976 frame rate Video should be XAVC Intra 4K |
|
Select the clips and choose > Clip>Consolidate/Transcode |
|
Then select where you want to save the consolidated files and choose the “Target Video Resolution” We recommend DNxHR LB MXF Then Choose Transcode |
|
Edit with the master clip not the linked file |  |


Overview
Content Tools