NOTE: This is work in progress, so it’s a little rough around the edges and has some areas that need to be filled in. But apparently people have followed it with success.
Originally written by Patrick Parker in Aug. 2020, with contributions from Mahija Ginjuaplli, Dusten Hubbard, Masa Kuwajima, and Edwin Vargas-Garzon
| Table of Contents |
|---|
Current Limitations
- Make sure your images are in 1:1 (square) format and sequentially numbered.
- Scrolling at Scale 1 (i.e., full resolution) is very slow for 24k x 24k tSEM images.
Point-match alignment does not work.
Background
Alignment is essential for serial section EM.
While Reconstruct can determine synapse area and trace volume regardless of alignment, good alignment is important for many reasons:
Accurate reconstruction
Autosegmentation
Blender Mesh Generation
Accurate Z-lengths
Identifying SER, glycogen, polyribosomes
Finding spine origins
Tracing oblique synapses
Surface area
User-friendliness
Pretty 3Ds
Reconstruct has a method for manual alignment (outlined in Ch 10 of the Reconstruct User Manual), but it is time-consuming and does not produce the best results. We also have a protocol for using TrakEM2.
AlignEM-SWiFT is an implementation of SWiFT-IR (Signal Whitening Fourier Transform Image Registration), developed by Art Wetzel, Tom Bartol, and Bob Kuczewski.
SWiFT-IR has been used to align serial EM images for:
- Hildebrand D et al. (2017) Whole-brain serial-section electron microscopy in larval zebrafish. Nature 545:345-349. DOI: 10.1038/nature22356.
- Morgan J et al. (2016) The Fuzzy Logic of Network Connectivity in Mouse Visual Thalamus. Cell 165:192-206. DOI: 10.1016/j.cell.2016.02.033.
Here is more information on SWiFT-IR:
Arthur W. Wetzel, Jennifer Bakal, Markus Dittrich, David G. C. Hildebrand, Josh L. Morgan, Jeff W. Lichtman (2016) Registering large volume serial-section electron microscopy image sets for neural circuit reconstruction using FFT signal whitening. https://arxiv.org/abs/1612.04787
1. Upload your files from your local drive (Windows PC)
- Install and start WinSCP.
- Set up a New Site: File protocol = SCP; Host name = stampede2.tacc.utexas.edu; Port number = 22, User name = your TACC username. Click "Save" if you have not done so already. Click "Login".

- At the prompt, enter your TACC password. In the next prompt, enter 6-digit number on your TACC Token app. This will open your work folder, named with a 5-digit number, e.g.: /work/#####/yourname/stampede2.

- There is a storage size limit to disk quota for your work folder on stampede2 (1 TB?). Make sure to clear unused files before starting a new alignment because you can end up with ~700 GB of data at the end of a single alignment project. If you have a large image data set (~300 images or more), you will fill up your disk quota before saving cropped images. To avoid this, you could use the scratch space on stampede2 (/scratch/#####/yourname). The scratch space is intended to be temporary storage, so make sure to move your files out when you are done.
- Move your files to TACC. In WinSCP, navigate to your files in the left-hand window and drag files over to your work folder.
- (Harris Lab specific) If you are moving image files from khbackup, see here.
2. Open AlignEM-SWiFT in 3DEM.org
- In a browser, log into 3DEM.org using your TACC accout credentials.


- Click "Workbench" > "Applications" > "Visualization" tab > "AlignEM_Swift_Dev".


- Now you should see a window titled "Run AlignEM_Swift_Dev". Leave "Working Directory" blank. Under "Parameters, keep the default value and scroll down to bottom of the page to click "Run". This starts AlignEM_Swift. Be patient while it opens. (Jobs Status tab pops open on the right side. Click Refresh button in the Jobs Status tab to check the current status.)


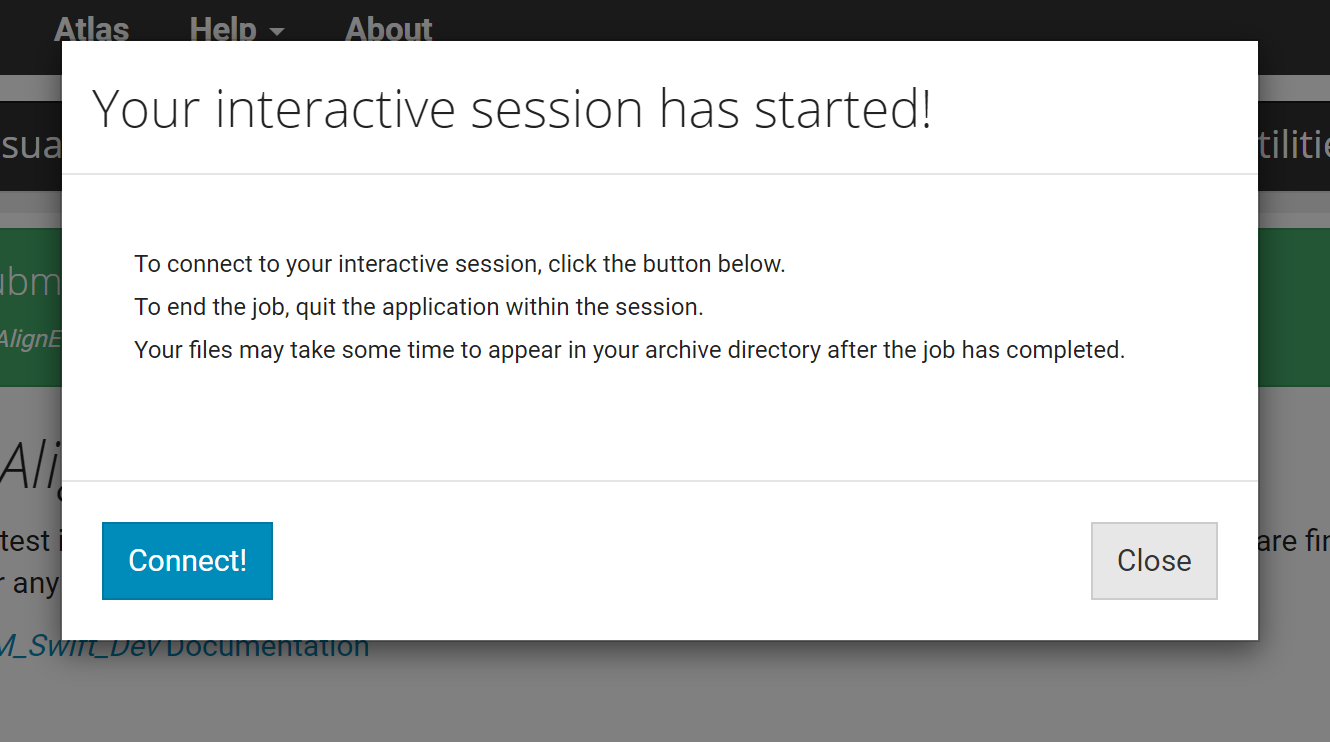
- When a node on stampede2 is assigned to your job, “Your interactive session has started!” will pop up. click "Connect" and log in again. This will launch an interactive session. Be patient for AlignEM_Swift window to open.

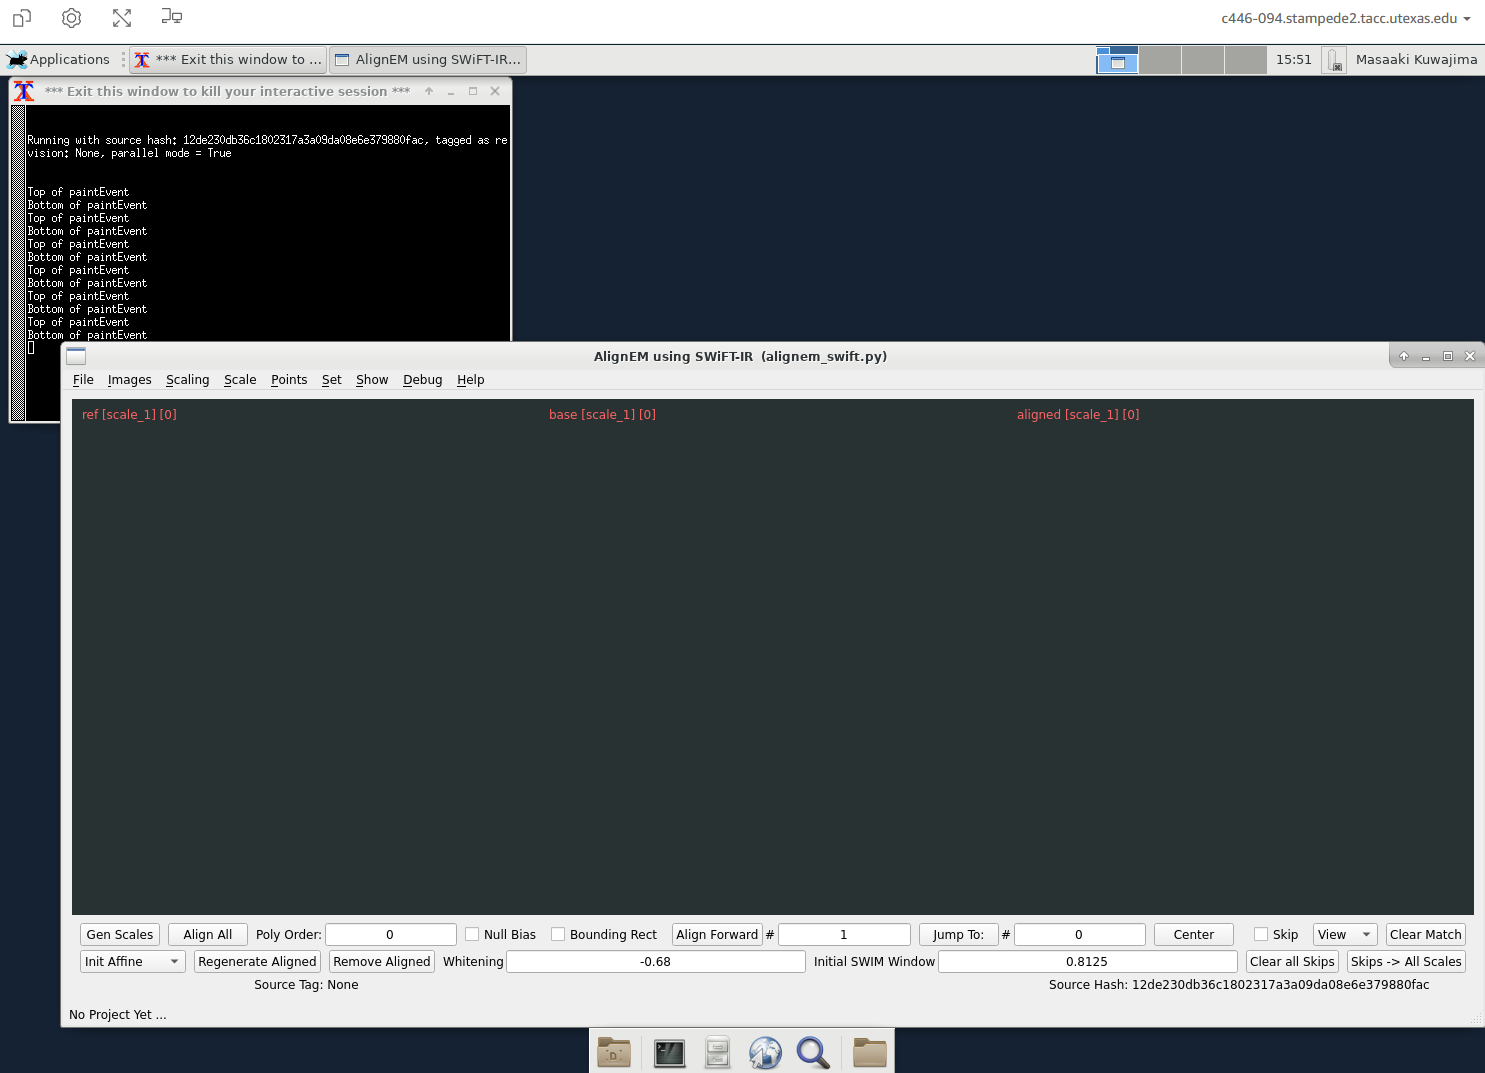
- Once AlignEM_Swift starts, your browser window should look like this:
3. Find Your Files in TACC
- Open File Manager. In the TACC window, open Applications (top left) > File Manager. Or, in the bottom tool bar, click on the file cabinet icon.

- This will open your home folder (with the house icon
 ). The filepath bar will list your 5-digit home folder number, e.g.: /home1/#####/yourname/. Make note of your 5-digit folder number because you will need it in the next step. Your 5-digit code is the same for both the home and work folder.
- Home vs. Work folder. Your home folder is basically your desktop. That is what opens automatically (with the house icon). You will need to open the File System to navigate to your work folder, where you have placed your files from WinSCP.
- Open your work folder. You will need to navigate to your files in SWIFT below -- this step will just allow you to see your work folder. From your work folder, you can reorganize your files and folders and rename anything you might need to. If no organization is necessary, you can skip to the SWIFT steps.
- To open your work folder: In the left sidebar under DEVICES, click on File System (this will take you to the root directory) > Scroll down until you see the “work” folder > double-click on work > scroll down to find your 5-digit folder, double-click on it > double-click on the folder with yourname > click on stampede2. This navigates to the folder where you dropped your files via WinSCP: /work/#####/yourname/stampede2. Another method of reaching this folder is to copy /work/#####/yourname/stampede2 into the filepath bar, if you have saved that filepath from the WinSCP step.
- Note on bookmarks: If you want to save a bookmark, drag and drop that folder into the left hand sidebar.
4. Opening Images
- Open Images. “AlignEM using SWIFT-IR” window is open:
- Images > Import Base Images > Navigate to your work folder on Stampede2 (Computer > double-click root directory “/” > scroll down to “work” > find your 5-digit number > stampede2) > Select folder with series images you want to align.
- When selecting images, ensure images are in increasing numerical order from top to bottom (click on Name to re-order if necessary). (They can be named whatever you want as long as they sort in sequential order.)
- Select all the images (click on first image & shift-click on the last image or hit ctrl-A) > Open.
- It might be better not to include the calibration grid image (usually numbered 000), because AlignEM-SWiFT can sometimes apply weird transformation to it even when it is skipped. You can manually crop the cal grid image (it does not have to be the same size as the rest of the series).
- Images > Import Base Images > Navigate to your work folder on Stampede2 (Computer > double-click root directory “/” > scroll down to “work” > find your 5-digit number > stampede2) > Select folder with series images you want to align.
- Images load: Because images are full resolution (too zoomed in) click “Center” button on bottom right (to center the image and view the entire section).
- The first image will appear in the center window labeled "base". To the left is the "reference" window that would display the image against which the current image in the "base" window would be aligned. The rightmost window is labeled "aligned" and this is where the base image after alignment would be displayed.
- You can also use Shift-scroll to change the level of zoom. Holding the cursor over the area of interest will scroll into that area.
- Scrolling through the images at the full resolution will be slow at this point, so wait until a coarse scale is generated (see below).
5. Saving Your Project File/Folder
- File > Save Project As > Navigate back to the folder one level up from the images (i.e., the images folder and the project folder are in the same directory) > (File name will also be name of the file directory.) Don’t use any spaces in the name. It will automatically give it a .json file name. > Save. Here’s an example of your folder containing a project folder, images, and project .json file:

6. Define and Generate Scales
- AlignEM-SWiFT works the best when a series of serial EM images is aligned in increments from down-sampled to full resolution. This step will generate the down-sampled (coarse) images.
- Check the green numbers in the top right above the images – these show the pixel resolution for the base image.

- The coarsest image should be ~1,000 x 1,000 pixels. So, if you are using images that are 24,576 x 24,576 at the full resolution, the scale factor would be 24.
- Ideally, you want your coarsest scale to have isotropic voxels, meaning the same resolution in X, Y, and Z. Since our typical 24k x 24k tSEM images are 2 nm/pixel (X-Y) and ~50 nm thickness (Z), these images down sampled in X-Y by factor of 24 would have roughly isotropic voxels at ~50 nm in X, Y, and Z.
- It would help align the series if there's an intermediate scale between 24 (coarsest) and 1 (full resolution). For starting with 24k x 24k images, use the scales 24, 6, and 1.
- Enter scale factors: Scaling > Define Scales > type in “1 6 24”. (Note: There has to be a space between the numbers.)
- Generate those image scales: click "Gen Scales" in the bottom left. It usually takes ~3 min for a series of 250 sections.
- When completed, the log window should show something like this:
- Go to Scale menu > select the coarsest scale. Center again.
- Save the project. File > Save Project.


7. Skipping Images with Flaws
- Scroll (mouse wheel or up/down keys) through the image series to check for major flaws (especially folds).
- With an image with flaws in the “base” window, click Skip button. A red X is across the image.
- When all skipped images are identified, check “Skip for all scales”.
- Show > Uncheck Skipped Images to show the image again.
8. Initial Alignment at the Coarsest Scale
- Make sure that under Set > Use C Version is checked.
- Check "Bounding Rect". Bounding Rect places a grey rectangle around images so that none of them are cropped after alignment. This will ensure that we don’t lose any of the original image.
- Check "Null Bias". This will help to center the images in the Bounding Rect. The goal is to ensure that the image doesn’t start drifting or spiraling out.
- Choose "Init Affine" in the bottom left. It should be selected by default, but double-check.
- Click "Align All". You will see a prompt asking: “Do you want to delete aligned images from zero?” Click "Yes" to proceed.
- The black log window says “Waiting for Alignment Tasks to Complete”. This usually takes ~30 seconds.
- You should see this in the log window when done:
- You should see the images aligned with a grey border. Click "Center" to center the image.
- Save the project. File > Save Project.
- Scroll through the images to check if the images are successfully aligned. Problems to look for include:
- You see blank grey in the aligned window (that’s where the alignment failed).
- You see big jumps in alignment.
These can happen when the image field shifts a lot from image to image. A large piece of capillary or a large debris of similar shape and location can also throw off alignment.
A large piece of capillary Debris of similar shape threw off alignment between these images. 


- If you see errors in alignment, do the following:
- Start a new project.
- Set the SWIM window to 0.75.
- Load the base images.
- Save as a new project.
- Generate scales.
- Uncheck "Null Bias" and "Bounding Rect", then start "Init Align" at Scale 24.
- If this works, then check "Null Bias" and "Bounding Rect", and then click "Regenerate Alignment". (This allows you to change Bounding Rect, Null Bias, and Poly Order options without re-running the entire alignment.)
- Save project, and move onto the next Scale for Refine Align.
- Save the project. File > Save Project.


9. Refine Alignment at Finer Scales
- Go to Scale menu > select the next (finer) scale. Center again.
- Choose "Refine Affine" in the dropdown menu in bottom left.
- Everything else will stay the same as the Init Affine:
- Make sure that under Set > Use C Version is checked.
- Check Bounding Rect.
- Check Null Bias.
- Run Refine Alignment by clicking "Align All". You will see a prompt asking: “Do you want to delete aligned images from zero?” Click "Yes" to proceed. Alignment at Scale 6 will take about 1 min for a 250-section series.
- Continue the above steps for Refine Align for all subsequent fine scales until Scale 1 is completed. Scale 1 alignment can take ~15 min for a 250-section series.
- Save the project. File > Save Project.

10. Crop the Aligned Images
- Do not touch the skipped images.
- Choose "crop" from the drop-down menu in lower left.

Method 1
- Click and drag a crop area in the "aligned" window.
Method 2
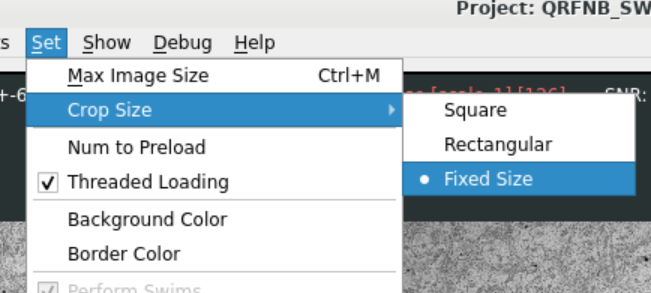
- Set > Crop Size > Fixed Size
- Enter pixel dimensions of the crop area. (A 17,000 x 17,000 image is about 290 MB.)
- In the align window, click on center of the crop area.
For both Methods after crop area is defined
- Use the "jump to" function to check every 20 images or so to make sure the crop area contains image data. (Currently it takes a long time to scroll through the aligned images at Scale 1.)
If you need to adjust the size/location of the crop area:
Method 1 -- click and drag a new crop area.
Method 2 -- click on the aligned window to re-center the crop area. You can adjust the size by entering new pixel dimensions under Set > Crop Size > Fixed Size.
File > Save Cropped As...
- Choose the directory for storing the cropped image.

- Monitor the progress in the log window, or open the save location in File Manager to see the cropped images being saved.
- Sometimes, this process fails – AlignEM-SWiFT will retry for 10 times before stopping, and you might find that only some of the images are saved. If this happens, retry Save Cropped As until you confirm all images are saved.
- Worse yet, you might encounter a memory issue. If this happens, save the project, close the current interactive session, re-launch AlignEM-SWiFT, open the saved project, and try again. If that does not work, you may need to start from the beginning.


11. Finishing & Saving
- Save the project. File > Save Project.
- Close AlignEM-SWiFT. File > Exit. This will close the interactive session.

12. Downloading Aligned Images From TACC
Need to add these steps here