Page History
The Mobile TV Studio was built to easily record and stream an event that takes place outside, or in a room without infrastructure already installed.
Inputs and Outputs
Three (3) HDMI camera inputs Four (4) SDI camera inputs Six (6) XLR microphone inputs Hyperdeck for playback Hyperdeck for record Web Presenter for streaming  | Cam 1 = Source 1 on switcher (HDMI) Cam 2 = Source 2 on switcher (HDMI) Cam 3 = Source 3 on switcher (HDMI) Hyperdeck Playback = Source 4 on switcher Cam 5 = Source 5 on switcher (SDI) Cam 6 = Source 6 on switcher (SDI) Cam 7 = Source 7 on switcher (SDI) Cam 8 = Source 8 on switcher (SDI)
|

ATEM Software on a laptop
To use the ATEM software, plug in an ethernet cable to the port on the back of the unit labeled - ATEM You MUST set the IP address on the computer to static and use the IP address of 192.168.10.5 |
|
Now you can configure and run a show (if desired) with the software. You can start and stop Media Playback, switch out graphics for the downstream keys, switch cameras, etc. |
|


Web Streaming with Web Presenter
In order to stream live, plug in an ethernet cable into the port labeled WEB PRESENTER. This needs to be a port that has open access to the internet. NOTE: If you plug in a USB-C cable to the front port on the Web Presenter you can use the webcam feature of the Web Presenter. This would present the PROGRAM OUT to the computer as a webcam. You can then stream to your platform of choice, ie. FaceBook Live, YouTube, etc. To do this you would have to log in to the account (Facebook, YouTube, etc) that you want to use. Then that platform will see the Web Presenter as a webcam. |
|
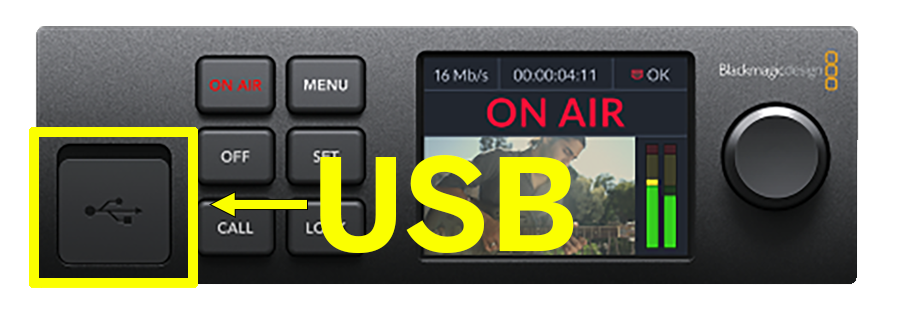
Hook up a USB cable from your laptop to the front USB port on the Web Presenter. This is USB-C on the Web Presenter. |
|
Download Web Presenter Software This will allow you to configure the Web Presenter. Once installed, run the Blackmagic Web Presenter Set up. It will open, search for, and locate the web presenter. Once it is found, click the round icon show here to change settings. |
|
Under Live Stream: You can set where the stream will go. Platform = (Usually) YouTube Server = Primary Key = copy the stream key from the platform site and paste it where it says "Key". Once the stream key has been set and you are ready to stream you can click the ON AIR button. Or you can press the physical ON AIR button on the front of the Web Presenter. To STOP a stream, press the OFF button. |
|
Using the Web Presenter as a Webcam: Plug in a USB-C cable from the front USB port to a computer and any streaming platform will recognize the PROGRAM OUT as a webcam. Just log into the streaming platform of choice (FaceBook Live, YouTube, Twitchy, etc) and use the Web Presenter as a webcam. |
|


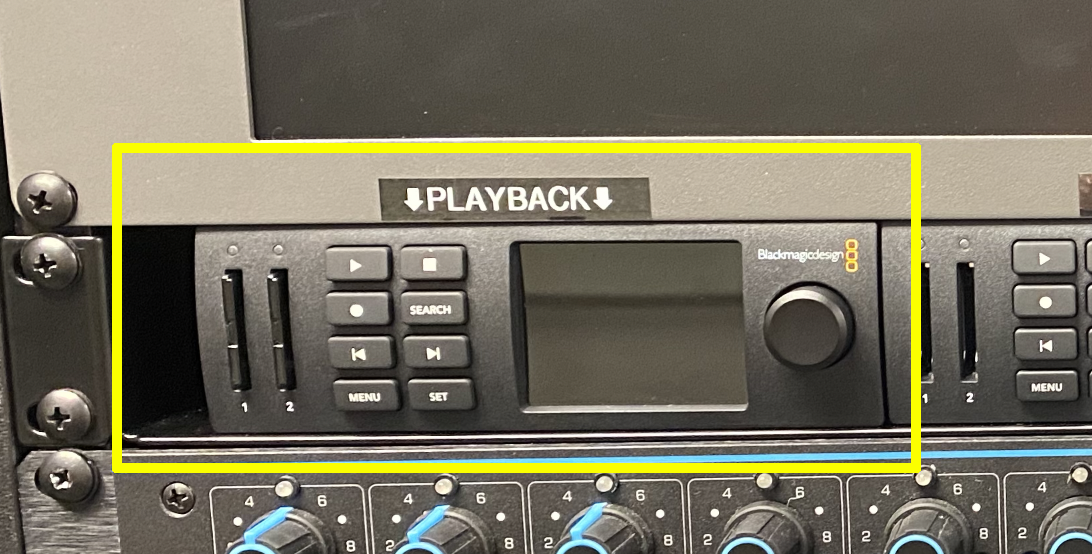
Media Playback with Hyperdeck
Use the Hyperdeck for PLAYBACK of media. Media to be played back should be copied to an SD card and inserted into the Playback deck. The media MUST be encoded as 1080i (upper field first) ProRes 29.97 . If media is not encoded as this it may not playback correctly or at all. Here is an Adobe Media Encoder preset - Hyperdeck Pro-Res422 1080i29.97 Also, make sure that the RECORD MODE is set to ProRes. The media must be encoded as ProRes and the Hyperdeck must be set up to record in ProRes. If this doesn't match the playback will fail. |
|
The PLAYBACK Hyperdeck is routed to input 4 on the switcher. |
|

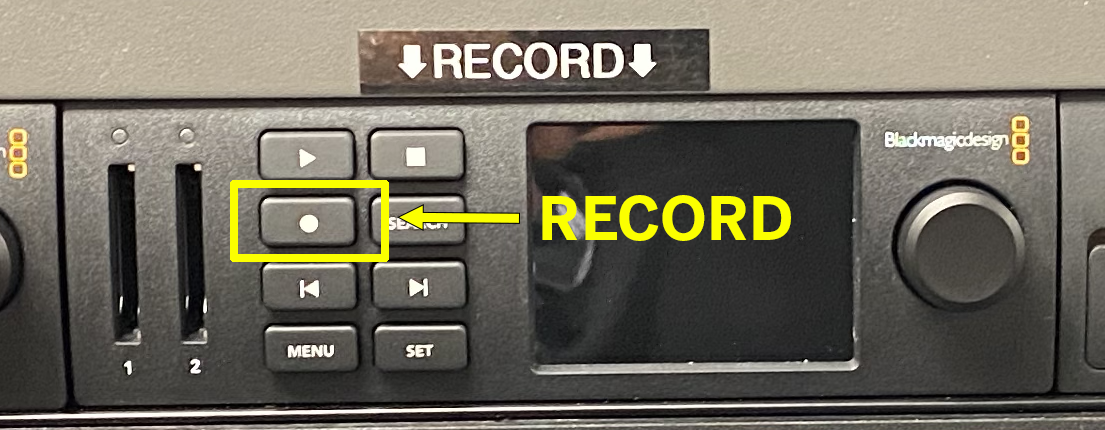
Record with Hyperdeck
Insert an SD card, format card using the MENU button. The RECORD button is the one with the WHITE DOT. Press it to begin recording. When you are ready to stop the recording, press the button with the white square. The Hyperdeck can record in ProRes, H.264, and DNX. Normally the Hyperdecks are set to record ProRes but this can be changed using the Menu button. |
|
Audio Mixer and Channel Routing
The SIX microphones IN are mapped to the audio mixer from 1 to 6. Inputs 7 and 8 on the mixer are for the Playback Hyperdeck. |
|

Overview
Content Tools