Page History
...
1. In a web browser, go to https://stache.utexas.edu/
2. Click Log in now
3. Sign in using your EID and EID password then authenticate with Duo
4. You are now signed in to Stache and viewing your home page. You'll see the entries you have created and entries others have shared with you
...
Create a New Entry
1. Sign in to Stache
2. From your Stache homepage, click + Add a new entry in the top right corner
3. Enter your desired entry name and click Create
The entry opens to show three sections on the left, Purpose, Secret, and Note. While the sections are labeled, they are suggestions. On the right-hand side of the window you'll see entry permissions and other settings.
4. Click the section to show the contents. Click within the section again to start typing and add information. IMPORTANT: click Save. If you do not click save, your changes will be lost when you exit the browser window.
a. The Generator button opens a password/passphrase generator.
Share Entries with Others
1. Sign in to Stache and open the entry you want to share.
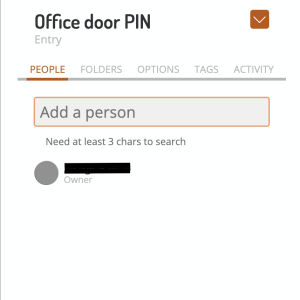
On the right side, beneath the entry title, with the People tab selected, you'll see a list of current permissions.
2. In the Add a person text box, begin typing the person you want to add by EID or name. A list of search results will populate, select the desired person.
3. The default permission is Reader. Select the change you'd like to make. IMPORTANT: click Save. If you do not click save, your changes will be lost when you exit the browser window.
...


