Page History
Organize Content with Anchor Links and an On-Page Menu
Style a link to appear as a CTA ("call to action") button
Add and style a link list (Arrowed Link List style)
Clear Formatting in the WYSIWYG
Add Content to Pages that Auto-Populate (News, Events)
Add a link that opens in new tab/window
Using 3-col overview and 3-col statistics
Scheduling content to be published or unpublished
| Anchor | ||||
|---|---|---|---|---|
|
Each event collection is a term in the taxonomy called "Event Collection." This is analogous to how Articles and Internal Pages are content types and individual instances of a content types are called nodes. Event collections are use to group related events together on a page.
To add or edit an event collection, navigate to Structure > Taxonomy > Event Collections.

Click the blue "Add term" button or click Edit on the row of the event collection you wish to edit.
Fill in details. Use the Event Category field to create a link to all events with the same category. The link will appear above the Event Collection title.

| Anchor | ||||
|---|---|---|---|---|
|
Note: This can only be done by users with the Admin or Publisher role.

On-page menus can only be placed on Landing Pages. Start by creating or editing a Landing Page.
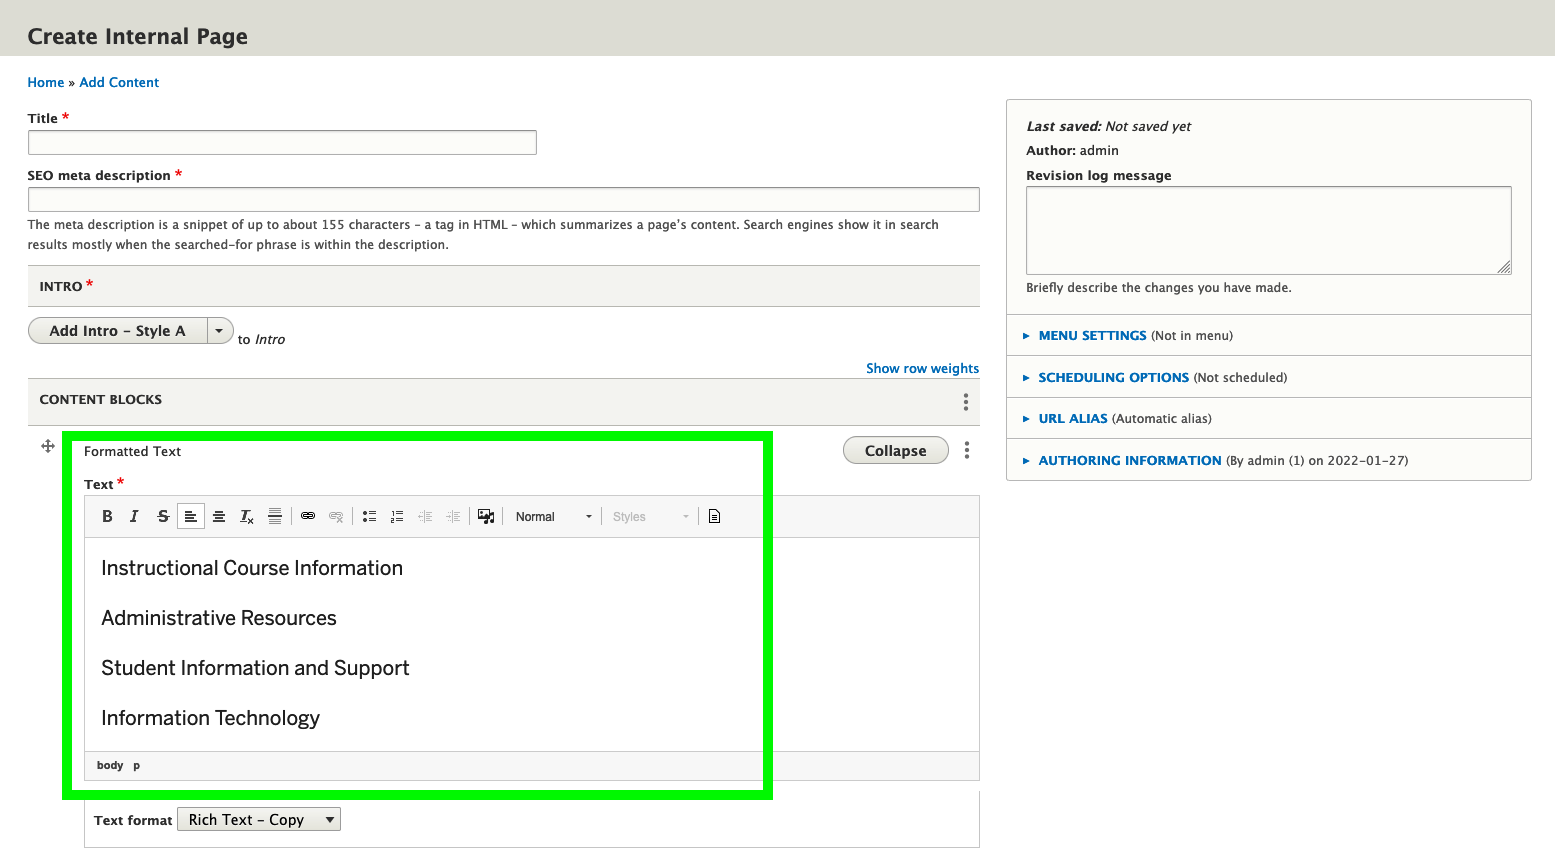
An on-page menu is designed to link to the unique anchor IDs of individual content block components on the Landing Page. The following content block components support anchor IDs: Card Grid, Profile Card Collection, File List, Formatted Text, Highlighter - Style A, Highlighter - Style B, Intro - Style A, Numbered List, Table, Accordion (Single), Accordions.
Add anchor ids to content blocks
For each content block component that should have a link in the on-page menu, enter a unique ID in Anchor ID field.

Make a note of page's url and the each unique anchor ID so you can create a corresponding item in an on-page menu.
Create the on-page menu
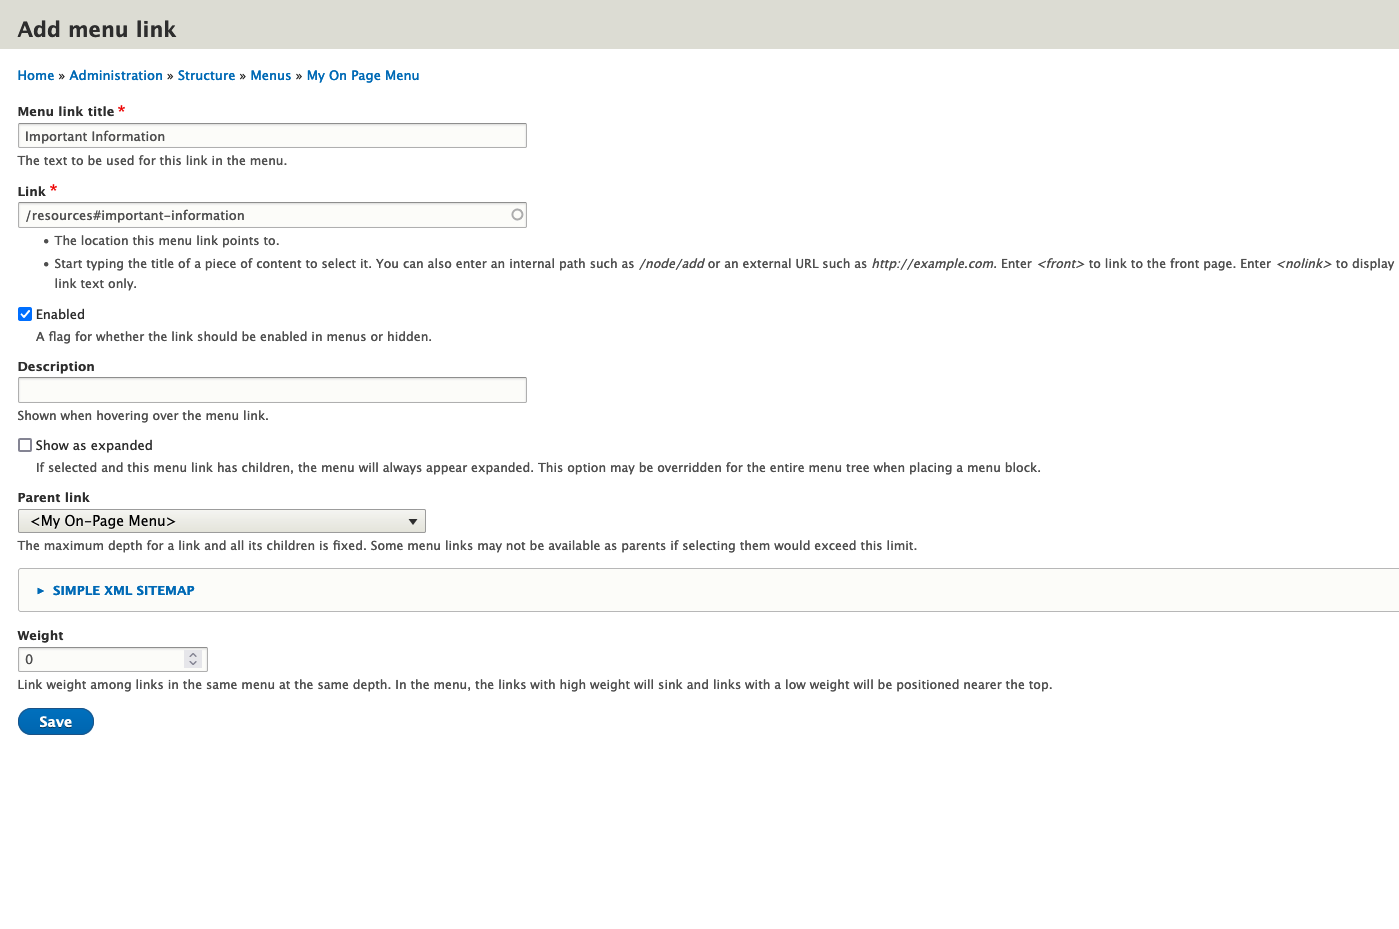
Go to Structure > Menus > Add Menu, enter a Title and click Save.
Click Add link to add menu links for each unique anchor id you entered on the Landing Page.

The Link should start with the first slash after ".edu" and end with a hash symbol (#) and your unique anchor id. For example "/resources#important-information"
| Anchor | ||||
|---|---|---|---|---|
|

| Anchor | ||||
|---|---|---|---|---|
|
Example
The Arrowed Link List appears like this on the website:

To create an Arrowed Link List, type or paste the list items into the text area of a Formatted Text content block. Each list item should be on its own line.
Highlight the text and format it as an unordered list using the bullet list widget in the editing toolbar.

Highlight each line item and make it a link to the desired content or url.

Highlight the entire list again. This can be done by placing the cursor anywhere in the list text and clicking ul at the bottom of the editing window.

With the entire list selected, choose Arrowed Link List from the style drop down menu in the editing toolbar.

Save your work.
| Anchor | ||||
|---|---|---|---|---|
|
To clear column styling (or any other styling), use the “clear formatting” widget in the editor toolbar.
![]()
| Anchor | ||||
|---|---|---|---|---|
|
Latest News
The "Latest News" block on the home page uses Drupal's "sticky" content flag to determine which articles to display. The newest published article flagged as sticky will appear in the lefthand column of the Latest News block. The three newest published articles not flagged as sticky will appear in the righthand column.

Use the filter options on the main content list to find articles flagged as "sticky.
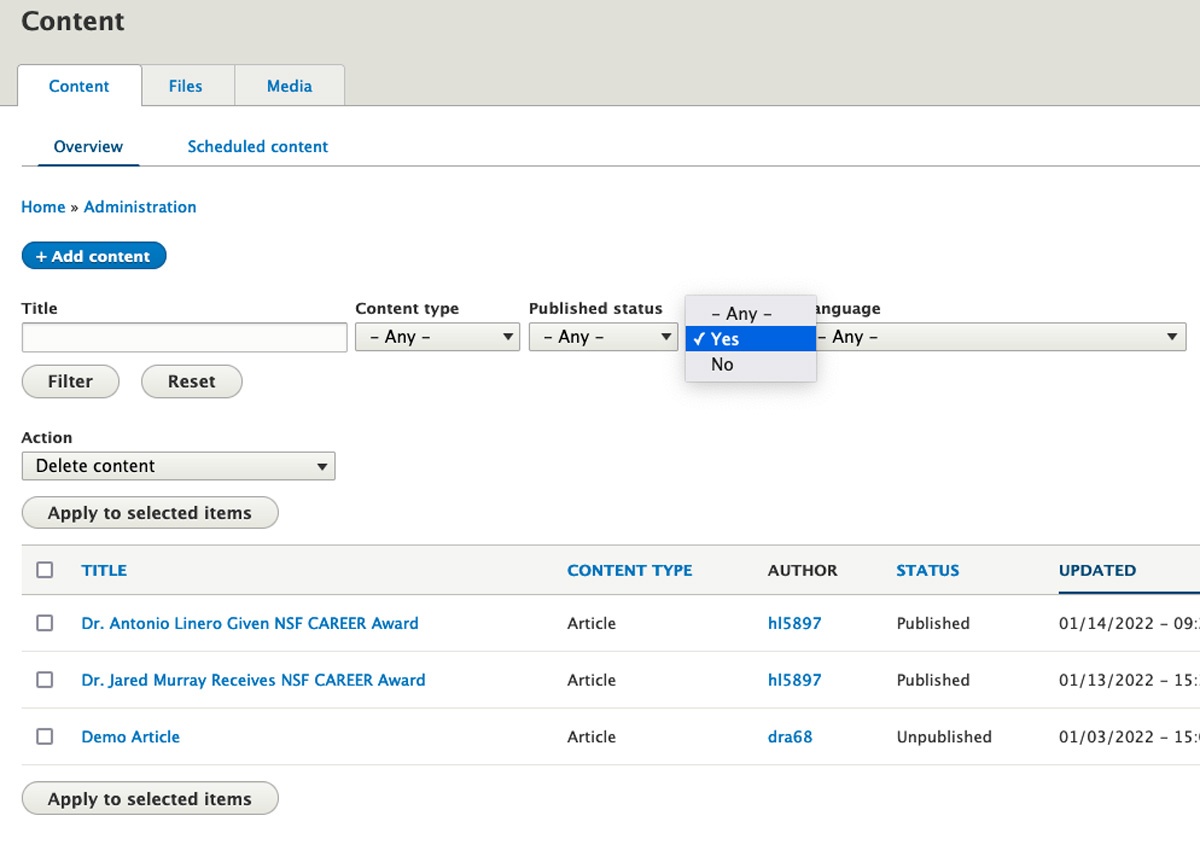
Use the "Actions" dropdown to update the sticky status of selected content.

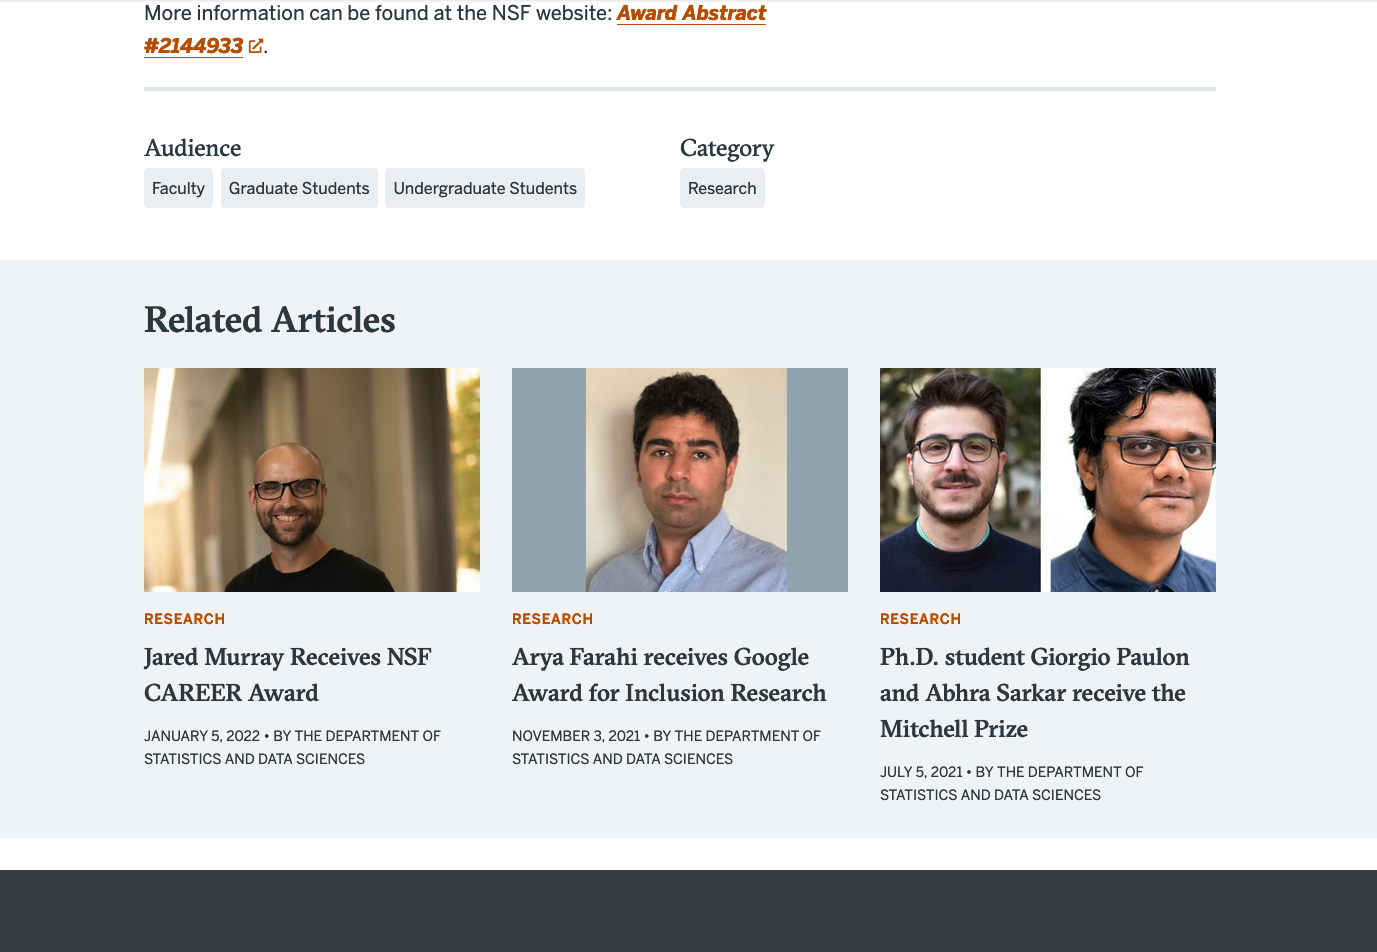
Related Articles
This block shows the three newest published articles that share the same Article Category as the article being viewed.
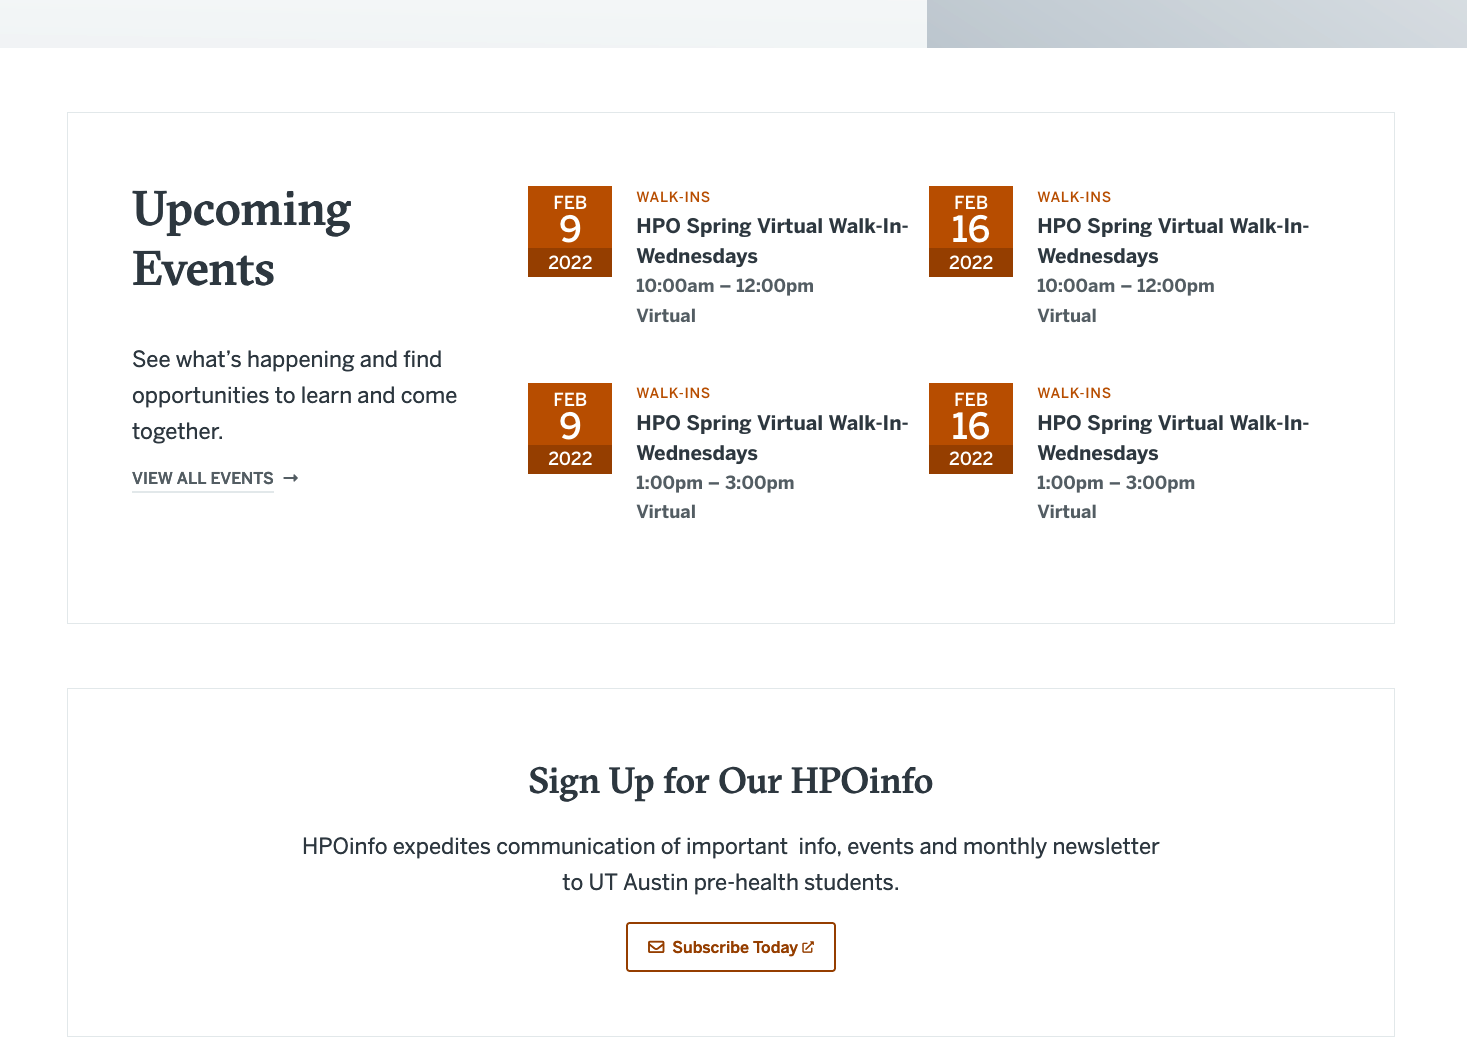
Upcoming Events
The next four upcoming published events — based on event date — appear in the Upcoming Events block
Other Events in This Series
This block shows all published events that are part of the same Event Collection.

| Anchor | ||||
|---|---|---|---|---|
|
In the modal overlay that appears when adding or editing a hyperlink, click ADVANCED to show additional options. The option to open a link in a new tab/window is a checkbox in the ADVANCED section.

| Anchor | ||||
|---|---|---|---|---|
|
The WYSIWYG text editor provides code templates for displaying brief bits of information in three-column format in a Formatted Text content block.
Example
- To access a menu of available code templates, click the template tool icon on the far right of the editing toolbar.

2. Select the template to paste into the Formatted Text area.

3. Replace the placeholder text.

| Anchor | ||||
|---|---|---|---|---|
|
- The Table component is available only on the Internal Page content type.
- Add a "Table" content component to the node
- Use the WYSIWYG template tool to add placeholder table to the text area

| Anchor | ||||
|---|---|---|---|---|
|
- Articles, Internal Pages and Landing Pages can be scheduled for publishing and/or unpublishing.
- The content’s creation time will be updated to the scheduled publish time.
- Only users with the Publisher role can use this feature. Content creators can view the list of scheduled content.
- When editing content that supports scheduled publishing and unpublishing, expand the Scheduling Information panel in the righthand column of the node editing form.

- Enter a future date and time in the Publish On section. The "Unpublish On" date/time is optional.
- Leave the "Published" option at the bottom of the editing form unchecked.

- Save the node.
- A list of all nodes scheduled for future publishing and/or unpublishing can be found under Manage > Content > Scheduled.
Overview
Content Tools