Page History
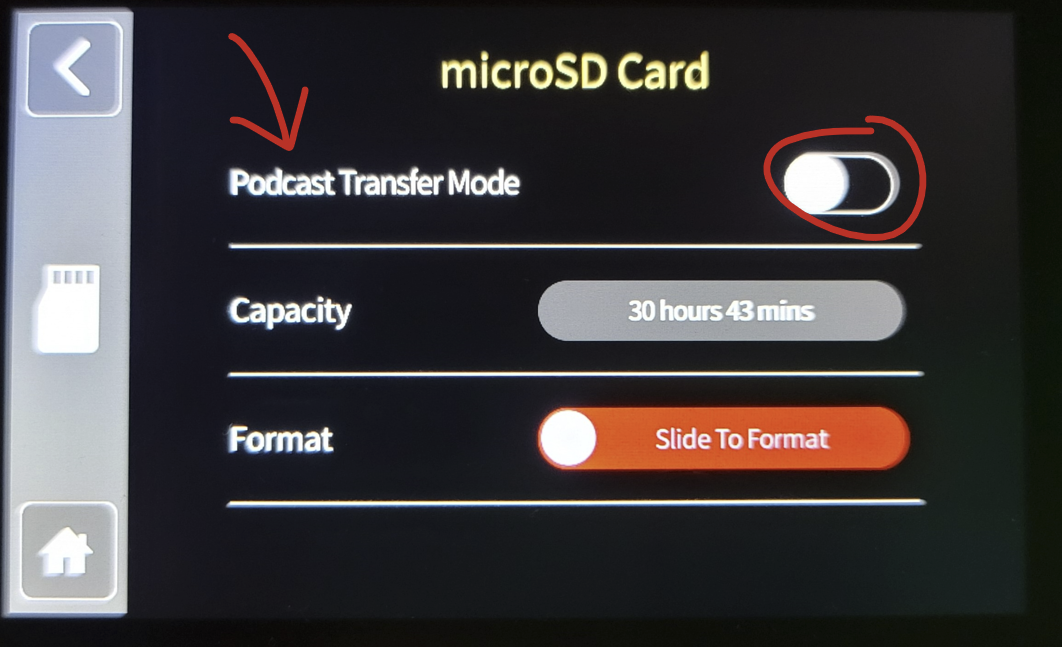
To transfer your media off the RODECaster, you need to put it in Podcast Transfer Mode. This makes the RODECaster operate like external drive. All features are disabled and the SD Card is mounted to the computer through the cable. To enable it:
|
Once you have completed recording you can use the Podcast Transfer Mode to transfer the audio files to the computer.
Note that when the RØDECaster is in ‘Podcast Transfer Mode’ all other functionality is disabled.

|
|
 |
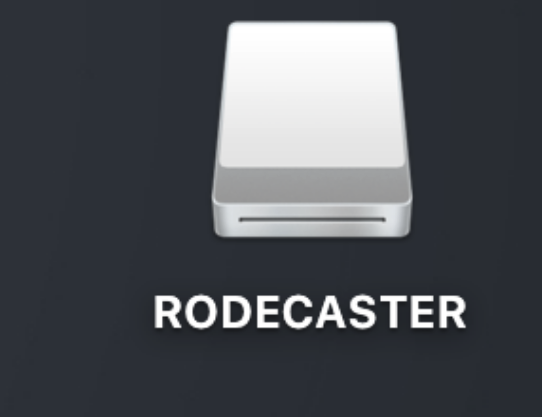
| After a brief moment, you should see RODECASTER appear as a volume on your desktop |
|
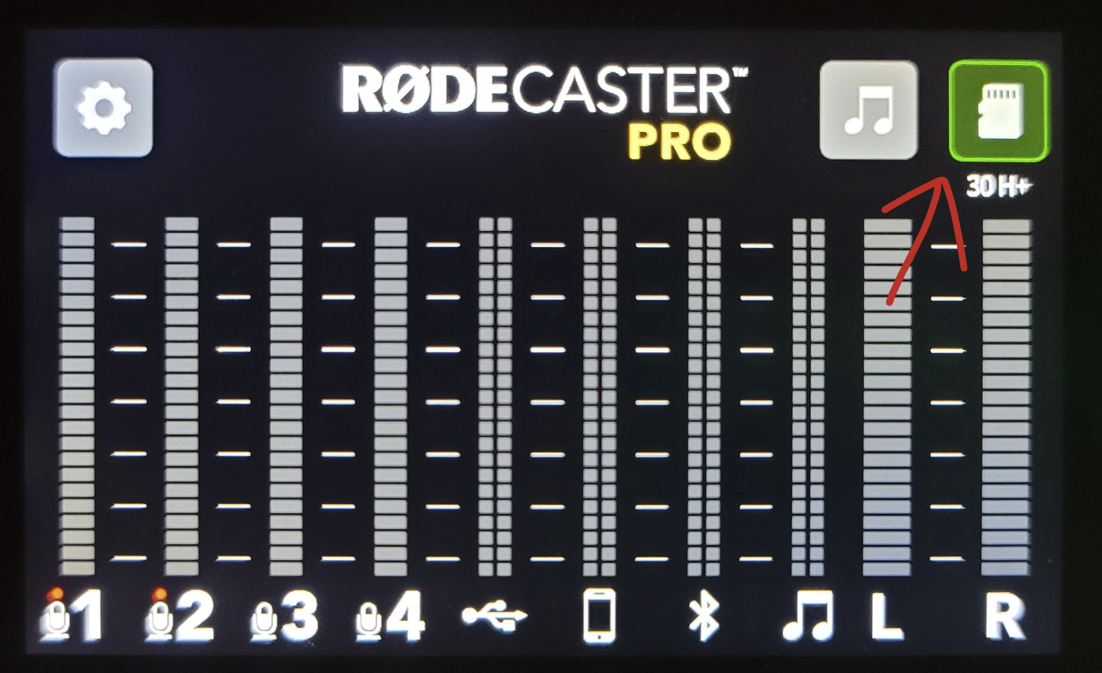
Click on HARDWARE icon

Click on microSD Card icon

Flip the Podcast Transfer Mode switch to ON
![]()
Confirm switching to Podcast Transfer Mode by clicking YES
Note: When the RØDECaster is in ‘Podcast Transfer Mode’ all other functionality is disabled.
The RØDECaster will mount as a volume on the desktop

The recorded .WAV audio files are in the folder called PODCASTS |
If you know how you recorded, be that Stereo or Multitrack, you can copy the WAV file and proceed to work with it as you choose |
|
If you aren't sure and would like to make sure, you can open the RODECaster Pro Software to view your recording in more detail |  |
Locate your podcast in the list Below the name, you will see either Multi-channel or Stereo |
|
Title it and then click on Save In the finder window that opens, select a place to save it, then press open |
|
Once the podcast saves, check the location you picked and you should now find the multitrack split into 9 wav files, 4 mono mic files, and 5 stereo files consisting of the main stereo mix, bluetooth, sfx, phone (trrs), and usb. |
|
The most popular file for uploading podcasts directly to the internet is known as the Stereo Mix. This means all of the channels have been mixed together into a 2 channel audio file. If you want to extract this file from your multi-channel recording, you will need to continue to the next steps.

Open the RØDECaster Pro software in the Applications folder
When it launches it will show you the podcasts in a list Find your podcast

Title it and choose a custom color and then click on Save

Choose a place to save it and click Open

If you want the full mix of all of the inputs, then choose Stereo Mix.wav

You can either customize the WAV file in a digital audio editor, or use can use the file as-is.

If using the computer to playback/edit your audio file, you will need turn up the USB Channel input on the RØDECaster to monitor the audio

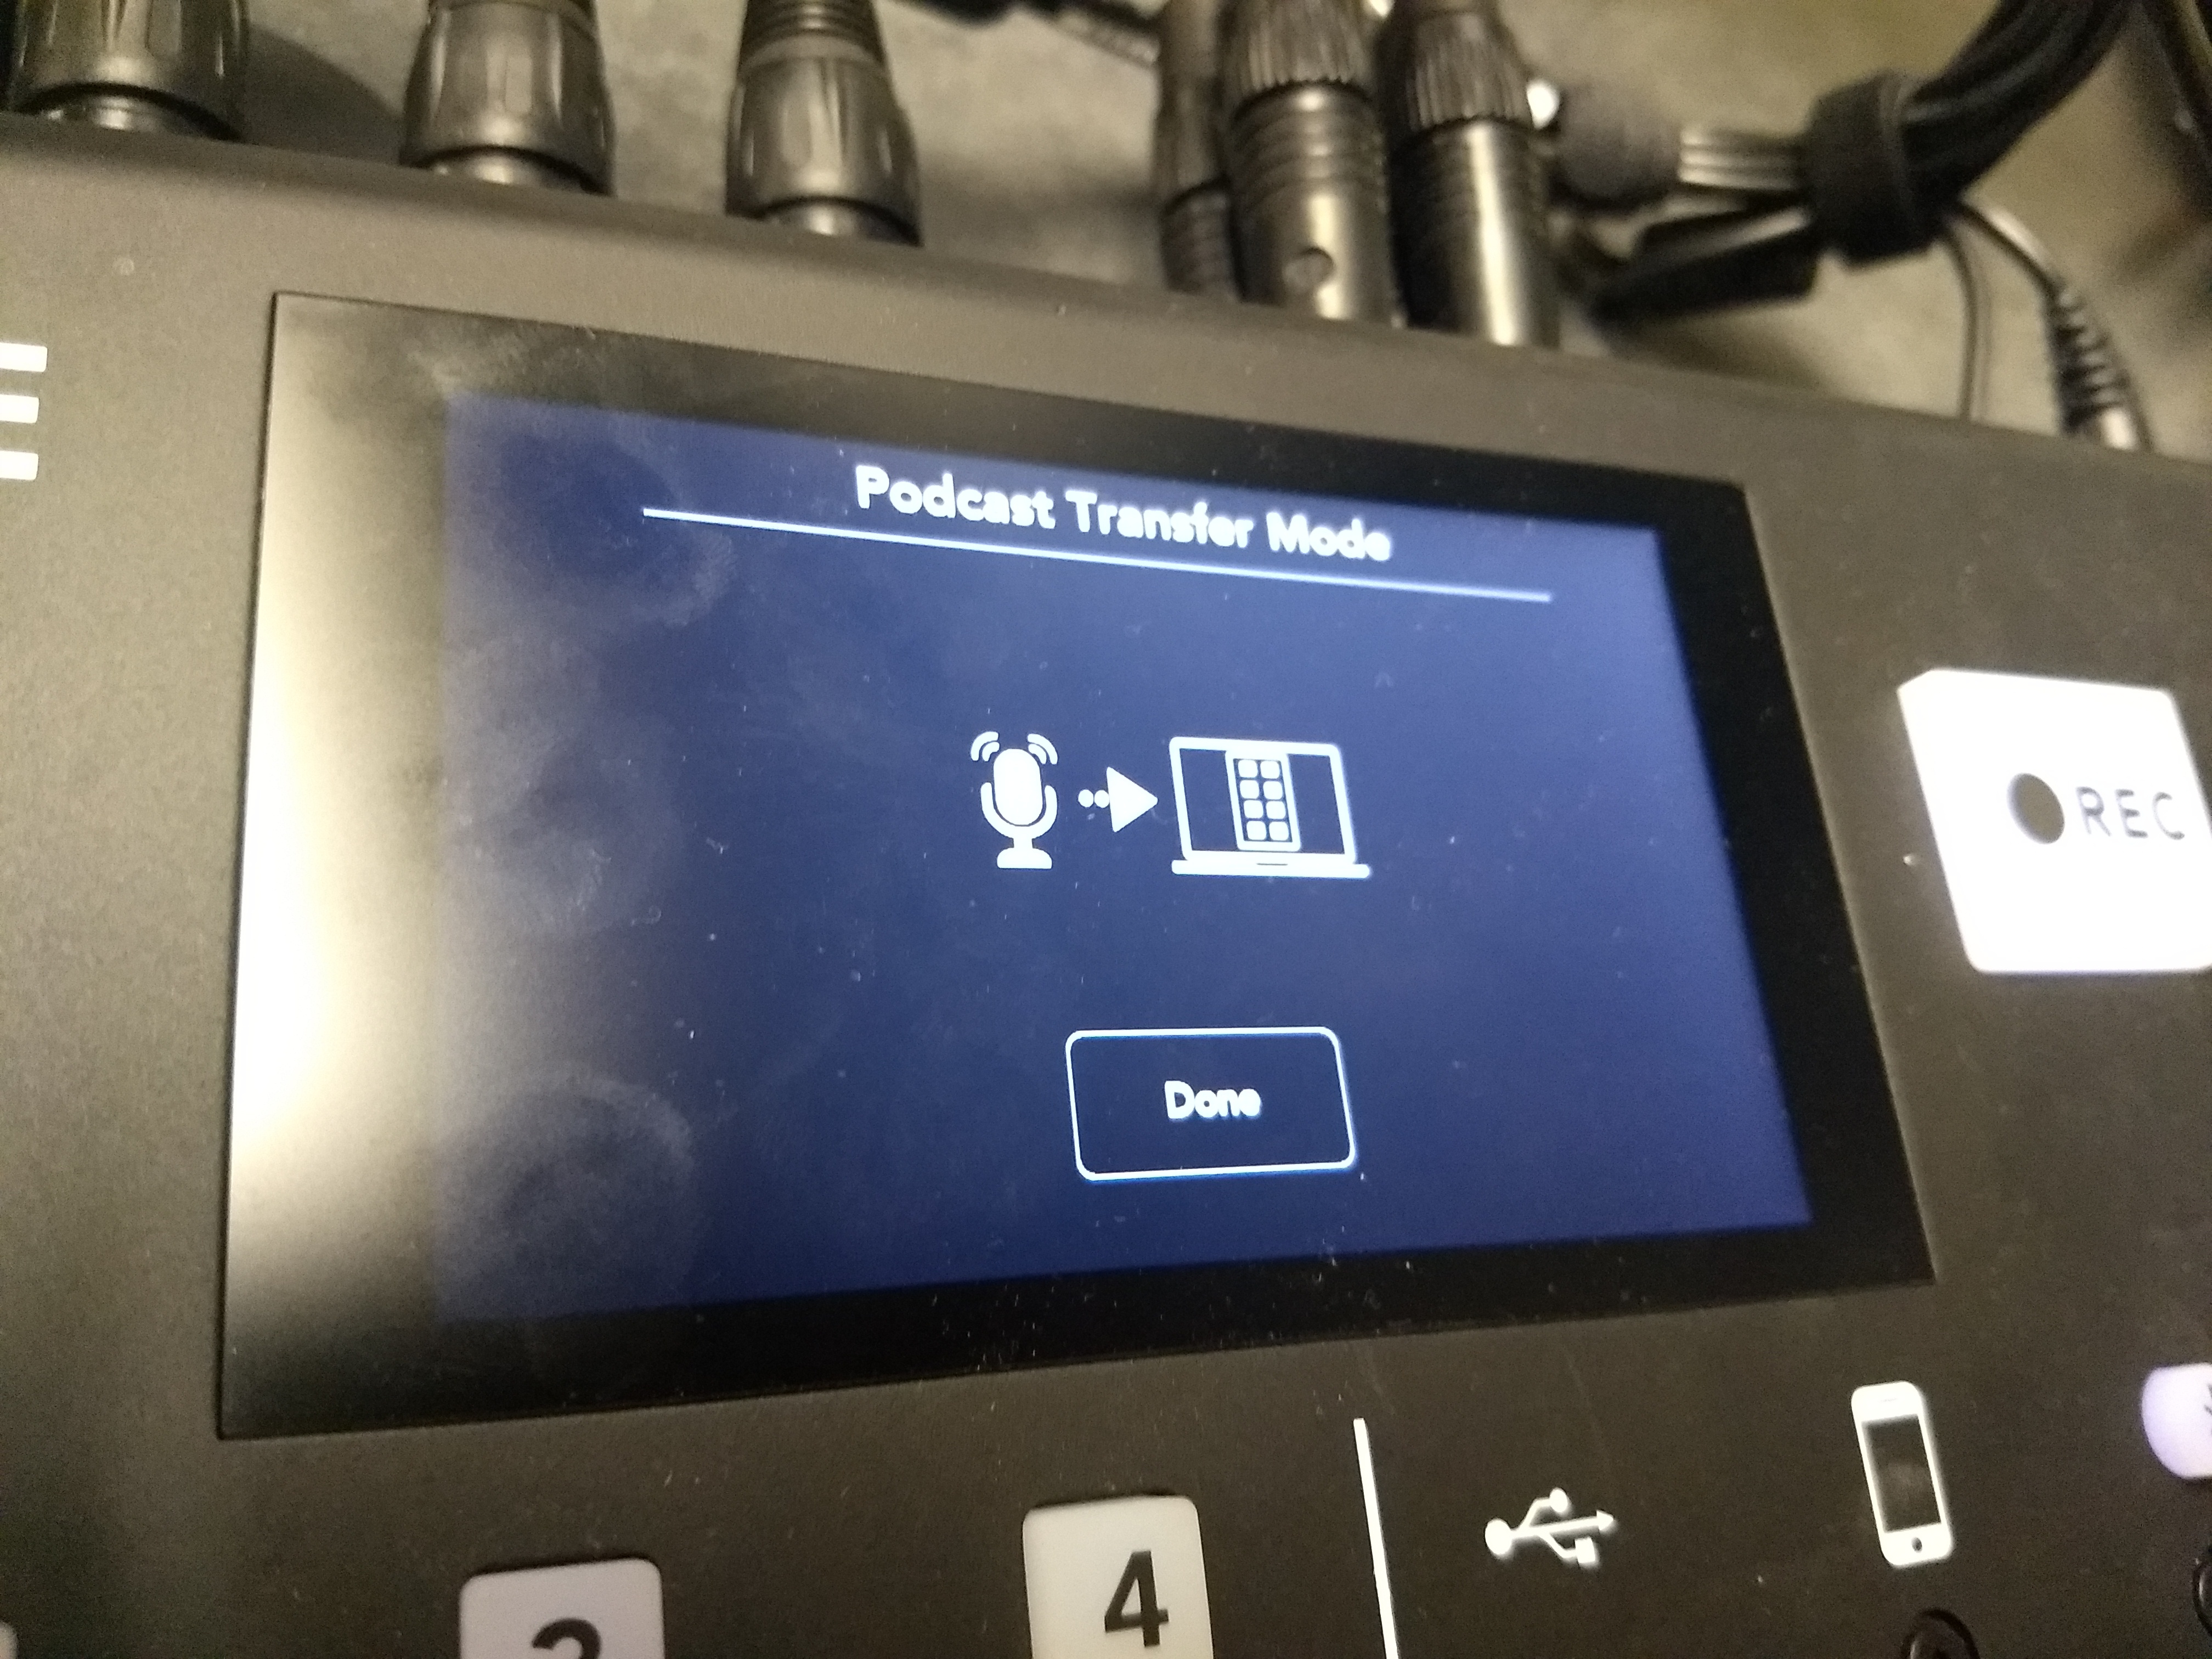
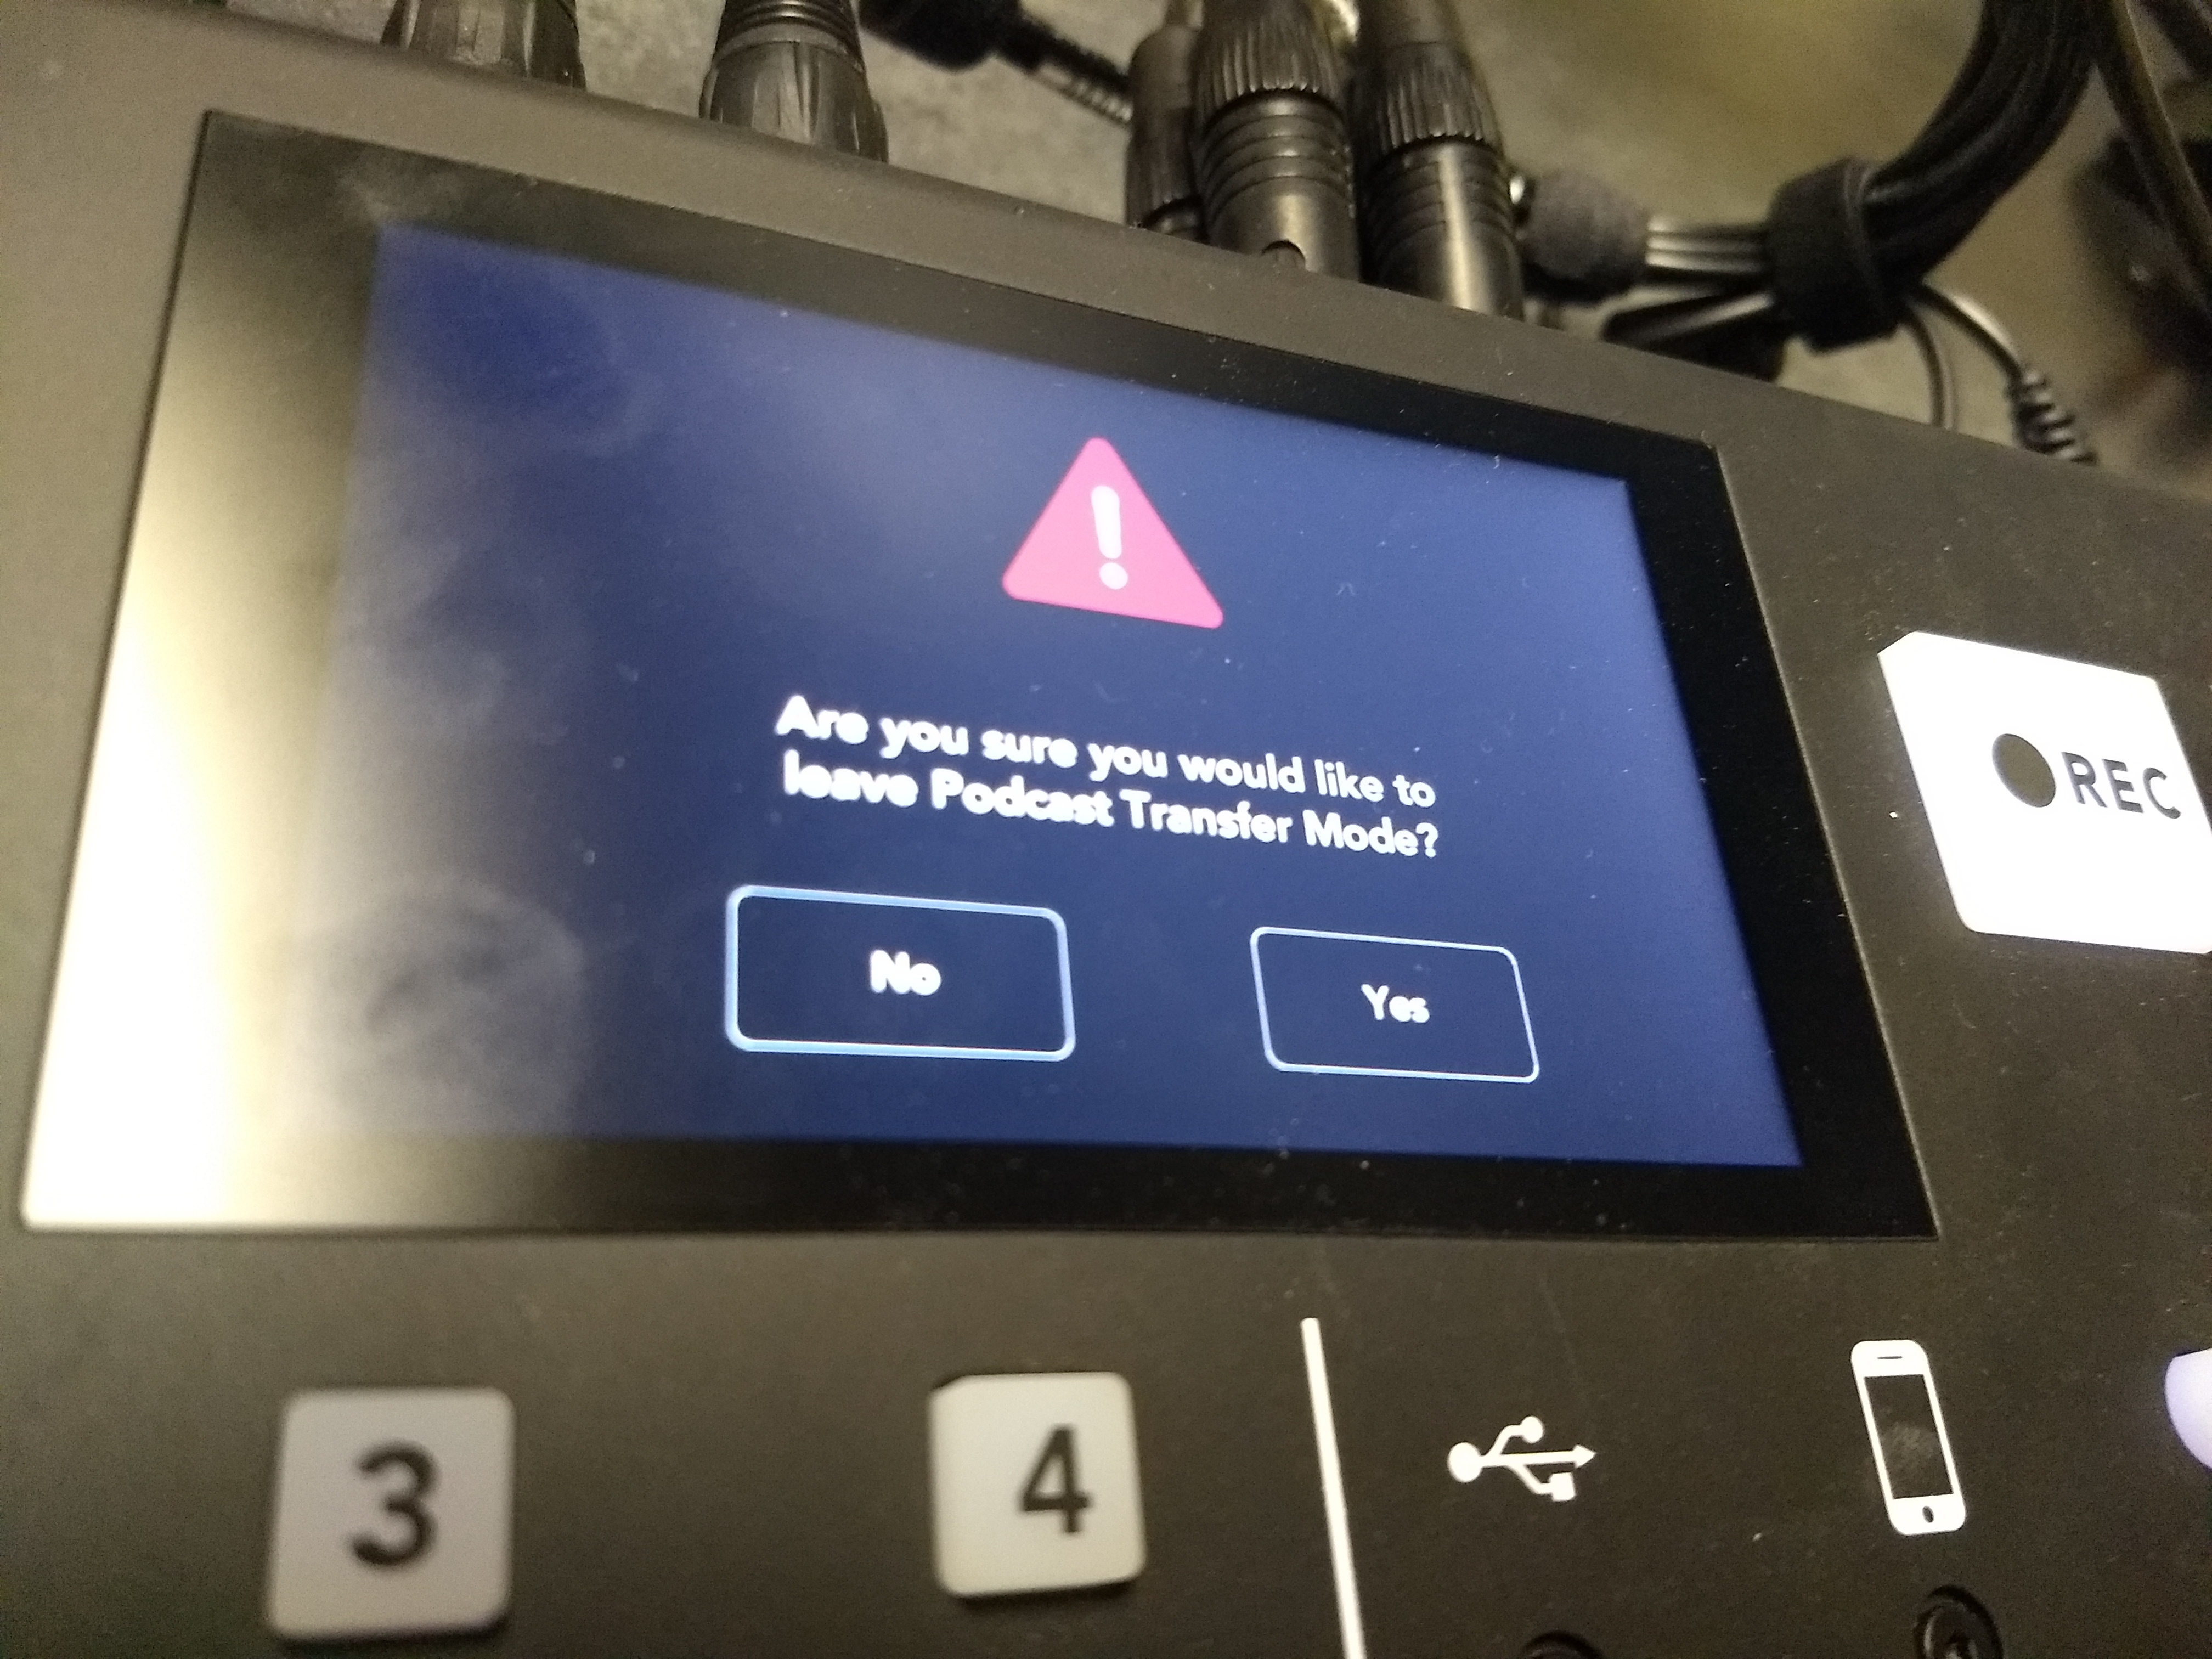
| When you are finished transferring your files to the computer, click "Done," and then click "Yes." The RØDECaster will disconnect from the computer. |
|
Overview
Content Tools