Before you start, please make sure your Monitor's Brightness and Contrast settings is set to 50. | 
|
Power on the Printer and make sure it is connected to the computer. It will take a while to fully warm up, and will make a lot of noise in the process. You will be able to tell when it's ready when the light stops blinking on the front.
While it is powering on, you are ready to start. | |
TIP: If at any point you are unsure of what you are doing in the ColorMunki software, look for a video icon like the one pictured. It has short 10-15 second demos of the featured step. | 
|
Step 1:
Connect the Colormunki device to the computer (not the keyboard) via it's USB cable. | 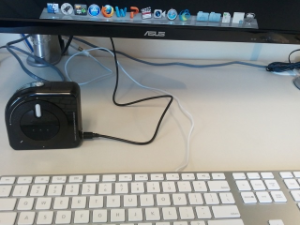
|
Step 2:
Open the ColorMunki application under Macintosh HD>Applications>Colormunki Photo and click ok through the registration process. If the computer does not have the ColorMunki software on it, . Click click here to download it. ColorMunki | 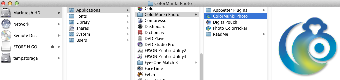
|
Step 3:
Select Match My Printer to My Display. | 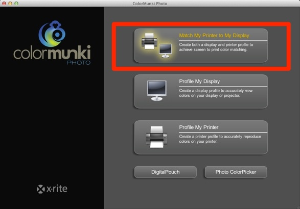
|
Step 4:
Select LCD. | 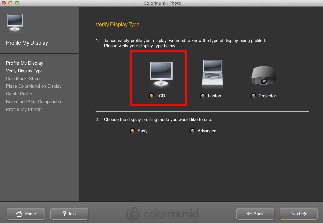
|
Step 5:
Select Easy and then Next. | 
|
Step 6:
Look for the green connected check mark to see if you are connected. | 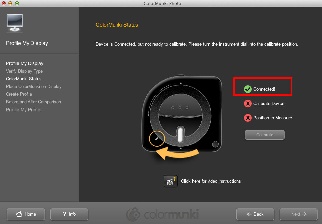
|
Step 7:
Turn the dial on the ColorMunki to match the instructions on the screen. | 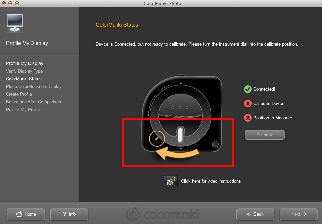
|
Step 8:
Select Calibrate. | 
|
Step 9:
Move the dial back where indicated by the picture. Hit Next.
If there are any problems at this stage, select Back until you get back to Step 6 and start over. | 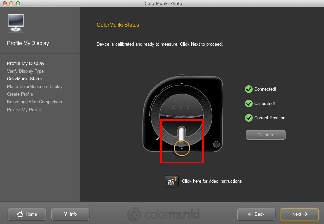
|
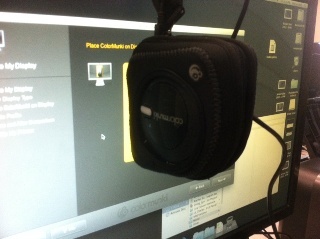
Step 10:
While leaving it plugged in, put the Colormunki into the case as pictured in the photo. | 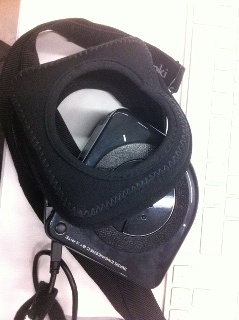
|
Step 11:
Once zipped in it's pouch, turn it over and make sure the slide is positioned open as pictured. | 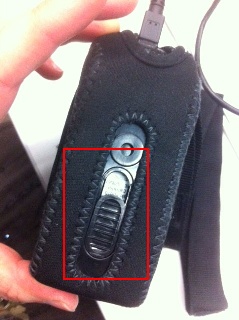
|
Step 12:
Place the Colormunki over the monitor and fit it over the yellow square on the screen. Place the weighted strap behind the monitor to counterbalance it. It may take some careful placing | 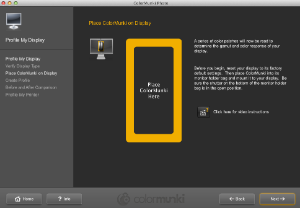
|
Step 14:
Rename the Profile name to PJDisplay.icc. Hit Save and then Next. | 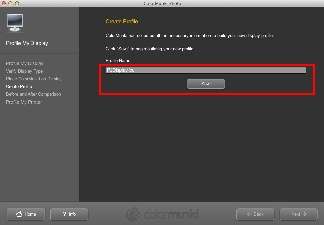
|
Step 15:
You can click the Before and After buttons to see the changes made if you like. Otherwise, click Next. | 
|
Step 16:
Select Create New Profile. | 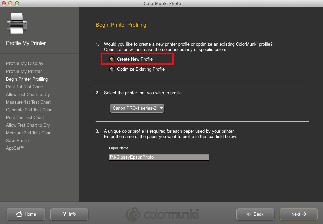
|
Step 17:
Select from the dropdown menu the Canon Pro-1 series-2.
If the printer is fully powered on and connected, but still not showing up, you can call the Helpdesk for assistance. | 
|
Step 18:
Type in a Paper name. Make sure it starts with PJ- and then the paper's name. In the example it's "GlossyEpsonPhoto", but it can be named whatever you like as long as there are no spaces. | 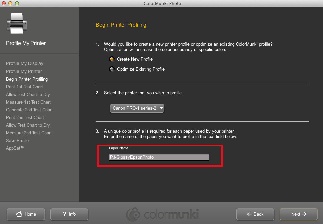
|
Step 19:
Hit Print to Print a Test Chart. | 
|
Step 20:
Allow the test print to dry for 5-10 minutes because the difference between wet and dry ink can change the color dramatically. Do not skip this step.
When the status bar is finished and a message comes up that it's done, hit Next. | 
|
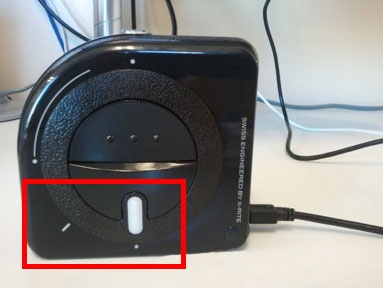
Step 21:
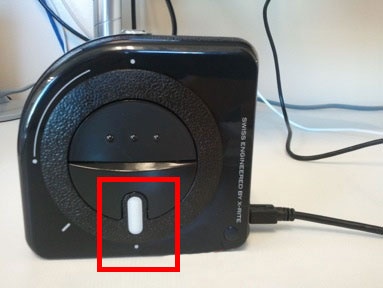
Without unplugging it, take the ColorMunki out of the zippered pouch. Push the button near the USB slot to release the trap door. | 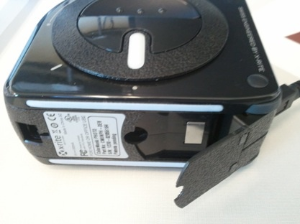
|
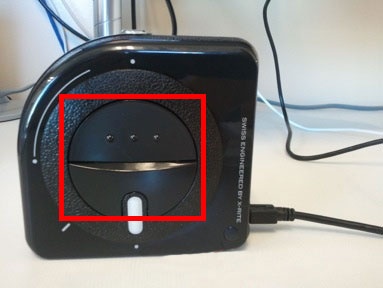
Step 22:
Turn the central dial to the area indicated in Fig. A.
Place the ColorMunki at the bottom of the first row on the test print (refer to the page orientation on the software screen.) Press and hold the measure button (the large button in the middle of the unit indicated by the red square.) | Fig. A
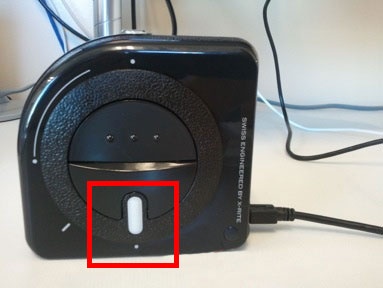
Fig. B
 |
Step 23:
Slowly and consistently move the unit across the page in the direction of the arrows. Keep moving the unit until you reach the white of the page on the other side of the test patches and then immediately release.
You may have to redo the same row several times, as it takes practice. A success will lead you to the next strip on screen. A fail will highlight the row in red and ask you to rescan.
When done scanning all the rows, hit Next. | 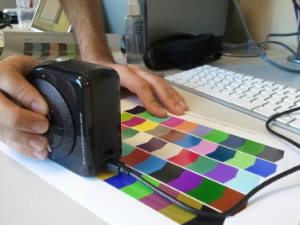
|
Step 24:
Select Print to print the next Test Chart. After waiting for it to dry, repeat the same workflow as in Step 23. When done hit Next. | 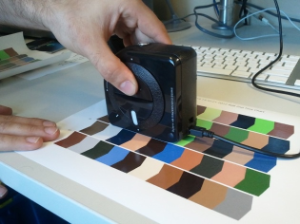
|
Step 25:
Make sure the profile name is the same one you entered in Step 18. | 
|
Step 26:
Select Save. | 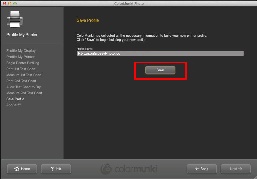
|
Step 27:
Select the check box next to "Configure my applications...," indicated by the arrow. Hit Finish. | 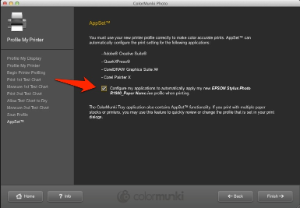
|
Step 28:
Go to the Apple desktop and select Go>Go to Folder | 
|
Step 29:
Copy and paste ~/Library into the dialog box. | 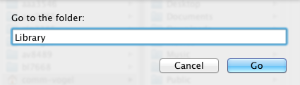
|
Step 30:
When Library comes up, select ColorSync>Profiles>PJDisplay.icc and GlossyEpsonPhoto.icc | 
|
Step 31:
Drag both PJDisplay.icc and* GlossyEpsonPhoto.icc *to Macintosh HD>Library>ColorSync>Profiles>Profiles
And you're done. You now have a paper type calibrated to your monitor. | 
|