Page History
...
The go to the Deliver tab |
|
| Choose to Render the Entire Timeline |  |
Click on Render Settings> and use the slider to navigate to the AVID AAF tab |  |
Click on Browse to select the hard drive and folder you want to render to |  |
| Navigate to the hard drive and you can choose to Add a new folder if needed |  |
| Name your new folder and click OK |  |
| Make sure you select the newly created folder and click OK |  |
Choose to Render at Source Resolution Choose the Codec DNxHR Type DNxHR HQ this is recommended if you choose 4:4:4 or higher media will not play on your hard drive |
|
| Add 15 to 20 frames of handles |
|
Click on the Audio tab Check the box for "Export Audio" if you want to export Audio Do NOT choose "Same As Source" for the Channels drop down. (your audio will come out as static)Make sure to choose 2 for the Channels drop down. | 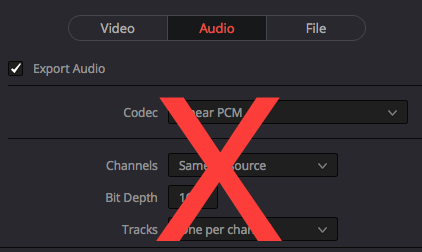 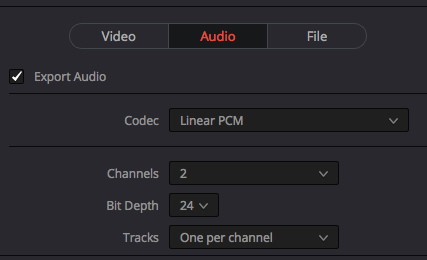 |
| Click on Add to Render Queue |  |
| Choose to Start Render once the Job has been added to the Render Queue |  |
Job has completed. The files need to be added to AVID MediFiles Folder Quit Resolve>Save the project. Make a backup of the project and save it for the final color correction and conform. See this workflow for making a backup. DaVinci Resolve - How to Relink Offline Media from a Exported Project | 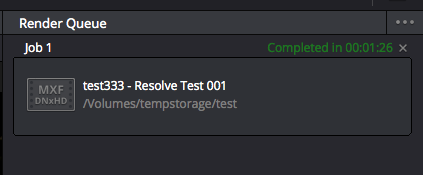 |
Job has completed. The files need to be added to AVID MediFiles Folder Quit Resolve>Save the project. Make a backup of the project and save it for the final color correction and conform. See this workflow for making a backup. DaVinci Resolve - How to Relink Offline Media from a Exported Project | |
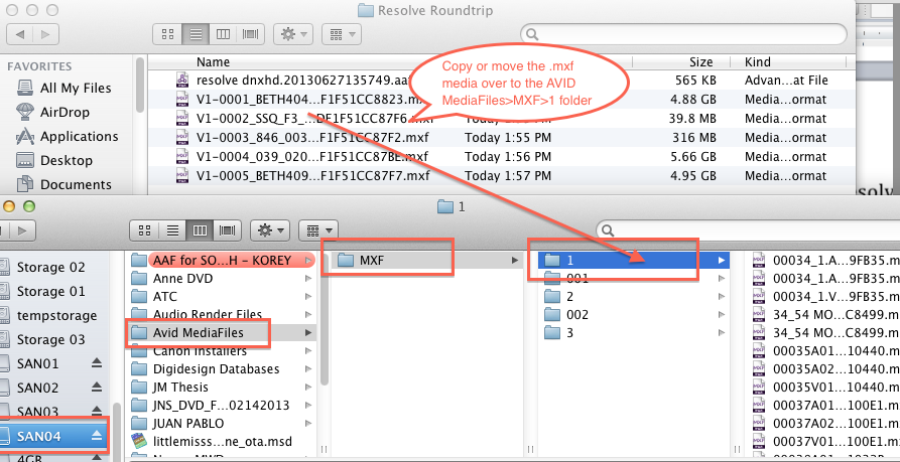
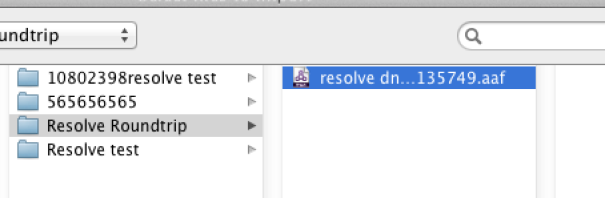
| Put the Color Corrected files from Resolve into your AVID Project. Open the exported Resolve files. There will be ONE .aaf file and several .mxf files. This example is short - most projects will have a lot more .mxf files. |
|
AVID reads media from the Avid MediaFiles folder on the root level of the hard drive. The .mxf files exported from Davinci Resolve must be moved to this folder. See example below. |
|
| Copy or Move the .mxf files to the AVID MediaFiles>MXF>1 folder |
|
After the files are moved to the Avid MediaFiles >MXF>1 folder on the hard drive open the AVID Project or make a new one. |


Launch AVIDMediaComposer |
|
Open your project  |
|
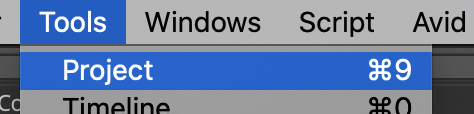
Make sure your project window is open >Tools >Project |
|
Make a New Bin |
|
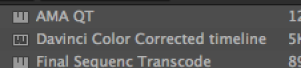
Title the new bin "Color Corrected VersionFootage" |
|
Go to >File>Import>File>Input>Import Media |
|
Navigate to the .aaf file in the Resolve exported media folder and select it. Choose Open |
|


The file will come in and a timeline will be created along with some Master Clips in the AVID bin. The media in the newly created timeline should automatically relink to the .mxf files exported from resolve. If the files don't link double check the workflow explained in this document. Make sure you put the .mxf files in the right place so AVID will read them.
This last step will remove any previously applied LUTs and random color correction.
...
Overview
Content Tools