Page History
...
| Open After Effects and Select >New project |
|
Next Import the files to apply the timewarp effect >Rt. Click in the bin and choose >Import>File |
|
Once all the clips are imported |
|
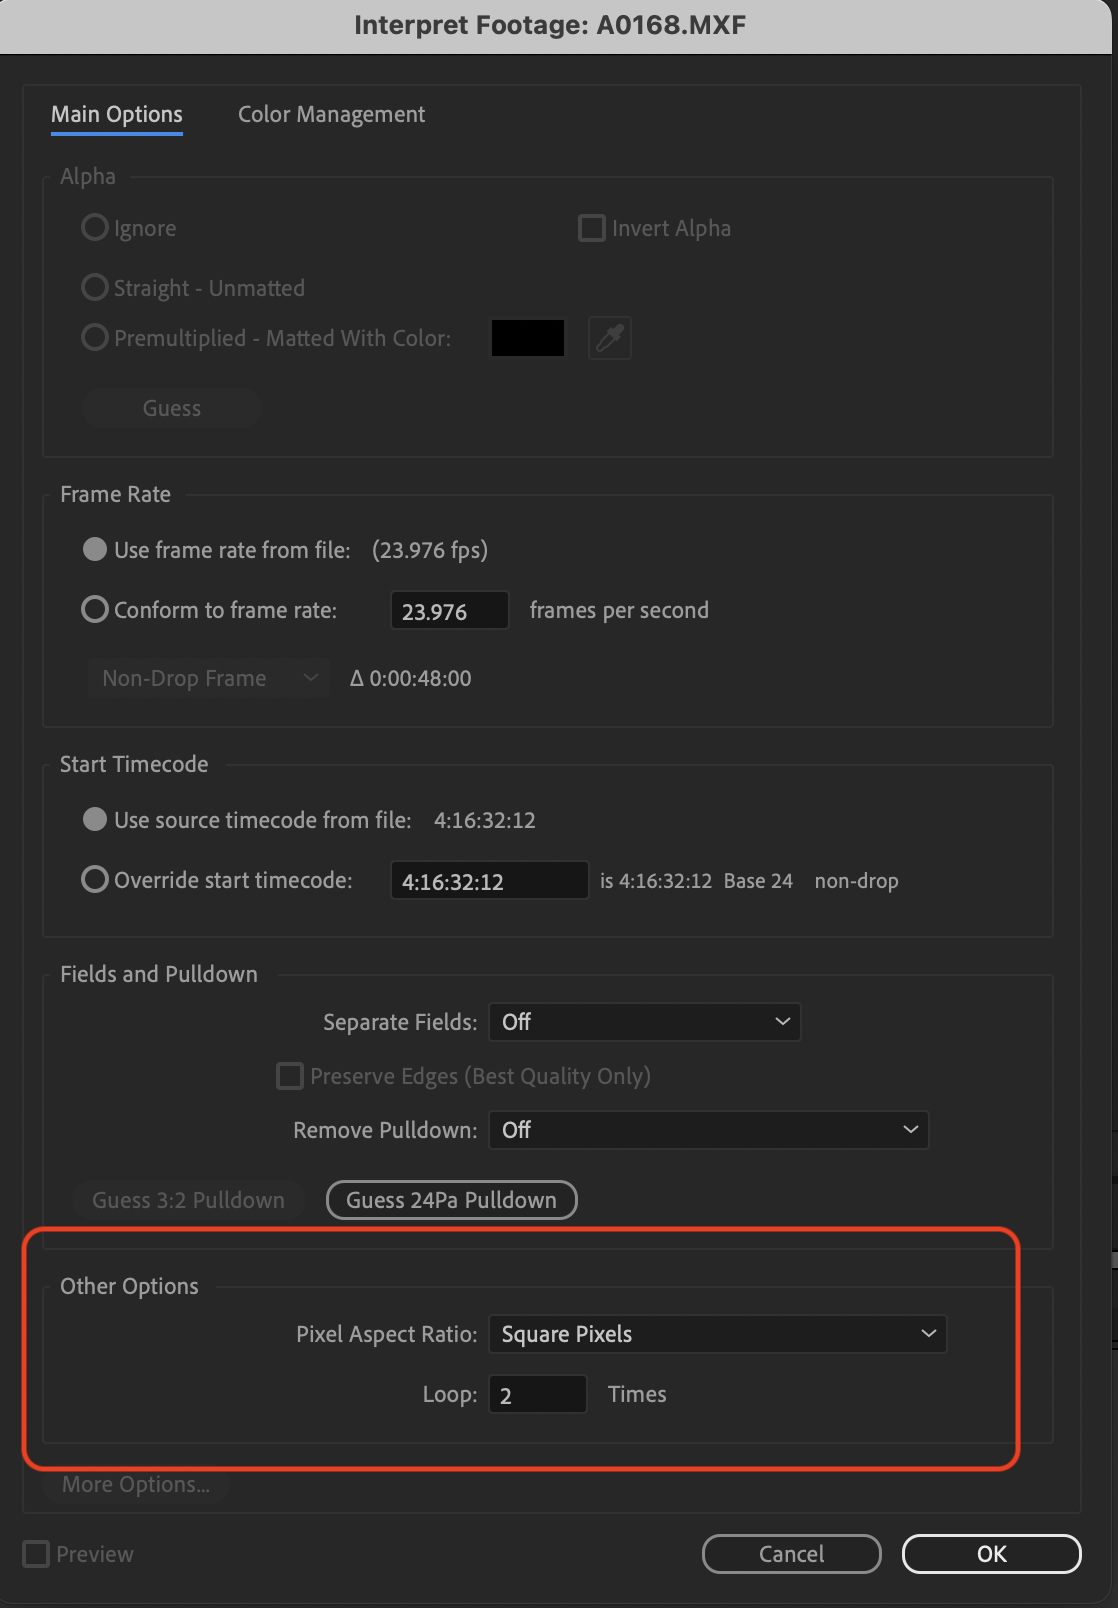
Next have to Interpret Footage Right click on the imported clip and choose >Interpret Footage Can only do one clip at a time |
|
On the "Interpret Footage" menu, near the bottom is a section called "Other Options" to loop the footage. Loop 2x for 50%, 4x for 25% etc. Either way, you'll need to extend the duration of the Comp Settings to fit the new length (i.e. double for 50%). |
|
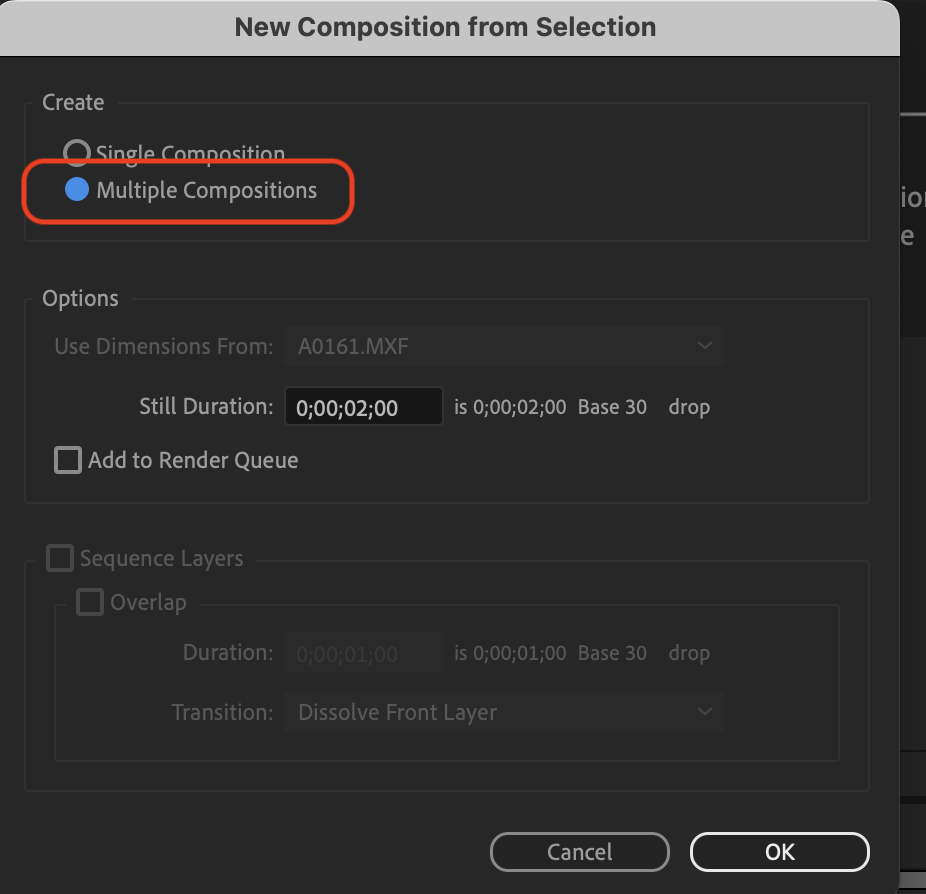
Make your composition by dragging your footage down and drop it on to the "New Composition" icon Drag multiple clips if needed to the composition icon to make new compositions |
|
If you drag multiple clips down to the new composition icon then choose >Multiple Compositions to make a composition per clip |
|
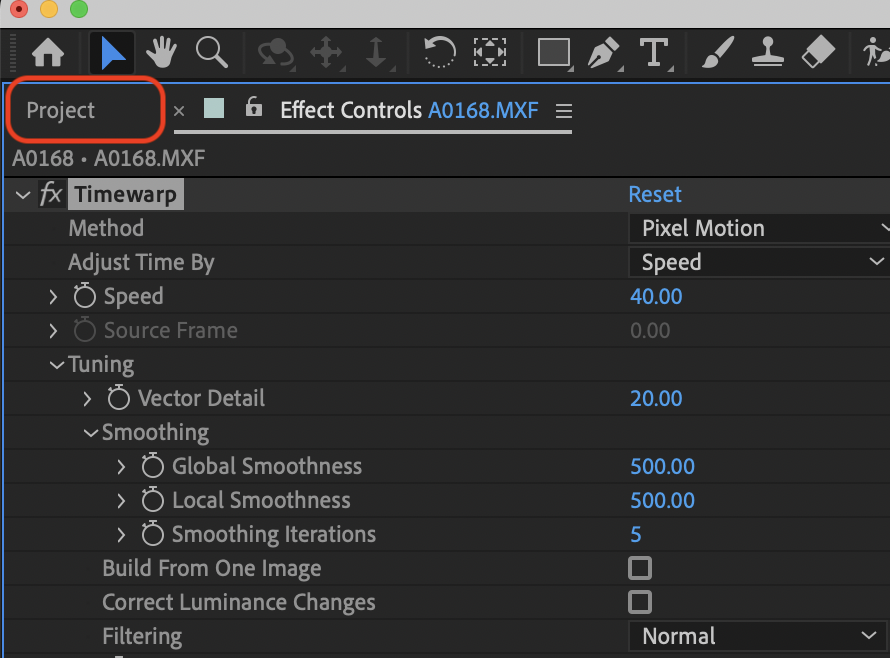
Load a composition by double clicking it to load in the composition window Apply the Timewarp effect on the clip loaded in the composition |
|
| Adjust the Speed to desired value: (our example 50.00) % Tuning: Set Vector Detail to the 50 to 60 value if you have lots of render time otherwise leave it at 20 Set the Filtering to Extreme if you have render time otherwise leave at normal Motion Blur found that it can help but can make footage look weird so use with caution |
|
| When you have your effect set correctly in the Effect Control tab |
|
| then right click on the effect and choose >Copy |
|
Load the next composition and choose "Command V" to paste Then the effect will be added to the composition. Once you have added your effects to all the comps |
|
| Then select all the compositions to render and choose |
|
| Add to Adobe Media Encoder Queue |
|
Once in Media Encoder you can have endless options for exporting Change the render settings and the file saved destination to start rendering click the green arrow in the top left of the window
|
|
If you notice that your compositions are getting cut off and not rendering the entire clipsYou might need to add length to your comps see the next steps | |
| Click back on the Project tab |
|
Double click one of the compositions to load into the composition window |
|
>Composition> Composition Settings |
|
Note the Preset will match your clips resolution But we need to change the timeline Duration here to be as long as we looped the clip in the previous step. Ex Looped 2 x's make the timeline at least twice as long Add an extra couple of minutes just to make sure you can extend your clip enough to show the entire clip. |
|
| You will also need to drag the end of the clip to the end of the composition |
|


...
Overview
Content Tools