Pick the Channel you would like to adjust gain, change EQ or adjust compression and hold down the A/B button or "OverPress" it till it lights up RED |
|
Navigate to the "Dynamics" tab.
Adjust the "GAIN" slider with the touch pad or input knob to adjust the gain of the selected microphone input.
Make sure signal bounces around 0 on the VU meter. | |
Navigate to the Dynamics tab and adjust the compression settings to change the compression on the selected channel. You may have to click on the "enable" button. "THRESH" is used to define the point at which the compression "kicks in." In this screen shot it is at -20.1dB which is confusing because that is equal to 0 on the VU meter. "RATIO" is used to determine how much the compressor compresses. In this screen shot 3.00:1 means that for every 3dB that comes into the compressor past the set "THRESH" the compressor will output 1 dB. In effect reducing your dynamic range.
"ATTACK" is used to determine how soon the compressor "kicks in." In this screen shot 5.00mS means that once the input signal has lasted 5 miliseconds past -20.1dB, the compressor will start and continue to reduce the incoming signal until that signal goes below the "THRESH" again. "RELEASE" is used to determine how soon the compressor "kicks out" or stops affecting the incoming signal once the signal has dropped below -20.1dB. In this screen shot, that time lasts for 320 mili seconds. "MAKEUP" is used to turn the compressed signal back up, or "make up" the gain that had been compressed out of the original input signal. You may notice that once you've set your input gain (in the previous step) correctly, and add compression that your signal will be some what lower. Adjust this make up gain to get it back up to 0 on the VU meter.
If nothing seems to be happening...make sure the "ENABLED" button is pressed. | |
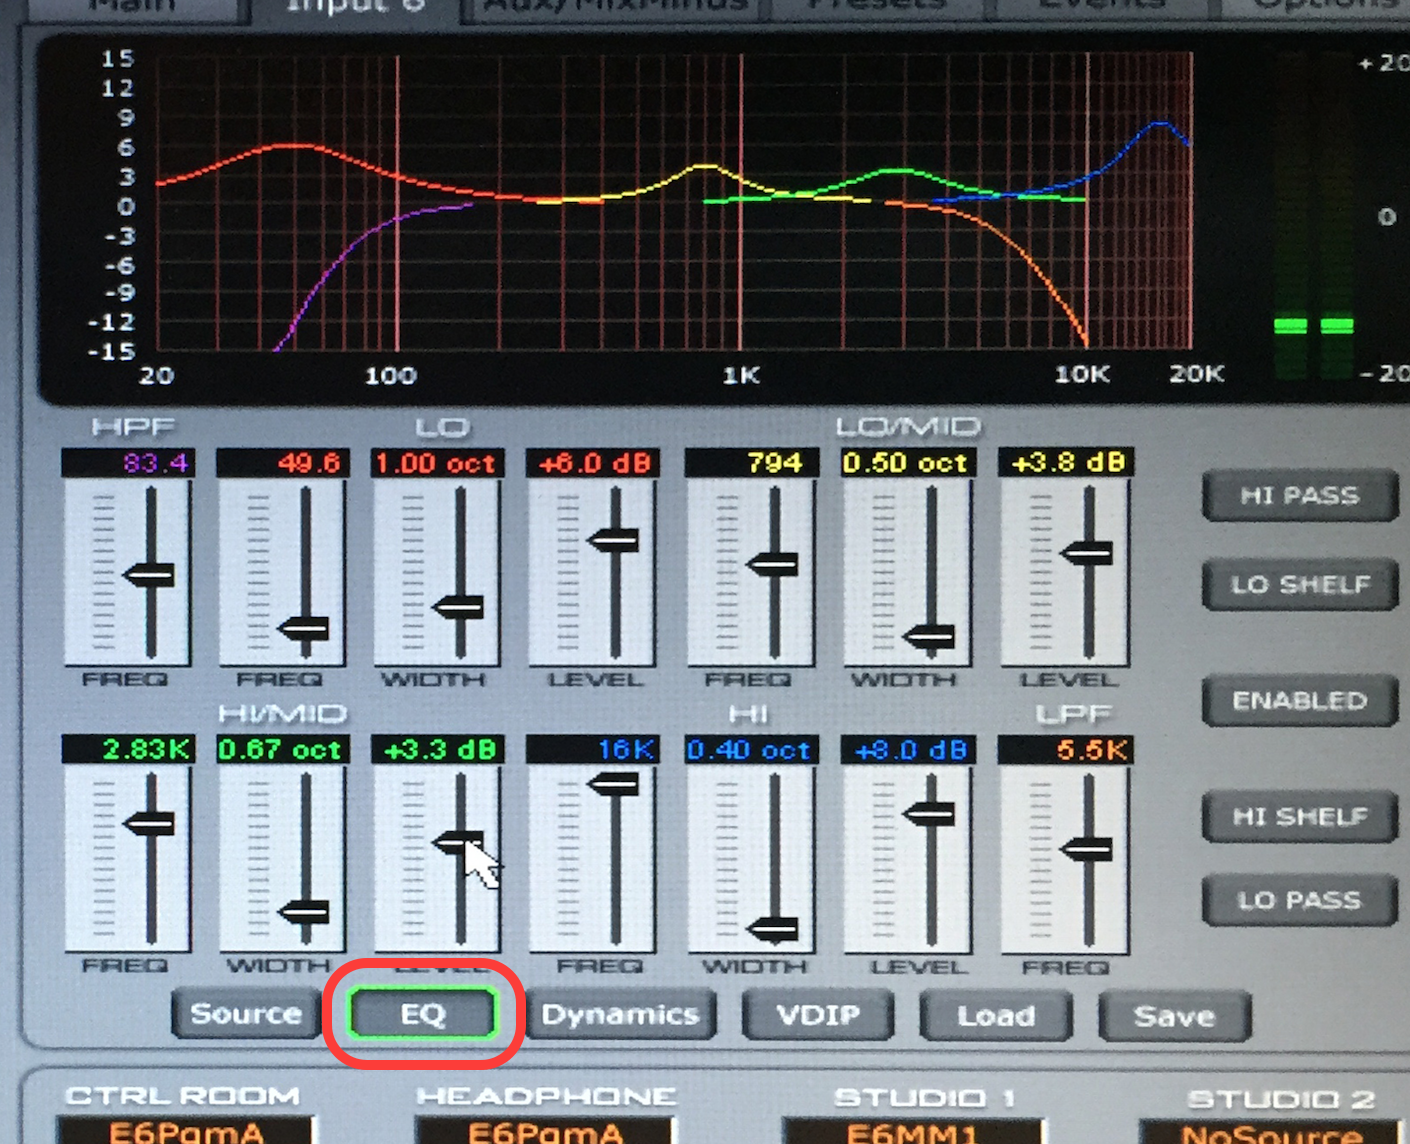
Navigate to the EQ tab and adjust the sliders to change the equalization on the selected channel. You may have to click on the "ENABLED" button. The "HPF" slider determines what frequency to start cutting off your lows. This is useful if you want to get rid of low frequency rumbles or low frequency mic handling noise. The next three sliders are in the "LO" section and determine how to handle low frequencies. "FREQ" determines the center point of the frequencies you would like to effect, "WIDTH" determines how much bandwidth or how wide of a brush you would like to stroke with to change you low frequency sounds, "LEVEL" determines how much you would like to add or subtract to the selected frequency and width to change the low frequency spectrum of your sound. In this example, there is a 6dB boost at 49.6 hertz with a width of 1 octave. "LO/MID" settings respond in a similar way to "LO" settings but are in the male vocal range. "HI/MID" settings respond in a similar way to "LO" & "LO/MID" settings but are in the female vocal range. "HI" responds in a similar way to "LO", "LO/MID", & "HI/MID" settings but are where sibilance sits...like the "s"s and "t"s. |
|


also ; Snapshot settings and apply to another mic
Reviewed 10/9/17 - Cox
Overview
Content Tools