Guide for Windows
Before getting started, there are some things to understand. First off, a computer can have multiple administrative accounts, that is accounts that belong to the Administrators group and have the same rights as "Administrator," but there is only one "Administrator" account and it cannot be deleted or demoted (but it can be disabled). Recent versions of Windows disable the built-in "Administrator" account by default, and walk the user through creating a new account during setup. This new account is added to the Administrators group, so while it is not "Administrator", it is just as dangerous.
Secondly, a lot of programs and computer configuration options are tied to a user account. Switching to a completely new user account will likely result in a lot of wasted time reconfiguring applications and moving data around. This is not the preferred solution. If, however, you are using the built-in "Administrator" account (very unlikely), it is the only way to move forward with this. In that case, we recommend you wait until you are installing a new version of the operating system or moving to a new computer before continuing. The rest of this document assumes that you are not using the built-in "Administrator" account (very likely).
![]()
Windows 7
How to not run as an administrator
| Standalone (Not Domain-Joined/Personal Computers) | Domain-Joined (UT Computers) |
|---|---|
Create a new administrative user account
Assign a password to the new administrative account
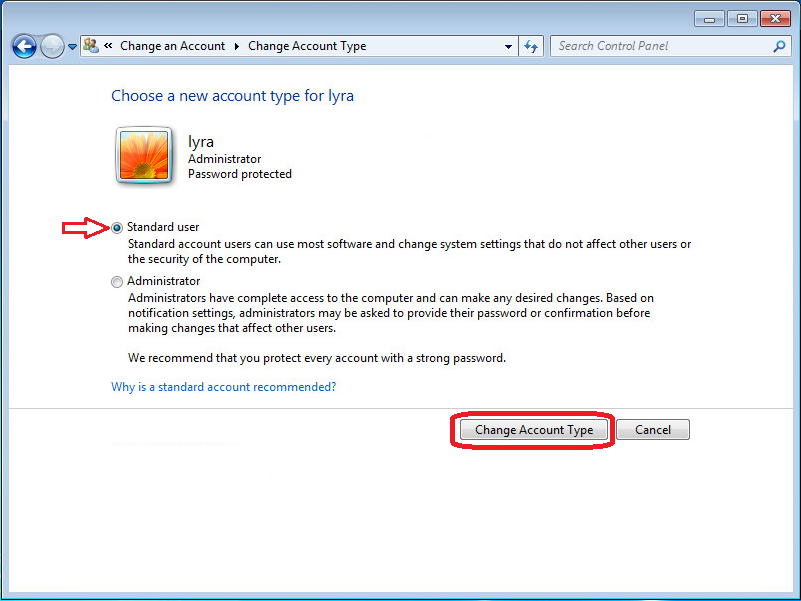
Make the original user account a standard user
14. Close the Control Panel. Log off and back on for changes to take effect. | Create a new user account
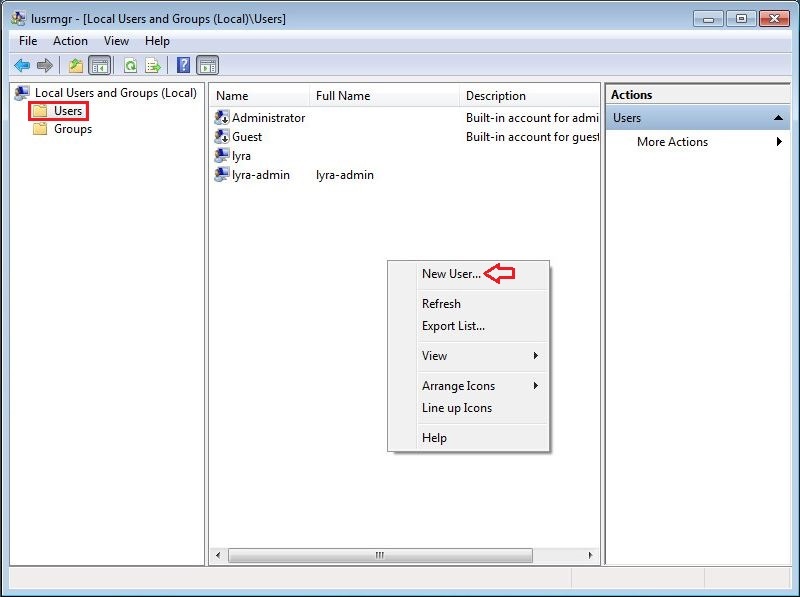
5. Click Advanced and click Users in the tree view in the left pane.
7. Click Create and then click Close Add the account to the local Administrators group
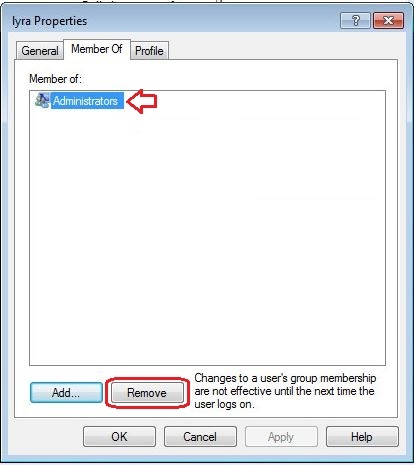
10. When the group name resolves, verify that it reads "<hostname>\Administrators" and click OK 11. Click OK again Make the original account a standard user
15. When the group name resolves, verify that it reads "<hostname>\users" and click OK 16. Click OK again 17. Close the Local Users and Groups control panel applet 18. Close the User Accounts control panel dialog (or click OK) 19. Close the Control Panel 20. Log off and back on for changes to take effect. |


![]()
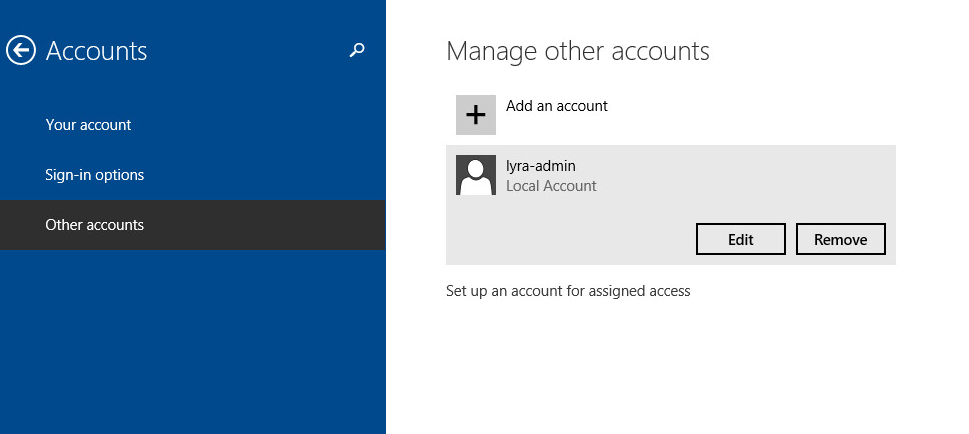
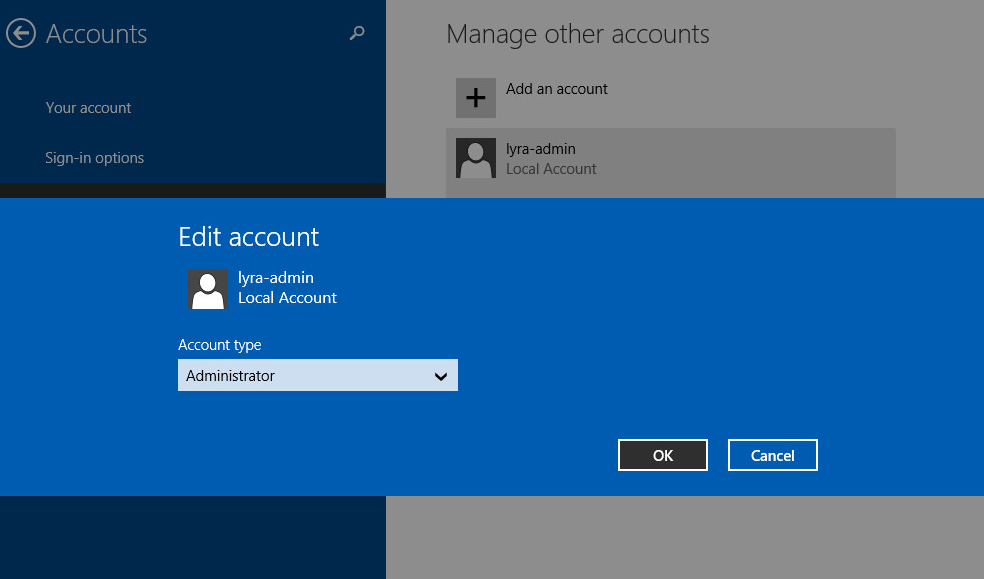
Windows 8.1
How to not run as an administrator
| Standalone (Not Domain-Joined/Personal Computers) | Domain-Joined (UT Computers) | ||||||||
|---|---|---|---|---|---|---|---|---|---|
 14. Log out & back in. |    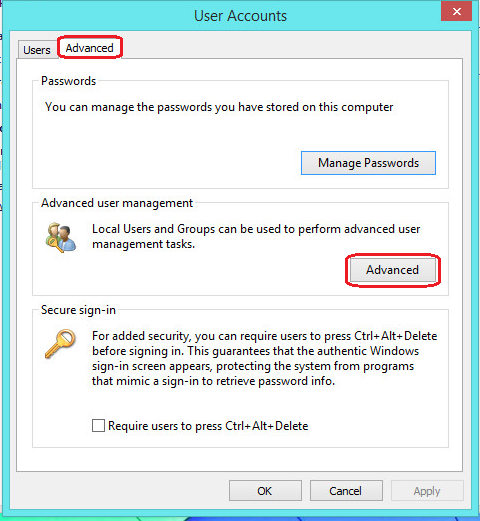  
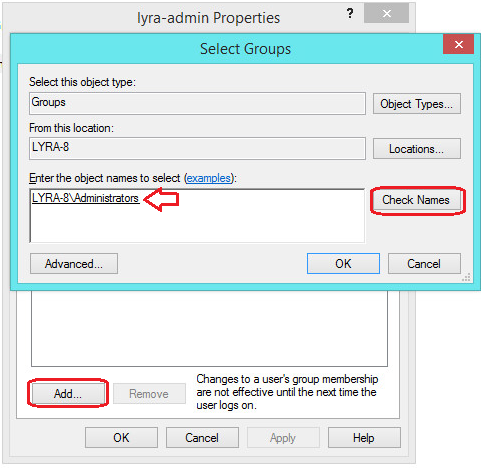 9. The name will resolve to "<hostname>\Administrators" , Click OK 10. Click OK again
 13. Click OK 14. Log Off and back on |


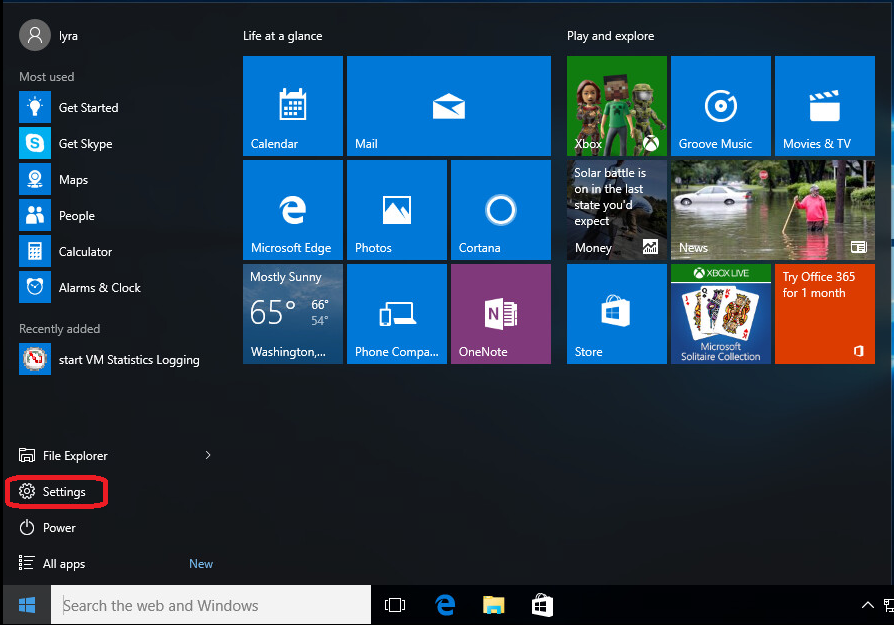
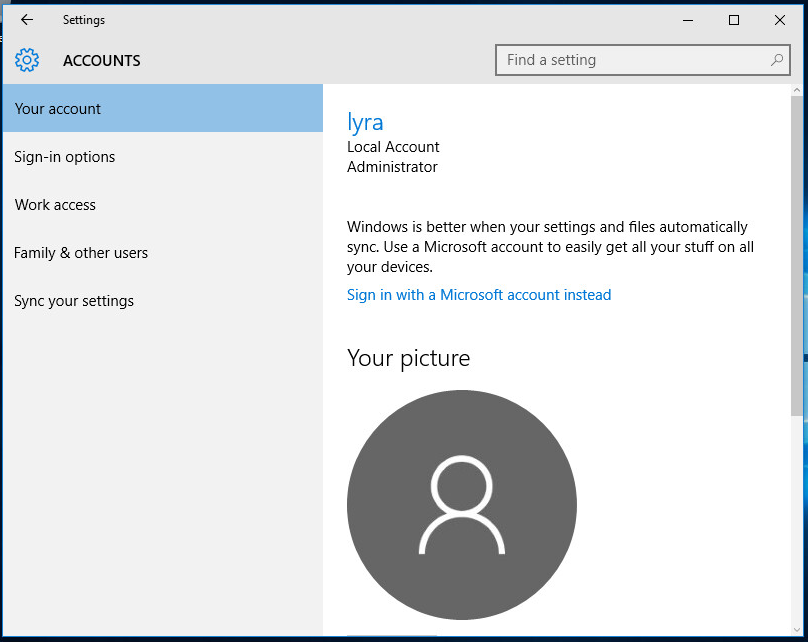
Windows 10
How to not run as an administrator
| Standalone (Not Domain-Joined/Personal Computers) | Domain-Joined (UT Computers) | ||||
|---|---|---|---|---|---|
  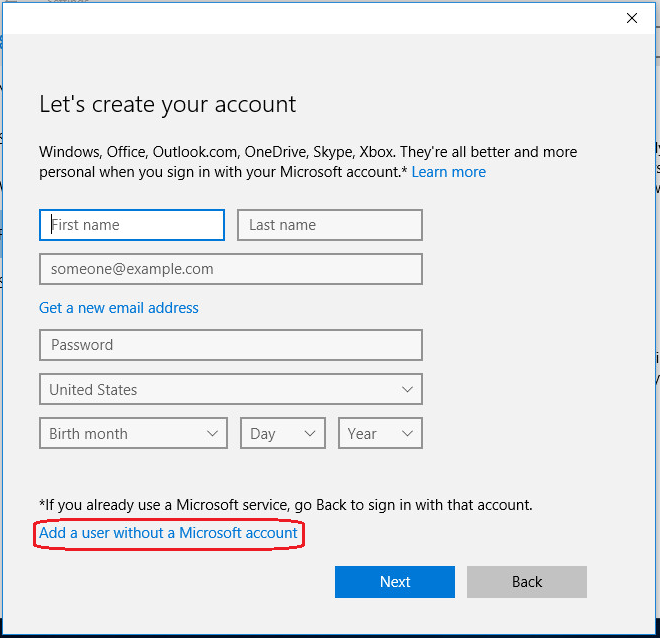     
 13. Log out and back in. |  
4. To continue follow steps 4 - 13 of the "Standalone" instructions and screenshots. |


Scenarios
After following the above set of steps, some tasks may not work right away because administrative access is required. Anytime administrative access is required, a dialog box (UAC) will open prompting you to authenticate with an administrative account. Using the new account you just created will almost always allow the process to continue, but in some cases you will need to run programs as an Administrator for them to work properly. If you find yourself unable to run a program you previously ran before or if you are having issue configuring a setting, the Run As... feature outlined below may resolve this issue.
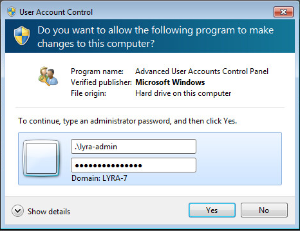
UAC Elevation Prompts
Below are examples of UAC prompts for each operating system:
| Windows 7 | Windows 8.1 | Windows 10 |
|---|---|---|
 |  |  |
Run-As Administrator/Other User
Below are examples of running at administrator in each operating system, key combinations/procedures are the same in each OS:
- Run As Administrator: Right-Click on program > Choose "Run as administrator"
- Run As Different User: Shift + Right-Click on program > Choose "Run as different user"
| Windows 7 | Windows 8.1 | Windows 10 |
|---|---|---|
Administrator:
| Administrator:
| Administrator:
|
Different User:
| Different User:
| Different User: 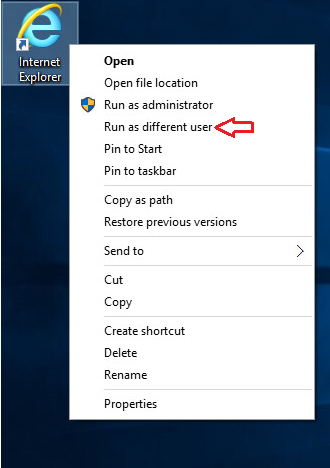 |


