Adding an Image to an Event or Story
An image can be added to a story or event using the "Image" field. Click the "Browse" button to launch the Media Browser.
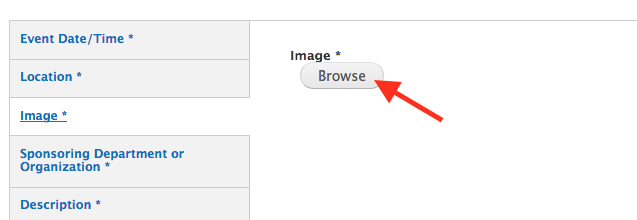
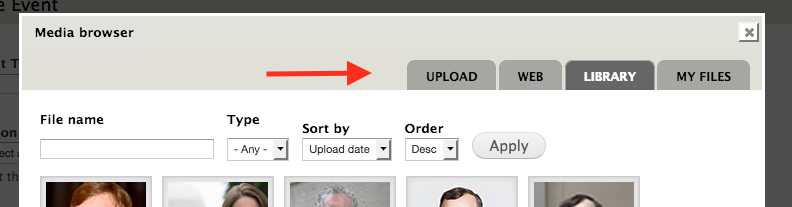
Follow the prompts to upload an image or choose an existing image from the Media Browser's "Library" or "My Files" tabs.
Adding an Image to the Body/Description Section
An image can be added to a story's "Body" field or an event's "Description" field or any text area that has a WYSIWYG toolbar. In the toolbar, click the "Add Media" button to launch the Media Browser and follow the same instructions above.

Image Alt Text
- Every image is required to have meaningful “alternate” text that will show if an image is not displayed, or if a visually impaired user is using a text-to-speech browser.
- The alt text should describe the image and, if possible, incorporate page keywords. The
- It is not necessary to include the words "Image of" or "Photo of" in the alt text.

Adding Files Without the Media Browser
To upload or find a file for use in other places (such as a right rail link) where the Media Browser is not available follow this process.
Accessing Files
On the Content screen, choose Files from the selection of left-hand tabs.

Finding a File
On the following screen, you can filter existing files—much like on the content screen. Please avoid uploading duplicate files. Using the same file facilitates updates and keeps the size of our website manageable.
Replacing a File
If a file exists on the website, such as a PDF with instructions or a photo of a particular professor, it can be updated in just one place by adhering to the following process. Then that file will be automatically updated across the website.
- Find the file you wish to update, and select it.
- Click the Edit tab.
- Replace File.
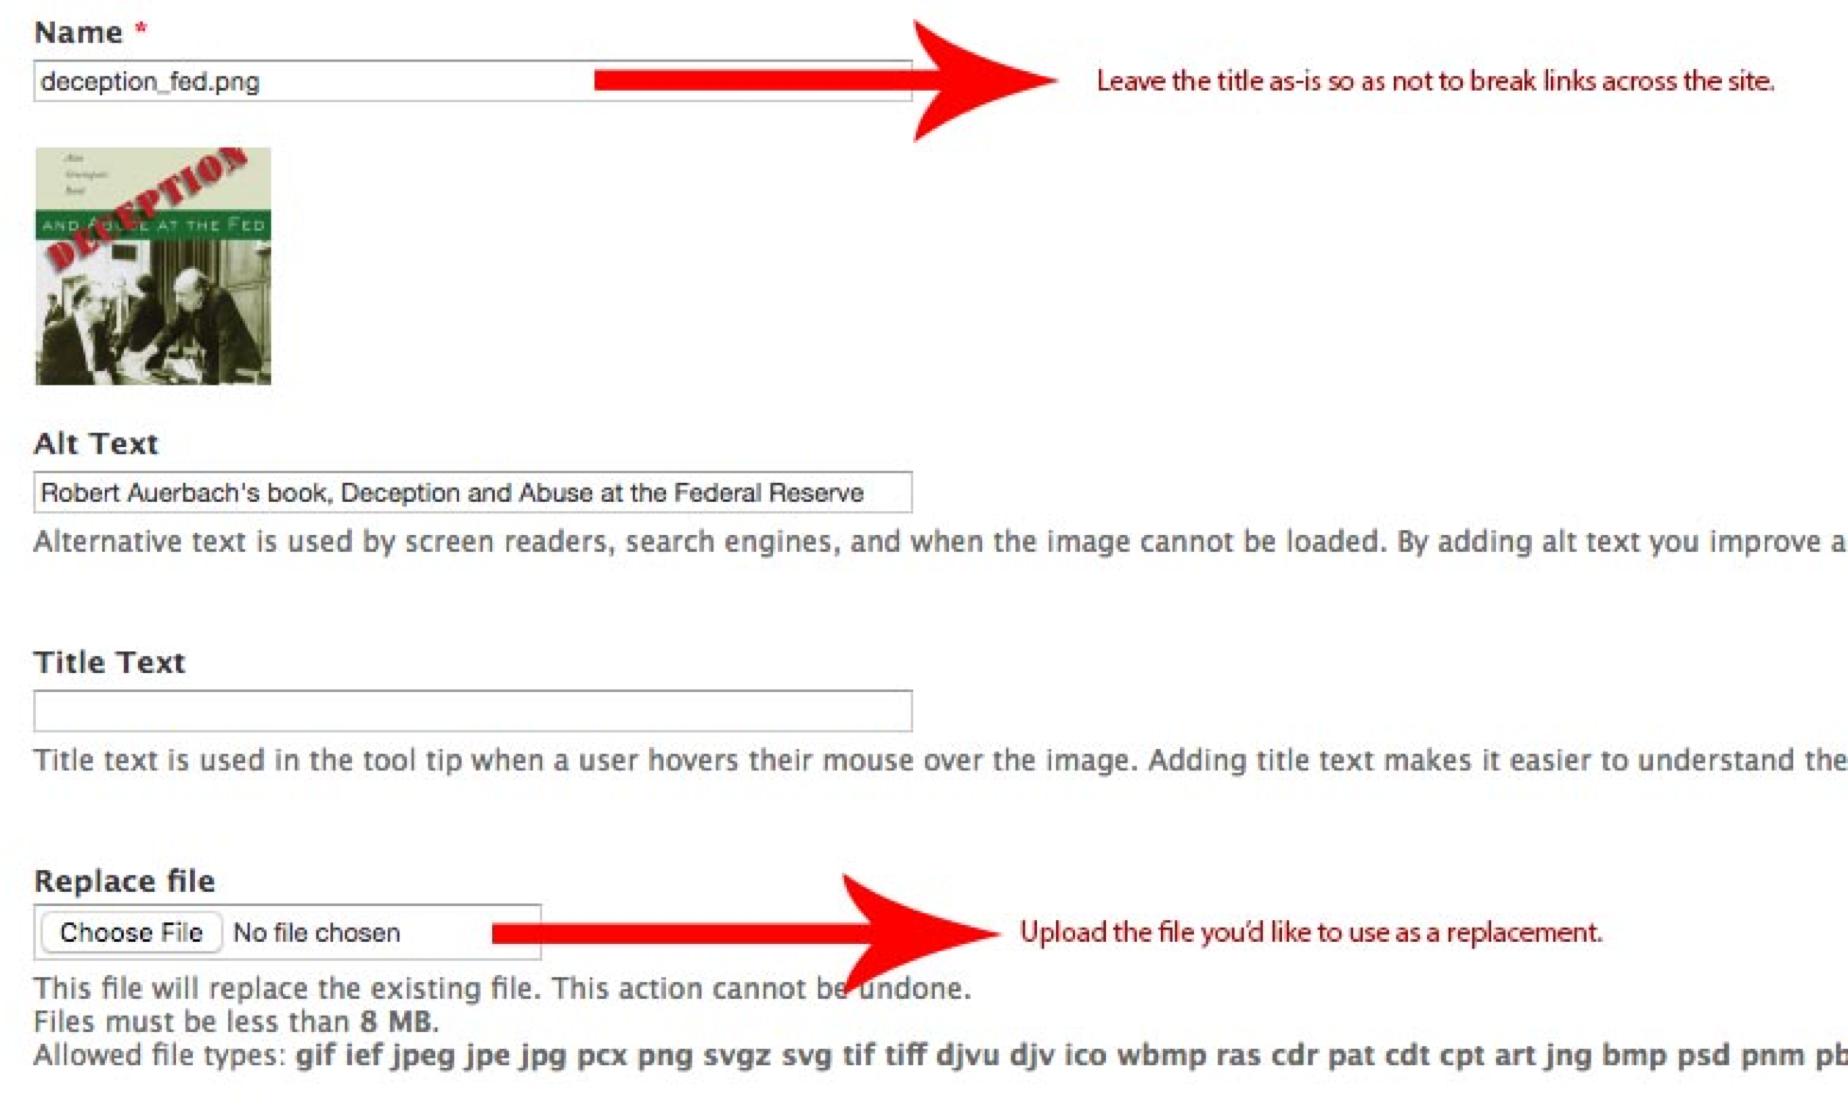
NOTE: The name of the new file MUST MATCH EXACTLY the name of the old file to keep all links across the site functional.
Adding a New File
- On the Content screen, with the Files tab selected, click “+ Add File”
- Select “Choose File,” find the file you wish to upload, and click “Upload,” then “Next.”
For PDFs, the process is now complete. Some tips on adding PDFs: Do NOT use files with spaces in the name (e.g., MGPS Internship Requirements.pdf).
For images, move on to step 3:
3. The Alt Text field MUST be completed. See Accessibility section for more information. Then, click “Save.”
For all files, DO ensure the name of the file is meaningful so you and/or others can find it with ease in the future.