CMB Edit Suites CMB 4.120 and CMB 4.112
Check the connection from the Thunderbolt 3 ADAPTER from the computer connect to the Thunderbolt cable from the Blackmagic Ultra Studio 4K Located under the desk If working with a Mac Pro Tower make sure the thunderbolt cables are plugged in
| |
This is the Blackmagic device that delivers audio and video to the OLED Monitor you can't see this because it is under the desk. |
|
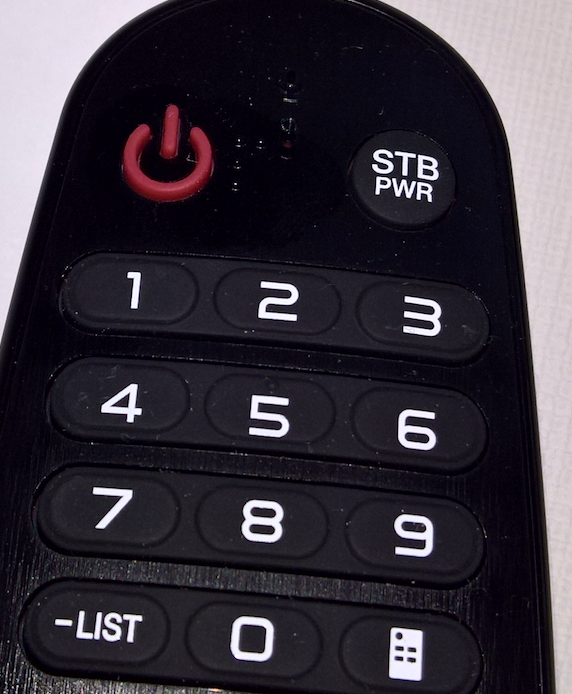
Turn on the OLED using the Remote |
|
| On the Mac Go to your System Prefs |
|
Select Sound |
|
Select Output Tab > Blackmagic Audio If Blackmagic option is unavailable make sure the thunderbolt cables are connected and restart the computer. |
|
| Plug your headphones into the PHONES output on the ROLLS Amp. Make sure amp is powered on. |
|
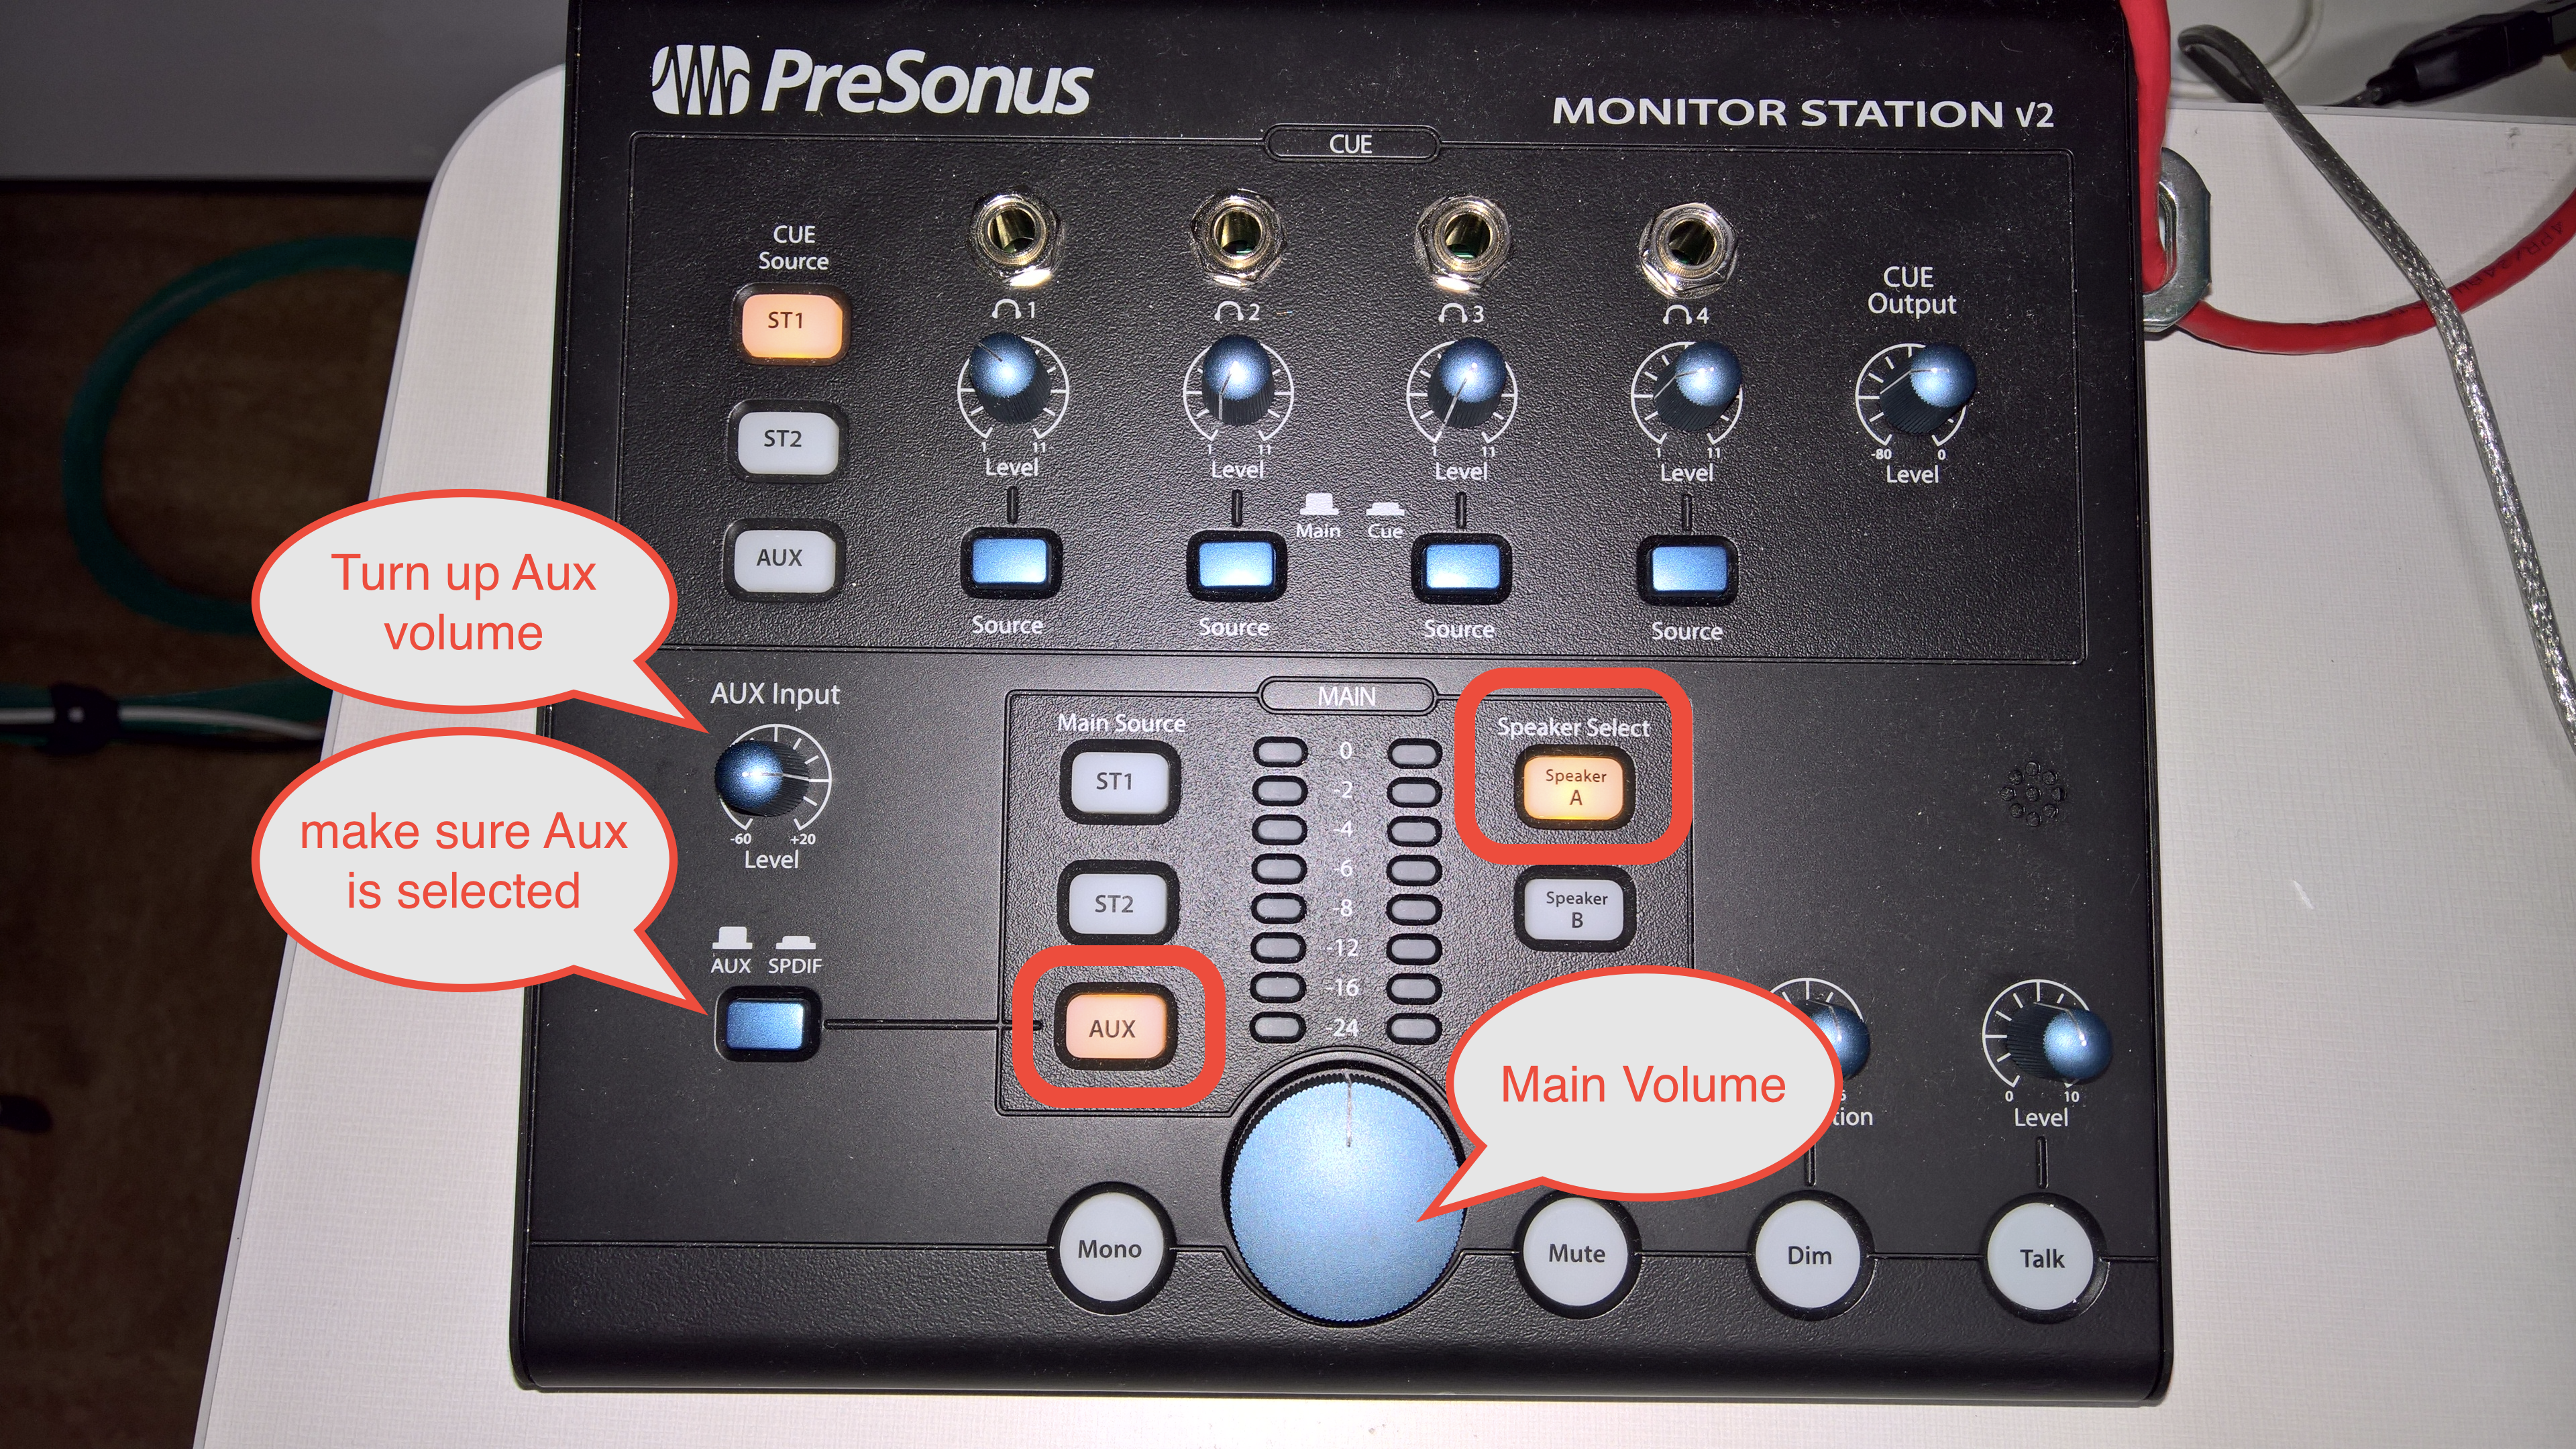
Setup the PreSonus Monitor Station if the suite has one |
|
How to setup AVID for Displaying HD, UHD and 4K video on the LG OLEDOpen AVID |
|
Choose to open your project or make a new one 23.98 fps is recommended |
|
Make sure the output to hardware is enabled Here it is disabled |
|
| Click the icon and choose UltraStudio 4K as the output setting |
|
Once the project opens Check the format >AVID Media Composer >Preferences |
|
Make sure your project is set to this UHD 23.976 If you don't see image out of AVID troubleshooting tip is to set AVID format to 1080 23.98 then you should see the image on the tv
Then back to this
|
|


Premiere Pro output settings
One note about Premiere - You have to set the preference Choose "Premiere Pro CC > Preferences > Playback..." |  |
Choose Blackmagic Playback Click OK |  |
| Click on the Setup and choose scale down |
|
| Choose "Premiere Pro CC > Preferences > Audio Hardware..." |  |
| Make sure you Preferences look like this | 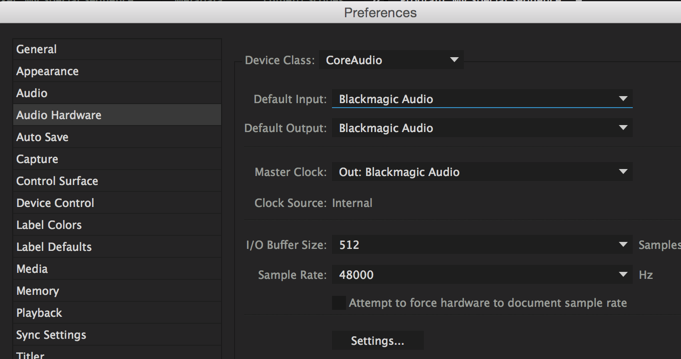 |
| If you get this error click Yes | 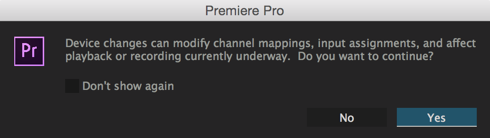 |
Davinci Resolve output settingsOpen DaVinci Resolve |
|
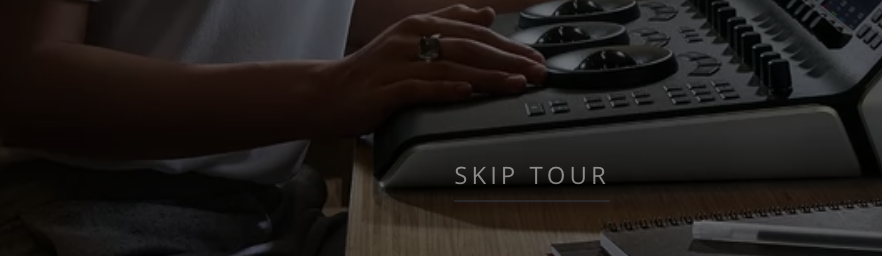
| Choose to Skip Tour |
|
| Do the Quick Setup even if you think U don't need it |
|
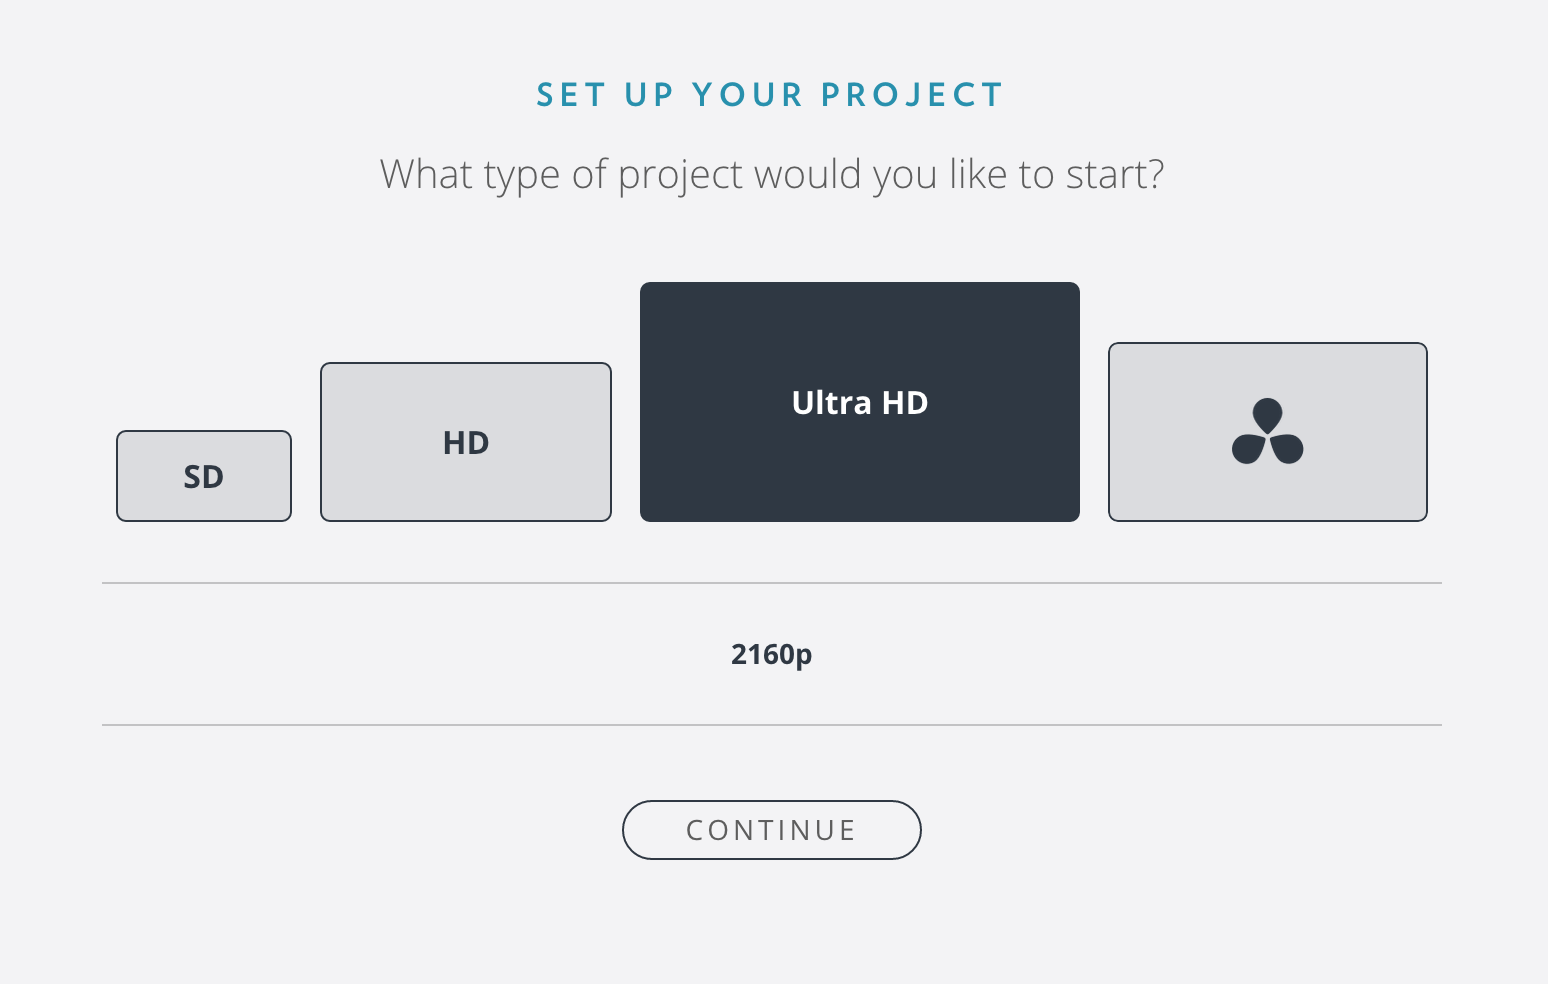
| Choose Ultra HD or HD |
|
Browse to your Hard Drive to save the Media to Select the magnifying glass and browse to your HD |
|
Choose your hard drive to save the Media click Open and then Continue |
|
Keyboard Layout is helpful if you already know another application like AVID Once your starting with Resolve you have to set a few more settings |
|
| |
Chose the UltraStudio 4K For both Video and Audio I/O |
|
You will have to close and open Resolve to apply the hardware settings |
|
| So name and save your project |
|
Reopen Resolve and chose your project to re-open that you just saved |
|
Simple import of Media >File>Import File>Import Media |
|
| Change the frame rate to match the clips |
|
When you import your footage make sure to note the Resolution of the clips you are working with and match the timeline resolution and project settings in Resolve |
|
Then go to the Project Settings Icon in the lower right corner of the screen of the application Choose Master Settings |
|
Since our media was 4096 x 2160 set the Timeline Resolution and the Video Monitoring to 4K 2160p 23.976
|
|
| You should see the image on the TV as well as hearing it |


Overview
Content Tools