1. Introduction
After you have configured the computers you need to purchase—following either the Ordering Apple Products or Ordering Dell Products guide—follow the steps below to complete your purchase in UT Market.
UT Market is the primary place to begin the purchasing process and assign purchases for checkout. After creating the UT Market cart, follow the procedures listed below to complete your order.
2. UT Market
Locate Shopping Cart
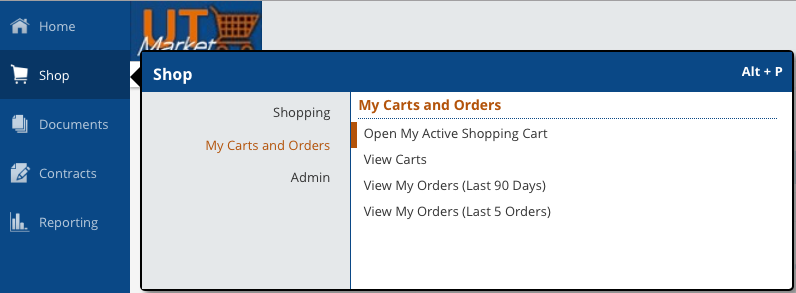
2.1 Navigate to UT Market. On the left side bar, select Shop → My Carts and Order → Open My Active Shopping Cart
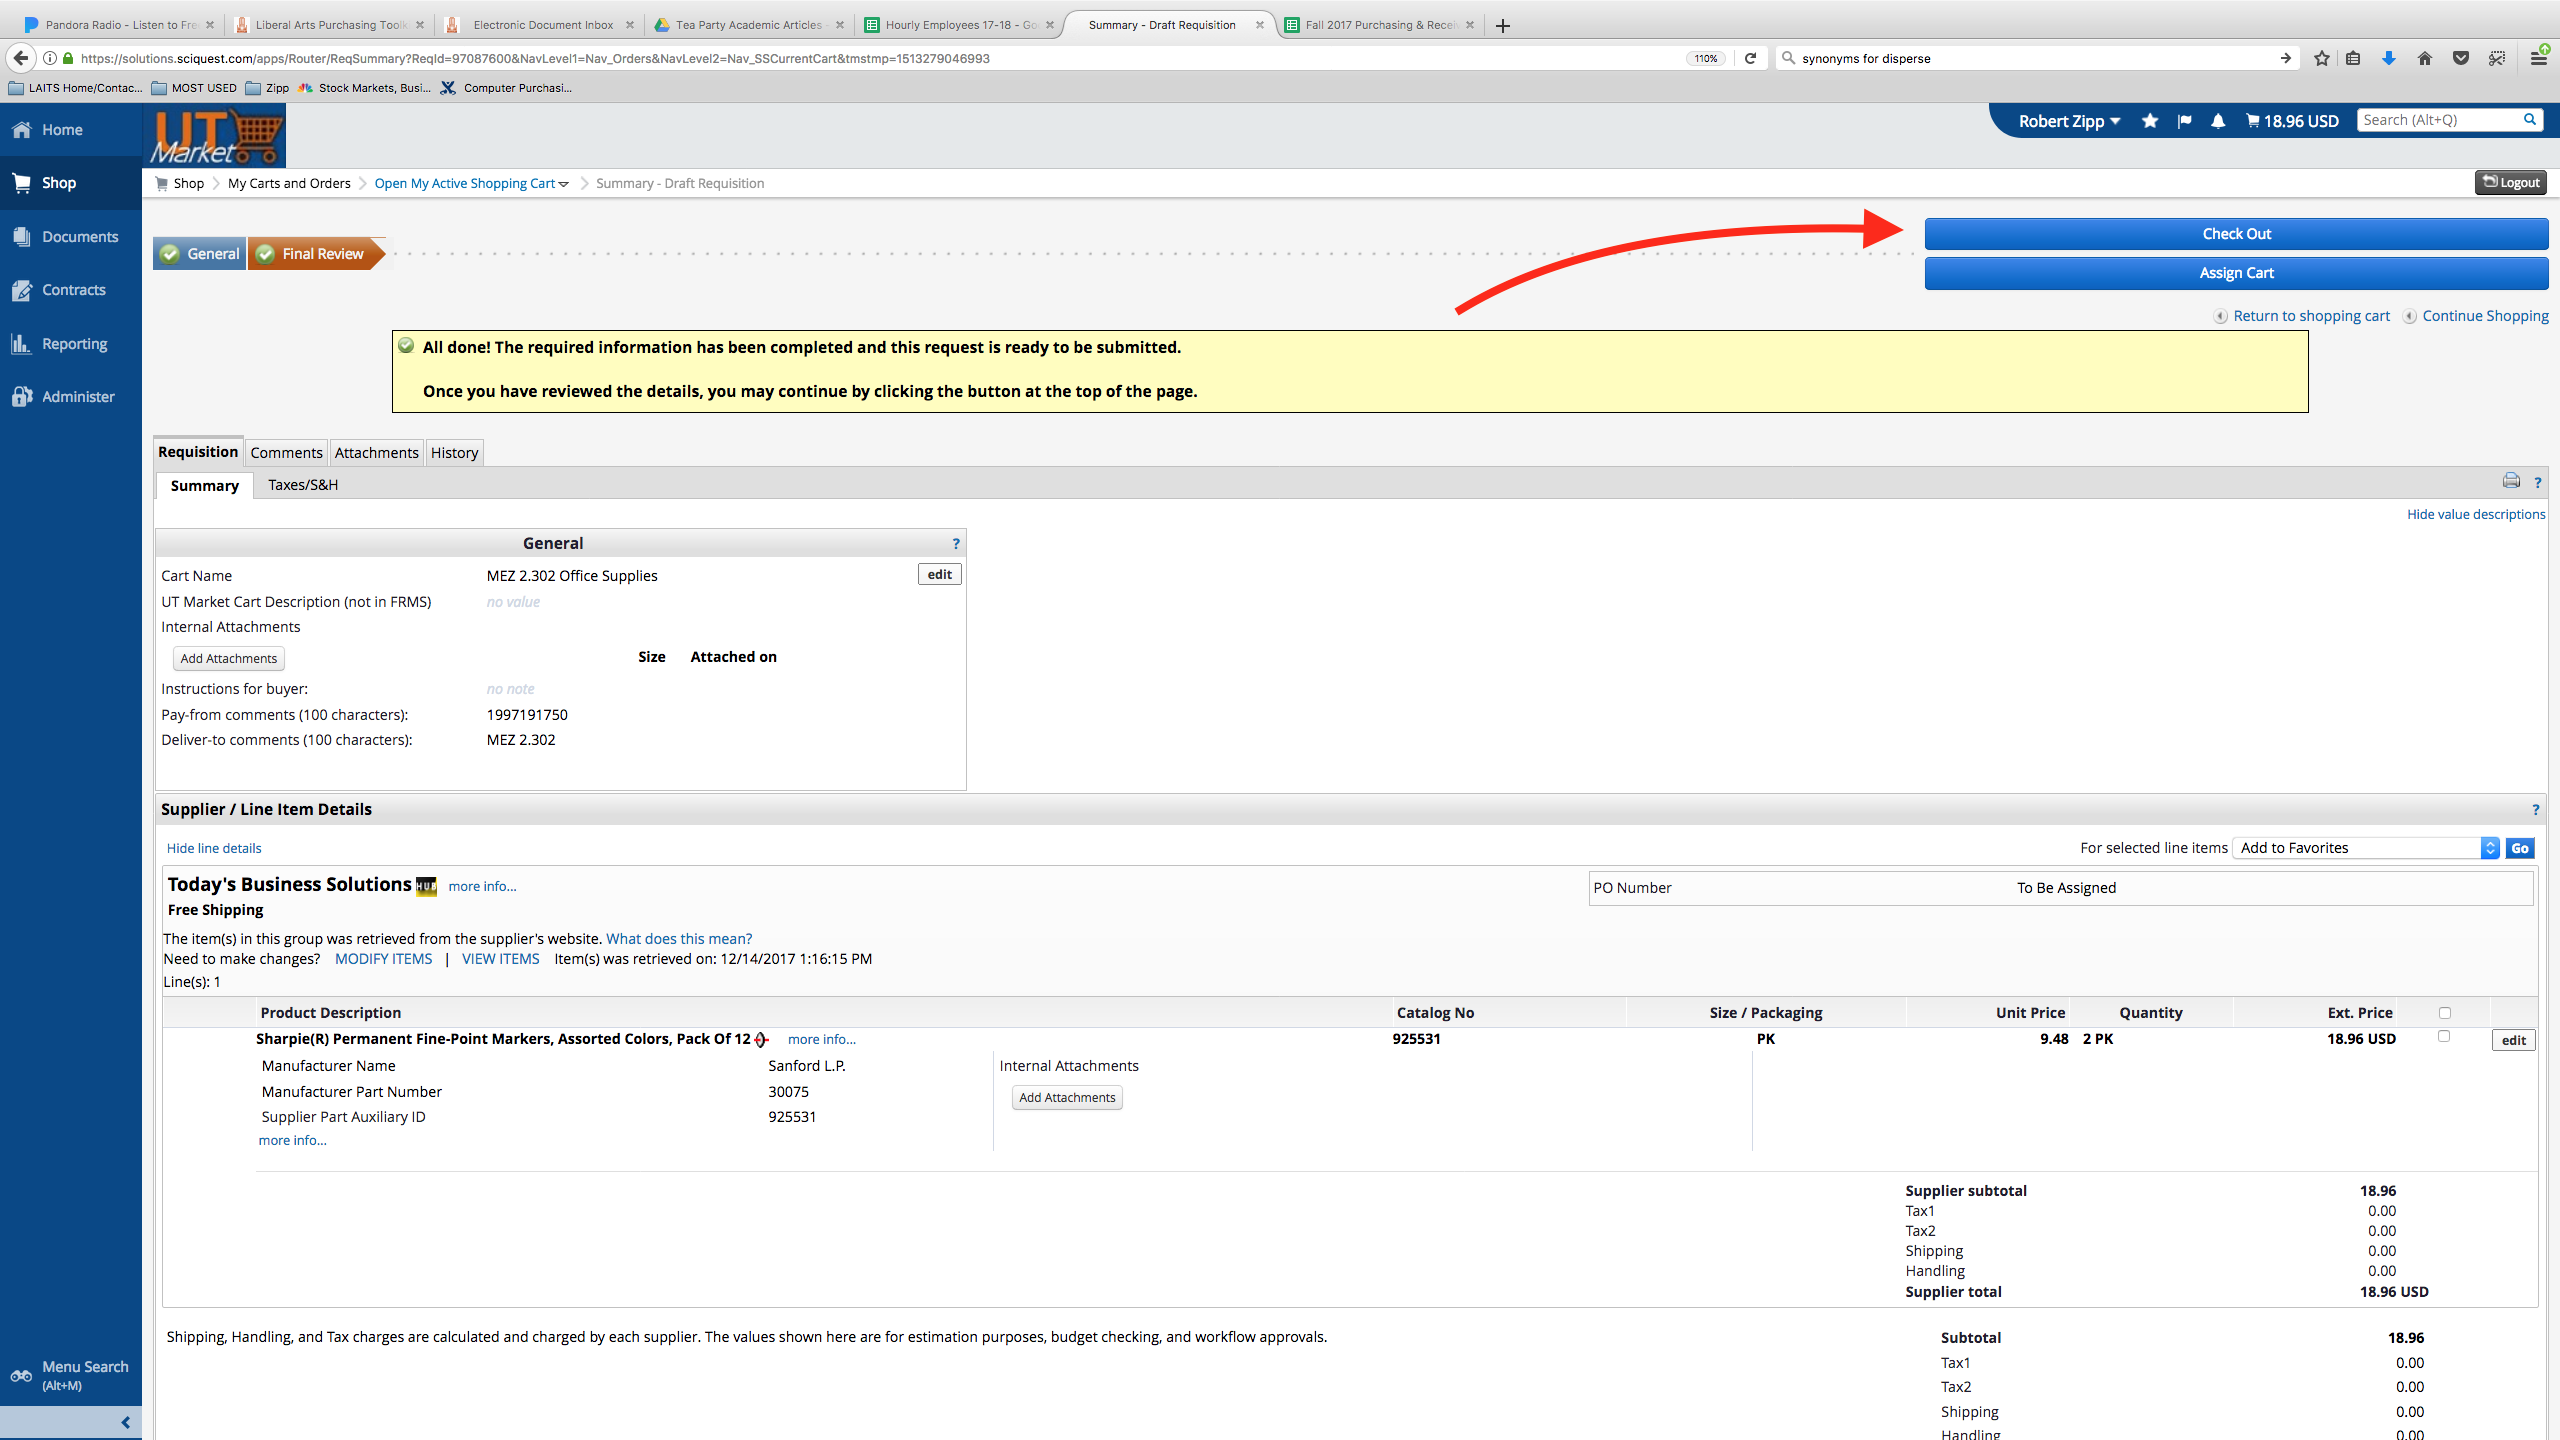
2.2 Fill out the following fields in the cart:
- Cart name and UT Market Cart description [Department Code] - [Brief description of items] - [End user/group]
- The Cart Name and & UT Market Cart Description should always be the same.
- Example: COLA - MacBook Air - Jane Smith
- Example: ENGL - Mac mini/Latitude - John Smith
- Example: MDSC - Latitude - John Smith
- Pay-From Comments: [10-digit account number without spaces]
- Deliver-To Comments: [2109 San Jacinto Blvd. L. Theo Bellmont Hall Rm. 220, Austin, TX 78712]
- Instructions for Buyer: A brief description the order, including:
- Summary of items
- Who requested the order
- Who approved
- End user
- Delivery instructions
Examples
Dell monitor and HDMI cable for _____. Approved by _____. Deliver to LAITS via 2109 San Jacinto Blvd. L. Theo Bellmont Hall Rm. 220, Austin, TX 78712
Dell Latitudes, 1 Dell Optiplex and accessories for FRIT Admin Staff. Approved by _____ for use by ______ (and ______). Deliver to LAITS via 2109 San Jacinto Blvd. L. Theo Bellmont Hall Rm. 220, Austin, TX 78712.
2.3 Click Review and Check Out.

2.4 Click Check Out
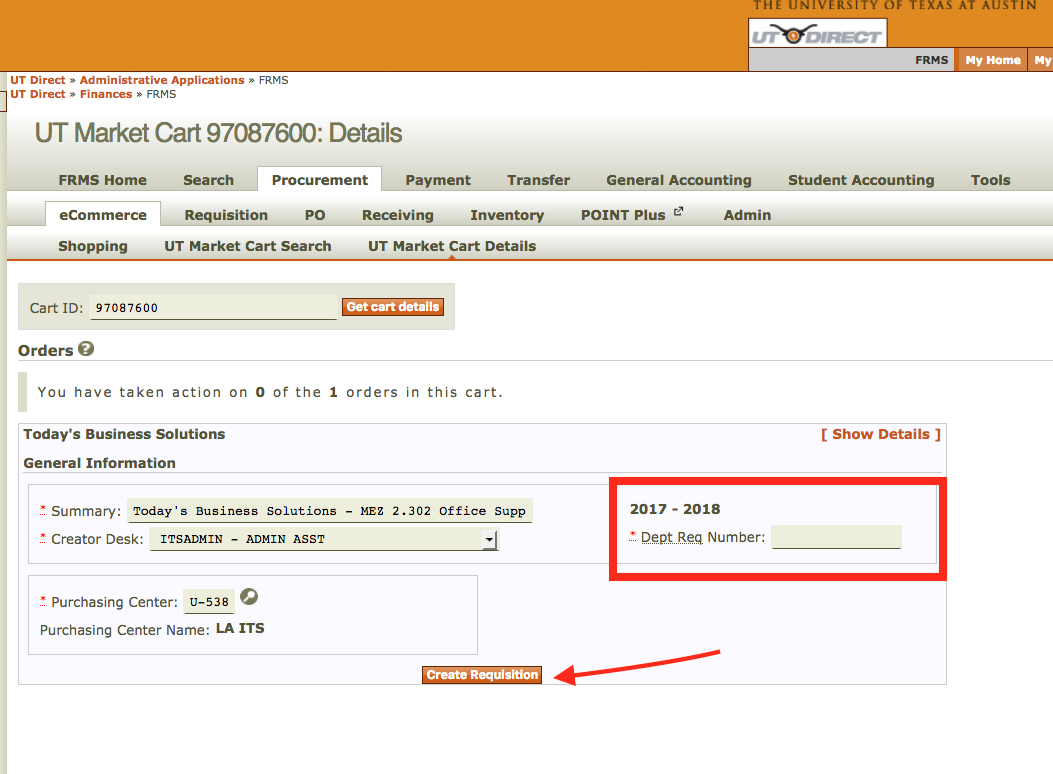
2.5 Enter in the Dept REQ Number. This will be an internal reference number to organize purchases in the department.
Then, select Create Requisition.
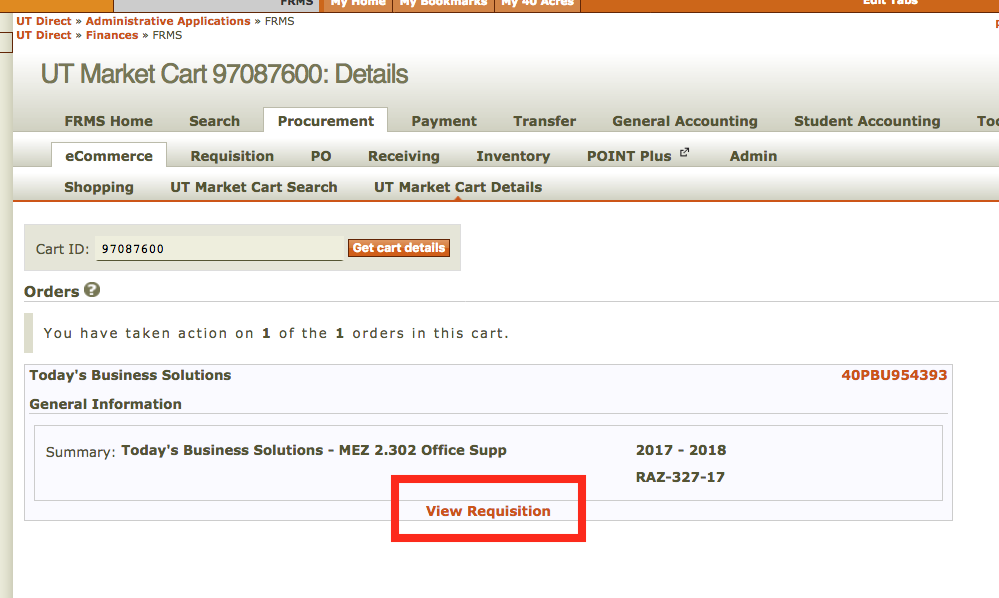
2.6 Then, select View Requisition
2.7 Review all the previously entered information and the Internal Delivery information.
Note: All orders should go through Campus Distribution Services.

2.8 If the item is going to someone other than the buyer, then you may edit information in red. This will let LAITS know who to contact for scheduling deployment. Click Save & Continue

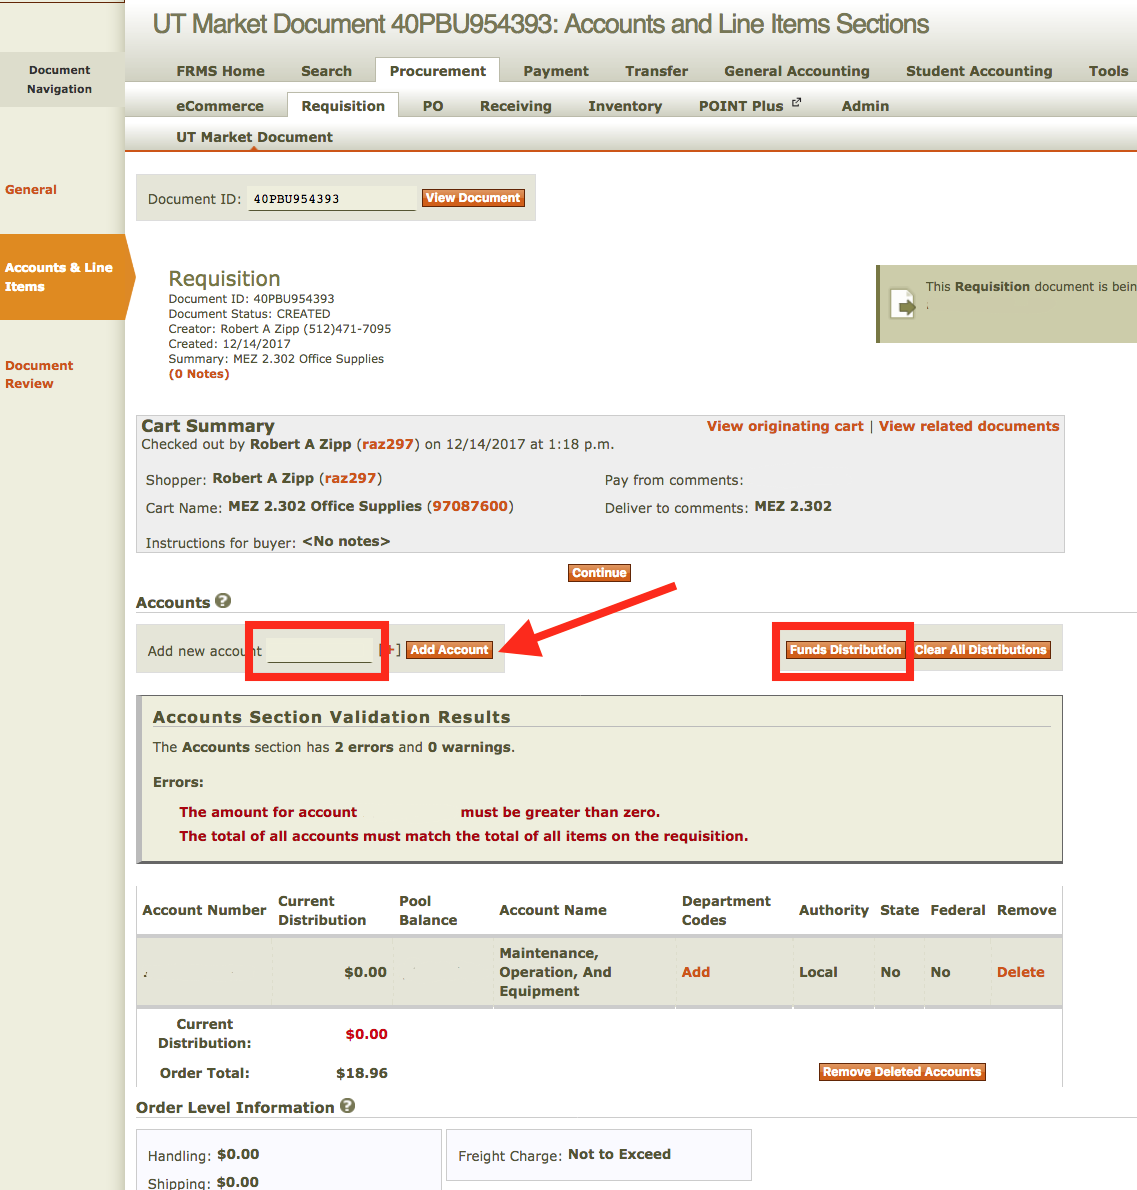
2.9 Enter the 10 digit account number and select Add Account. Select Funds Distribution.
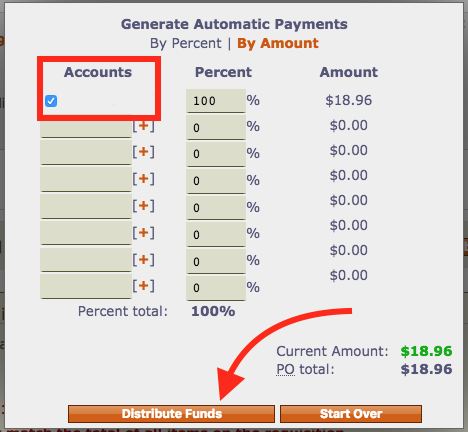
2.10 Distribute funds accordingly and select Distribute Funds.
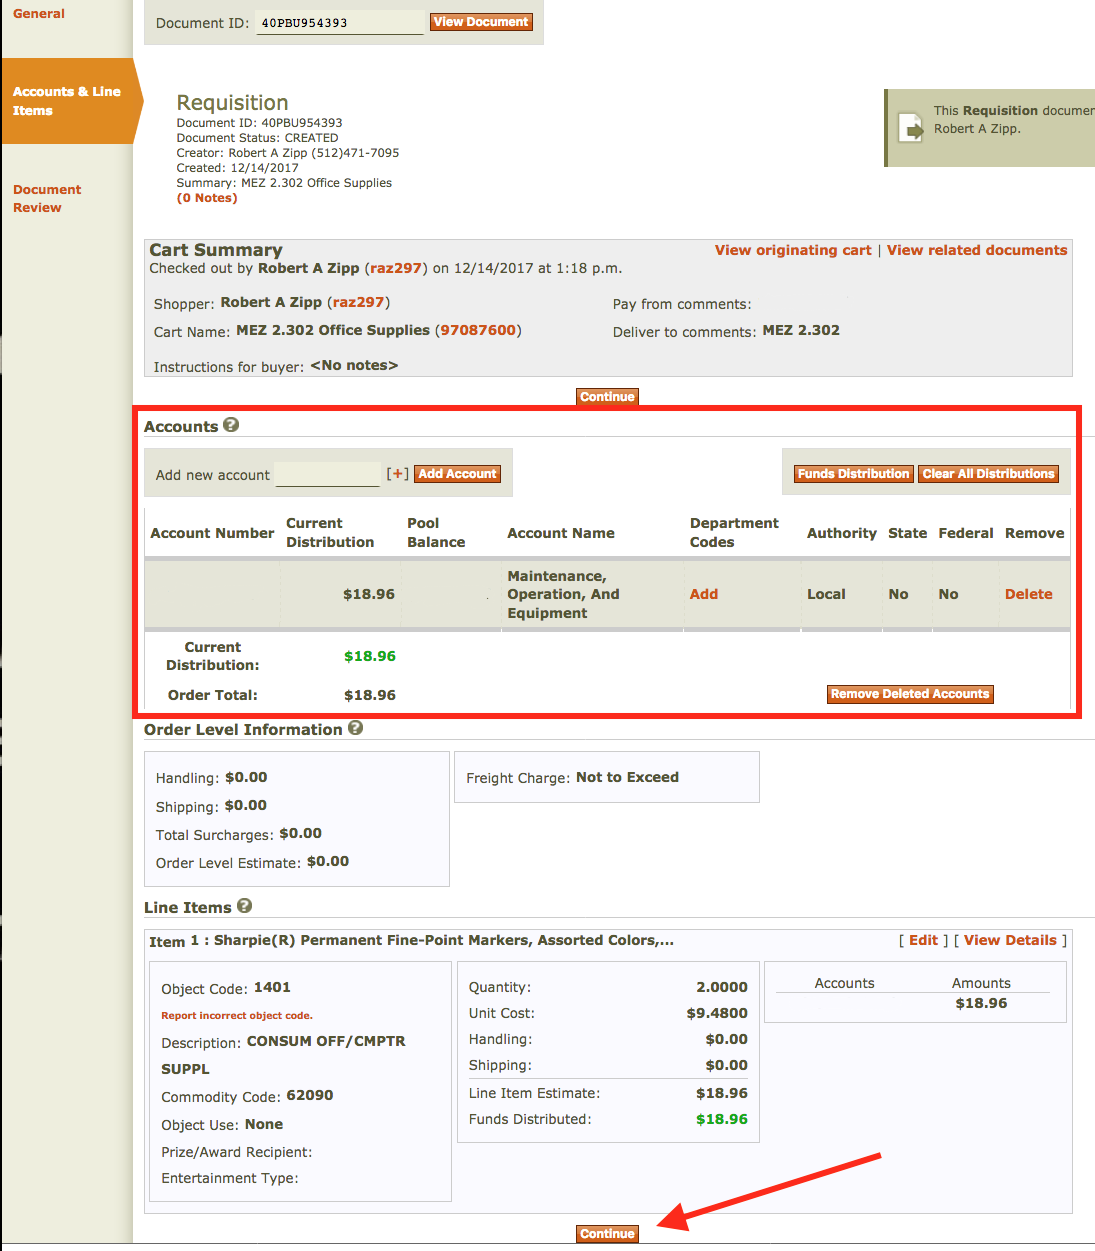
2.11 Review the information for accuracy then click Continue—account numbers have been removed from the image.
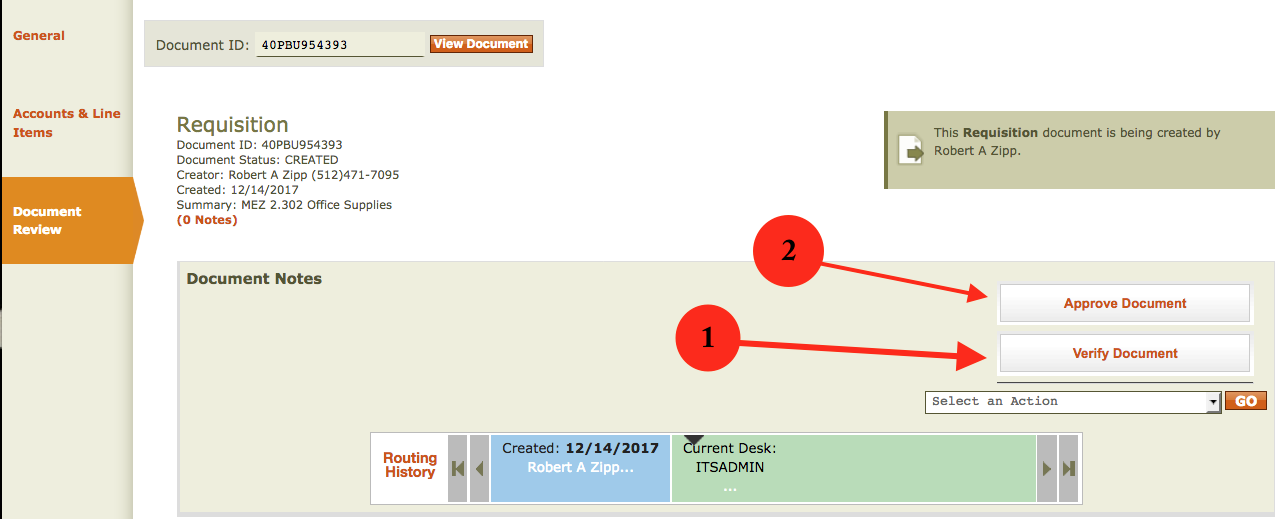
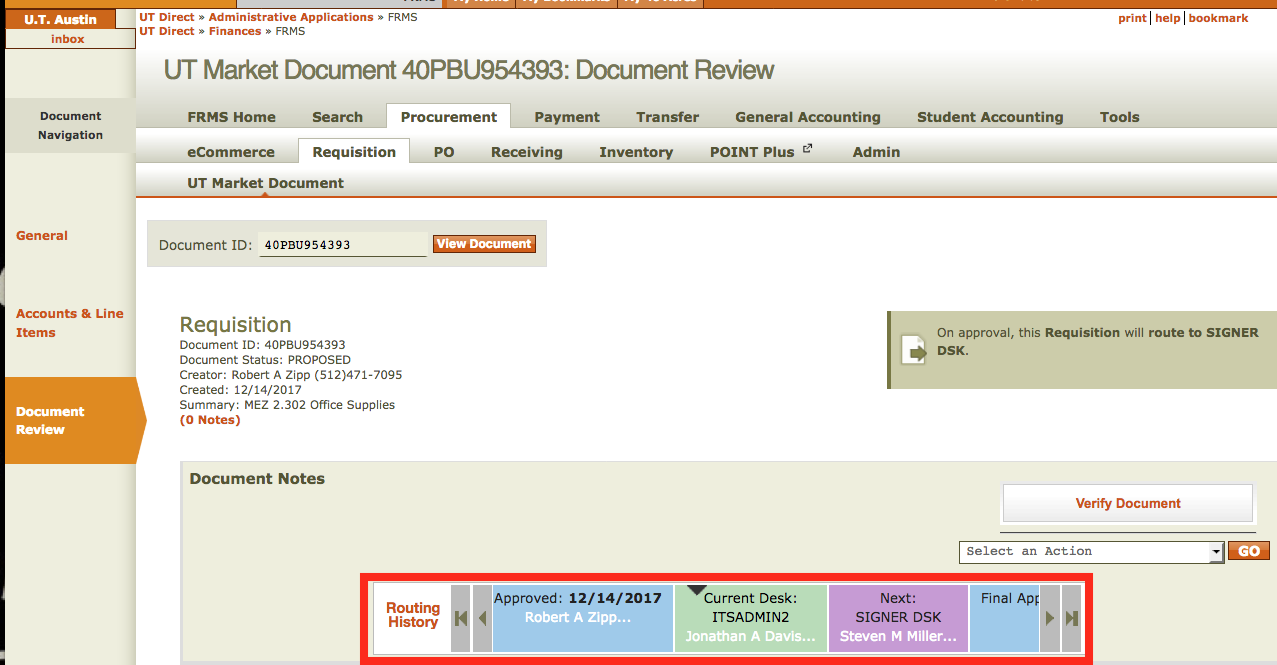
2.12 Click Verify Document, followed by Approve Document.
3. Helpful tips
3.1 See who the document routes to in case you need to follow up with that person to ensure they give the next person the document ID number (40PBUXXXXXX) to review and route the document forward.
3.2 You can use the drop down under Document Notes if you want to send an FYI → Use the new drop down to choose EID → Put in EID, then click Go →This will send a copy to UT Direct inbox for your own records.

Table of Contents
Overview
Content Tools