Learning Objectives: This page will cover how to signup for a UT Zoom account, install Zoom, and how to integrate your UT Zoom account with Canvas. If needed, it also explains how to delete your public (Non-UT) Zoom account and how to utilize SSO (Single Sign-on).
How to signup for UT Zoom Account
How to Install Zoom on your Computer
You can access the installer at the bottom of https://utexas.zoom.us/ or go directly to https://utexas.zoom.us/download
- Select the Zoom Client for Meetings option to download the Zoom Installer. Open downloaded file to progress through the install process.

How to Sign into Zoom
There are two recommended options
- OPTION 1 - Navigate to https://utexas.zoom.us/profile to log into your Zoom account using your UTEID and password.
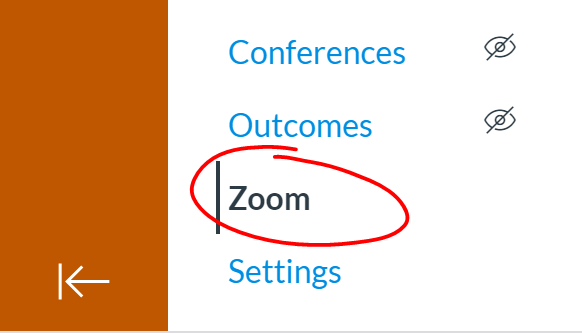
- OPTION 2 - You can access Zoom through your Canvas page for your class. Just log into your Canvas course and select the Zoom link in the left menu bar
NOTE: If you have an existing public Zoom account that you don't need, please delete it using these instructions to avoid mixing up your two accounts which could lead to a loss of functionality in a meeting.
NOTE: if you find yourself with a different login screen that offers an option on the right for "Sign in with SSO", please use the instructions posted here on the Troubleshooting page.
How to Connect UT Zoom Account to Canvas
This is done for you automatically when you click the Zoom link in the bottom left menu bar in your Canvas course.
- Navigate to your Canvas course
- Scroll down to the bottom of the left menu bar.
- Click Zoom link
- You'll be prompted to "Authorize" zoom in Canvas. Agree to that and your UTEID will be tied to your UT Zoom account.
- NOTE: If by some chance you skipped the signup process first, your account will be created when you Authorize Zoom in Canvas.
Video Instructions on Connecting to MSB Zoom Rooms
Please watch the video pertaining to the MSB building that your class is located in for a quick tutorial on how to use the Zoom rooms.
UTC: https://www.youtube.com/watch?v=F3CUisKX3yA&list=PL32TobLoKLYoCpg_YiJKwhvfNur32qzN2&index=2&t=0s
RRH: https://www.youtube.com/watch?v=4YzQH7cYp50&list=PL32TobLoKLYoCpg_YiJKwhvfNur32qzN2&index=3&t=0s
CBA: https://www.youtube.com/watch?v=A4xXRzdw12k&list=PL32TobLoKLYoCpg_YiJKwhvfNur32qzN2&index=4&t=0s
Alternate Zoom Room Setup for Better Meeting Quality
This method of initiating a Zoom meeting puts the bulk of the Zoom workload onto your laptop, which should result in a better meeting experience with clearer video. The main difference between the instructions for UTC/Rowling Hall and CBA/GSB is that in the first instance you do not connect your laptop to the desk with an HDMI cable. Use the "utexas" WiFi connection instead. In the second instance you do connect your laptop to the room's desk with an HDMI cable. In both instances, you will share your presentations from your laptop and not through the room's touch panel.
For UTC and Rowling Hall Zoom Rooms
- Join your Zoom meeting with your laptop first to ensure that the laptop becomes the meeting host. Note: Do not connect your laptop with an HDMI cable to the desk, use the utexas WiFi connection for internet connectivity
- After joining your meeting, close the options panel to join with computer audio or phone without picking either of them. Ensure that your laptop audio is muted (dismiss any warning that there won’t be audio on the Zoom recording. Your audio will be recorded through the room's microphone)
- Use the room's touch panel to join the Zoom Room to your meeting
- On your laptop make the Zoom Room a co-host. This will allow to you to use the room’s document camera if you need it
- Continue the meeting using your laptop to share presentations, etc. If you would like to use the room's doc cam, press the Doc Cam button on the desk's touch panel to switch to it. To return to your presentation simply share it from your laptop again. The Zoom meeting will automatically switch back to your laptop presentation
For CBA and GSB Zoom Rooms
- Join your Zoom meeting with your laptop first to ensure that the laptop becomes the meeting host. Note: Do connect your laptop with an HDMI cable to the desk. Do not hit share on the touchpanel, use your laptop to share your presentation
- After joining your meeting, close the options panel to join with computer audio or phone without picking either of them. Ensure that your laptop audio is muted (dismiss any warning that there won’t be audio on the Zoom recording. Your audio will be recorded through the room's microphone)
- Use the room's touch panel to join the Zoom Room to your meeting
- On your laptop make the Zoom Room a co-host. This will allow to you to use the room’s document camera if you need it
- Continue the meeting using your laptop to share presentations, etc. If you would like to use the room's doc cam, press the Doc Cam button on the desk's touch panel to switch to it. To return to your presentation simply share it from your laptop again. The Zoom meeting will automatically switch back to your laptop presentation
Using Virtual Backgrounds in Zoom Meetings
The virtual background feature allows you to display an image or video as your background during a Zoom Meeting. Please visit this Zoom article on virtual backgrounds for more information:
There are McCombs and UT-related images that may be used as virtual backgrounds available at Zoom Backgrounds on the Communications wiki
If you have completed all the above setup steps, please move on to Step 2
Still need help?
For McCombs faculty, please contact Media Services via email or phone:
- Email VC-Trouble@mccombs.utexas.edu
- Call 512-232-6679 (GSB/CBA) and 512-232-4646 (RRH)
For all other UT faculty, please contact your respective college or school