Crestron Touch panel
- Click home>Advanced>Surround Settings>Make sure surround settings are set to auto

Choose Surround Sound
- Make sure surround settings are set to auto

- Make sure the front panel of the decoder in the rack states HDMI and PCM – should look like this frame grab


Launch the Audio MIDI Setup tool. Click HDMI and Output > Choose 8ch-24 bit Integer

Choose Configure Speakers. Multichannel 5.1 Surround and set to these settings below. Click Apply.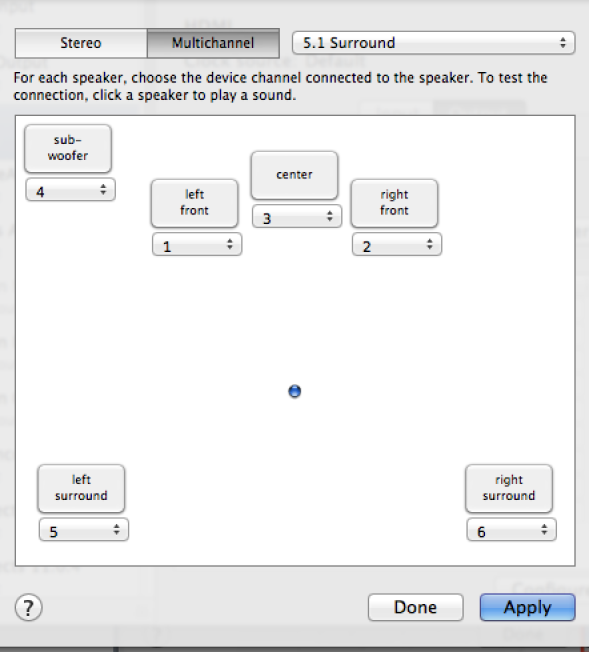
Click Apply and Done and Close the Audio Midi Setup Tool.
Launch ProTools | Open a session |
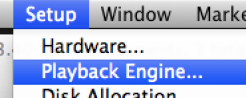
Check the Playback Engine> go to >Setup>Playback Engine |
|
Make sure the HDMI output is selected and you will need to restart if it is not already selected |
|
Click on >Setup>I/O |
|
Click on the 5.1 path order and make sure the L, R, C, LFE, Ls and Rs are selected |
|
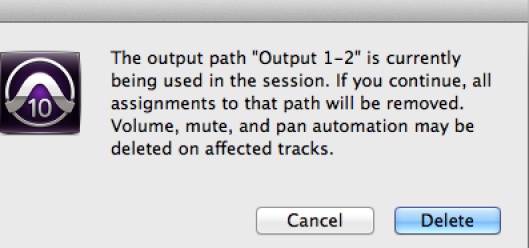
Select all the ouputs and delete them. |
|
After all the outputs are selected click delete path |
|
Click Delete |
|
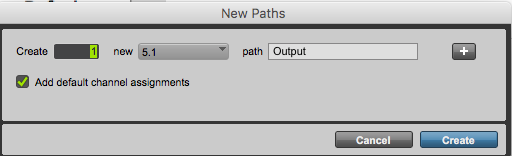
Click on "New Path" |
|
Choose to create 1 new track 5.1 and path = Output |
|
The channels will auto populate |
|
Click OK to Apply |
|
Go to >Track>New |
|
Create a mono track and create some pink noise on the track to test |
|
On the new track select a span of the clip to create the white noise on |
|
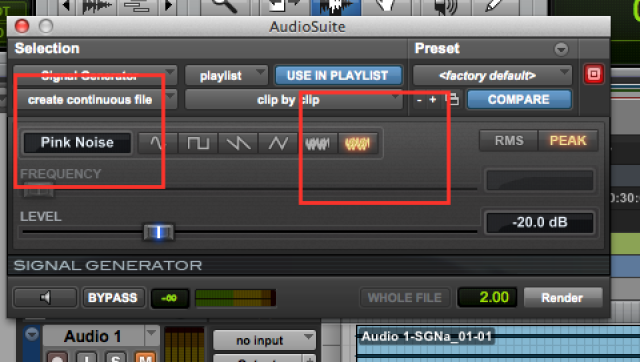
Go to AudioSuite>Other>Signal Generator |
|
Choose Pink Noise |
|
Make sure the Output is Yellow and set to Output 5.1 output |
|
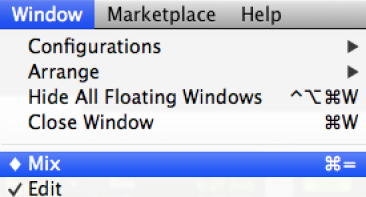
Go To >Window> |
|
In the mix window on the track with the 5.1 output you will see the "Multi Channel" Panner window |
|
To see the Multichannel fader larger click on the mini fader |
|
This will open the surround window |
|
Note to check LFE |
|
Go to Output> |
|


Overview
Content Tools