*The purpose of this guide is to setup your control surfaces for mixing with ProTools. Once the peripherals are setup, the guide will walk you through creating a blank session for 6 channel (5.1) surround sound mixing.
| If the Wi-Fi of the computer is already ON, turn the Wi-Fi OFF | 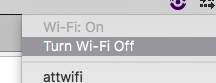 |
| Turn the computer Wi-Fi ON |  |
| Go to the WiFi Icon and choose > Create Network |  |
The default settings (for the Network Name and Channel ID) are fine. Click "Create" |  |
| Confirm that you are connected to the network that you just created |  |
Put your iPad on the ProTools Dock or use the one that is already there. TURN IT ON OR -Wake it up by pressing the "Home" key For more information about using the Dock please refer to the manual: ProTools Dock (for Apple iPad) You can also view a YouTube video which walks you through the functionality of the Dock and the App: | 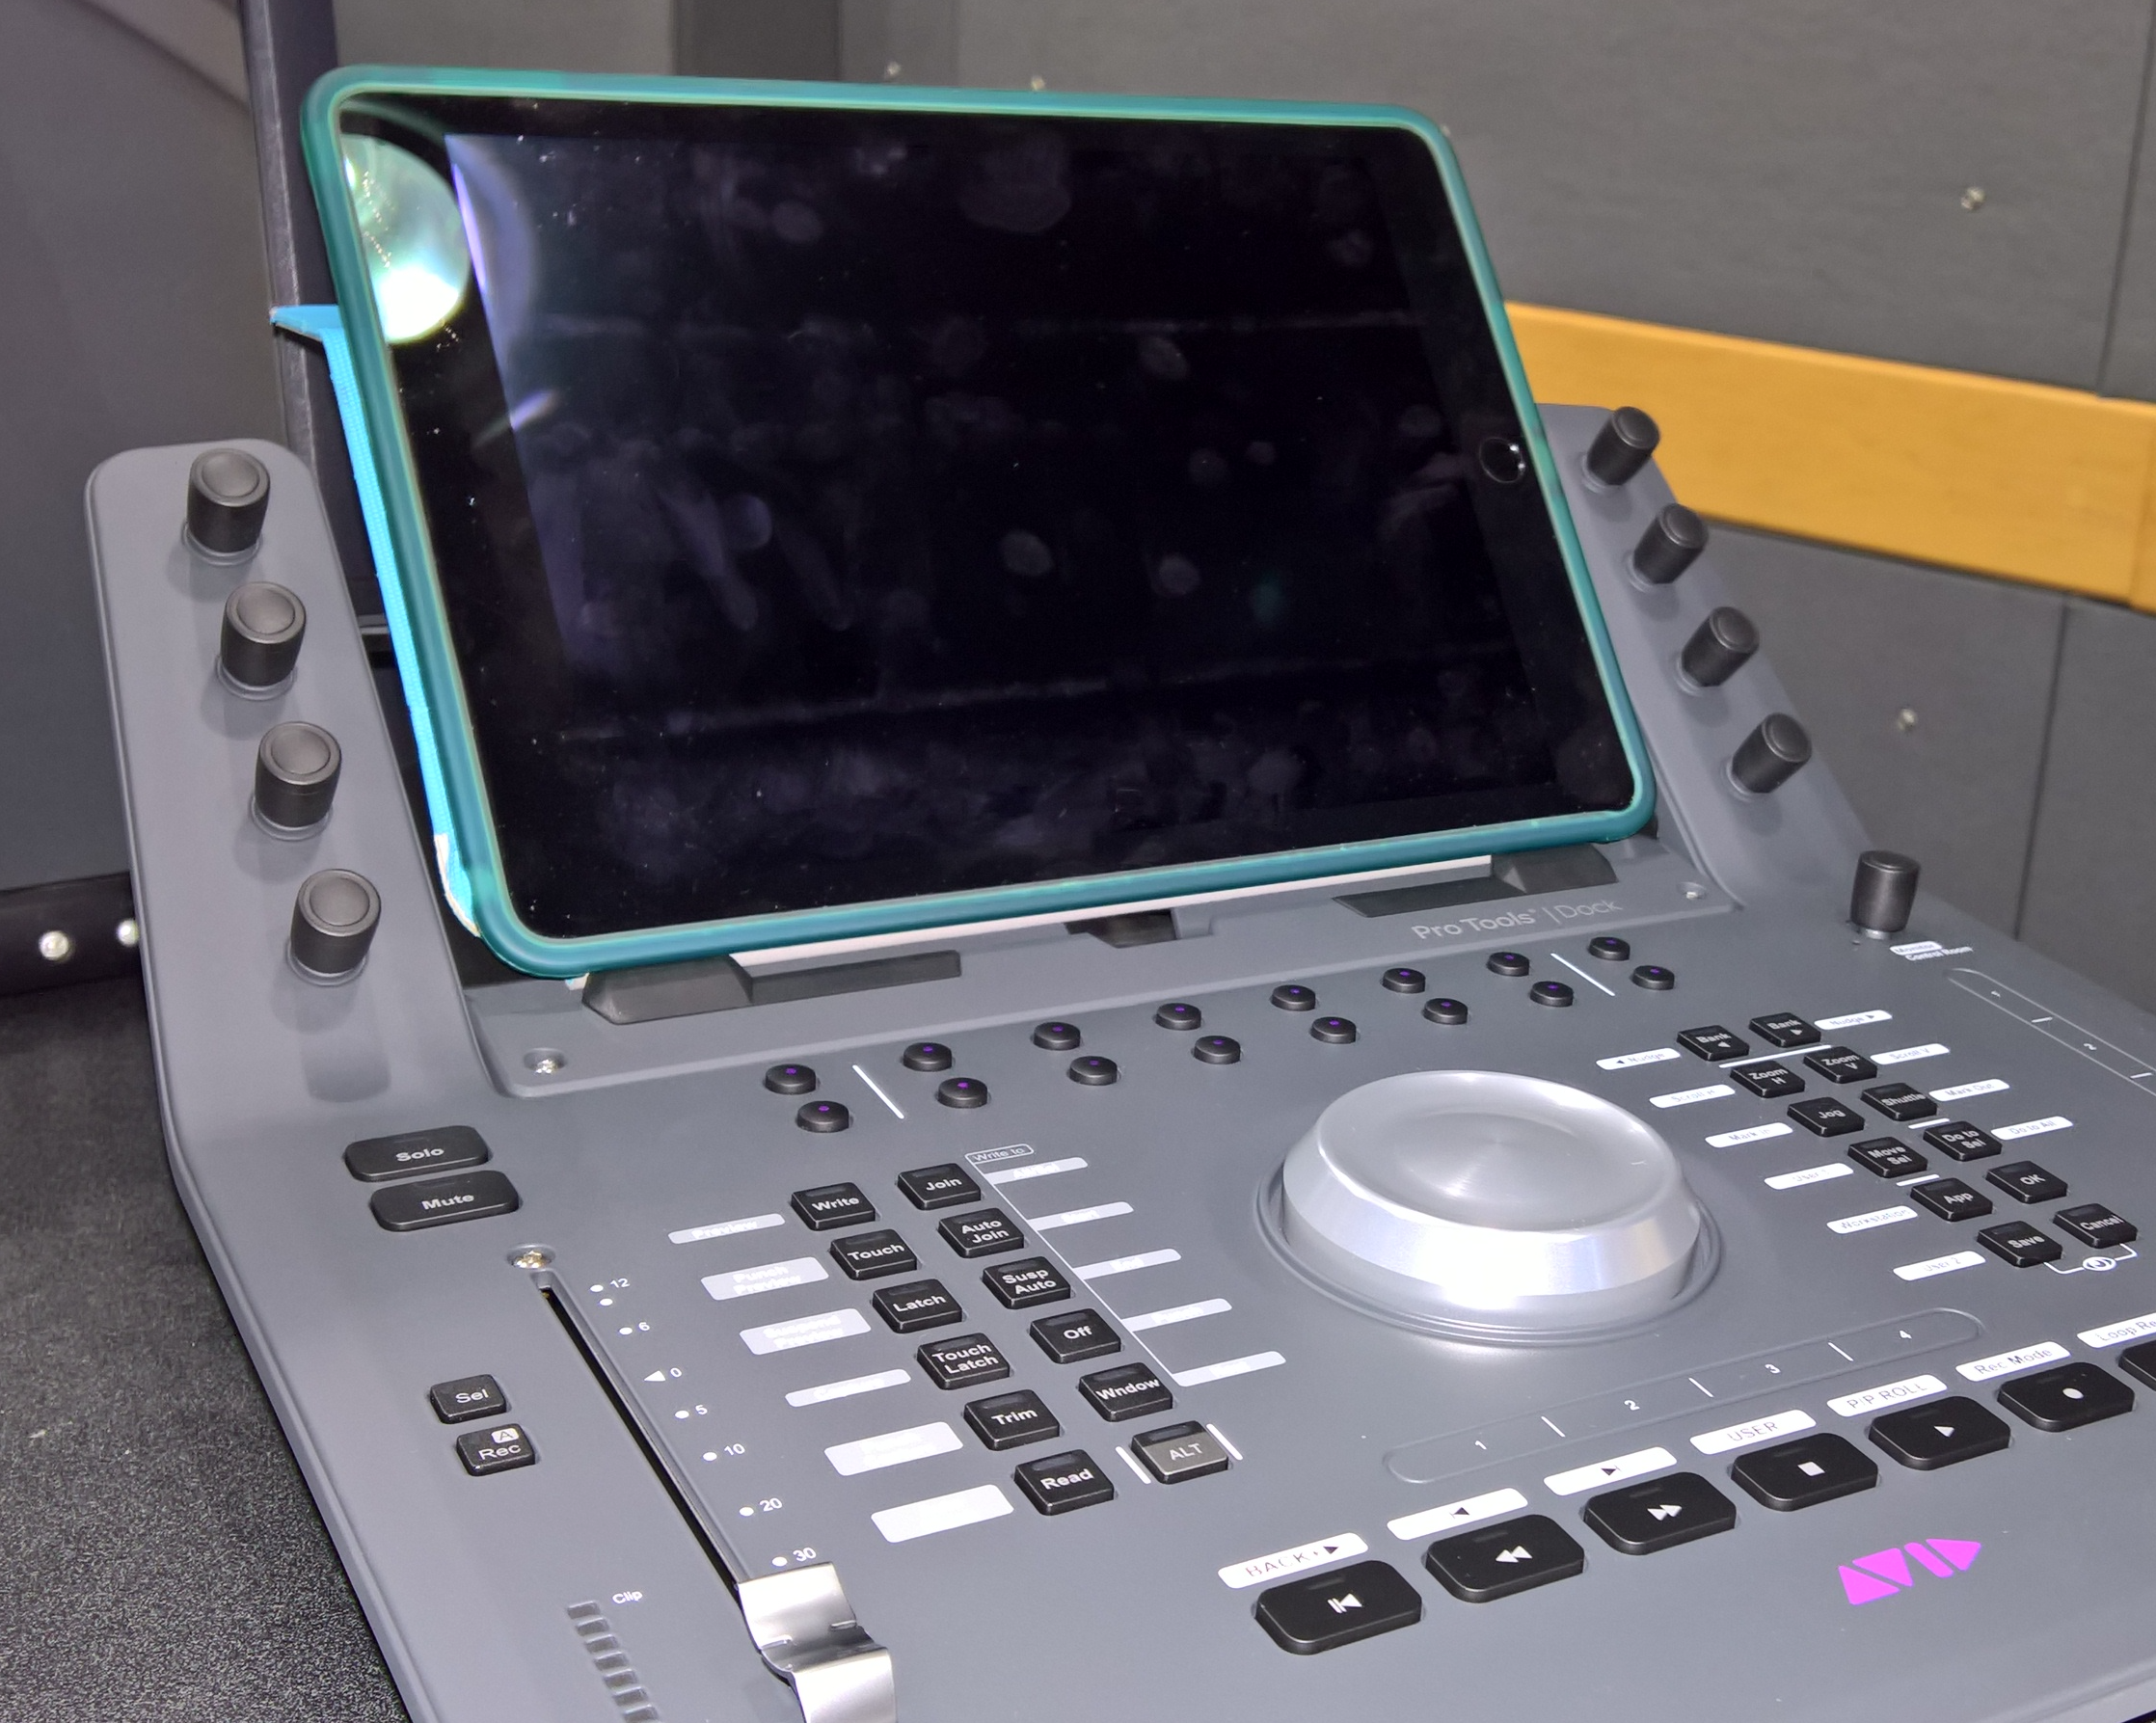 |
| Go to Settings |  |
| Enable Wi-Fi |  |
| Choose the WI-FI network for the Device you just created. |  |
| Choose to "Join Anyway" |  |
On the iPad, open the PT Control Application If you don't have the app installed download it from here |  |
PRO TOOLS 5 CMB 1.122 Make sure the room is not muted on the Xilica Remote Aslo pres the 5.1 83db SMPTE X-Curve button to make the room 83db |
|
PRO TOOLS 4 CMB 1.1108A Check that the Mute Button is OFF press #1 button Make sure the Fixed 80db butt is pressed to make the room 80db Press button #2. |
|
On the computer, launch the EuControl application. Applications>Euphonix>EuControl Please be patient while launching - it may take a couple of minutes for the application to launch properly. |
|
Once the application is running, go to > Window > EuControl Settings |
|
The Surfaces Tab should list 3 devices: AVID S3 PT Dock Your iPad PT Control App It should look similar to the picture on the right. |
|
The Workstations Tab should list the computer that is connected |
|
Open ProTools > Create Session or Open existing session |
|
ProTools will ask you where the Waves Plugins are. Go to Applications > Waves > Plugins V9 |
|
Choose Create Blank Session and or Open an existing session If creating a blank session, Choose - Create Name the session - Local Storage BWF (.WAV) Audio File Type 24 Bit Depth 48kHz Sample Rate Last Used I/O Settings LOCATION (press the location button) CHOOSE one of the ProTools HARD DRIVEs VERY IMPORTANT - you know where you saved your session !!!click Create to create your session | |
| If you get this clcik OK |
|
Then go to >Setup>Session |
|
| Go to "Clock Source" and choose SYNC HD |
|
| This Message should pop up. Click OK |
|
Go to > Setup > Peripherals |
|
Navigate to the Ethernet Controllers Tab Enable the Ethernet Port > Ethernet #2
Choose to Enable EUCON |
|
If you would like to import a .aaf file use this workflow wiki. | https://wikis.utexas.edu/display/comm/ProTools+-+Open+a+.aaf+or+.omf+and+Quicktime+in+ProTools |
Title the session and choose a destination to save the session. |
|
Next go to > Setup > Playback Engine |
|
Choose HDX Disk Playback Cache Size: Normal PowerTip: If you encounter buffer errors (ProTools keeps stopping during playback,) you can change the H/W Buffer Size and Disk Playback Cache Size of the Playback Engine to dedicate more computer resources for the playback process. |
|
Next go to > Setup > Hardware |
|
Go to Main Tab |
|
Analog In Tab should be set to this |
|
Analog Out tab should be set to this > |
|
Go to the Monitor Tab and make sure the MAIN AND ALT are set to "None" as shown here |
|
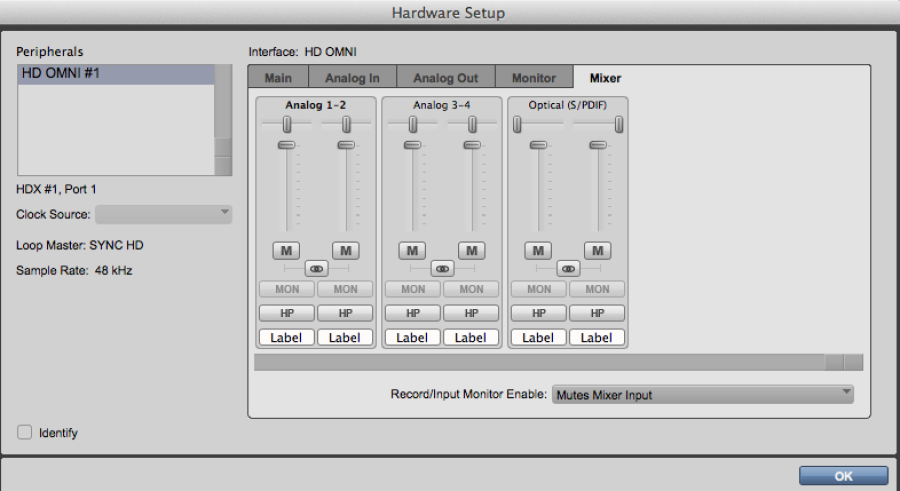
Mixer settings |
|
|
|
Click on Output Tab |
|
Click on Import Settings |
|
Navigate to the ProTools 4 or ProTools 5 Storage> If you can not find it use the magnifying glass to search
|
|
NO to Keep paths used in session |
|
Choose to REMAP to the new Monitor Paths |
|
| Then Click OK Here |
|
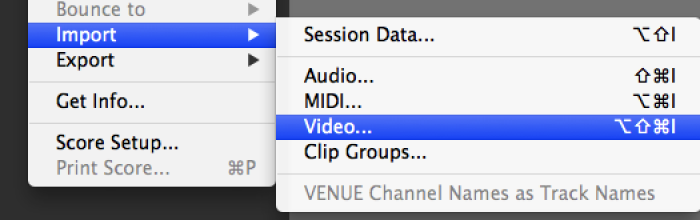
Next Import the video into the project |
|
Navigate to the video file that you want to view in the ProTools session |
|
Choose New Track |
|
Choose to import at Session Start |
|
Choose to enable the Video Engine |
|
If you would like to use the audio of the video file choose to save it to the default Audio Drive folder |
|
Video Engine will launch and you should be able to see the image on the projector automatically |
|
|
|
Once the track is imported into the ProTools session change the format of the clip to 720p/23.976 or 1080p/23.976 depending on what kind of file you have so it plays out to the projector. |
|
Next make sure the Video Track is Online and that the menu states that Video Hardware is Enabled. If Disable Video Hardware is showing it is okay Go to Options > Video Track Online |
|
Next Go to the Output and set all the tracks to "Main (5.1) > Main" |
|


Overview
Content Tools