Open Resolve.
(we're using version 12.5)


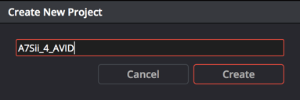
Name your project.
(Hint: whatever name you use here, Avid will recognize in the media tool later. Some editors name it the same as their Avid project name to simplify matters.)
Your new project will open


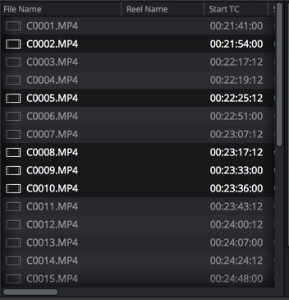
Select all the clips you want to transcode into Avid media.
(This is usually all the clips)

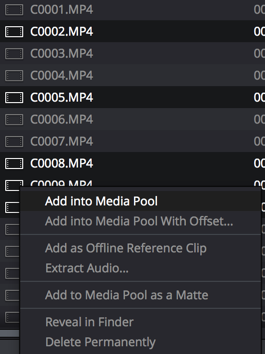
Right click and choose "Add into Media Pool"


Uncheck "Empty Timeline"
This will make a timeline with all of your clips from the media pool.
Click "Create"


The go to the Format tab and make sure the Format matches your clip
>Aspect Ratio
>Frame Rate
Make sure it matches.
Note if you shot 4K 4096 x 2160 you need to use the PAID version of Resolve
The free version only supports UHD 3840 x 2160.
Then hit create


Browse to a location you want your MXF files to save to

Click on the Video Tab and choose to
>Export Video
Format - MXF OP-Atom
Codec DNxHR
Type DNxHR HQ
>Check Render at source resolution
>Check Use Constant Bit Rate

Then Click on Advanced Settings
Check the box for Retain sub-black and super-white data

Then Click on the Audio Tab - If you want to export Audio - If you do not then UNCHECK Export Audio
Do NOT choose "Same As Source" for the Channels drop down. (your audio will come out as static)
Make sure to choose 2 for the Channels drop down.
Choose 24 BIt


Get some coffee.


Close Resolve, Save if you plan on finishing in Resolve. See this wiki to see how to save a Resolve Project
DaVinci Resolve - How to Relink Offline Media from a Exported Project
Open the exported Resolve files. There will be ONE .aaf file and several .mxf files.
This example is short - most projects will have a lot more .mxf files.

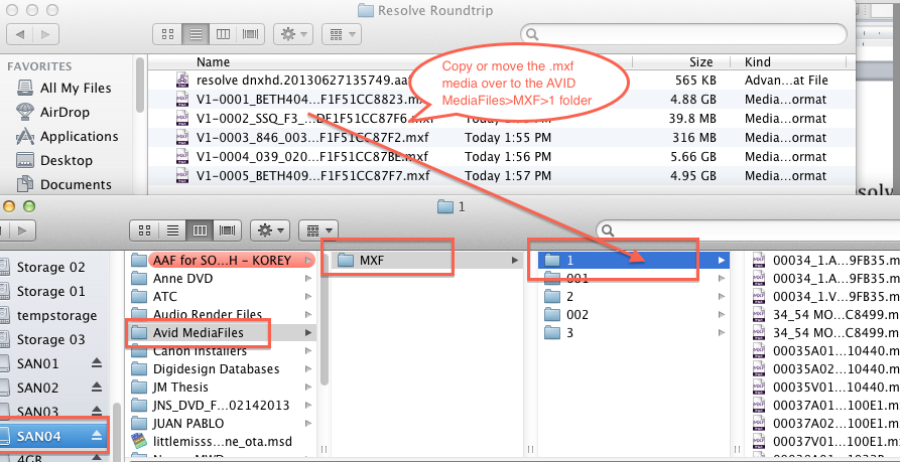
AVID reads media from the Avid MediaFiles folder on the root level of the hard drive.
The .mxf files exported from Davinci Resolve must be moved to this folder. See example below.


After the files are moved to the Avid MediaFiles
>MXF>1 folder on the hard drive open the AVID Project or make a new one.
Launch AVIDMediaComposer

Open your project

Make sure your project window is open
>Tools >Project

Make a New Bin

Title the new bin "Color Corrected Footage"

Go to >File>Input>Import Media

Navigate to the .aaf file in the Resolve exported media folder and select it.
Choose Open


If they are not there, you may need to delete some data base files, or you saved them in the wrong spot.
(you'll want to get the proctor for this)