While the course home page serves as an organizational template for what you have done in the course, there are always going to be differences between what was on the webpage and what you did. Here we will create a document that will highlight exactly what tutorials you did to go along with the home page. Additionally, throughout the course you have been running anything of substance (ie programs and scripts) on iDev nodes, but as mentioned several times, using the idev nodes is not how you will typically want to interact with TACC. Note that there is actually very little "tutorial/code/command" on this page. Instead this is a more detailed review of key ideas, with commands at the end to collect useful things to archive .
This tutorial aims to:
There is often confusion about differences between the different types of compute nodes (development vs normal) and how the reservation we've been using this week allowed us to with the tutorials though the idev node which while great for learning, troubleshooting, and testing (at least in some cases),as compared to how you will use the job submission system for actual analysis of your work. The stampede2 user guide includes some great information that tries to speak to people both well versed in computer science and those that aren't. They provide the following figure to describe how the resources at stampede2 are laid out which while accurate and helpful doesn't describe 3 key things that I always find helpful to think about:
 at the University of Texas > Linux and Lonestar 5 > Screen Shot 2016-05-22 at 4.07.32 PM.png")
A few years ago this course began using similar figure that highlights the things that I think are important (specifically the 3 things I feel the above doesn't convey), and label things with the terms I use to think about them. As mentioned several times, my background is biology, not computer science, and ultimately I think slightly inaccurate descriptive terms may help clear up some of the confusion.
 at the University of Texas > GVA2022 - Class Review > tacc_workflow.png")
The stamapede2 user guide has detailed information about the queues and what the limits are, but similar to the figures above, as a biologist the information in those tables isn't really what I tend to think about. Instead I think about the queues as follows:
| Queue | Max Time | Purpose/when to use |
|---|---|---|
| normal | 48 | this is my default queue, while 48 hours is the max time, I can only think of 2 instances I have ever needed to request more than 24 hours. Remember I work mostly with bacteria and up to 100s of millions of reads across dozens-400 samples at a time typically so your experience may vary. |
| development | 2 | Short jobs that I need output from, to start a larger job. In particular, read trimming (always) and FastQC/MultiQC (if more than 25ish samples or 50ish millions of reads) |
| largemem* | 48 | Recently working with collaborator on sequencing project with very deep coverage, majority of reads related to a host organism, and minority of reads related to a poorly characterized bacteria. This required a the largemem node for a complex mapping command, and subsequent assembly attempts. |
| "other" | ? | I know there are other queues that are available, but have never had need to figure out what they are or found nodes above to be lacking. As described in the read QC tutorial with not knowing about the 'zgrep' command it is possible or even probable that using one of the other queues would be more efficient, but I doubt it as the normal queue is for typical things, and the other queues are more specialty services addressing specific issues (turn around time, memory, etc). |
*largemem queue was on ls5, does not have equivalent in stampede2. Frontera has ultra large memory nodes (2-4x those available on LS5). If you running into memory problems (large assemblies), you may want to consult with someone at tacc https://portal.tacc.utexas.edu/tacc-consulting to verify if frontera is where you should be working.
Submitting a job to the queue is my (and should be your) default position for several reasons:
>& command used in several of the advanced tutorials (Breseq, fastp, structural variants, and several others) so I can view information from the run after the run is done or has had an error. (more on the >& below).There are times that I do use idev nodes:
First, running in interactive mode gives you some comparison of how different programs work. Think back on your runs this week, what programs/commands printed information to the screen that had useful information (read trimming, read mapping come to my mind), what programs didn't (mpileup, indexing, file conversions), and what programs had large amounts of information but wasn't directly needed or evaluated (breseq, spades). This may help you decide when there are things you want to capture and when you should expect empty files.
Second, it speeds the class up. No matter what output is generated when you execute a command, you get your command prompt back when the command is done, and you can immediately interrogate the results rather than waiting and guessing when your job starts, and when it finishes.
Finally, throughout the course we made use of the reservation system which allowed us to skip the queue and immediately get an idev session or job running. In previous years where reservations weren't possible tutorials were planned around a:
I hope you can see that using idev nodes has enabled each of you to accomplish more tutorials than previous years while hopefully learning more. Generally, the feedback from students who have taken the course under this type of format has been positive, so if you find that you are overly reliant on idev nodes or have a hard time transitioning to submitting jobs, I'd love to hear the feedback so I can attempt to modify things further.
When you log into stampede2 using ssh you are connected to what is known as the login node or "the head node". There are several different head nodes, but they are shared by everyone that is logged into lonestar (not just in this class, or from campus, or even from Texas, but everywhere in the world). Anything you type onto the command line has to be executed by the head node. The longer something takes to complete, or the more it will slow down you and everybody else. Get enough people running large jobs on the head node all at once (say a classroom full of summer school students) and stampede2 can actually crash leaving nobody able to execute commands or even log in for minutes -> hours -> even days if something goes really wrong. To try to avoid crashes, TACC tries to monitor things and proactively stop things before they get too out of hand. If you guess wrong on if something should be run on the head node, you may eventually see a message like the one pasted below. If you do, it's not the end of the world, but repeated messages will become revoked TACC access and emails where you have to explain what you are doing to TACC and your PI and how you are going to fix it and avoid it in the future.
Message from root@login1.ls4.tacc.utexas.edu on pts/127 at 09:16 ... Please do not run scripts or programs that require more than a few minutes of CPU time on the login nodes. Your current running process below has been killed and must be submitted to the queues, for usage policy see http://www.tacc.utexas.edu/user-services/usage-policies/ If you have any questions regarding this, please submit a consulting ticket. |
Recall this is the type of message that I have gotten when working with downsampled data on the head node and lead me to start an idev session to figure out what is going on.
Every job you submit will have 2 parts:
Access to nodes (regardless of what queue they are in) is controlled by a "Queue Manager" program. You can personify the Queue Manager program as: Heimdall in Thor, a more polite version of Gandalf in lord of the rings when dealing with with the balrog, the troll from the billy goats gruff tail, or any other "gatekeeper" type. Regardless of how nerdy your personification choice is, the Queue Manager has an interesting caveat: you can only interact with it using the sbatch command. "sbatch filename.slurm" tells the que manager to run a set of job(s) based on information in filename.slurm (i.e. how many nodes you need, how long you need them for, how to charge your allocation, etc). The Queue manager doesn't care WHAT you are running, only HOW you want to run it.
The easiest way I have found to deal with slurm files is by copying a .slurm file into the directory I am running my job from and editing the relevant parts. This is exactly what you have been walked through when you have submitted jobs in tutorials rather than run them interactively.
Recall that we have copied the GVA.launcher.slurm file into many of our optional tutorial directories on scratch.
#!/bin/bash # # Simple SLURM script for submitting multiple serial # jobs (e.g. parametric studies) using a script wrapper # to launch the jobs. # # To use, build the launcher executable and your # serial application(s) and place them in your WORKDIR # directory. Then, edit the CONTROL_FILE to specify # each executable per process. #------------------------------------------------------- #------------------------------------------------------- # # <------ Setup Parameters ------> # #SBATCH -J jobName # More descriptive the better #SBATCH -n 1 # number of tasks to run at once (68 max recommend, 272 absolute max) #SBATCH -N 1 # number of nodes (68 cores, 272 threads per node) #SBATCH -p normal # normal is most common queue #SBATCH -o Queue_job.o%j # autogenerate log files with name format #SBATCH -t 12:00:00 # time in hh:mm:ss format ##SBATCH --mail-user=ADD # uncomment and add email to recieve emails from TACC about job status ##SBATCH --mail-type=all # what emails to send #SBATCH -A UT-2015-05-18 # charge SUs to class account #------------------------------------------------------ export LAUNCHER_PLUGIN_DIR=$LAUNCHER_DIR/plugins export LAUNCHER_RMI=SLURM export LAUNCHER_JOB_FILE=commands $LAUNCHER_DIR/paramrun |
| Line | Text | Purpose |
|---|---|---|
| 16 | #SBATCH -J jobName | Use detailed names if you expect to have multiple jobs on queue system at once. Helps with the showq -u command |
| 17 | #SBATCH -n 1 | How many tasks to run at once. 68 suggested max if working with 1 Node, 136 if working with 2, 204 if working with 3, etc |
| 18 | #SBATCH -N 1 | How many nodes do you want to request at once. The more nodes you request here, the longer it will take for your job to start |
| 19 | #SBATCH -p normal | Discussed above. VERY rare personally to use other on stampede2 |
| 21 | #SBATCH -t 12:00:00 | How long for the job to run. Rare for me to request more than 12 hours. The longer you request, the longer it is likely for your job to start. If you request too short, job won't finish, likely have to resubmit job starting over, and will take at least twice as long overall. |
| 22,23 | ##SBATCH --mail-user=ADD ##SBATCH --mail-type=all | Where to send emails and what emails to send. What email options: all, begin, end, fail. If you at least turn on "end" your email will slowly accumulate how long different programs/analysis is taking to complete will help you estimate line 21 better over time |
| 31 | export LAUNCHER_JOB_FILE=commands | Replace "commands" with exact name of commands file (see below for comment on naming commands/slurm files). |
'="breseq -j 6 -p -r Ref.gbk -o Run_output/" & A1 & " " & B1 & " " & C1 & " >& runLogs/" & A1' with sample name in A1, read1 in B1 and read2 in C1.Adding >& symbol to the end of a command followed by a file name is very useful. This results in redirecting what would normally print to the screen as either the standard output and the standard error streams to a file that follows. This can be very useful for determining where/why a particular sample failed as it sorts it into a specific file based on the sample being analyzed. This behavior is demonstrated in the fastp tutorial as well as the advanced breseq tutorial.
The same information will be found in the .o<jobID> and .e<jobID>, but the output and error streams will be mixed together among all simultaneously running commands.
I suggest and try to conform to the idea that all commands files should be named something descriptive followed by a _ or a. and then the word commands. The same description should also be used as a prefix to the .slurm file. This enables me to easily and obviously associate commands with the conditions they were run in TACC on. The down side is that this then leads to more jobs failing because i have a typo between the commands file name, and what is listed on line 31 of the slurm file.
Alternatively, you can use no description and just have all slurm files called 'launcher.slurm' and all commands be in a file named 'commands'. This cuts down on what you have to edit in the slurm file and makes it much easier to avoid typos (note you could still accidentally name your commands file 'cmmmands'). The downside here is that when you are optimizing either computer conditions (slurm file) or command options (commands file) it can be hard to keep track of what your progress has been, especially if you step away from your analysis for more than a few days.
Once you have your slurm file with all your options set, your commands file full of the commands you want to run, and you've got everything named according to whatever convention you are using its time to actually submit the job. As the class has almost exclusively focused on giving access to commands via conda (more on conda itself below), it is critical that you remember the next step:
conda activate environment_name |
When the job is submitted to the queue a snapshot of your $PATH (more below), all currently available programs, and current directory architecture is sent along with your commands file. This means if you have installed say fastp on a conda environment, but you do not activate that environment, you will get an error ... not when you submit the job, but when the job tries to run. Remember, the queue system doesn't care WHAT you are trying to run, it assumes you wrote commands that will work. Perhaps it is because I'm still a recent convert to the relatively new tool that is conda, but failure to activate my conda environment (or activating the wrong one) is the #2 most common cause of submitted jobs failing.
Whats the #3 most common cause of submitted jobs failing? That honor goes to the italic "current" in reference to the directory architecture. As mentioned in a few of the tutorials, some programs will create directories that do not exist if you list that directory as part of an output filename or output directory. Others do not. As mentioned in those tutorials, making all your own directories will never cause a command to fail, hoping or assuming the program is capable of creating directories will cause all the programs that can't to fail. Often I forget this fact until I run the sbatch command, and then I forget that adding the new directory after the job is submitted doesn't fix the problem.
mkdir folder1 folder2 folder3 # will make 3 different folders mkdir -p folder1/folder2/folder3 #will make folder3 inside of folder2 inside of folder1 mkdir -p folder 1/ folder 2/ folder 3 #will make 4 different folders at the same level. They will be named 1 2 3 and folder |
It was mentioned back on Monday when you didn't have any more context on it beyond taking my word for it. The #1 reason commands fail is because of typos, as I know several have experienced this week first hand. |
Once you have your directories created and have access to the conda environment you want its time to launch the job.
sbatch launcher.slurm |
Once your job is submitted you often want to check on the status of it. Things that you are specifically interested in checking/learning:
Some of the common commands that you can run and what they will do or tell you:
Command | Purpose | Output(s) |
|---|---|---|
showq -u | Shows only your jobs | Shows all of your currently submitted jobs, a state of: "qw" means it is still queued and has not run yet "r" means it is currently running |
scancel <job-ID> | Delete a submitted job before it is finished running note: you can only get the job-ID by using showq -u | There is no confirmation here, so be sure you are deleting the correct job. There is nothing worse than deleting a job that has sat a long time by accident because you forgot something on a job you just submitted. |
showq | You are a nosy person and want to see everyone that has submitted a job | Typically a huge list of jobs, and not actually informative |
SUs or "service units" are a currency TACC uses to control access and encourage everyone to engage in the best behaviors. We have not spoken much about them, as they are provided as part of the class. These are an exhaustible resource (though they can be replenished via the allocation management pages on the user portal or contacting people at TACC). Giving every command its own node, is probably wasteful unless you are having memory issues.
For information on applying for an allocation at TACC, visit https://portal.tacc.utexas.edu/allocations-overview. It is my understanding (which may be flawed) that this is a very easy process for UT faculty, and possibly more difficult for external academic researchers, but still be possible (potentially requiring you to go through https://portal.xsede.org/submit-request#/login which is linked from the allocations overview page above). In my experience, the people at TACC are awesome at helping people through these types of processes and ticket requests through the TACC user portal are a great way to start the process. If there is an actual bar from allowing you (or more likely your PI), I suspect the people at TACC have much more detailed information about alternative resources.
Each job (including idev sessions) uses SUs at a given rate. SUs are deducted from your balance based on the time, type, and number of nodes you occupy, NOT the time requested. More information can be found here. This represents an additional reason submitting a job is better practice than idev nodes most of the time: they cost less. Not because they are charged differently, but rather, a submitted job is charged based on exactly how long the commands take to execute while idev sessions have waiting between executing commands and you must remember to log out at the end of it to stop the billing.
Recall from today's presentation that you will be left on the allocation through at least the end of July, and probably the end of August. If you are removed from the allocation and are still trying to work with the tutorials, please reach out and we will see if we can add you back to them.
As noted on the first day. This is only the second year that this course has been taught using conda environments. Overall I think this has gone exceptionally well, and significantly better than last year. Feedback on this in the post class survey would be greatly appreciated if you have any thoughts on how you would have rather seen conda presented especially if you disagree and feel that the use of conda was a negative thing in the course. Additional tips on how to make better use of conda can be found here.
Some things I suspect you will want to remember as you begin creating your own environments and working with new tools:
All week we have talked about the strength of being able to transfer conda environments not just between computers but also between operating systems. While I will give you commands below to copy your environment files to another machine, a blog post with some more information about a few different ways of doing this and why you might choose one way over another can be found at https://www.anaconda.com/blog/moving-conda-environments. The ability to transfer environments not just among machines but also between people opens up some possibilities that you may not have thought of yet:
cdh for pathway in $(for conda_env in `conda env list`;do echo $conda_env|grep "^/.*miniconda3\/envs";done); do env_name=$(echo $pathway|sed 's/.*\///');echo $env_name;conda activate $env_name;conda list;done > list_of_envrionments_used_in_GVA2022_and_packages_installed.txt # for pathway in $(for conda_env in `conda env list`;do echo $conda_env|grep "^/.*miniconda3\/envs";done); do env_name=$(echo $pathway|sed 's/.*\///');echo $env_name;conda activate $env_name;conda env export > $env_name.yml;done # mkdir GVA2022_conda_files mv *.yml GVA2022_conda_files mv list_of_envrionments_used_in_GVA2022_and_packages_installed.txt GVA2022_conda_files tar -czvf GVA2022_conda_files.tar.gz GVA2022_conda_files/ |
Using the scp tutorial you can now transfer the GVA2022_conda_files.tar.gz file back to your computer
Lacking could mean several different things:
So what is mamba? mamba is a "drop in solution" for conda that is faster/more efficient. Functionally, this means that you install mamba via conda, and then just always type mamba anywhere you would otherwise type conda. Additional information about be found here: https://bioconda.github.io/faqs.html. A more detailed discussion/description of mamba can be found here. Mamba is likely going to be taking the place in next year's course due to recent revelations that a few programs can be installed via mamba that conda can not.
One of the nice things about the conda system is that it handles changing your path or adding executable files to your path for you. In previous years, anything not loaded through TACC's module system had to either be moved into your path, or your path modified to include them. Because of how broadly we have used conda, important discussions about the dangers and problems modifying your $PATH variable have not come up. Briefly putting them here as I'd feel very guilty not listing it somewhere for you to review if you ran into problems down the road with it.
Your $PATH variable is a list of locations on the computer that the command line searches through when you enter a command.
Anytime you manipulate your PATH variable you always want to make sure that you include $PATH on the right side of the equation somewhere separated by : either before it, after it, or on both sides of it if you want it in the middle of 2 different locations. As we are explaining right now, there are reasons and times to put it in different relative places, but if you fail to include it (or include a typo in it by calling it say $PTAH) you can actually remove access to all existing commands including the most basic things like "ls" "mkdir" "cd". |
The majority of the files we have worked with have been in our $SCRATCH space. Recall that files on $SCRATCH can be deleted after a period of inactivity. Below is a list of things that you SHOULD copy to your $HOME or $WORK space.
Navigate to the $SCRATCH directory before doing the following.
cds # move to your scratch directory nano commands |
echo "My name is _____ and todays date is:" > GVA2022.output.txt date >> GVA2022.output.txt echo "I have just demonstrated that I know how to redirect output to a new file, and to append things to an already created file. Or at least thats what I think I did" >> GVA2022.output.txt echo "i'm going to test this by counting the number of lines in the file that I am writing to. So if the next line reads 4 I remember I'm on the right track" >> GVA2022.output.txt wc -l GVA2022.output.txt >> GVA2022.output.txt echo "I know that normally i would be typing commands on each line of this file, that would be executed on a compute node instead of the head node so that my programs run faster, in parallel, and do not slow down others or risk my tacc account being locked out" >> GVA2022.output.txt echo "i'm currently in my scratch directory on stampede2. there are 2 main ways of getting here: cds and cd $SCRATCH" >>GVA2022.output.txt pwd >> GVA2022.output.txt echo "over the last week I've conducted multiple different types of analysis on a variety of sample types and under different conditions. Each of the exercises was taken from the website https://wikis.utexas.edu/display/bioiteam/Genome+Variant+Analysis+Course+2022" >> GVA2022.output.txt echo "using the ls command i'm now going to try to remind you (my future self) of what tutorials I did" >> GVA2022.output.txt ls -1 >> GVA2022.output.txt echo "the contents of those directories (representing the data i downloaded and the work i did) are as follows: ">> GVA2022.output.txt find . >> GVA2022.output.txt echo "the commands that i have run on the headnode are: " >> GVA2022.output.txt history >> GVA2022.output.txt echo "the contents of this, my commands file are: ">>GVA2022.output.txt cat commands >> GVA2022.output.txt echo "I will next create a what_i_did_at_GVA2022.slurm file that will run for 15 minutes" >> GVA2022.output.txt echo "and i will send this job to the queue using the the command: sbatch what_i_did_at_GVA2022.slurm" >> GVA2022.output.txt |
wc -l commands |
If you get a number larger than 19 edit your commands file with nano so each command is a single line as they appear above. Several of the lines are likely long enough that they will wrap when you paste them in nano and cause problems
cp /corral-repl/utexas/BioITeam/gva_course/GVA2022.launcher.slurm what_i_did_at_GVA2022.slurm nano what_i_did_at_GVA2022.slurm |
As stated above things we want to change are:
| Line number | As is | To be |
|---|---|---|
| 16 | #SBATCH -J jobName | #SBATCH -J end_of_class |
| 21 | #SBATCH -t 12:00:00 | #SBATCH -t 0:10:00 |
Again use ctl-o and ctl-x to save the file and exit.
sbatch what_i_did_at_GVA2022.slurm |
Based on our example you may have expected 1 new file to have been created during the job submission (GVA2022.output.txt), but instead you will find 2 extra files as follows: what_i_did_at_GVA2022.e(job-ID), and what_i_did_at_GVA2022.o(job-ID). When things have worked well, these files are typically ignored. When your job fails, these files offer insight into the why so you can fix things and resubmit.
Many times while working with NGS data you will find yourself with intermediate files. Two of the more difficult challenges of analysis can be trying to decide what files you want to keep, and remembering what each intermediate file represents. Your commands files can serve as a quick reminder of what you did so you can always go back and reproduce the data. Using arbitrary endings (.out in this case) can serve as a way to remind you what type of file you are looking at. Since we've learned that the scratch directory is not backed up and is purged, see if you can turn your intermediate files into a single final file using the cat command, and copy the new final file, the .slurm file you created, and the 3 extra files to work. This way you should be able to come back and regenerate all the intermediate files if needed, and also see your final product.
# remember that things after the # sign are ignored by bash cat GVA2022.output.txt > end_of_class_job_submission.final.output mkdir $WORK/GVA2022 mkdir $WORK/GVA2021/end_of_course_summary/ # each directory must be made in order to avoid getting a no such file or directory error cp end_of_class_job_submission.final.output $WORK/GVA2022/end_of_course_summary/ cp what_i_did* $WORK/GVA2022/end_of_course_summary/ # note this grabs the 2 output files generated by tacc about your job run as well as the .slurm file you created to tell it how to run your commands file cp commands $WORK/GVA2022/end_of_course_summary/ |
As we have seen several times in class, many output files are comma, or space, or tab delimited . While this type of formatting is often required for downstream applications, it can make it very difficult to look at if you are just trying to get a feel for what is going on. One solution to this is often to copy from the terminal screen to Excel. Sometimes Excel will recognize the delimiter character and each chunk of data will go into its own Excell cell. Other times each line goes in column A (or worse the entire copy paste goes into cell A1. For reasons unknown to me, using the text editor BBEdit (formerly known as text wrangler, not to be confused with any association to TACC's naming conventions) as an intermediate can automatically convert tab (and some space) delimited text to the invisible tab characters Excel expects, and if not (or if it uses comma delimiters), BBEdit's find/replace interface is capable of working with the same regular expressions you are increasingly becoming familiar with from the command line programs (sed, grep, awk). While there is a paid version of BBEdit I have never even bothered using their free 30 day trial.
BBEdit is also a very lightweight plain text editor. This means that it is capable of opening large files (such as genbank references) without huge amounts of buffering or "destination" formatting issues that something like microsoft word would have. https://www.barebones.com/products/bbedit/. If in your own work you find an alternative that seems to do much of the same functionality as described here, I would love to hear about it.
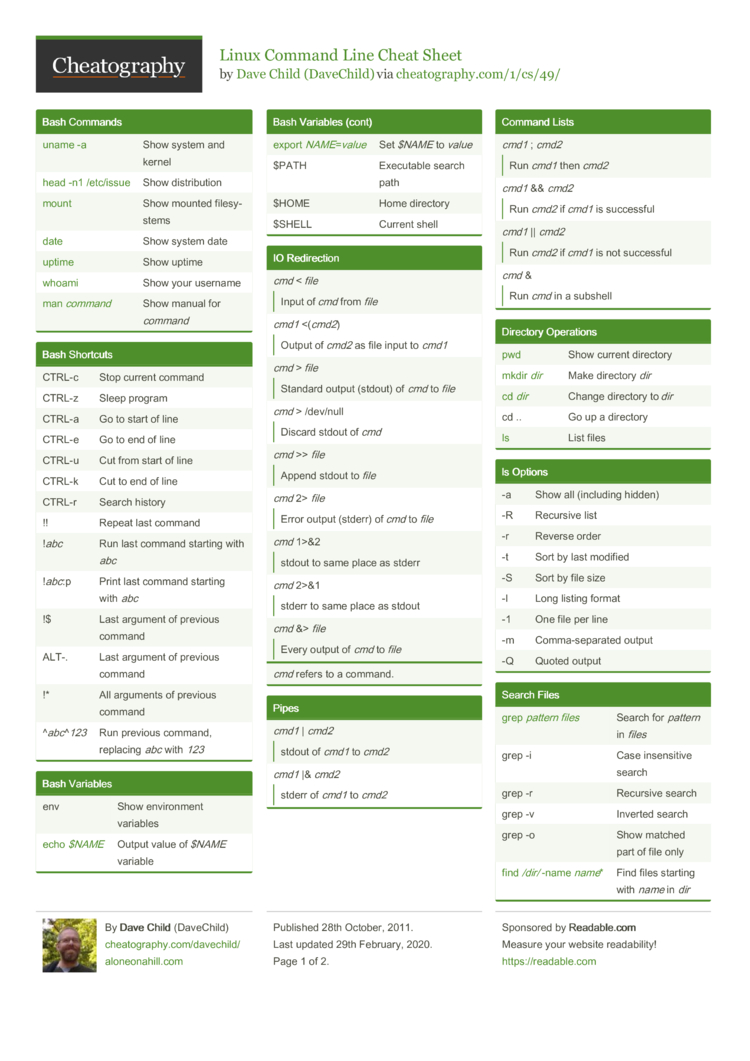
cheat sheets are a common thing produced by people for common commands they want to use but don't always remember the exact formatting for or needed options. Here are a list of cheat sheets that may be helpful and what they are helpful for. They should at least provide you with the scope different cheat sheets are produced, if you find one lacking there are others that may have something you are looking for and can be found pretty quickly using google.
Return to GVA2022 to work on any additional tutorials you are interested in.