First bring in your .aaf from AVID or .XML from Premiere
>Import>Timeline

Navigate to your .aaf and or .xml

Use the default settings usually works fine

Once the timeline is loaded in and all media is linked to the timeline and double check that all is correct
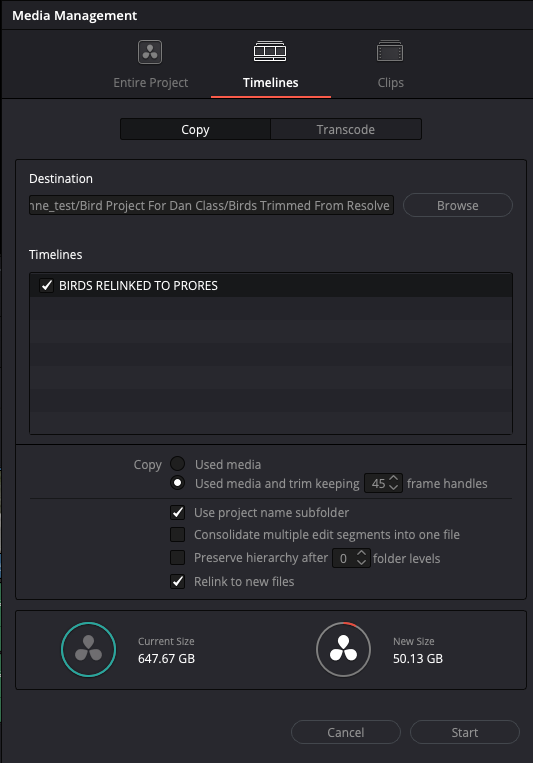
Then choose >File>Media Management

To copy a trimmed version of the original media used in the project select the following options : TIMELINES - COPY - TRIM KEEPING (24 frames for example)
Choose - RELINK TO NEW FILES).

Browse to where you want to save the new consolidated media and the .drt That stands for Davinci Resolve Timeline

Locate where you want to save and choose Open

You will get a comparison of the current project size and the new size of the project after consolidating
Click Start to begin

Progress bar will open and give some progress info

the final export will look like this with the .drt file

You can double click the .drt to open the new timeline in resolve

Choose Don't Change or change it doesn't seem to make any difference.


Or to make ProRes files of all the media > choose >Timelines>Transcode
Choose Video > QuickTime > Apple ProRes > Apple ProRes 422 or 4444
Render at Source Resolution
Retain Sub-Black and Super-White Data
>Start
