First open the timeline and select the video and audio tracks to export.

Next Turn on the Full Green setting on the timeline


It is that little round icon in the timeline that is usually 1/2 yellow and 1/2 green. We want to make it

FULL Green like this frame grab.

Mark an Inpoint and and Outpoint in the timeline. Example of how timeline should look before exporting

Timeline>Render>Render In/Out


Make sure everything is rendered.

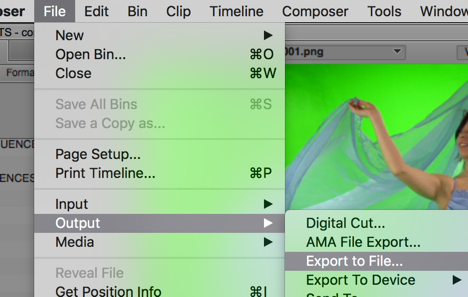
Next go to >File>Output>Export to File
Title your Export in the "Save As" box


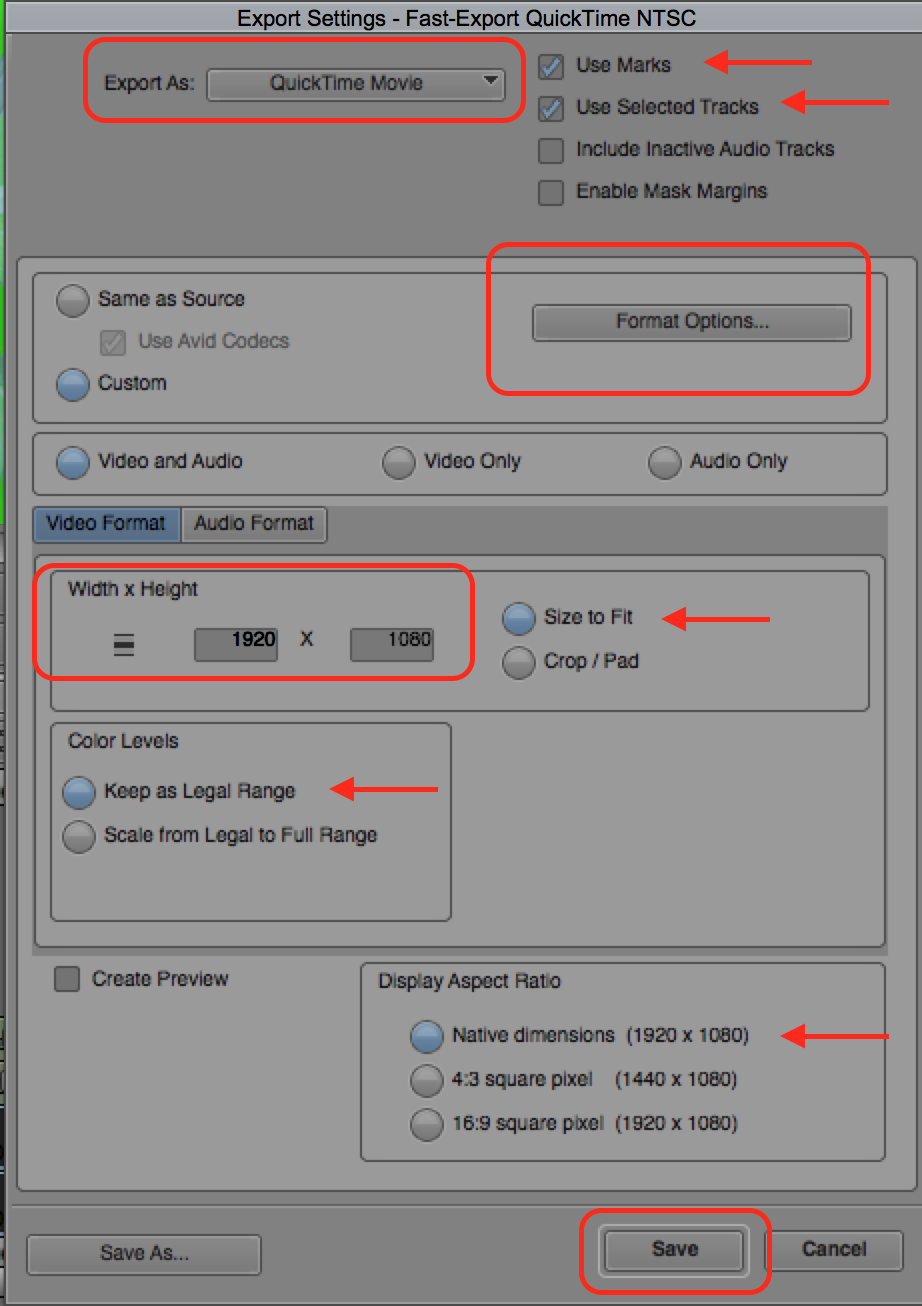
Choose "Export Setting" – Fast Export QuickTime NTSC

Click on "Options"


Choose Export As QuickTime Movie, Use Marks, Use Enabled Tracks

Uncheck Same as Source by clicking on the Custom button

Click on Video and Audio or what you want to export

Video Format Width and Height 1920 x 1080 for a less compressed QT.

Display Aspect Ratio leave on Native Dimensions

Color Levels - Keep as Legal Range

Click on Format Options

Click on Video Settings

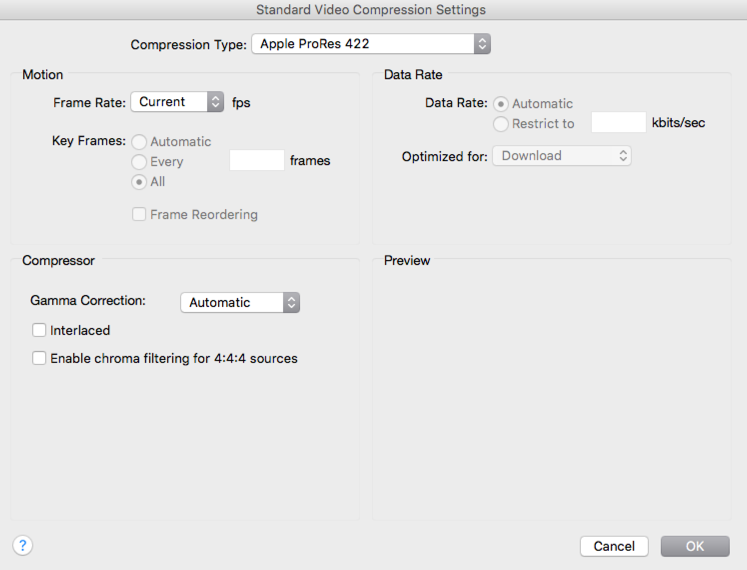
Select the Apple ProRes 422 Compression

Choose Apple ProRes 422 Compression Type
All other settings leave alone


Click OK then Click OK at the next menu that pops up.

Click on the Video "Size" setting

Make sure the dimensions are set to 1920 x 1080 HD


Click OK

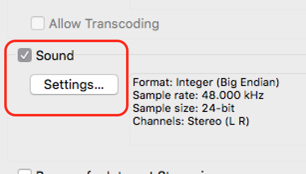
Click on Sound Settings

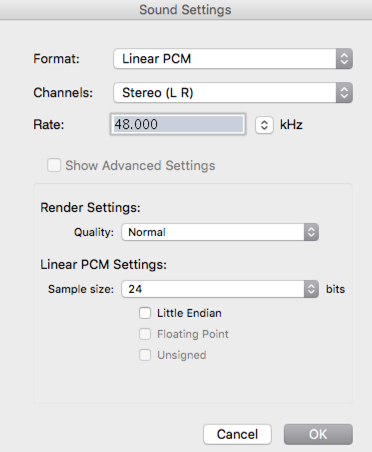
Format - Linear PCM

Channels - Stereo (L-R)

Rate 48.00

Quality - Normal

Linear PCM - Settings

Sample Size 24

Click OK

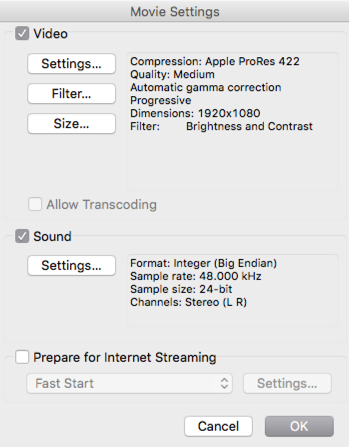
Movie Settings - Final Check


Compression - Apple ProRes 422


Dimensions 1920 x 1080


Sound 48.000 kHz

Sample Size 24-bit

Channels - Stereo (L R)


Click OK

This is how the AVID export window should be set


Choose Export As QuickTime Movie, Use Marks, Use Enabled Tracks

Uncheck Same as Source by clicking on the Custom button

Click on Video and Audio or what you want to export

Video Format Width and Height 1920 x 1080 for a less compressed QT.

Display Aspect Ratio leave on Native Dimensions

Color Levels - Keep as Legal Range


Click on Save

Click on Save and will be prompted to select a place to save the quicktime

Then click Save and the export will start.

Title the file as what you want to save the file as

Navigate to the hard drive and folder you want to save the file to


Click "Save"


After the export completes

Launch Adobe Media Encoder
Look for it in the Applications folder or use the magnifying glass in the

upper right corner of your monitor by the time clock and type in "Adobe Media Encoder"


Click the "+" icon in the project window that opens or you can simply drag and drop your file to be compressed into the grey portion of the "Queue" window

After clicking the "+" icon, navigate to the file on the hard drive and click Open.

When the file loads into the project window, click on the "Format" tab dropdown and click on "H.264"

Next click on the "Preset" upside down triangle and scroll down the dropdown and select Vimeo HD 720p 23.976

Click on the "Output File" Click on the blue writing and a navigation window will open allow you to name and choose where to save the file. Click on Save to confirm

Click on the "Green Play" icon to begin the compression Queue

The Current Encode window will show estimated time and processing information.


When this is finished you will upload the resulting .mp4 to Vimeo!!